Are you planning to organize an event and want to share about it with your visitors through your website? And wondering which is the best WordPress event calendar plugin? Then, we present you with an honest review of The Events Calendar plugin.
Whether you’re a solo artist looking to share your next world tour with your fans or a company that organizes seminar events. Wouldn’t it be easier if you’d create a calendar on your site and help your visitors to find all the information they need to attend?
Therefore, The Events Calendar is one such event plugin that lets you easily create and manage an events calendar on your WordPress website. Now, you might wonder whether it’s worth using for your website.
Don’t worry anymore. In this article, we’ll review this plugin and see everything you need to know about it. In this in-depth The Events Calendar review, we’ll try to provide you with an unbiased review of its key features, installation, support, and more.
So, let’s dive in!
Overall Rating
The Events Calendar is a popular event management plugin from Stellar WP that comes with free and premium options. It’s packed with excellent features for creating and managing a highly professional calendar on your website.
According to WordPress.org, it has 800,000+ active installations. Besides that, it scores a rating of 4.3 out of 5 stars as per the review of 1,914 users. Isn’t it awesome?
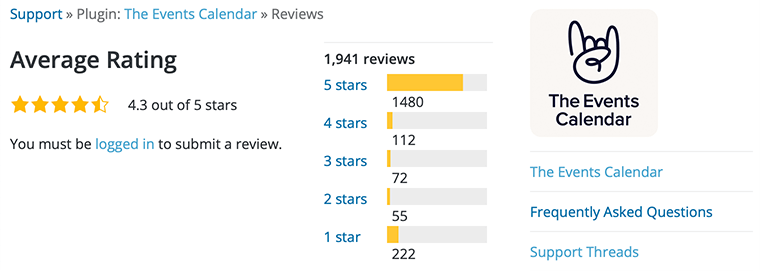
Moreover, we also strongly believe in that rating and would also give it 4.5/5 stars, and would highly recommend using it.
With that said, let’s explore even more and try to find out whether it’s worth it or not.
Pros and Cons of The Events Calendar
In this article of The Events Calendar review, we’ve also included the pros and cons of this plugin. So, let’s take a peek!
Pros of The Events Calendar
- A good plugin with smart support;
- Fast and reliable plugin;
- Regularly updated;
- Allows you to import events from your Google Calendar, iCalendar, Meetup, and other sources.
Cons of The Events Calendar
- Limited premium support option;
- Limited features;
- Needs to upgrade to its pro version even for basic options and features.
With that, you might get an idea about what kind of plugin The Events Calendar is. So, let’s begin our actual review of The Events Calendar with its overview section.
A. What is The Events Calendar? – Overview
The Events Calendar is a free WordPress event plugin that helps you easily create and manage an events calendar for your website.
With over 800,000 WordPress installations and a 4.3 out of 5 stars rating, it’s one of the feature-rich event management systems. It comes with a very beginner-friendly interface that makes it easier to add all your event details, including a dedicated page for venues and organizers.
Similarly, it allows you to display your events in a calendar view. You can even customize its default month view to show daily and weekly too. Plus, it lets you add a filter option to allow your users to find the exact events they’re looking for.
Moreover, its core plugin works smoothly for simple calendars and to create events. However, its premium version gives you access to several great features like recurring events, event blocks, shortcodes, and more.
Furthermore, it even lets you quickly import data from other calendars to speed up the event creation process. Besides that, one good thing about The Events Calendar plugin is that it integrates with Eventbrite.
B. Key Features of The Events Calendar
The Events Calendar comes with many great features to help you manage your events from start to finish. Therefore, let’s go through some of the key features that it has to offer.
- It allows you to highlight your events with multiple views – Month, List, Day, Photo, Map, and Summary.
- You can easily import events from other calendars with a CSV importer. Plus, it allows your users to subscribe to event updates with iCalendar or Google Calendar.
- Comes with a complete set of Event Blocks to help you build events in the block editor –no code required.
- Allows you to set the time zone for your events and keep everyone on the same schedule.
- Let’s put your specific events in the spotlight to drive engagement and increase attendance.
- With Events Calendar Pro, you can unleash recurrence capabilities and create tickets for recurring events.
- Comes with developer-friendly code that is completely customizable and lets you create the exact calendar you want.
- Get advanced widgets to share your events from any spot on your website to display a mini calendar grid view, upcoming events, featured venues, etc.
- It lets you have separate pages for venues and organizers to display everything related to the events.
- You can use shortcodes to embed a calendar or event anywhere on your website, display event countdowns, or highlight featured venues.
C. How to Get Started with The Events Calendar?
In this section of The Events Calendar review, we’ll look at how you can install and activate the plugin on your WordPress website.
The Event Calendar is a freemium WordPress plugin. It comes in both free as well as premium versions. You can download its free version from the official WordPress plugin directory.
Whereas in the case of the premium version, you’ve to purchase the premium plan of the plugin. And then, after, you can upload and install the plugin to your WordPress website.
Firstly, let’s look at how you can install the free version of The Events Calendar plugin.
Install & Activate the Free Version of The Events Calendar Plugin
To install the plugin, all you need to do is log in to your WordPress dashboard and then click on the Add New button within the Plugins menu.
Afterward, at the top right side of the page, you’ll see a search field box. There you’ll need to type “The Events Calendar” and look for the plugin.
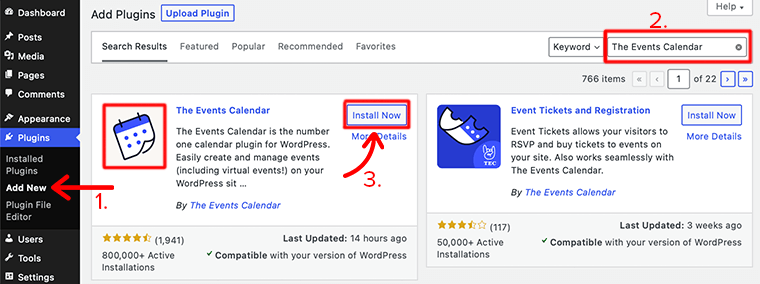
Following that, once you’ve found the plugin, click on the Install Now button, Once the installation is completed, click on the Activate button and you’re done.
So in this way, you install and activate the free version of The Events Calendar plugin on your WordPress website.
Purchase & Install the Pro Version of The Events Calendar Plugin
We just looked at how you can completely install and activate The Events Calendar plugin on your WordPress website. Pretty simple right?
Now, if you want to use its pro version, you first have to purchase its premium version. After that, you upload it and install it to your website via the Upload Method.
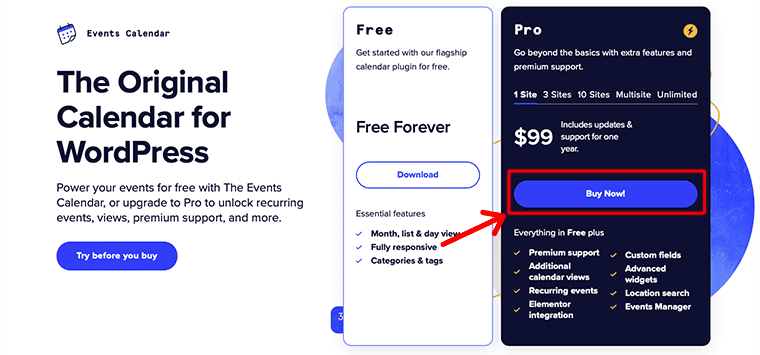
First of all, you’ll have to create an official user account from its official website. Once you’ve created an account, visit its official website and select the plan according to your requirement. Followed by clicking on the Buy Now button. Here, we’ve selected a Pro Plan for 1 Site.
While making a purchase, you’ll have to provide all the payment-related details and other information. After you’ve successfully purchased the pro version, you’ll get the download link and license key in your email.
Now you can download the ZIP file of Events Calendar Pro and store the license key for later use.
However, before you purchase the premium version, you need to create an account and fill in all the details. Also, you can apply for a coupon for a discount if you’ve got one. Once you’re done, you can purchase the pro version.
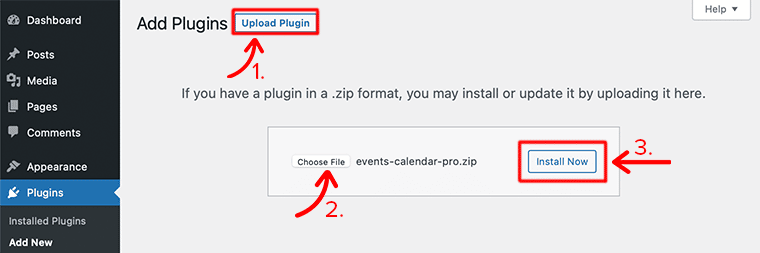
Now to install just downloaded pro version to your WordPress, you need to follow the following step:
- Login to your WordPress Dashboard;
- Navigate to Plugins > Add New;
- Click on the Upload Theme button;
- Then, click on the Choose File button and then find the .zip file on your device;
- After the uploading process is completed, click on the Install Now button.
In this way, you can easily purchase and then install the pro version of the plugin on your WordPress website. However, if you’re going to install the pro version then, don’t forget to first install the core version and then only upload and install the pro version to the website.
To learn more, check our complete guide on how to install a WordPress plugin.
D. How to Use The Events Calendar Plugin?
In this section of The Events Calendar review, we’ll show you how to use this plugin to create and manage events.
As we all know that The Events Calendar is a one-stop solution for events. It comes with a fully-responsive design, a variety of views, and countless ways to customize your events.
Therefore, let’s rundown and see how you can use the plugin to create, manage, and sell events in no time!
1. Creating Events
Once you’ve installed and activated The Events Calendar, the first thing you want to do is create some events.
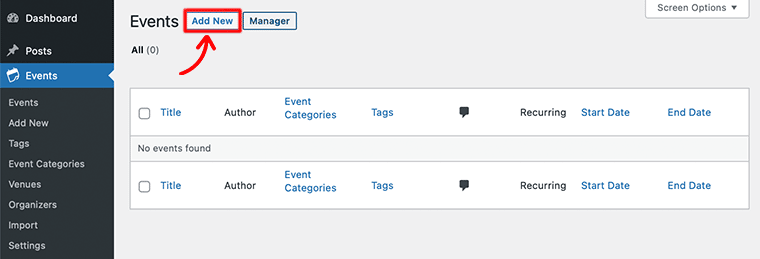
To be honest, creating an event is easy. All you need to do is start with logging into your WordPress dashboard. After that, you’ll find a menu entry called Events on the left sidebar. And from there, click on the Add New button.
Once you’ve clicked on it, it’ll take you to the event editor. You might find the editor quite identical at the first glance – to the regular page and post editor used by WordPress.
Just like creating a page or post, you’ll first add a title and description to your event.

Event Time
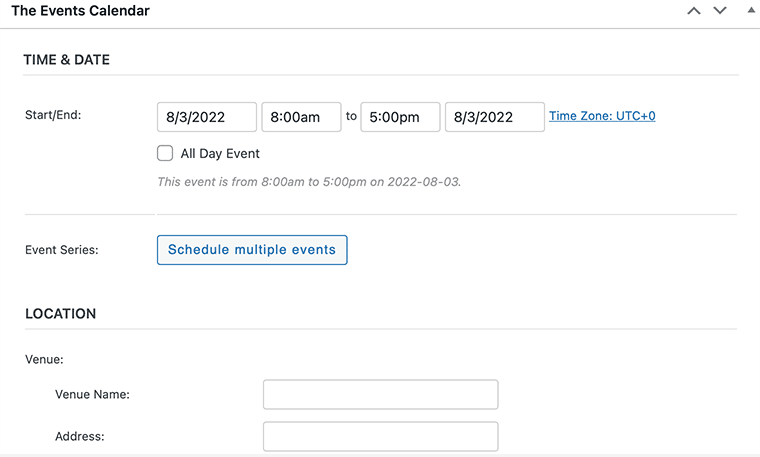
Following that, you’ve to provide specific bits of information associated with your events such as date, time, venue, and organizer. For that, you can find fields to set all of these things that can be found below the description editor under The Events Calendar meta box.
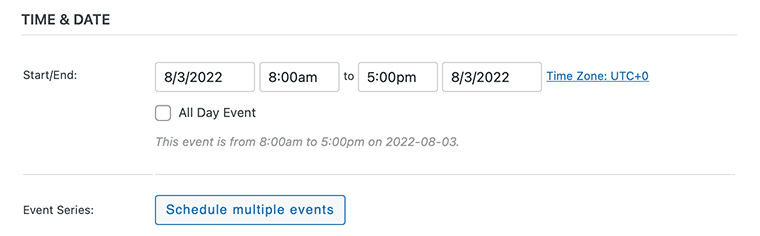
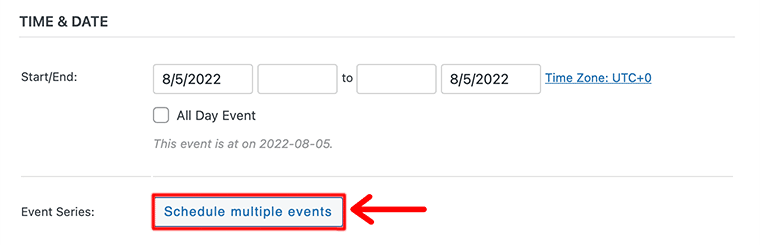
Now let’s start by defining the start and end dates of your event. Under the Time & Date section, you’ll find two key date and time options – Start/End and All Day Event.
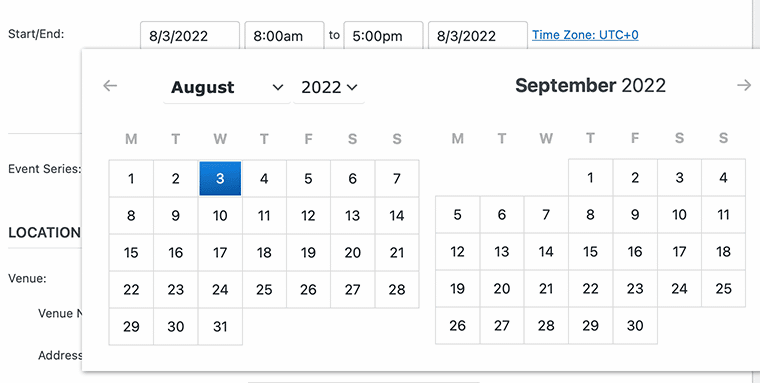
- Start/End – Simply in this you’ll add the start and finish date of the event. When you click into the date field, it’ll pop up a date picker and from there you can select your desired dates from a calendar.
- All Day Event – You can select this checkbox if the event is happening for a full day. On selecting this, you’ll not be able to specify a time for the event.
Here in this way, you can set the date and time for a singular non-recurring event. However, for creating events that take place on multiple days, you need to click on the Schedule multiple events buttons. We’ll talk more about this a bit later in this article.
Event Venue
With that date and time, your audiences will now know when your next event is happening. But without specifying the location of your event, your audience will not know where to come for the event. Hence, in the next step, we’ll add the venue to our event.
In the Venue section, you’ll get different fields to fill up regarding your location of the venue. It also provides you the option of whether or not to show the map to your location.
Likewise, if you’ve created or want to use a venue from a previous event, you’ll have the option of selecting an existing venue from a drop-down menu. Or else for creating a new venue, you can select the Create option from the menu option. This will then popup the new venue form fields to create a new venue for your event.
Once you’re satisfied with the event’s venue, you can move on to the next section i.e. the organizers.
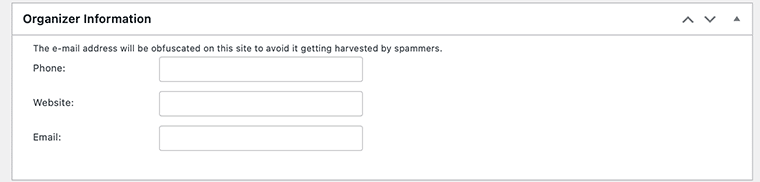
Event Organizers
Similar to that venue, if you’ve already created an organizer and want to select any pre-existing organizer details then you can do that too.
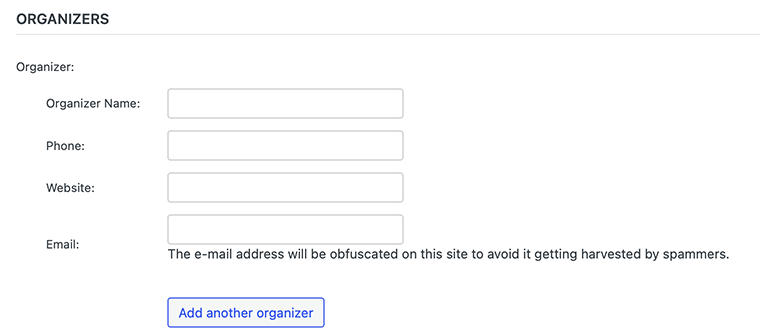
Under the Organizer section, you’ll get to enter the organizer’s name, address, phone number, and email address. Whereas, you can also add multiple organizers to an event.
Event Website
In this next section, The Events Calendar lets you add an event URL. This feature comes in handy if you’re organizing events for external organizations and have a dedicated event website.

Event Cost
Finally, you can also label a price for the event. However, this can be optional if you want the event to be free for all the audiences. In that case, you can simply enter a 0 (zero) or leave blank to the field.

Plus, when selecting the currency symbol, you get the choice to display it either before or after the actual amount.
Along with this all settings, on the right side also have more meta boxes that you need to configure before you create your events. In those, you’ve tags, categories, event status, featured image, and more. And once everything is done, you can Publish your event to go live on the internet.
In this way, you can easily create a singular non-recurring event in no time. However, if you want to create an event that takes place frequently in an interval then you can also create a recurring event. And that is what we’ll look into in our next section.
2. Creating a Recurring Event
Before we look at how we can create a recurring event, let’s first talk about what is a recurring event.
A recurring event is an event that occurs more than once on your schedule calendar. For instance, weekly cooking classes, monthly business seminars, school exams, etc.
You can make these things easily available on your website so that your visitors can easily track the event. With the help of The Events Calendar, it’s possible to create events of the same type that don’t follow a regular pattern.
However, this feature is only available in Events Calendar Pro, so you need to upgrade to its premium version.
Just like you created an event earlier in this article in the same way you’ll also create recurring events. The only catch is that under the Time & Date section of the Add New Event page.
The first thing you need to do is to correctly choose the start date, end date, and start and end times the same as creating a single event. After that, just below the Start/End options, you’ll see an option to Schedule multiple events.
With that, click on the Schedule multiple events buttons and it’ll display the row of buttons for available recurrence types. You need to click on the respective button according to the occurrence of the event.
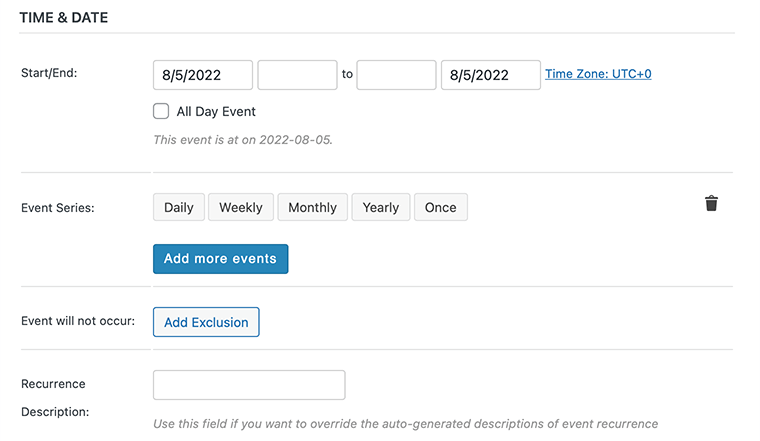
For instance, if you click on the Monthly option, it’ll scroll down a series of more option fields to configure. In it, you need to provide the occurrence of the event every month along with the date and time.
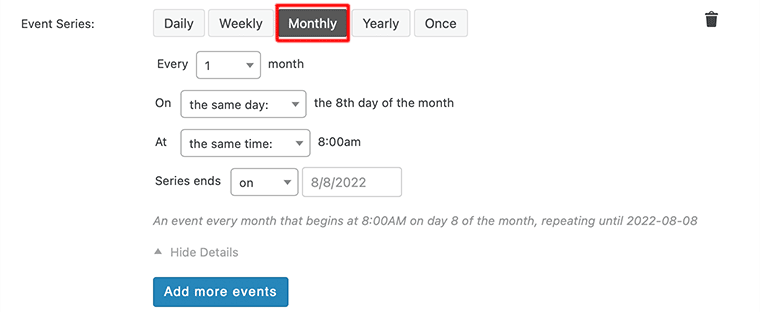
In this way, you can create a simple recurring event that follows pattern-based rules. Similarly, you can also create a non-pattern-based recurring event by using the Once recurrence type.
Simply click on that button when adding a recurrence rule to your event as shown in the following image.

After that, enter the date for your event into the On field and also specify whether this event will occur at the same or different time as the original event. Once you’ve finished providing the details for your first event recurrence, you can also add other rules as per your need.
For that, click on the Add more events button and repeat the same process. At last, after you’ve entered the recurrence rules, you can save your changes by clicking on the blue Publish button visible on the right side of the page.
Finally, you’ll be able to make Recurring Events as intuitive as possible. With that, let’s look at how The Events Calendar lets you create a venue and organizer page for your events.
3. Creating a Venue and Organizer Page
For any event, having a specific location and information about an organizer is a must. These pieces of information can act as an additional context for the event – where the event is happening and who is in charge of it.
With Events Calendar Pro, Venues and Organizers can also have their own pages. Now let’s see how one can easily create Venues and Organizers for the event.
Creating Venues
To create Venues for the event, head over to Events > Venues > Add New from your WordPress dashboard.
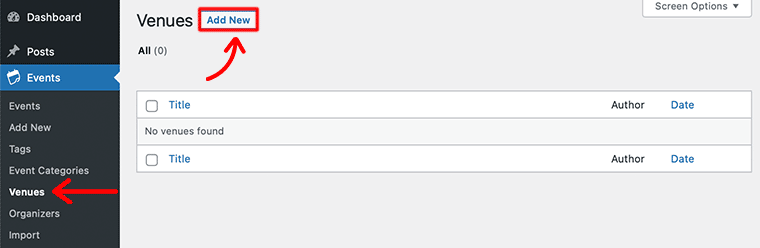
When you click on the Add New button, it’ll take you to the event editing screen that allows you to –
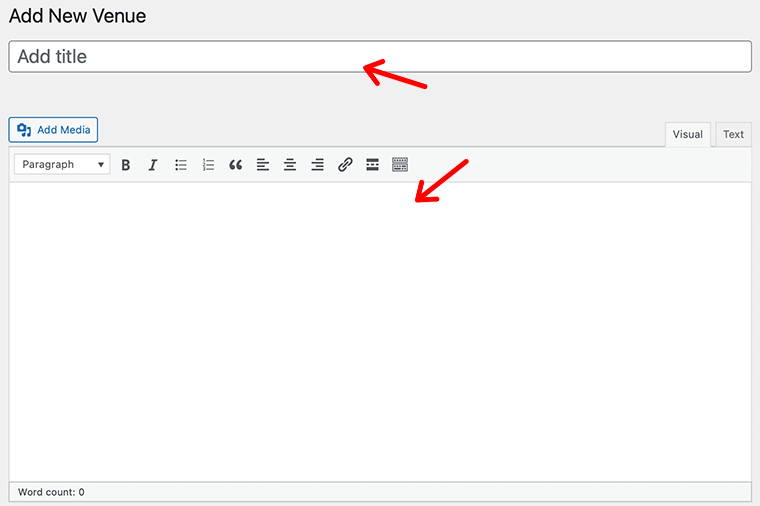
- Add the name of the venue
- Add a short description of your location
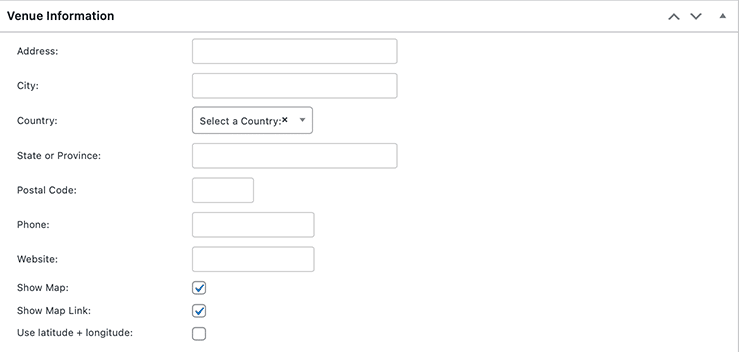
- Provide detailed information about the venue (address, city, country, state, ZIP, phone, and website)
- Enable an option to display Google Map for the venue
- Option to add longitude and latitude of the location
When creating a venue, you should include as much or as little information about the venue, so that anyone can easily locate the address of the event.
However, if you’re using longitude/latitude for the venue, add the correct geographical coordinates to make Google Maps work properly. Or else Google Map will be unable to locate the exact location or display an entirely different location.
Once you’ve created venues, you can view all your saved venues by going to Events > Venues and manage them the way you do with any default WordPress content.
Creating Organizers
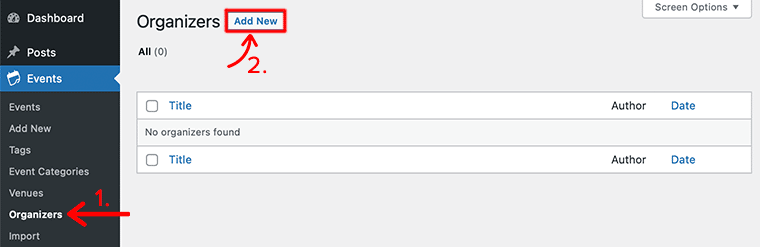
Just like we created Venue, in a similar we can also create Organizers. To create a new Organizer, navigate to Events > Organizers > Add New.
Following that, in the event editing screen, you’ll have the following options to fill –
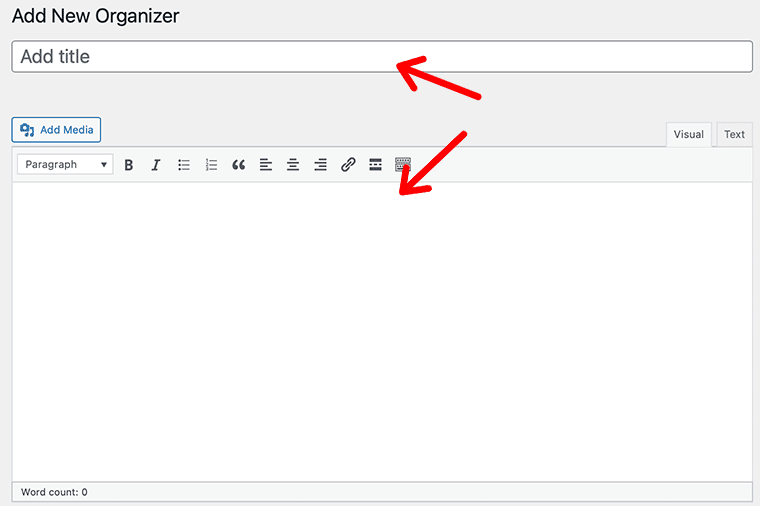
- Add the name of the organizer
- Introduce the organizer with a short description
- Include the organizer’s information – phone, website, and email
After that, you can click on the Publish button to make your Organizer’s information visible to your audiences.
Similarly, to view all your previously created organizers, go to Events > Organizers and edit the information like you would any default WordPress content.
Venues and Organizer Pages
As mentioned earlier, Events Calendar Pro lets Venues and Organizers have their own pages on your website. These pages will show off information about your venues and organizers in an intuitive way. Plus, it gets linked with the respective events that are associated with them. Isn’t it awesome?
You can find the dedicated pages respectively for both using the following URLs:
- For Venues – [your-site]/venue/[venue-name]; eg. www.example.com/venue/venue_name
- For organizers – [your-site]/organizer/[organizer-name]; eg. www.example.com/organizer/organizer_name
Plus, you can access these pages from your dashboard for each taxonomy. For instance, in Venue, go to Events > Venues, then hover over one of the venues from the list and click on the View link to see the page for that venue.
4. Getting Started with Event Blocks
Great news for those users who are using the Events Calendar Pro! They’ve come up with their own set of blocks called Event Blocks.
These blocks can help you instantly get started building events in the block editor and unleash greater possibilities – no code required. As a result, you can move, edit, and style each element of the block independently right from your block editor.
With that let’s look at how we can access Event Blocks right from our WordPress block editor. For that just like you create any page/post, go to Add New and it’ll take you to your WordPress block editor interface.
From there, you need first to give a name to your post/page. Then, you’ll see the blue ‘+’ icon in the top-left corner to open the block inserter.
Inside the block inserter, search for the Event Blocks in the search bar or scroll down to the bottom to find the blocks.
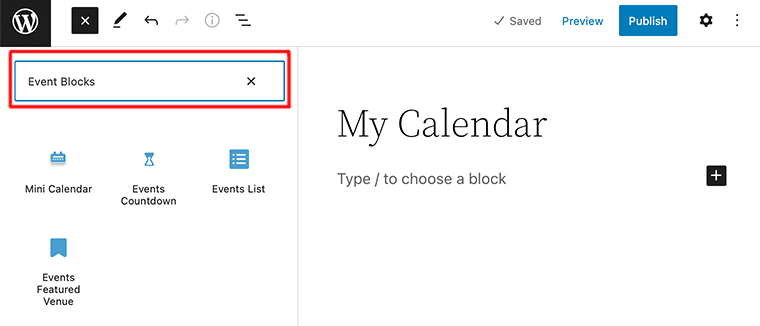
After that, you’ll find a bunch of event blocks that you can choose from that you want to add to your page/post. Once you’ve chosen the block of your choice, you can simply click or drag it into the content area of your editor.

For instance, in the above image, we’ve chosen the Mini Calendar and dragged and dropped it into the content area. In a similar manner, you can add other Event Blocks to your website.
Hence, this is how you can add any Event Blocks to your WordPress website directly from your default WordPress editor.
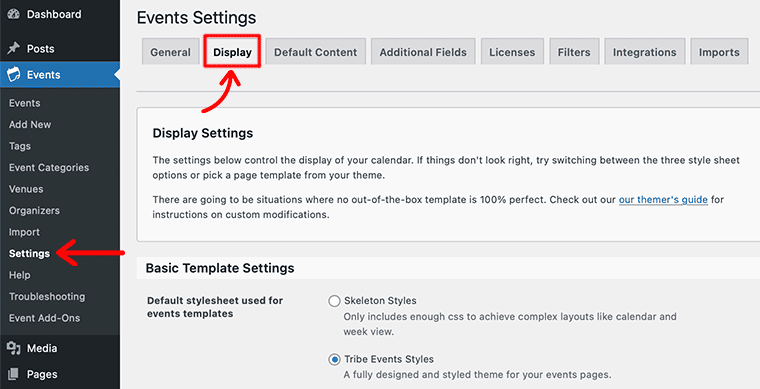
5. Basic Template Settings
In it, we’ll look at how The Events Calendar lets its users define the template that their calendar shows on their main events page.
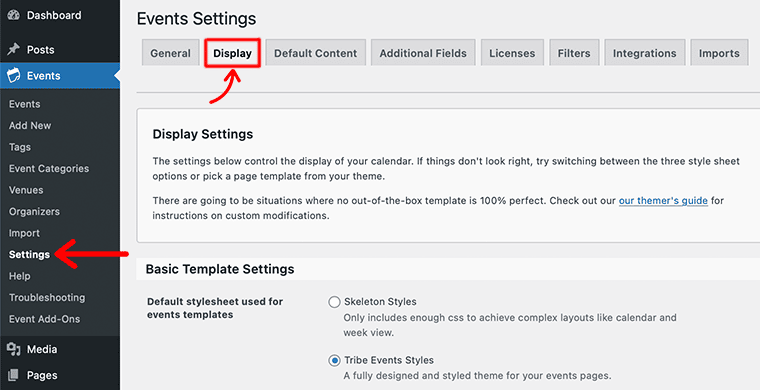
For that, navigate to Events > Settings, then click on the Display tab from your WordPress dashboard. There you’ll find a bunch of display settings that give you control over the display of your calendar.
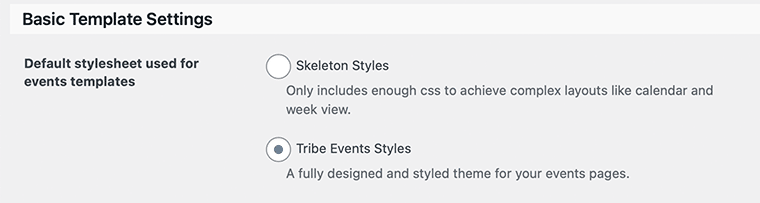
i. Default stylesheet used for events templates
Under the Default stylesheet used for the events templates option, you need to determine whether you want to use the CSS stylesheet that was developed for The Events Calendar or not. With that, you’ll find two options to choose from – Skeleton Styles and Tribe Events Style.
ii. Enable event views
Similarly, the Enable event views option allows you to enable and disable specific views to use for the calendar. It allows the users to switch the view of the calendar on the front end of the website.

The Events Calendar offers the following calendar views right out of the box:
- List: Displays your events in chronological list order.
- Month: Displays events in a traditional calendar grid.
- Day: Displays your events on a particular day in a list.
- Week: Events are displayed by week.
- Map: Alongside the map, events are displayed as a list.
- Photo: Events are displayed with images in a tiled grid.
- Summary: A quick overview of upcoming events is shown with the title, date, and time of each event.
iii. Default templates settings

These settings help you determine the default appearance of the calendar.
- Default view – It specifies which calendar view to display when a user first visits the calendar.
- Default mobile view – It specifies what default template to display when users view the calendar on their mobile device.
iv. Hide things
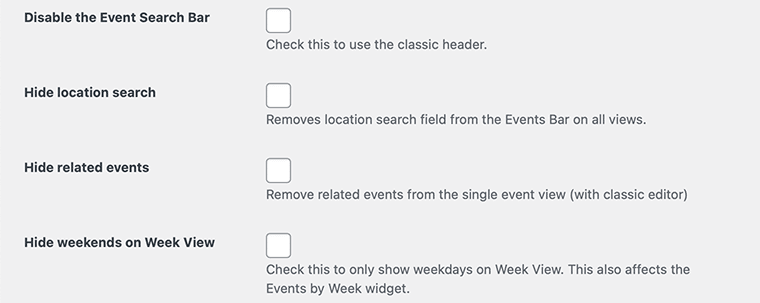
Using the following settings, you can enable or disable certain elements from displaying on the calendar and events.
- Disable the Event Search Bar – You can enable it to remove the event search bar from at the top of the calendar.
- Hide location search – It lets you remove the location search field from the Events Bar on all views.
- Hide-related events – Enabling it lets you display up to three events related to the current event in view.
- Hide weekends on Week View – Only available for Events Calendar Pro. This allows you to remove weekends (Saturday and Sunday) from the calendar’s week view.
v. Month view
This comes with two following settings that are only applied to the calendar’s month view.
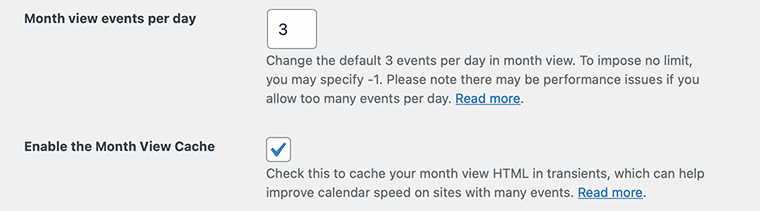
- Month view events per day – You can use it to specify the maximum number of events to display on a day in the calendar’s month view. You can change the default 3 events per day in the month view. Plus, to impose no limit, use -1 and it’ll display all the available events.
- Enable the Month View Cache – In the month view, the calendar takes a longer time to load than other views, depending on the number of events that are displayed.
Hence, enabling this option will use WordPress transients. This temporarily stores the view which helps to improve the calendar speed on websites with many events.
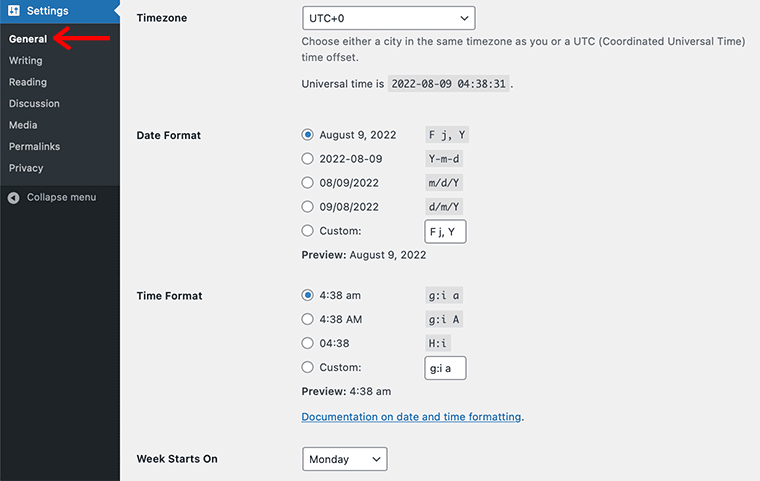
6. Setting Dates and Times
In order to determine the start of the week, timezone, and date format, The Events Calendar uses WordPress settings. You can find settings for all these options under Settings > General from the WordPress dashboard.
Similarly, if you want to override these settings from the WordPress settings then The Events Calendar lets you do that too in a few clicks. You can do this by navigating to Events > Settings and clicking on the Display tab.
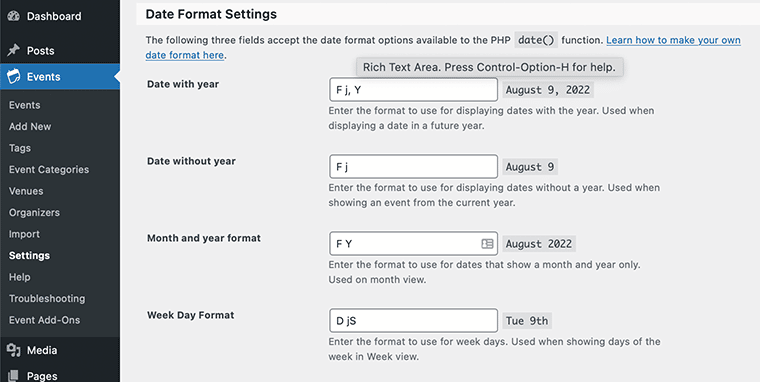
After that, scroll down to the Date Format Settings section to configure the settings just for the calendar.
Within that setting, you’ll find the format for a date with year, date without year, month and year format, date time separator, and more.
These are some of the key features of The Events Calendar that you can find once you installed and activated the plugin. Undoubtedly, the plugin is extremely easy-to-use and even beginners can learn to use it in no time.
Now that we’ve looked into how we can use the plugin, let’s look even more and try to learn about its add-on in the next section.
E. The Events Calendar Integrations and Add-ons
In this section of The Event Calendars review, we’ll look at some of the add-ons that integrate well with The Event Calendars plugin.
Now, look at some of The Events Calendar add-ons to add more functionality to your WordPress website.
| Add-ons | Description |
| Events Calendar Pro | Works alongside The Events Calendar and adds premium calendar features like recurring events, advanced views, cool widgets, shortcodes, additional fields, and more. |
| Event Aggregator | Helps you effortlessly fill your calendar with events from Meetup, Google Calendar, iCalendar, Eventbrite, CSV, and ICS. |
| Virtual Events | Allows you to highlight your virtual events on your calendar and integrate them with your favorite online meeting tools. |
| Event Tickets (Free) | Helps you sell and manage tickets and RSVPs to events |
| Promoter | You can send email alerts to your audience when events are announced for registration or on-sale dates. |
| Community Events | Let’s add an event submission form to your front so that users can submit events to your calendar. |
| Community Tickets | It helps event organizers to sell tickets to the events they submit via Community Events. |
| Filter Bar | Allows users to search events by category, venue, organizer, day of the week, and more. |
| Eventbrite Tickets | Through this, you can easily sell tickets to your event directly from your WordPress dashboard. |
Now that we just listed out most of the add-ons that integrate with The Event Calendars plugin. Let’s talk about a few of these add-ons and look at how they work.
a. Event Tickets
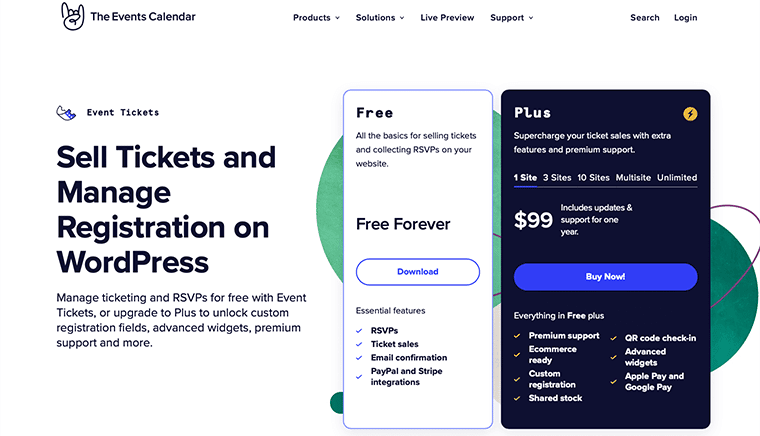
Event Tickets is an Events Calendar add-on that lets you manage ticketing and RSVPs for free. It allows you to easily sell tickets, collect registrations, and manage attendees for your in-person or virtual events.
Similarly, you can sell your tickets via WooCommerce or use their Tickets Commerce to sell your tickets with additional payment gateways like Stripe or Braintree. Plus, it easily integrates Event Tickets with your Stripe account or PayPal business account.
Key Features:
- Allows you to collect key details from name and email to T-shirt size and food preference using attendee registration forms.
- You can display a ticket stock countdown that lets your customers know how many tickets are left.
- Let’s generate sales and attendee reports for your events and tickets.
- You can create all your tickets and RSVPs right from your WordPress dashboard — no third-party plugins required.
- Easily you can manage registration and ticket sales for your free or paid virtual events.
b. Promoter
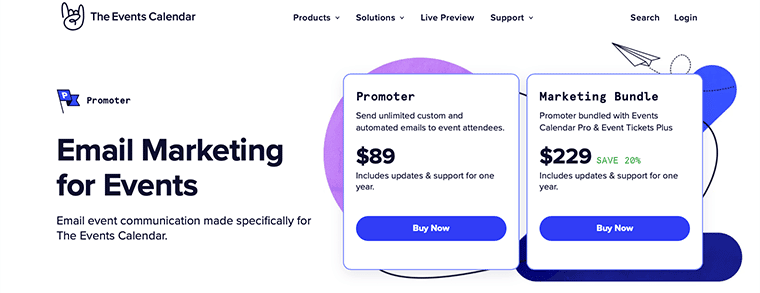
The Promoter is a premium Events Calendar add-on that integrates with your calendar and your WordPress site to make email marketing for events easier. You can send email alerts to your audience when events are announced and increase the excitement for registration or on-sale dates.
Likewise, you can use it to increase event attendance and engagement by automatically sending reminders for on-sale dates, event times, and more. It even lets you create personalized messages to increase engagement with dynamic content in your emails.
Key Features:
- You can get a birds-eye view of your event marketing with a Timeline view.
- Allows you to add your logo and brand colors to your email marketing.
- Let’s use automated marketing campaigns to schedule and prepare all of your emails for an event at once.
- Allows you to schedule pre-written messages with shortcodes.
- Also, you can merge tags dynamically to fill in content so that you don’t have to re-write emails each time.
F. The Events Calendar Pricing Plan – How Much Does it Cost?
The Events Calendar is a freemium WordPress plugin. It comes in both free and premium versions. You can easily download its core plugin (free) from the WordPress.org plugin repository or directly install it from the WordPress dashboard. Alternatively, you can also download it from its official website.
However, if you want to go beyond the basics with extra features and premium support then, its pro version is what you need. It comes with a handful of pricing plans that you need to choose according to your business requirement.
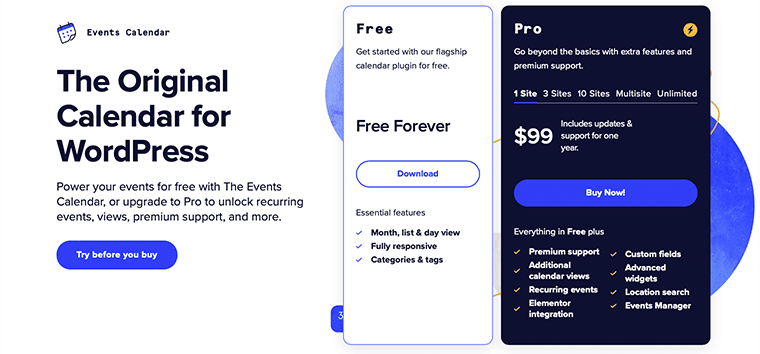
With The Events Calendar, you’ll get 5 different pro pricing plans – 1 Site, 3 Sites, 10 Sites, Multisite, and Unlimited.
- 1 Site – $99
- 3 Sites – $199
- 10 Sites – $399
- Multisite – $399
- Unlimited – $799
With all these pricing plans, you’ll get free updates and support for one year, advanced widgets, location search, Events Manager, Elementor Integration, recurring events, custom fields, premium support, and additional calendar views.
Likewise, if you’re satisfied with the plugin or it doesn’t fit your project then, they’re happy to refund the full amount within 30 days of payment.
G. The Events Calendar Customer Support
The Events Calendar is a straightforward and easy-to-use WordPress plugin. No doubt, even beginners can easily use this plugin without any hassle.
However, if you need any help or support amidst its use, you can very much rely on its excellent customer support and knowledge base. It comes with well-defined documentation and tutorials that you can look into to get deeper into this plugin.
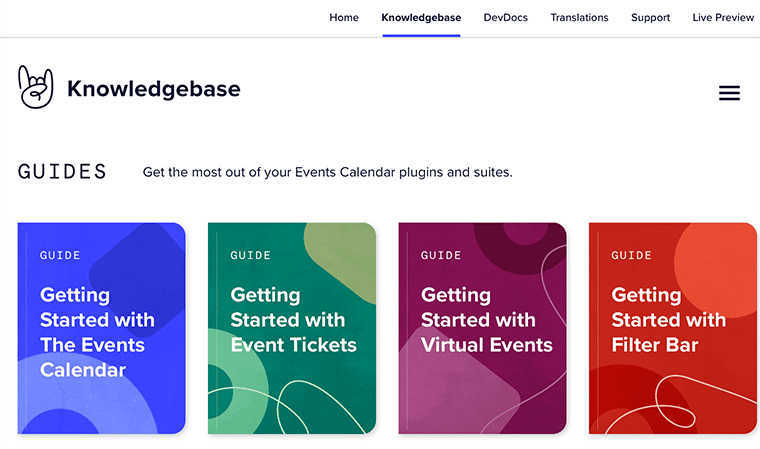
Besides, you can find all the beginner guides for the core plugin as well as for its add-ons. Not just that, it also teaches you how to troubleshoot recurring issues and problems in no time.
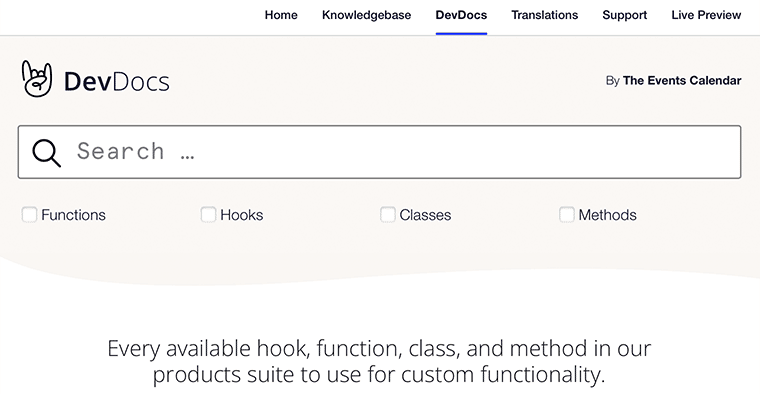
Likewise, a dedicated guide called DevDocs is available for developers who like to customize their websites on their own. In this, you find all the hooks, functions, classes, and methods of all their product suites to use for custom functionality.
Moreover, you can also check on The Events Calendar forum on WordPress.org. There you can find users like us who’re willing to help one another, solve the issues, and grow the community bigger and stronger. Plus, once a week the technical teams come to help users with basic troubleshooting and identifying bugs.
This above-mentioned support and resources are free to all users. You don’t have to purchase or become its premium user to access these resources. Although, it offers premium support for its customers with paid licenses.
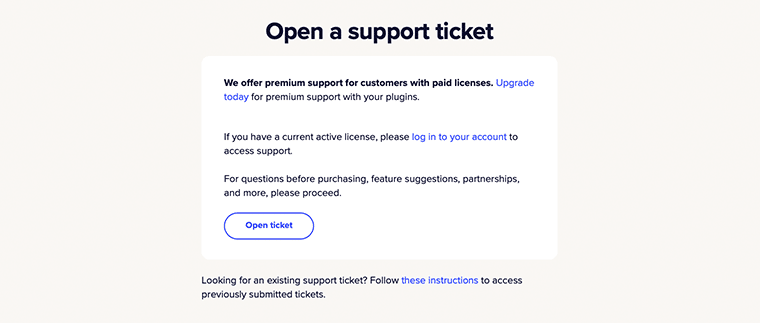
With premium support, you can open a support ticket and submit your problems, queries, or suggestions. Plus, you can even access previously submitted tickets. The only catch with this is that you need to have an account with The Events Calendar plugin.
H. The Events Calendar Alternatives & Competitors
Overall, The Events Calendar is an excellent WordPress plugin for creating and managing events for your website. However, if you’re still unsure about this plugin, then you can look for better alternatives to it. Hence, let’s now explore the alternatives to The Events Calendar plugin.
1. Events Manager
The Events Manager is a popular free event management solution for WordPress. It’s currently active on over 100,000 WordPress websites with a positive 4.1 out of 5-star rating.
This is an all-in-one plugin that lets you quickly and easily create events, accept bookings, and manage attendees. Its core version is genuinely useful and can manage basic events with ease.
Whereas with its premium version, you can add payment options, discounts, and coupons, customize booking forms, and a lot more. Also, its user interface seamlessly integrates with the WordPress dashboard and works like a desktop calendar.
2. Timely All-in-One Events Calendar
Timely All-in-One Events Calendar is a free event management plugin for WordPress.
It comes with a beautiful and modern user interface that makes it extremely easy to use for beginners. You can easily add events, sort them into categories and tags, and choose a layout from three built-in templates.
Likewise, it allows you to add events from other calendars that support the iCal format, including Google Calendar. You can even display your event venues using Google Maps along with the event details.
3. My Calendar
My Calendar is another simple yet powerful event management plugin that makes short work of showcasing and managing events.
It’s a beginner-friendly plugin that everyone can use and provides enormous flexibility for developers needing a custom calendar. This comes with a shortcode generator and widgets that let you easily add calendars to your WordPress blog posts, pages, or sidebars.
Similarly, in its premium version, you can add user submissions, sponsored event placement, event import from third-party tools, and more. Also, you can display Google Maps on a single event page and an event popup.
Check out some more alternatives to The Events Calendar with our article best WordPress events plugins to easily create and manage an events calendar on your WordPress site.
I. Frequently Asked Questions – FAQs
The Events Calendar is a core plugin that is required to run any of the premium calendar add-ons, including Events Calendar Pro, Community Events, Filter Bar, and others.
Whereas, Events Calendar Pro works alongside The Events Calendar and offers extra features like recurring events, additional calendar views, calendar shortcodes, and more.
Yes! The Events Calendar comes with a built-in CSV import tool that automatically lets you import events from Google Calendar, Meetup, Eventbrite, and more.
Some of the popular add-ons available for The Events Calendar are Events Calendar Pro, Event Aggregator, Community Tickets, Promoter, Virtual Events, Community Events, etc.
Unfortunately, The Events Calendar doesn’t allow you to have more than one calendar on your website. Instead, you can use event categories or tags to create calendar views that only display certain events.
Using the Events Tickets plugin, you can create RSVPs and tickets for events. Plus, it integrates well with PayPal so that you can collect payments for tickets.
J. Final Verdict – Is it Worth it?
With this, we come to an end to The Events Calendar review and we hope that you’ve already got enough ideas about it. By now you’ve already decided on whether you should or shouldn’t use this event plugin or not to manage your events.
If you’re still in delusion, let’s help you with that again in a few words. We think that The Events Calendar is a simple yet powerful event plugin that allows you to easily create and manage events.
Although at first look it might seem quite basic it seems to have all the features that any event plugin should have. Its free core plugin in itself is good enough to help you to create and manage your events.
However, you might find that the number of features may be a little thin. Don’t get disheartened by that, since it gives its user the ability to customize their calendar on their own.
Besides, its pro version comes with all the extra features that can help to enhance the functionality of your website. While using the plugin, it never seems to disappoint you nor makes your website sluggish at any time.
So – overall, we think that The Events Calendar is a good WordPress event plugin. It lets you easily create and manage an events calendar on your WordPress site.
Conclusion
That’s about it. This is a brief review of The Events Calendar plugin. We hope that you’ll agree with our review.
If you have any further queries about The Events Calendar and how it works, then please leave a comment below. We’ll try to get back to you as soon as possible.
Also, let us know if you’re using The Events Calendar plugin and please share your review with us in the comments section below.
You may want to take a look at our article on the best WordPress themes for event websites and also have a look at the best WordPress photo gallery plugins.
If you like this article, then please share it with your friends and colleagues. Also, don’t forget to follow us on Twitter and Facebook.