
Do you want to know how to add Google Analytics to WordPress? Or want to know how your website is performing? If yes, then you’ve come to the right place.
Understanding user interaction is crucial for optimizing content and user experience, leading to enhanced engagement, satisfaction, and overall website success. Also, it guides strategic improvements and aligns the site with user preferences and expectations.
And one of the methods to know your audience interaction is by adding Google Analytics to your site. It enhances your WordPress insights by gaining valuable audience data for informed content strategies and decisions.
In this guide, we’ll go through every step to add Google Analytics to the WordPress website. So, follow along!
Table of Contents
What is Google Analytics?
Understanding user behavior is crucial for a website’s success. And Google Analytics is a reliable tool, that provides valuable insights into website performance. Those insights are crucial for online marketing and website Search Engine Optimization (SEO).

At its core, Google Analytics is a tool developed by Google to help website owners comprehend user interactions. It’s not about complicated algorithms, it’s a practical means of understanding how people discover, navigate, and engage with your website.
This data helps in tailoring strategies to optimize user experience and achieve business objectives effectively. Why it’s important?
Google Analytics goes beyond providing numbers.
- Measures and analyzes the traffic.
- Shows visitors’ engagement on your website content.
- Helps to collect, extract, and format the data.
- Offers crucial insights for your site, linking with tools like Search Console, PageSpeed Insights, and AdSense.
- Helps to identify website’s low-performing pages, keywords search, organic search, etc.
Notably, Google Analytics is free, requiring only a Google account for website usage, making it accessible to all.
Also, offers a user-friendly dashboard, simplifying the process of interpreting data. It’s a practical tool, accessible to anyone willing to explore the insights it provides.
For more details, check our article on what is Google Analytics.
Curious how it works? Let’s check then!
How Google Analytics Works?
Have you ever wondered what happens behind the scenes when Google Analytics is at work? Let’s check the process.
To understand what’s happening on your website, the first step is creating a Google Analytics account and connecting with your website. We’ll get to this part in another section in detail.
Measures Your Website
After setting up your account, you add a tiny piece of code, known as JavaScript, to every page on your site. This code notes what users do when they land on your pages.
The first thing Google Analytics does is measure your website.
How it’s done? Let’s take an example!
So, if you have an online store the tracking code helps you see which pages are popular, like those selling food items or beauty products. It can even track if users go all the way to the purchase confirmation page after adding a product to the cart.
Below is an example of a Google Analytics tracking code.
But that’s not all. This code also picks up some details from the user’s browser. Things like language preference, and the type of browser they’re using (like Chrome or Safari). As well as what device and operating system they have.
So you’ll not only know who’s visiting but also what brought them there in the first place. Whether it’s a search engine, a clicked-on ad, or an email campaign, everything is revealed by Google Analytics.
Processing and Reporting
Now the next part!
When the tracking code on your website collects data, it bundles it up and sends it to Google Analytics for a transformation into insightful reports.
Now, here’s the fun part, Google Analytics doesn’t just throw the data. It takes the information and organizes it based on certain criteria. Whether your data are for a mobile or desktop, or if they are Safari or Chrome-friendly.

But, hold on, there’s more!
Google Analytics is flexible. It lets you tailor how the data gets processed. You might want to filter out internal company or developer traffic, and Google Analytics lets you do just that.
After that, your data will be stored in a secure database. Safe and unchangeable.
And done! After processing and organizing, your data emerges in Google Analytics as neat, comprehensive reports.
You can access your data from this link: https://analytics.google.com/analytics/, but make sure you’re logged into Google Analytics.
Isn’t it a smooth journey from raw data to actionable insights?
Why Would You Want to Add Google Analytics to WordPress?
So you have a website built with WordPress, and are curious why you want you add Google Analytics! The answer is simple:
Google Analytics keeps an eye on various metrics in real time, allowing you to see what visitors are doing on your site right now.
Let’s explore some of the features this tool brings to the table.
- Pageviews: This number reveals how many times people have checked out your web pages. Plus, it can be detailed to let you know which posts are getting the most attention.
- Session duration: This metric reveals the amount of time people spend exploring the content you’ve crafted. Also, get the report of the average session and new session duration on your website.
- Bounce rate calculation: This value displays how quickly people leave certain pages on your website.
- Pages per session: Checking how many pages each person looks at when visiting your site can tell what they’re checking out. Or, if they need more links to other interesting stuff.
- Social: When you share the blog on Facebook and Twitter, Google Analytics tells you exactly how many people dropped by.
- Benchmarking: Here we’re talking about everything, from the people who visit your site directly to the ads you pay for. It’s like checking your performance report to see how well you’re doing compared to everyone else online.
Once you set up Google Analytics for WordPress and use the correct plugin, you can easily view this information on your WordPress dashboard.
So let’s learn, how to add Google Analytics to WordPress.
How to Sign Up for Google Analytics?
Getting started with Google Analytics is a breeze, and you only need a Google or Gmail account to kick things off. Here’s a step-by-step guide to get you rolling:
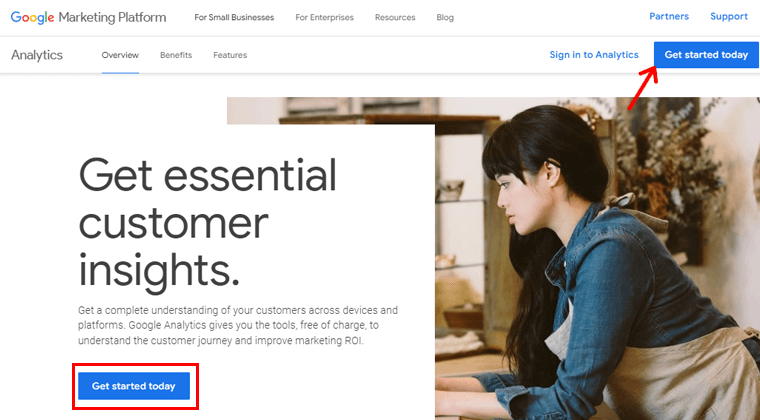
Step 1. Sign up on Google Analytics
Go to the Google Analytics website and hit the ‘Get started today’ button.
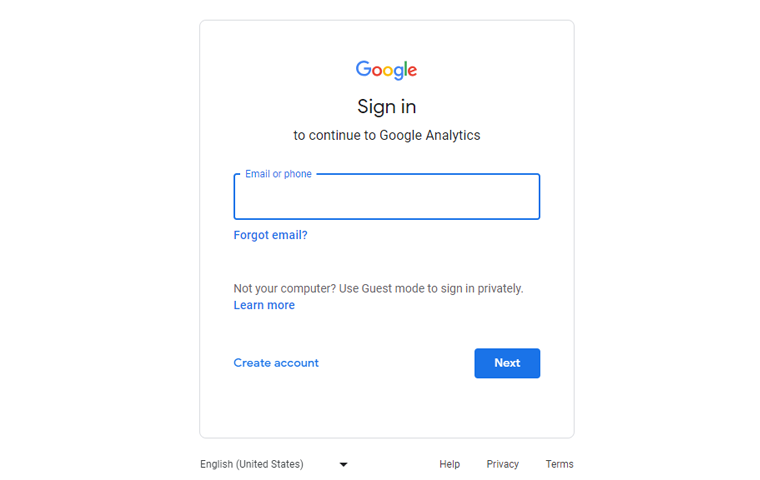
Log in with your Gmail account.
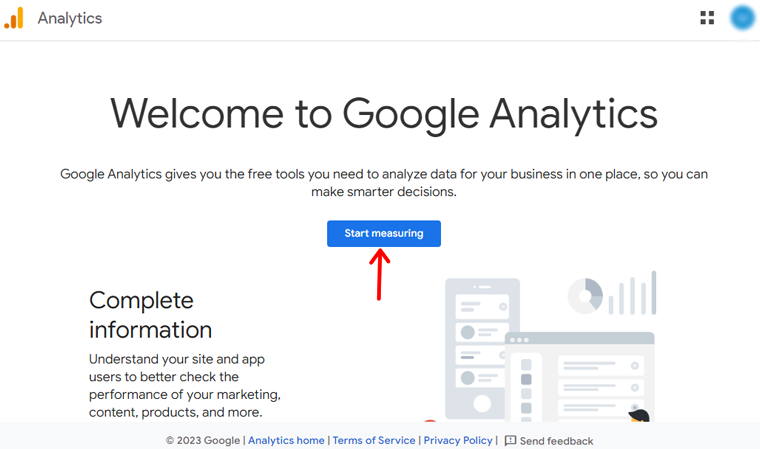
After signing in, you’ll land on a welcome screen. Now, click ‘Start measuring.’
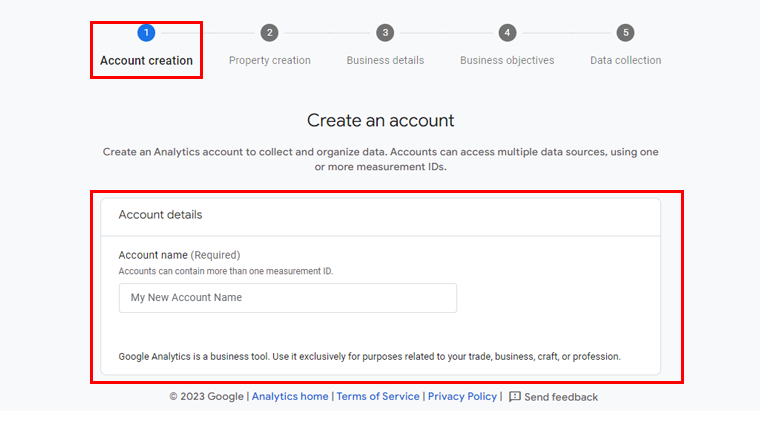
If you don’t have an account, you’ll be asked to create one. So start by adding an account name.
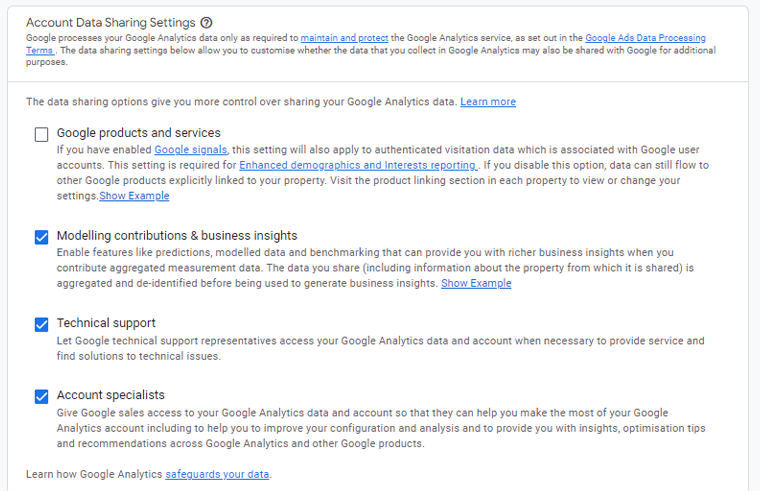
You’ll also encounter some data-sharing settings. The data-sharing options give you more control over sharing your Google Analytics data. You can choose what you require or stick with the defaults.
Step 2. Enter your website details
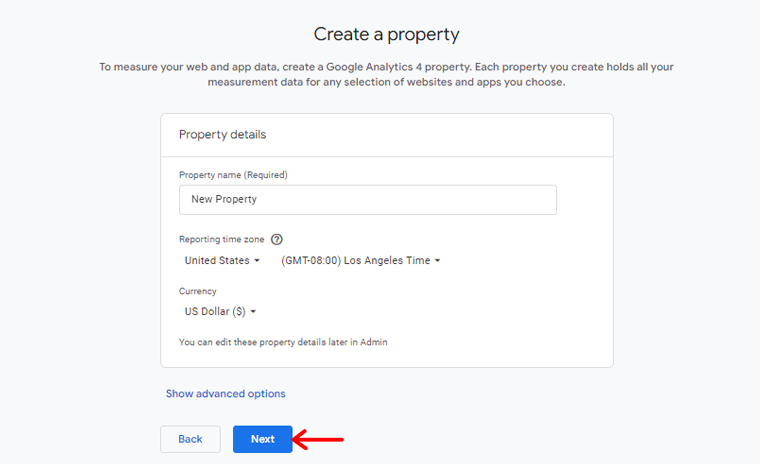
To measure your website data, create a Google Analytics property. Each property you create holds all your measurement data for any websites you choose.
So, name your property and click ‘Next.’
Following that, you need to provide details about your business.
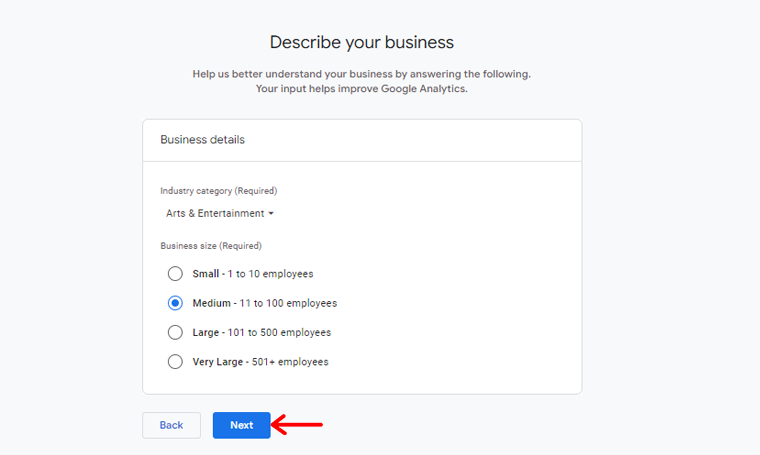
Also, choose your business objective, whether it is to generate leads, online sales, brand awareness, examine user behavior, or get a baseline report. And then hit the ‘Create’ button.

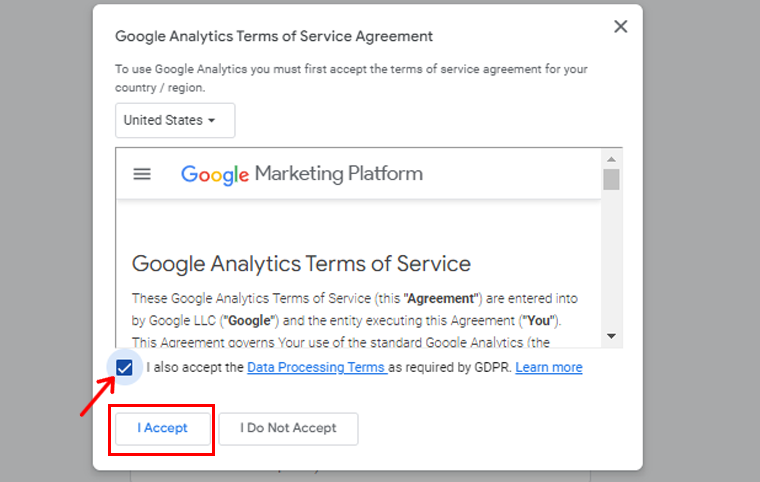
Now a pop-up box will appear that displays Google Analytics Terms of Service Agreement. To use Google Analytics you must first accept the terms of service agreement for your country/region.
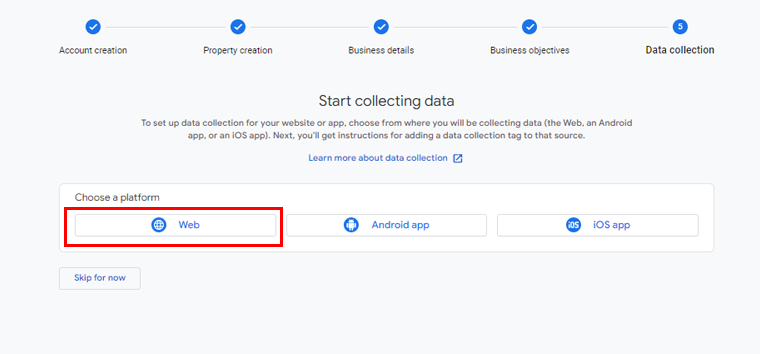
You will now be presented with options for your Google Analytics Web stream. As we are configuring Google Analytics for a WordPress site, proceed by selecting ‘Web’ as the platform.
Following this, you’ll be required to input your website URL and Stream name.
By default, Google Analytics will activate the ‘Enhanced Measurement’ option, enabling the tracking of page views, scrolls, outbound clicks, file downloads, and various other metrics within Google Analytics.
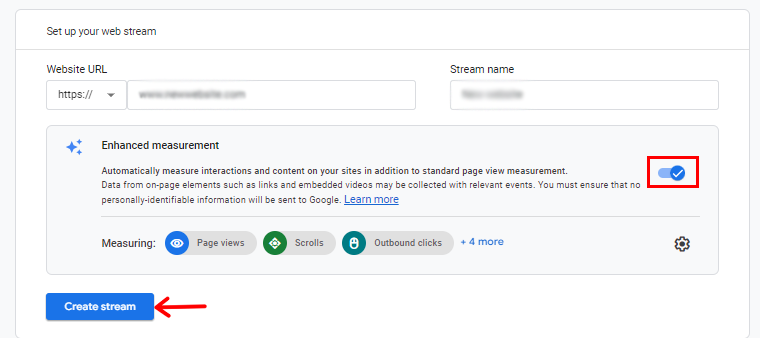
After that, you can proceed by clicking the ‘Create Stream’ button.
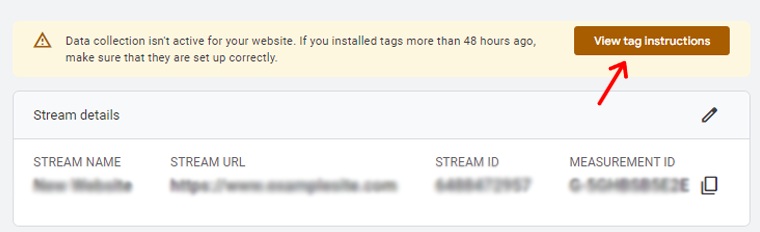
Upon completion, you’ll be able to view essential details such as your Stream name, URL, ID, and Measurement ID.
Additionally, it will display the various enhanced measurements that will be recorded.
At the top of the page, an alert bar will guide you on integrating Google Analytics with your WordPress site.
Now, click the ‘View Tag Instructions’ button. You’ll be presented with various methods to seamlessly incorporate the Google Analytics tracking code into your WordPress website.
Then you’ll have 2 options either to install with website builder or CMS or install manually. Here, we’ll choose the ‘Install Manually’ option.
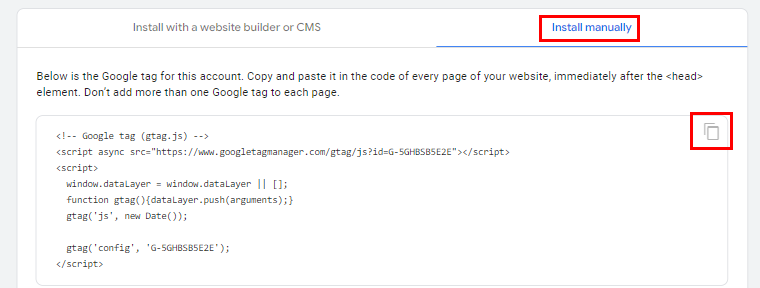
Upon selecting, you’ll see Google Analytics tracking code, so copy the code. You’ll need it later to add it to your WordPress site.
And that’s it! Now you’re all set up with Google Analytics. The next step is installing it on your WordPress site.
How to Add Google Analytics to WordPress?
Here, we’ll go through a few methods of adding Google Analytics to the WordPress website.
Method 1 – Add Google Analytics Using WordPress Plugin
When it comes to adding Google Analytics to your website, using a plugin is the smart move. It’s Luckily, there are plenty of Google Analytics plugins out there designed just for this.
Here, we’ll show you how to do it by using the MonsterInsights plugin. This plugin helps you to showcase vital analytics and meaningful stats. Also, helps seamlessly link your WordPress site with Google Analytics.
So start making informed, data-driven decisions to increase your business growth.

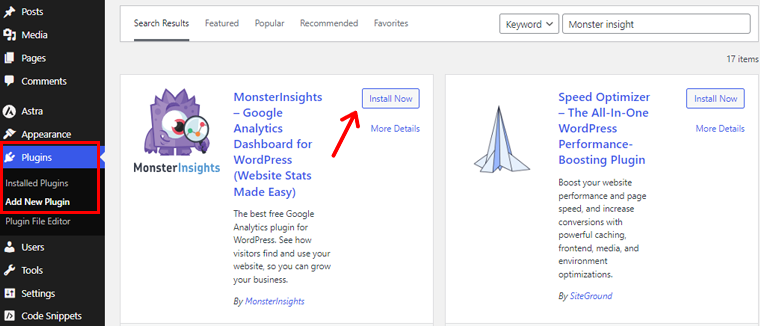
First, on your WordPress dashboard go to ‘Plugins > Add New Plugins.’ Then search and click ‘Install’ once you see the ‘MonsterInsights’ plugin.
After that Activate the plugin.
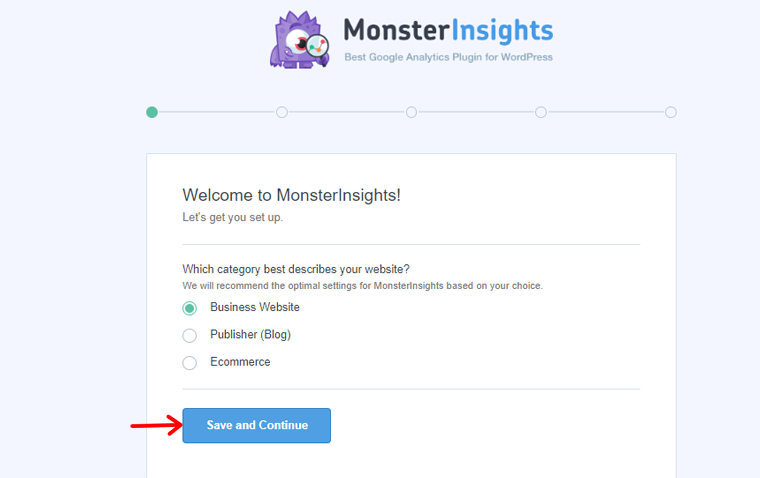
Once activated, the plugin will introduce a new menu item called ‘Insights’ in your WordPress admin menu. Click ‘Launch the Wizard’ on the welcome screen.

Initially, you’ll need to select a website category (business, blog, or online store) and proceed by clicking the ‘Save and Continue’ button.
After that, click the ‘Connect MonsterInsights’ button.

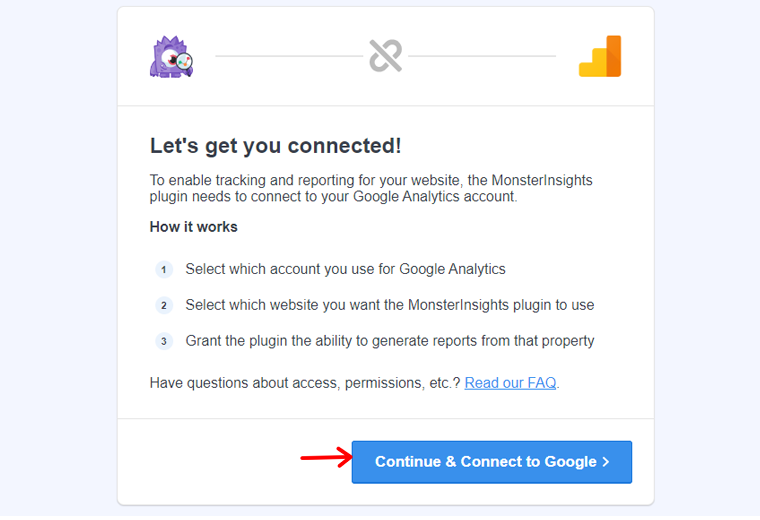
To enable tracking and reporting for your website, the MonsterInsights plugin needs to connect to your Google Analytics account. So click the ‘Connect & Continue to Google’ button.
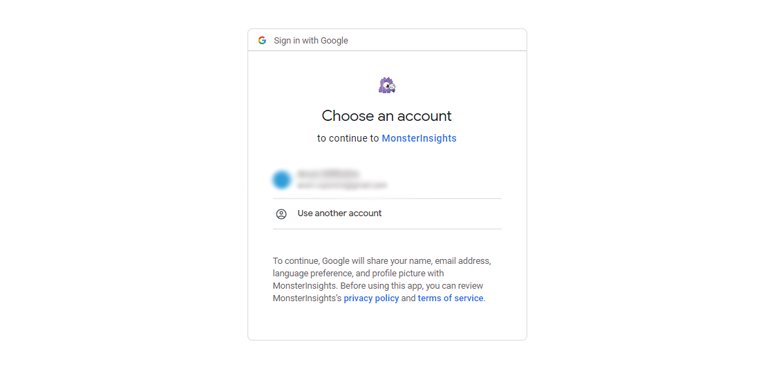
Following that select your Google account and continue.
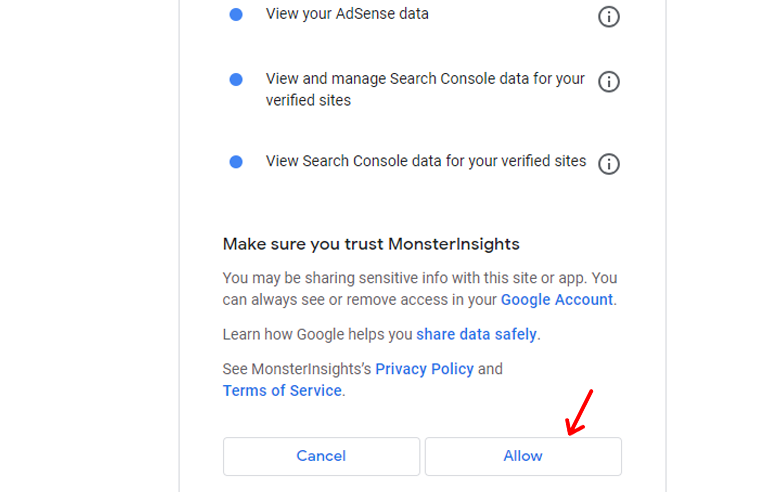
After that, click the ‘Allow’ button to continue.
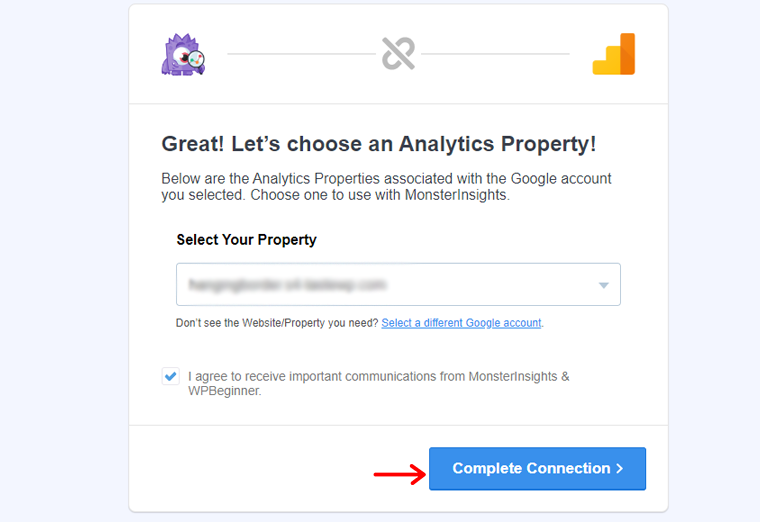
Now, choose the website you want to connect to and then click the ‘Complete Connection’ option.
Now MonsterInsights will connect Google Analytics to your website. Then, choose the recommended settings for your website.
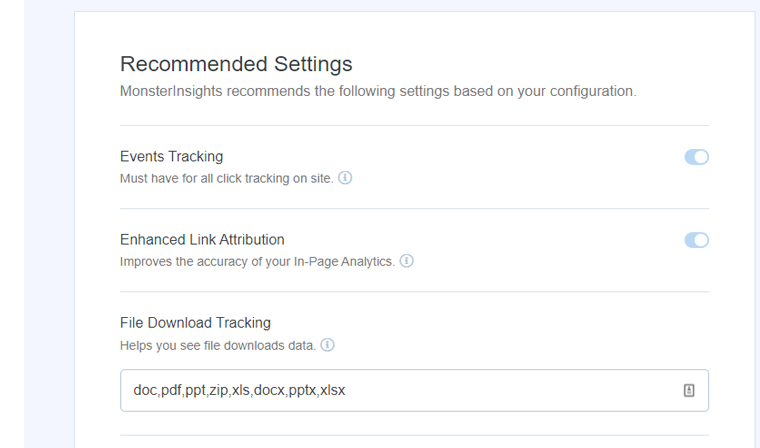
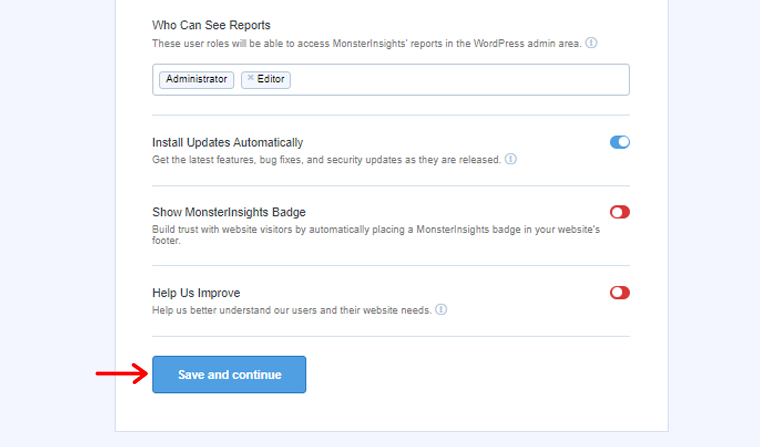
The default settings suit most websites. Also, MonsterInsights lets you choose user roles for report visibility. Once done, save settings by clicking the ‘Save and Continue’ button.
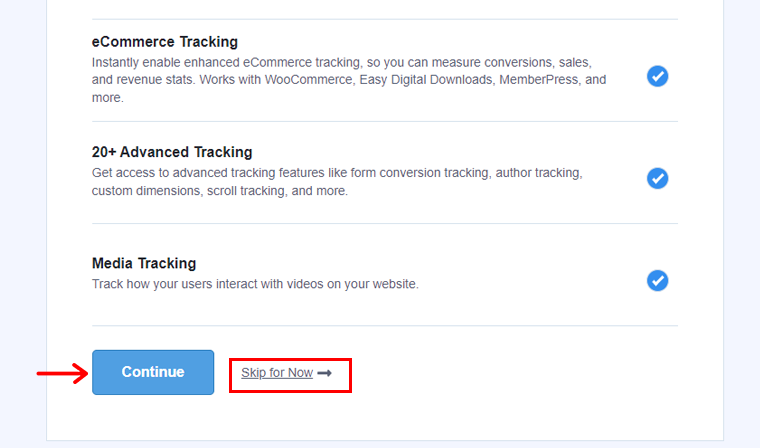
Following this, MonsterInsights presents a list of website tracking features for your selection. Choose to proceed by clicking the ‘Continue’ or ‘Skip for Now’ button.
Upon proceeding to the next screen, MonsterInsights will confirm the successful setup of Google Analytics tracking. Indicating the connected status, installed tracking code, and active data collection.

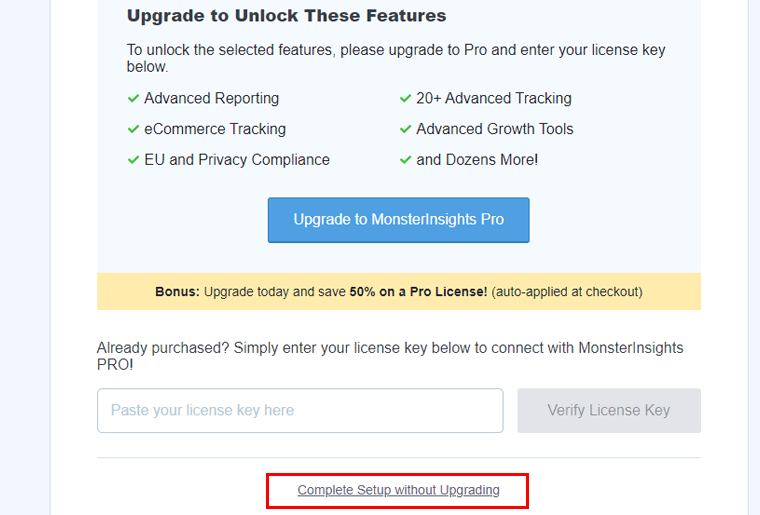
Further scrolling you’ll see a field to enter the license key. But for now, click the ‘Complete Setup without Upgrading’ for the current setup phase.
And you have successfully added Google Analytics to your website using MonsterInsights.
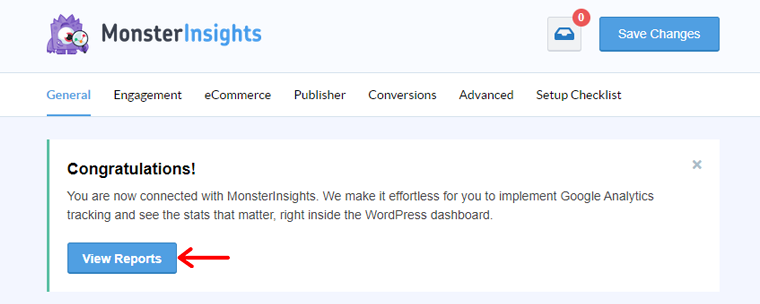
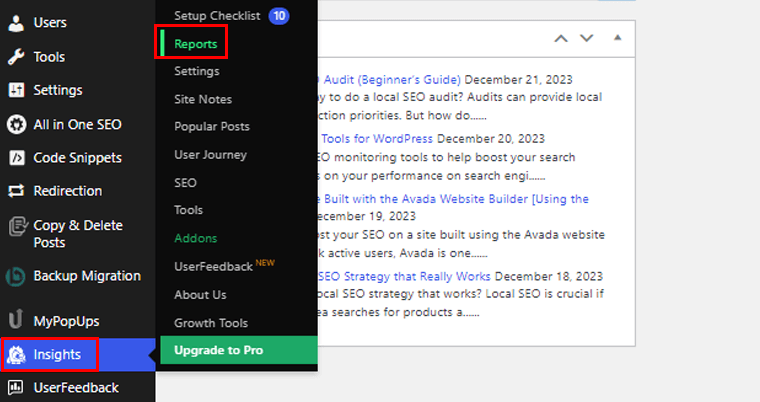
Now, you’ll be prompted to your WordPress dashboard. So, to see the report, go to ‘Insights > Report.’
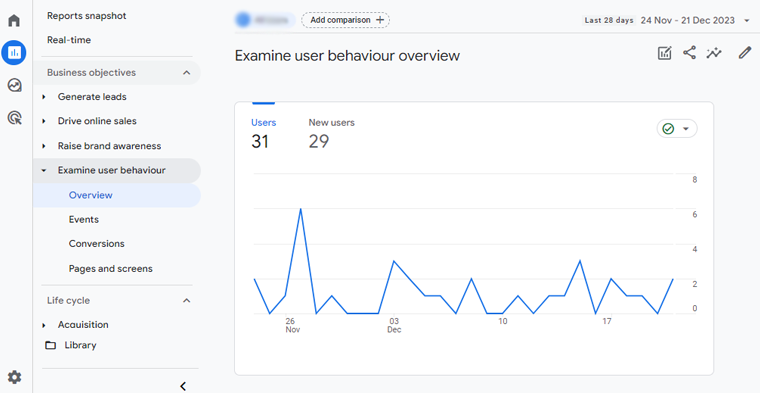
Below is an example of an analytics report you’ll get for your website.
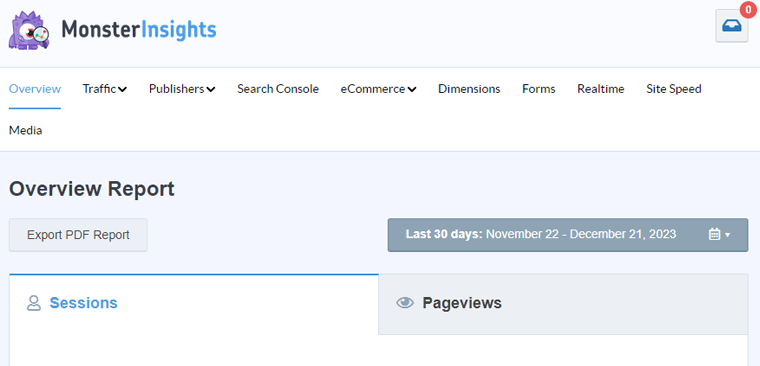
Note: However, to process data it can take up to 24 hours.
Method 2. Set up Google Analytics Manually
So, here we’ll learn to set up Google Analytics manually on your WordPress site. But, it doesn’t let you do the advanced tracking configuration. Also, you won’t see your data right in your WordPress dashboard.
Now, let’s check, how to do it!
Remember that Google Analytics tracking code you got when setting up your Google Analytics account? Copy that code.
Head over to your WordPress dashboard and now you need to install the WPCode plugin. This plugin helps you to add code snippets in WordPress without having to edit your theme’s functions.php file.
Let’s start then!
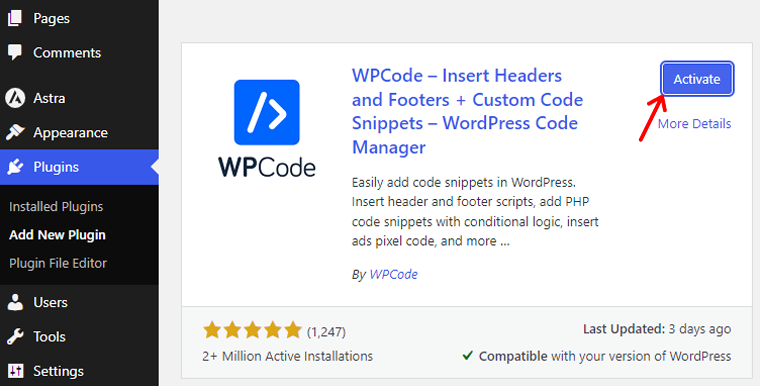
Click on the ‘Plugin > Add New Plugin.’ Search and hit the ‘Install Now’ option.

Following that click on the ‘Activate’ option. And your plugin is ready to use.
Need detailed help with this? Check out our guide on installing WordPress plugins.
Now, you’ll see the ‘Code Snippets’ option, click on it. Then head to the ‘Header & Footer’ section. And paste that Google Analytics tracking code in the ‘Header’ section.
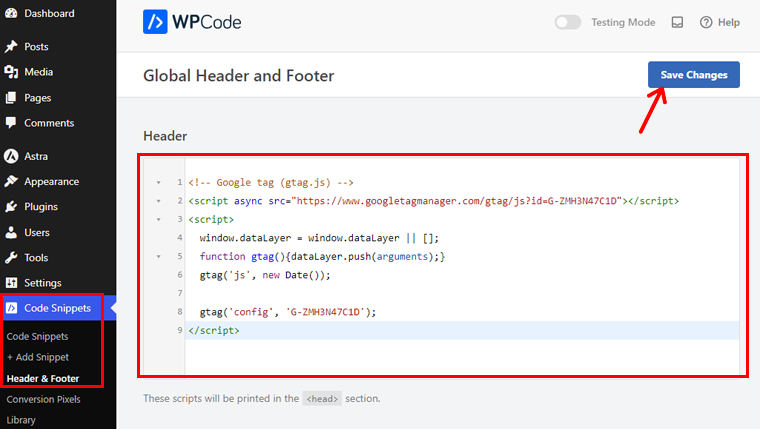
Don’t forget to hit the ‘Save Changes’ button.
And done! You’ve added Google Analytics to your WordPress site manually.
Method 3. Set Up Google Analytics on WordPress Theme
Now let’s learn to set up Google Analytics on WordPress Theme.
Adding Google Analytics code to your WordPress theme can be a bit tricky. Imagine your code disappearing if you change themes, not the best, right?
So, we usually steer clear of this method. But, if you’re feeling tech-savvy and up for a challenge, then let’s move on.
Now, there are 2 methods to add Google Analytics code to your WordPress theme. You can pick just only one. Here we’ll demonstrate how to do it in both ways.
Add Tracking Code in The Theme header.php File
For this guide, we’ve Astra theme installed.
If you want to learn to install themes, then check out our complete guide on installing WordPress themes.
Now go to your WordPress dashboard. Then click on ‘Appearance > Theme File Editor.’
A code editing page will appear, click on the ‘Theme Header’ option on the right side menu. Once there, just paste the Google Analytics tracking code above the </head> tag.
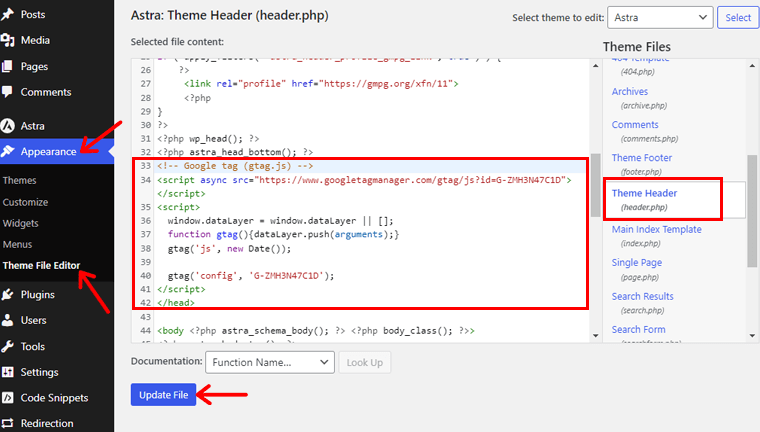
Now click the ‘Update File’ button to make the changes.
And, you’re done!
Add Tracking Code in The Theme functions.php File
The next method is through the WordPress functions file. Instead of manually placing the tracking code on every page, you can make it an automatic process by using the WordPress functions file.
Tip: It’s best to create a backup of the file before you modify it.
Now go to ‘Appearance > Theme File Editor.’
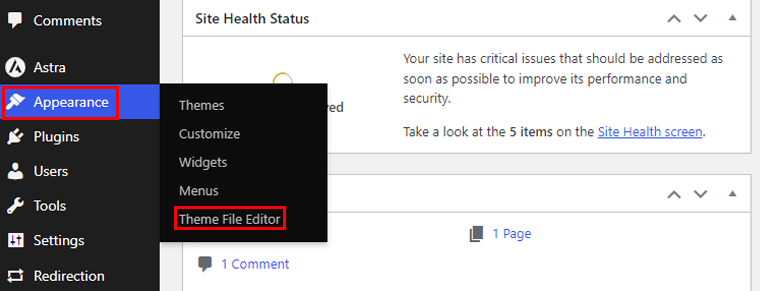
Then, click on the ‘Theme Function’ option on the right-hand side menu. You will need to add this code to your theme’s functions.php file.
<?php
add_action(‘wp_head’, ‘wpb_add_googleanalytics’);
function wpb_add_googleanalytics() { ?>
// Paste Google Analytics Tracking Code Here
<?php } ?>
Then add the Google Analytics Code the one you copied before. Below is an example of how your code should look.
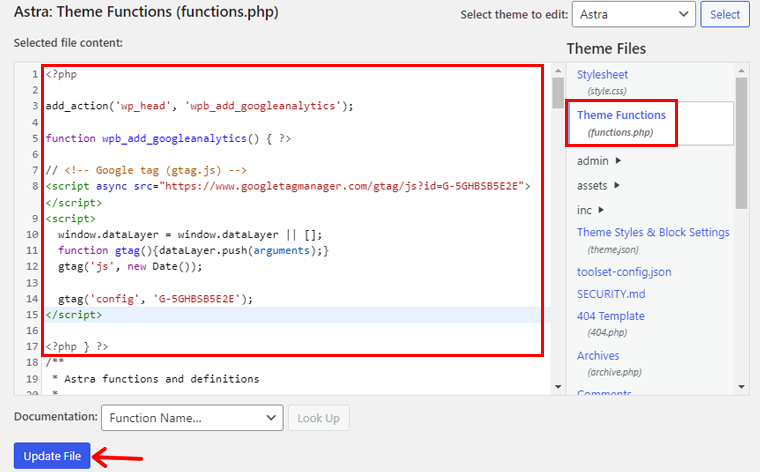
Following that, click on the ‘Update File’ option, and it’s done!
Note: If you happen to slip up and make a PHP syntax error in your functions.php file, you’ll see a white screen and both the dashboard and your website will be unavailable until you fix the error.
After all these steps of connecting Google Analytics to your WordPress site, it’s time to see reports.
Recommended Method – Using Insert Headers and Footers Plugin
The methods mentioned for adding Google Analytics directly to the WordPress theme can be suitable for tech-savvy users. But we recommend the use of the header and footers plugin like previously we used the WPCode plugin.
This plugin provides a user-friendly, non-technical approach. Making it ideal for beginners or those who prefer a simpler setup.
Here’s why we recommend this method:
- Eliminates the need to navigate and modify theme files directly.
- If you decide to change your theme, the tracking code remains intact, avoiding the risk of losing it during theme switches.
- Reduces the risk of syntax errors or unintentional mistakes.
- Allows users to manage not just Google Analytics but also other tracking codes or scripts easily.
- Updates to the tracking code or the addition of new scripts can be done swiftly through the WordPress dashboard.
How to View Google Analytics Reports
Here we’ll talk about 2 methods of checking your Google Analytics report.
Method 1: From Google Analytics Dashboard
To dive into your Analytics world, go to http://www.google.com/analytics. Click the ‘Sign in’ button at the top right.

There, you’ll find the built-in reports neatly organized in the left column. Each section is divided into different tabs.
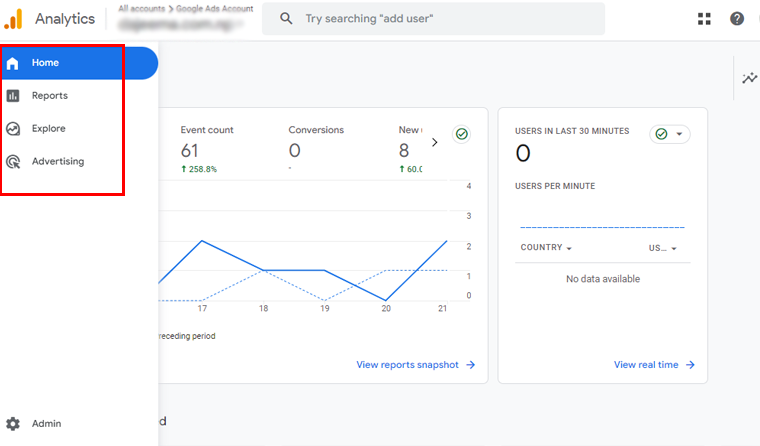
Clicking on each tab reveals more details and options. It’s a simple and intuitive way to explore and understand what’s happening with your website.
Let’s break down the different reports you’ll find in Google Analytics:
- Realtime Report: It shows who’s on your site right now, giving you a real-time view of active users.
- Acquisition Report: This report spills the beans on how people discover your site, through organic searches, referrals, emails, or affiliates.
- Engagement Report: It highlights conversions and events happening on your site.
- Monetization Report: This report organizes all your eCommerce data, including new features like in-app purchases and publisher ads.
- Retention Report: It distinguishes between new and returning visitors, giving you valuable insights into user retention.
- Demographics Report: This shows where your audience is from, right down to countries and cities. Plus, it adds a touch of personalization with gender breakdowns and interest reports.
- Tech Report: It reveals the details about devices, browsers, operating systems, app versions, and screen sizes people use to explore your website.
Method 2: From WordPress Dashboard
Here, we’ll demonstrate how to view analytics using the MonsterInsights plugin. After installing the plugin, checking out your site’s performance is a breeze. Just follow these easy steps:
First, log in to your WordPress dashboard. Then, navigate to ‘Insights > Report.’
There you’ll have many options like Traffic, Search Console, eCommerce, Dimensions, etc.
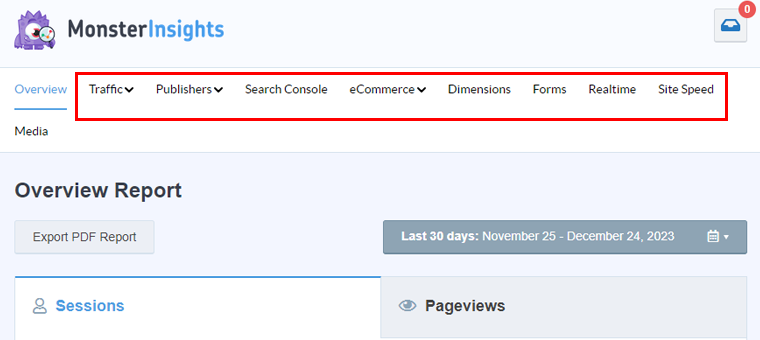
Let’s go through some of the reports.
- Traffic Report: Learn how visitors arrive at your website and which are the most engaged or profitable.
- Engagement Report: Improve your conversion rate with insights into Top Landing Pages, Affiliate Links, Exit Pages, Download Links, and more.
- Search Console Report: See exactly how visitors find your website from Google.
- eCommerce Report: Get reports on Average Order Value, Total Revenue, Sessions to Purchase, and Top Conversion Sources. Top Products, Number of Transactions, etc.
- Site Speed: You’ll get insights on Server Response Times, Mobile and Desktop Scores, First Contentful Paint, Automatic Recommendations, Total Blocking Time, etc.
And there you have it! With this simple route, you can keep track of your analytics views and reports anytime you want.
Frequently Asked Questions
1. Can I use Google Analytics for free?
Yes, Google Analytics offers a free version that provides powerful insights into website traffic, user behavior, and more.
2. What is Google Analytics in SEO?
Google Analytics in SEO is a tool that helps track and analyze website performance, user engagement, and organic search data, aiding in optimizing SEO strategies.
3. Can we earn from Google Analytics?
Google Analytics itself doesn’t generate income. However, using its insights can help optimize your website for better performance. Potentially leading to increased earnings through improved user engagement and conversions.
4. Do I need Google Analytics?
Yes, having Google Analytics is highly recommended. It provides invaluable data to understand your audience, track website performance, and make informed decisions for effective content and marketing strategies.
Conclusion
And that’s all folks! We’ve come to the end of our article on how to add Google Analytics to WordPress.
Hope now you know how to add Google Analytics to your WordPress site. If you’ve tried any of these methods, then do let us know how it went for you.
Also, you may like to check our article on the best Google Analytics plugins for WordPress and the benefits of web analytics for business.
Have any questions? Feel free to ask anything in the comment box below.
Also, follow us on Facebook and Twitter for more fresh content.