
Are you looking for an in-depth Otter Blocks review? Wondering if it’s the best Gutenberg blocks plugin for WordPress?
Otter Blocks equips you with a diverse powerful intuitive blocks. Empowering you to craft stunning layouts, integrate multimedia elements, and enrich your website’s functionality. All without ever leaving the familiar Gutenberg editor.
Whether you’re a professional WordPress user or a complete beginner, Otter Blocks promises an enhanced content creation experience. Allowing you to focus on conveying your message with impactful clarity.
But Is it truly the best Gutenberg blocks plugin for WordPress? Is it worth the investment?
In this article, we’ll review Otter Blocks, examining how it can elevate your website engagement and reach.
Let’s get started!
Overall Rating
Otter Blocks is a comprehensive Gutenberg blocks plugin. Offering over 26 unique block types to create engaging content effortlessly.
With features like AI-powered content creation and Lottie animations, Otter Blocks empowers users to craft visually stunning websites with ease. Users have given it a cool 4.7/5 star rating.
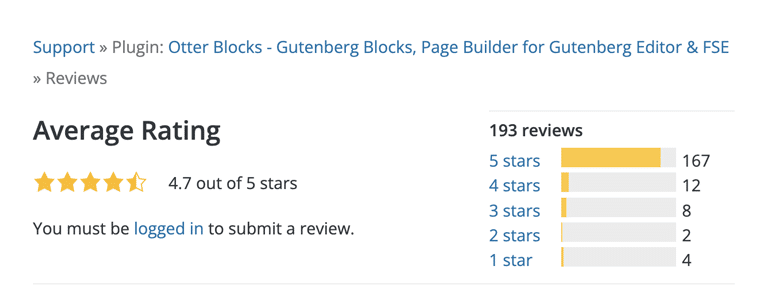
After thorough testing and evaluation, we give Otter Blocks a commendable rating of 4.7 out of 5 stars. We deducted 0.3 points due to the lack of compatibility with all WordPress page builders.
Although there may be slight room for enhancement, we highly recommend Otter Blocks as a top-notch block plugin. Its intuitive interface, extensive features, and value for money enhance your WordPress website.
Pros and Cons of Otter Blocks Plugin
Let’s look into the pros and cons of the Otter Blocks.
Pros
- Otter Blocks offers over 26 unique Gutenberg blocks.
- Dedicated WooCommerce Builder Blocks, such as add to cart, business hours, live search, etc.
- Craft content effortlessly with the help of artificial intelligence (AI).
- Incorporate Lottie animations anywhere within Gutenberg, adding dynamic and eye-catching elements.
- Show your progress or statistics with style using the beautiful Circle Counter block.
- Customize the CSS properties of any Gutenberg block on the page.
Cons
- It may have a slight learning curve for beginners.
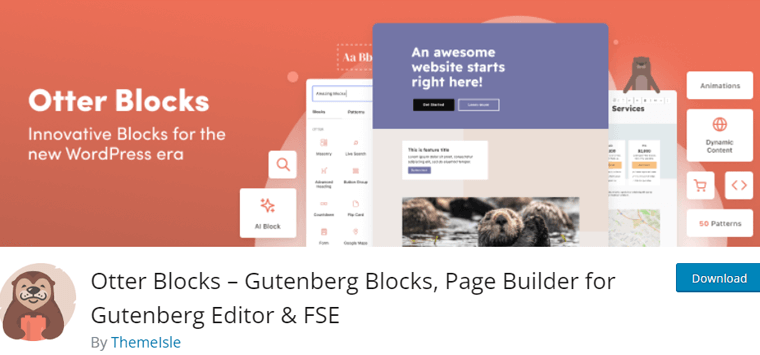
A. Introducing Otter Blocks (An Overview)
Otter Blocks is a plugin specifically designed to enhance the WordPress Block Editor, also known as Gutenberg. It essentially adds a bunch of new features to the editor, making it easier and more powerful to build your website.
Here’s a quick rundown of what Otter Blocks offers:
Otter Blocks comes with a collection of new blocks beyond the ones that come with Gutenberg by default. These blocks can include buttons, pricing tables, business hours, product reviews, etc.
This gives you more flexibility in designing your website pages.
Moving on, while Gutenberg offers some customization options, Otter Blocks expands on that. You can have more control over the style and appearance of your blocks, including things like colors, fonts, animations, and spacing.
If you’re using WooCommerce to run an online store, the Pro version of Otter Blocks includes special blocks tailored for that. This lets you build custom product pages and integrate other e-commerce features.
We’ll talk about this in detail in another section!
B. Key Features of Otter Blocks
Now, let’s explore the heart of the Otter Blocks plugin i.e. its key features to see what sets it apart from the rest.
1. WooCommerce Builder Blocks
It’s the pro feature and using this feature you can build custom Single Product Pages using WooCommerce Builder Blocks by Otter Blocks. It’s designed to maximize your conversion rate and bring more improvements.
And it brings in new blocks within the integration with Otter Blocks. You can find them in the Block List, they are:
- Product Review
- Product Add to Cart
- Product Image
- Product Meta
- Product Title, etc.

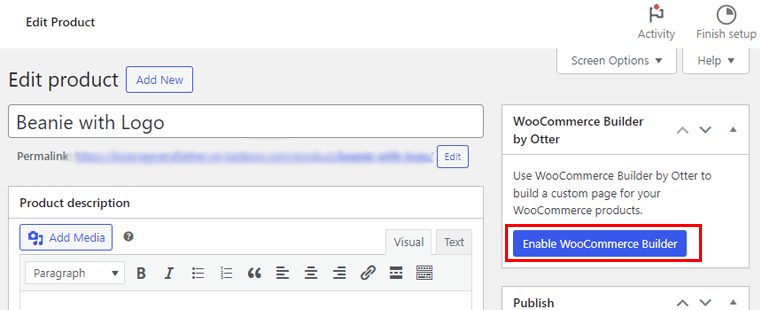
To use this feature, make sure you have installed the WooCommerce plugin. From that point, navigate to “Product > All Products” and pick the desired one.
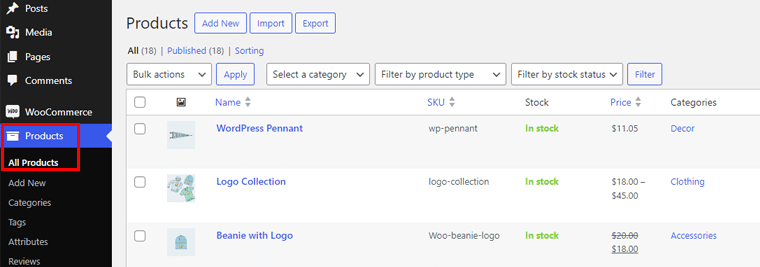
On the editor page, you will see a section that contains the Enable WooCommerce Builder button on the right side. So, click on it!
Following that, you’ll be redirected to the WooCommerce Builder, similar to the WordPress Editor.
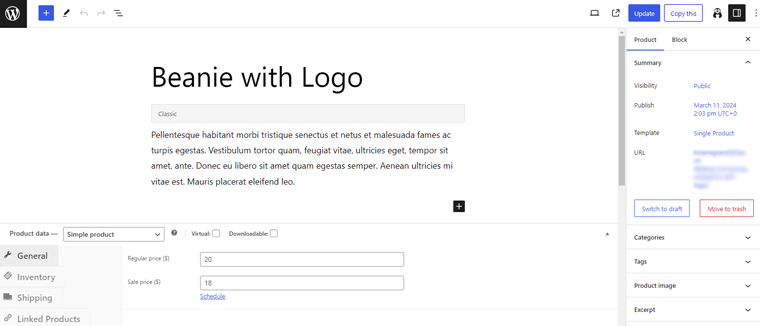
And, from this point, you can start customizing the sales page of the product.
So, scroll down and start with the General settings, Inventory setting, shipping weight, dimensions, and shipping class.
Moreover, on the right-hand side, you’ll see the “Sync with WooCommerce” option. Click on it and you’ll see the option to select the product. So here we’ve selected “Beanie with Logo” as an example.
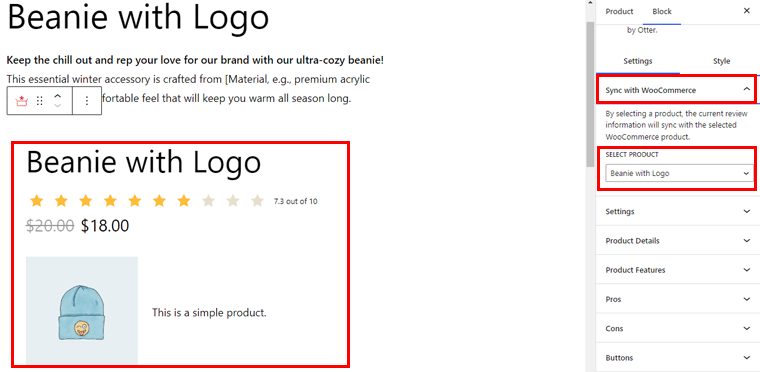
Once selected, it syncs with the selected product with current review information.
And there you have it!
2. Patterns
The Block Patterns are a powerful feature of Otter Blocks, and you can ease your life with stunning predefined blocks. These can be customized according to your needs and you can see how the blocks are combined to obtain a more practical section.
So to use these patterns, go to your WordPress dashboard, then “Pages > Add New Page.”
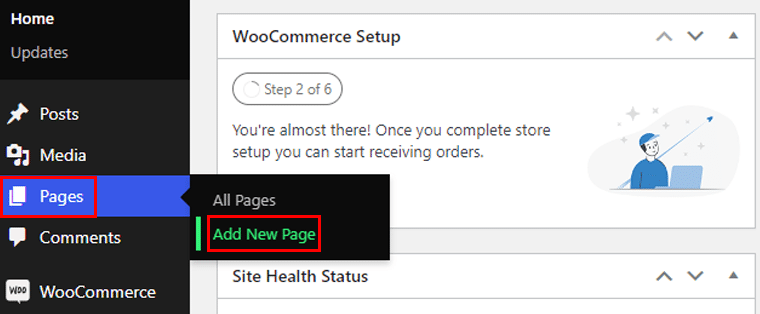
On the page editor click on the “+” icon in the top left corner.
Now switch to the “Patterns” tab and use the dropdown to find the Otter Blocks patterns.
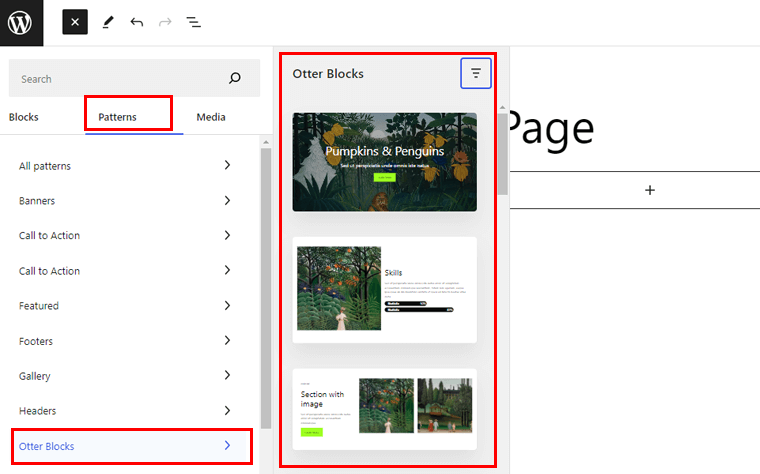
For this guide, we’re selecting the “Hero Area with Button” pattern. Here are certain things you can customize under the Settings tab:
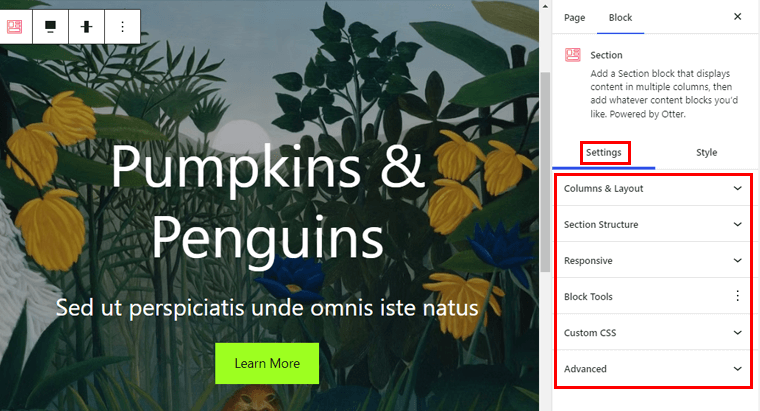
- Columns & Layout: Set your pattern column, and choose a layout for different screen types.
- Section Structure: You can add maximum content width, alignment, HTML tag, and minimum height.
- Responsive: Here you can choose to enable/ disable (hide this section on desktop, tablet, or mobile devices.)
- Block Tools: Where you can work with adding animations, custom CSS, visibility conditions, and more.
Now on the Style tab, you’ll have certain things you can customize. They are:
- Dimensions: Change the padding and margins for different types.
- Background & Content: Allows you to change the text and link color, background and background overlay, and text hover color.
- Border: You can change the border color, width, and radius, and enable box shadow.
- Shape Divider: It’ll add a shape divider, you can choose from slants, triangles, right curves, curves, etc.
Besides, the Otter Blocks patterns can be found in the dropdown, no matter what theme you are using. These are available and customizable and they can differ according to the style of the theme your website has.
3. AI Block
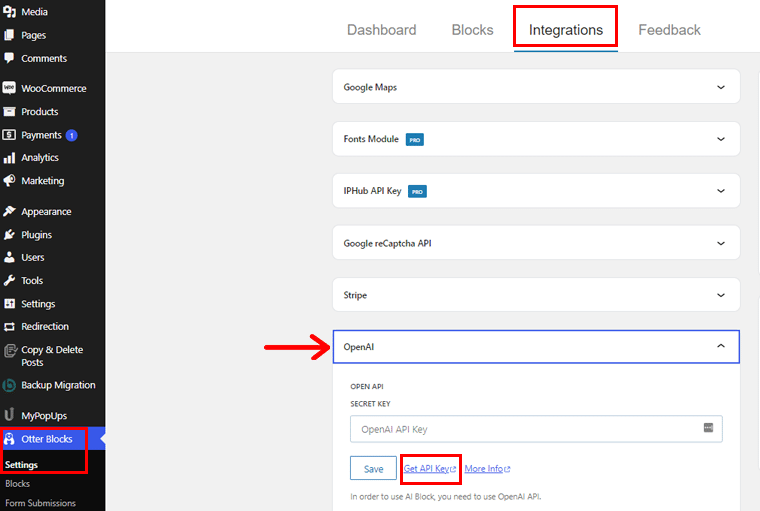
The AI Block works based on the OpenAI API key. You have to create an OpenAI account to use the AI Block.
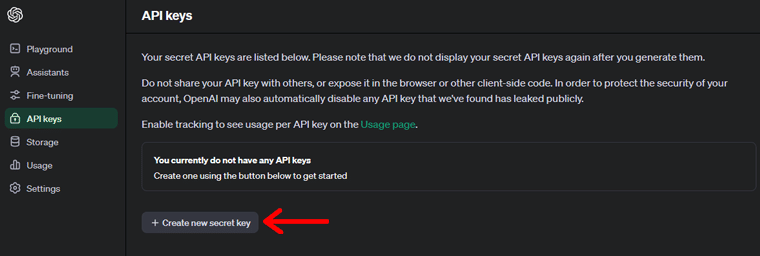
To generate the OpenAI API Key, go to your WordPress dashboard, then go to “Otter Blocks > Settings > Integrations > OpenAI.” Then click on the “Get API Key” link.
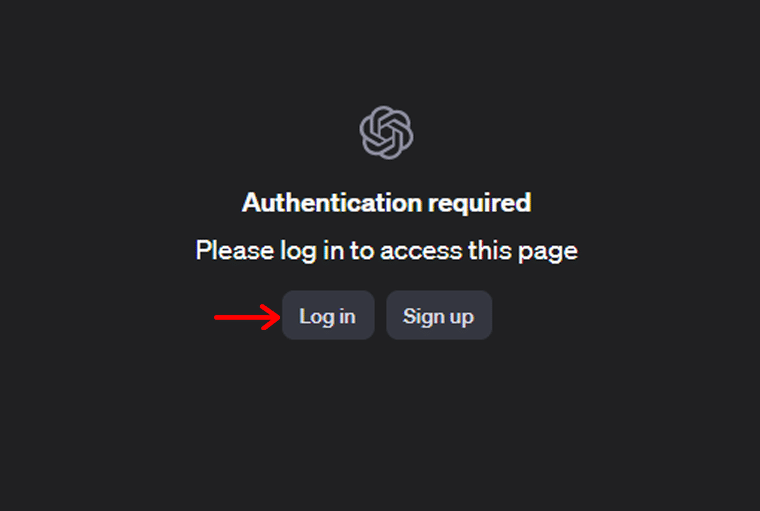
Now it’ll take you to the OpenAI page where you need to authentication is required, so click on the “Login” option.
Once logged in click on the “Create new secret key” option.
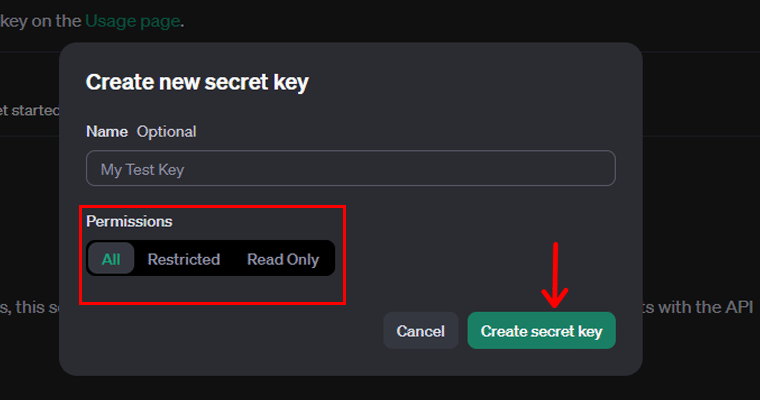
Now a pop-up box will open where you need to set permissions and again hit the “Create Secret Key” button.
You’ll have your secret key, so hit the “Copy” button. Remember to save this secret key for future use.
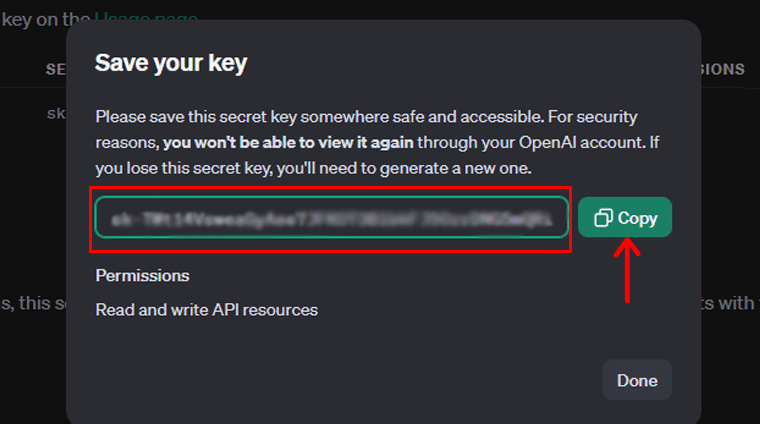
After generating the API key, make sure you add it to the OpenAI secret key tab. After that, hit the “Save” button.

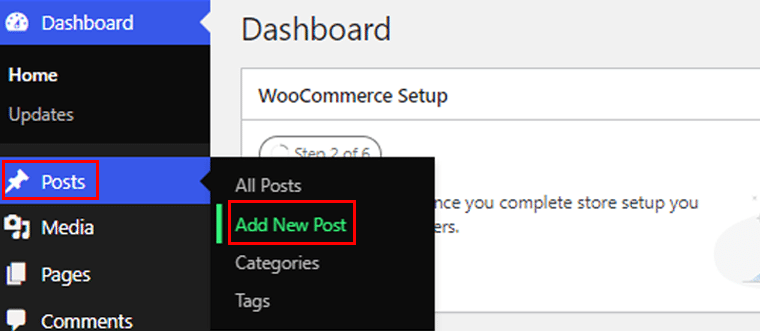
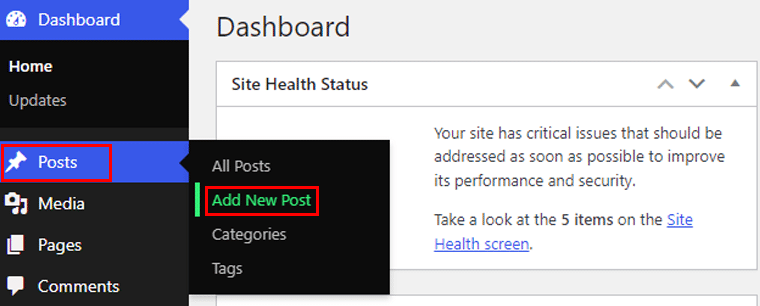
Now to use the block, let’s go to “Post > Add New Post.”
Now click on the “+” icon on the top left corner.
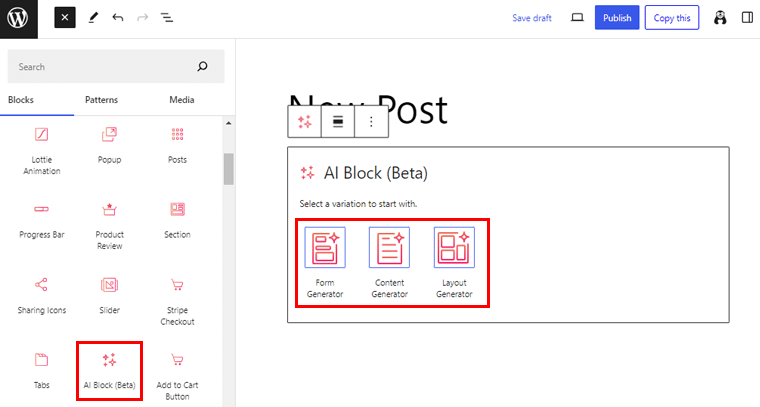
Search for AI Block and insert it into your post. From this point, you have 3 available options: start using the AI layout generator, content generator, and form generator.
Let’s go through them!
I) AI Content Generator
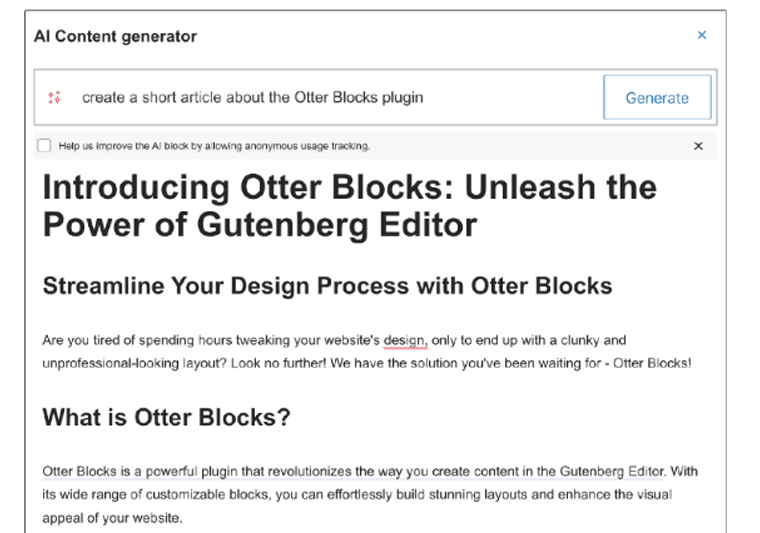
The AI Content generator can be used for multiple purposes. You can start by entering the desired output, then click on the “Generate” button.
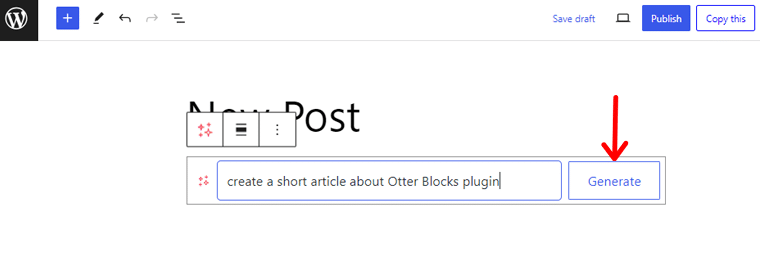
As a result, the Otter Blocks will create the content as mentioned in the prompt.
At the bottom of the blocks, you will see three buttons and arrows with the following functionalities:
- Replace: Once pressed, this button will turn the generated content into separate blocks so that you can easily replace its content.
- Insert below: Maintains the original generated content and adds new blocks beneath it containing the same output.
- Regenerate: It’ll replace the existing content. so that it will not be stored in the history list.
- History arrows: Allows you to access previous versions that have already been generated.
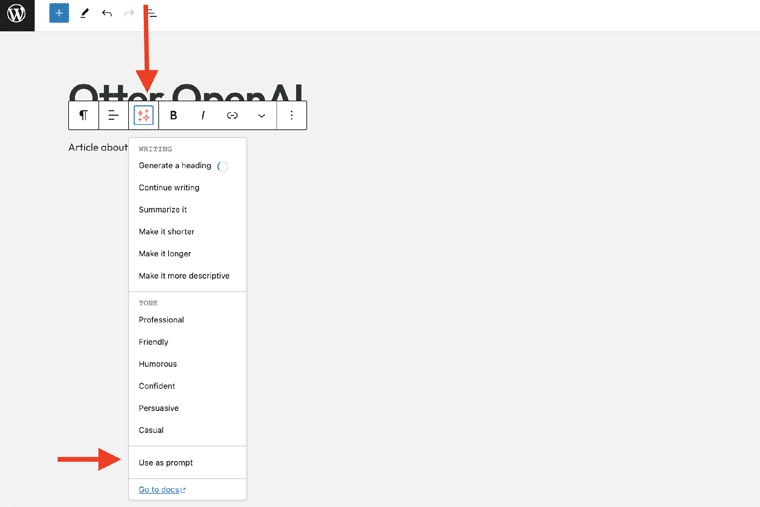
Apart from using the prompt from the block, the AI block adds a new icon in the toolbar that allows you to use its options directly on the page. This is available for headings and paragraphs, and it is also available when you make a multi-paragraph selection.
Note: Please note that if you select paragraphs and headings, the AI toolbar options will not be available.
Let’s go through some of them!
- Writing: It can generate headings based on the selected paragraph, and continue writing based on the existing idea. Also, summarize the content, and make the paragraph shorter or longer.
- Tone: It’ll rephrase the selected paragraph according to your preference using the available tone options. The available tones are professional, friendly, humorous, confident, persuasive, and casual.
- Use as prompt: You can use a paragraph as the source for the prompt. In this way, the content will be generated according to what’s mentioned in the paragraph.
II) AI Form Generator
As the name suggests, the AI Form can generate form fields based on the prompt that you give. After generating them, you can edit the fields, delete, rename, etc.

If you scroll down there are other options like:
- Replace: Replace the AI Block with a Form block, which allows you to edit the fields. After making this change, the prompt cannot be modified.
- Create AI Form: This button appears when you select the regular Form (after clicking on the Replace button) and insert a new AI form below.
- Insert below: Insert the generated form below the Ai Block/Prompt Editor with the regular form settings (add new fields, email to, etc).
- Regenerate: If you are not satisfied with the result, you can click on the Regenerate button to send the prompt again. This will replace the current form, meaning it’s not stored in the history list.
Note: To save the AI form, you have to click the Replace button and save the changes.
4. Visibility Conditions
Conditional loading is a feature that applies to all blocks within the Otter Blocks Library and Gutenberg and is represented by the Visibility Condition. It gives the user control of the visibility of the blocks based on the conditions inserted.
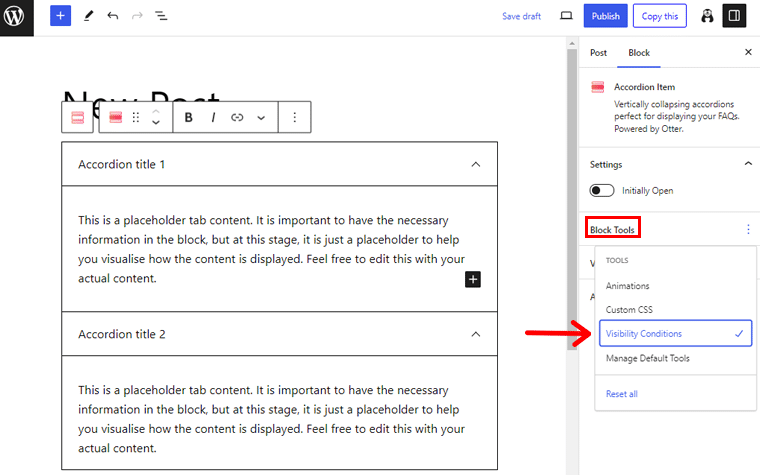
You can access the feature from the right sidebar under the Block Tools section. Click on the “+” icon, then select the Visibility Conditions. A new accordion will appear, where you can configure the conditions.
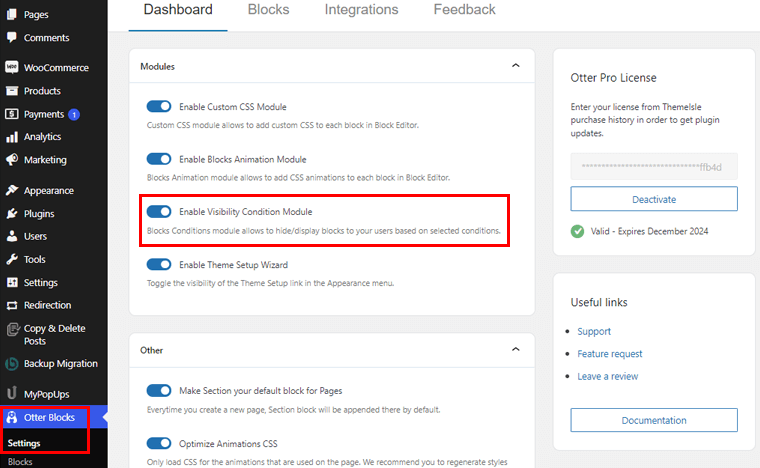
Now to start the process, first, you need to enable Visibility Conditions from your WordPress dashboard. Simply go to “Otter Blocks > Settings” and enable Visibility Conditions.
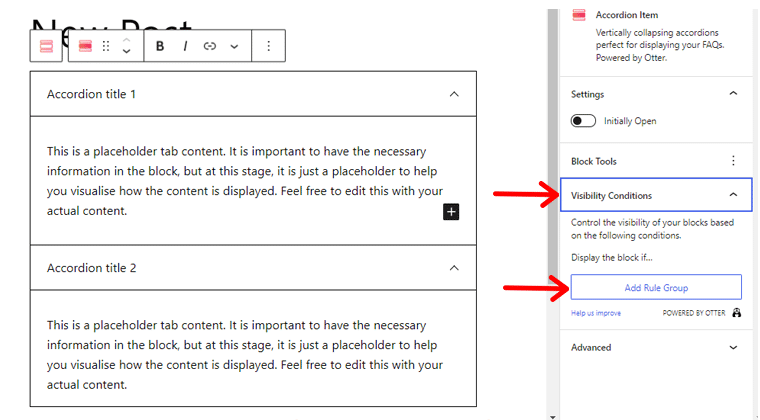
Following that, go to your page, add a block, and click on the “Add Rule Group” option.
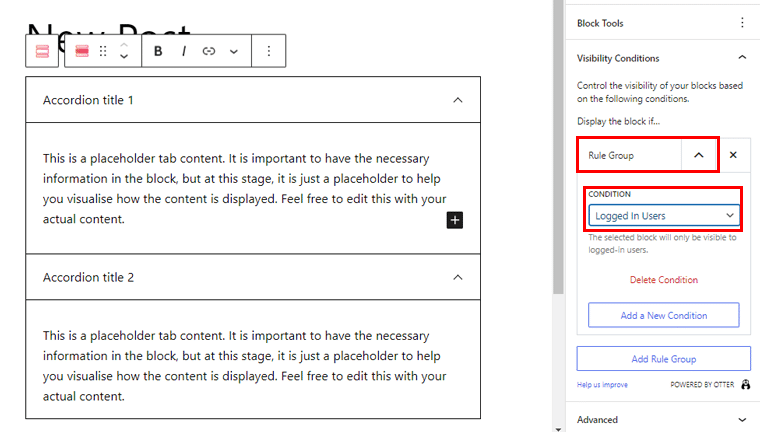
Then expand the Rule Group accordion and select one of the conditions displayed there. And you’re done!
Note: There can be many Rule Groups, but they will not be applied simultaneously, but one or the other (OR logical operation).
Other available conditions are:
I) User Conditions
It’s related to users’ status.
- Logged-In Users: The block will be displayed only for the users that are logged in.
- Logged Out Users: The block will be displayed only for the users that are logged out.
- User Roles: The block will be displayed only for certain users, such as administrators, editors, authors, and others. The user roles can be added by selecting them from the list.
- (PRO) Logged-in User Meta: This block will be displayed based on the meta of the logged-in user, which can be added in the meta key field.
II) Post Conditions
This condition is related to post elements.
- Post Author: The block will be displayed if the post authors are the ones that you have introduced into the field.
- Post Type: The block will be displayed if the post type is one of the selected types ( e.g. post, page, product ).
- Post Category: The block will be displayed if the post is part of a selected category.
- (PRO) Post Meta: The block will be displayed based on the post meta condition. The meta key can be added in the blank field.
Note: To use Post Meta, you should install the Advanced Custom Fields plugin, create such a field, copy its name, and paste it into the Meta Key field.
III) Advanced
- Screen Size: The block will be hidden on different screen types: Mobile/Tablet/Desktop. For example, you can hide one column of the section block on mobile.
- Query string: The block will be displayed if the URL contains the specified parameters you add to the Query String field. Check this doc for more details. You can control if the URL should contain any or all parameters.
- Country: The block will be visible according to the country code you set.
- Cookie: The block will be visible based on the PHP cookies you use to compare. Check this doc for more details.
IV) Date & Time Conditions
This condition is based on time and date and it’s a pro feature.
- Date Range: The block will be displayed if the current date is between the start and end date ( optional ).
- Date Recurring: The block will be displayed on certain days, according to the ones picked by you.
- Time Recurring: The block will be displayed if the current time is between the start and the end time you introduce.
Note: You can use the date recurring in combination with other date & time conditions.
V) WooCommerce Conditions
This is an extra visibility condition available for the PRO version that depends on the installed plugins.
- Products in Cart: The block will be displayed if the user has certain products or products from certain categories in the cart.
- Total Cart Value: The block will be displayed if the total cart value is greater / less than the value established by you.
- Purchase History: The block will be displayed if the client’s product history contains the products you inserted.
- Total Spent: The block will be displayed if the user has spent a certain amount of money ( greater / less than the value inserted by you ).
Note: The product can be added in the blank field only by selecting them from the list.
5. Dynamic Content
This feature helps to streamline your workflow, which allows you to bind certain elements in the editor.
I) Dynamic Value
The Otter Blocks plugin allows you to insert dynamic values only by adding the ” %” symbol anywhere inside the editor. The dynamic values can import information and automatically display it on your website.
So go to your page editor and add the “%” symbol. And it’ll list the number of items you can import on your website.
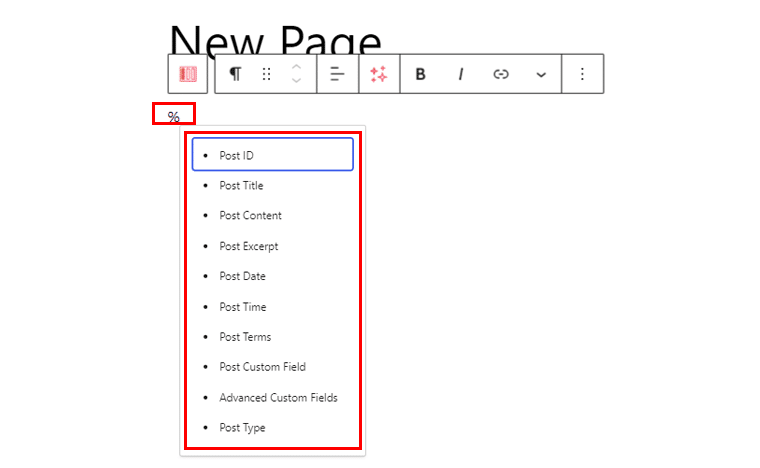
For this guide, we’ll choose “Post Content.” Once you add a value from the list, you will be able to make some customizations by clicking on it.
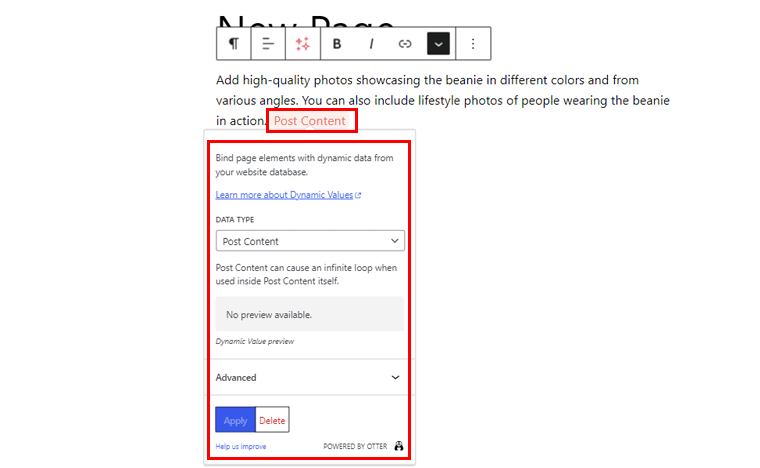
After that, the popup with item customizations will appear on the screen. It contains specific options depending on the data type.
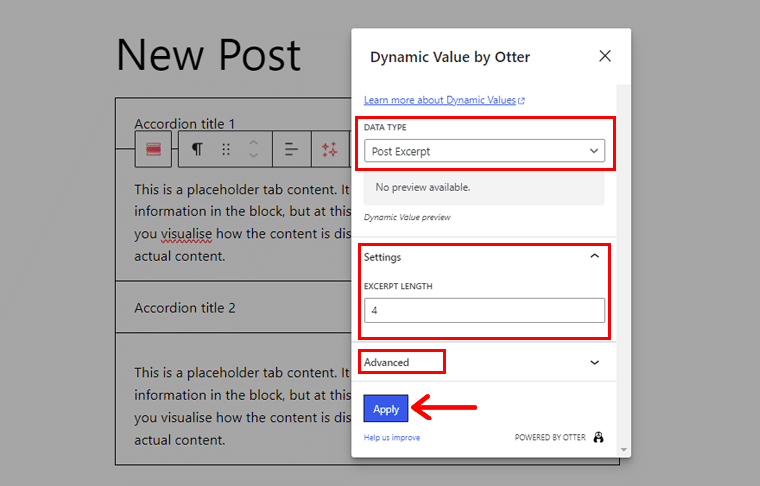
Also, the Advanced tab allows you to introduce text before and after the dynamic value. Once Done hit the “Apply” button.
And that’s it!
II) Dynamic Images
The Otter Blocks plugin allows you to add dynamic images. This will import information depending on the elements you pick from the menu in the editor after adding the Image block. Or after clicking on the Upload / Media Library button.
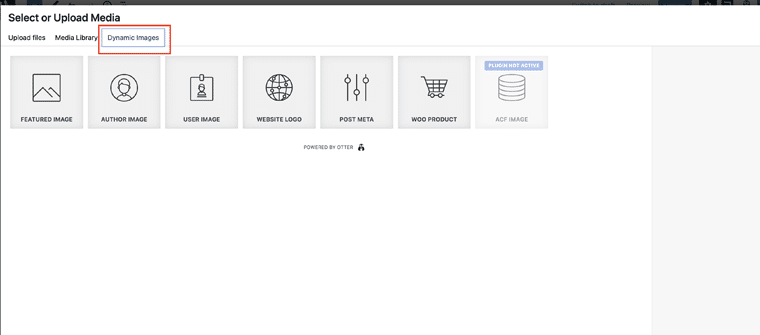
It creates a third tab called Dynamic Images, from which you can add the desired elements.
Moreover, you can set a fallback image that will appear in case of exceeded loading. Or case there is no picture to show simply add the URL of the image.
III) Dynamic Link
Automatically import and display information using the dynamic link feature. This will appear in the settings bar under the dropdown icon on your post or page editor.
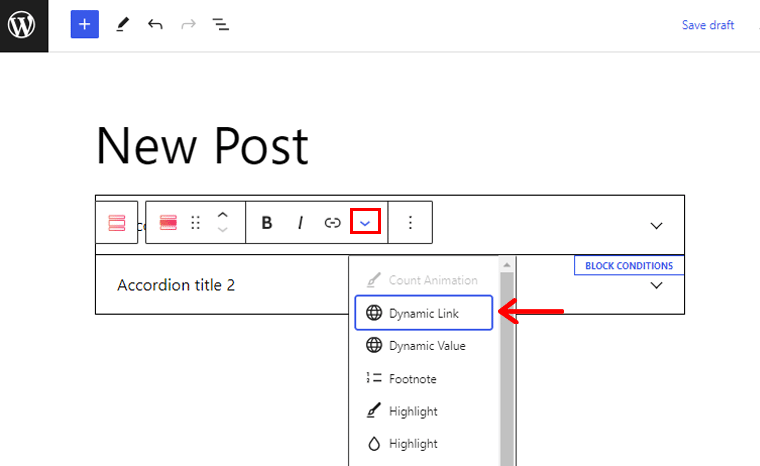
After inserting, you can choose the data type you want to show through the link.
Once you’ve done that, you can select a data type, and the plugin will automatically populate this link according to the choice. Don’t forget to hit the “Apply” button.
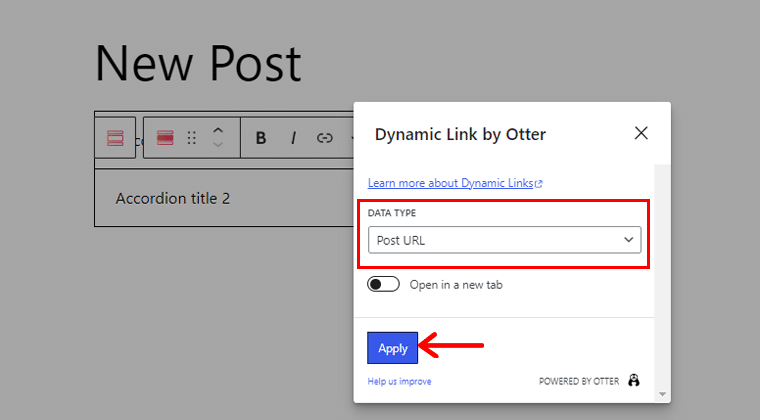
The following data types are available for dynamic link:
- Post URL
- Site URL
- Featured Image URL
- Author URL
- Author Website
- Post Custom Field – PRO
- Advanced Custom Fields – PRO
6. Integrations
One of the standout features of Otter Blocks is its seamless integration capability with your favorite services.
They enhance your website’s functionality and user engagement. With Otter Blocks, you can effortlessly create professional-looking email, forms and connect them with popular platforms.
Otter Blocks bridges the gap between your website and the essential services you rely on.
Here’s a breakdown of its powerful integrations:
I) Effortless Marketing Automation
Imagine seamlessly connecting your website with popular email marketing platforms like Mailchimp and Sendinblue. When visitors interact with your website, their information can be automatically added to your chosen platform’s contact lists.
II) Real-Time Data Exchange with Webhooks
Webhooks unlock a new level of communication between your website and other applications. With Otter Blocks, your website can send real-time data to other services whenever specific events occur.
For example, website purchases can be automatically sent to your accounting software or personalized notifications. This allows you to build powerful custom integrations and automation that streamline your website’s workflows.
III) Enhanced Security with hCaptcha Integration
Protect your website from unwanted spam submissions with hCaptcha integration. This adds a user-friendly challenge to your website interactions. Also, hCaptcha acts as a gatekeeper, filtering out bots and safeguarding your website’s data integrity.
IV) Future-Proof Connectivity
The Otter Blocks team is constantly expanding its integration library. This means you can connect your website with an ever-growing list of essential services.
Therefore with Otter Blocks, you can stay ahead of the curve and ensure your website remains adaptable to future needs.
7. Other Features
Besides, these, there are some other features of the Otter Blocks plugin. They are:
- Each block is carefully crafted to only load the most necessary resources on your front end.
- When using the pro version, you have dozens more options to design and show popups to your visitors based on various events.
- You can build sticky content areas using any block.
- Also, save unlimited templates in your Template Cloud account and import them later on other sites.
- Offers Extended Live Search feature, that allows you to show previous on the search result.
Having said that, let’s dig into the next section of the Otter Blocks plugin review.
C. Introducing Gutenberg Blocks by Otter
Let’s go through some of the powerful custom blocks offered by the Otter Blocks plugin.
| Otter Blocks | Description |
|---|---|
| The Section Block | Combines multiple blocks and creates multiple columns. |
| Form Blocks | Allow to create dedicated forms. |
| The Posts Block | It displays posts on different pages. |
| The Popup Block | Pop-up notices on your website. |
| Image / Animation – Related Blocks | Lets you create image blocks with animation. |
| Tracking Blocks | Create dynamic blocks like counter, progress bar, etc. |
| Posts – Related Blocks | Allows you to create blog posts for your website. |
| Shop-Related Blocks | Build a shop page using Otter blocks. |
| Layout – Related Blocks | Add accordion, table, and sections on your site. |
| Animated / Dynamic Blocks | Lets you add sharing icons, pop-ups, and flip cards. |
| Maps – Related Blocks | Generates maps on your website. |
| Icon-Related Blocks | Lets you add icons on your blocks. |
| Business-Related Blocks | Create blocks with business hours, testimonials, and services. |
| HTML – Related Blocks | Customize your site with advanced headings and button groups. |
| Integrations – Related Blocks | Enhance your site with a plugin card and Stripe integration. |
| The AI Block – Otter Blocks Library | Helps you generate content with OpenAI. |
| Add to Cart (PRO) | Creates an add-to-cart button for WooCommerce products. |
| Business Hours Block (PRO) | Create a beautifully styled Business Hours table. |
| Review Comparison Table (PRO) | Create professional-looking product comparison tables for your site. |
| Live Search Block (PRO) | Enhances the core block Search by adding two additional attributes. |
Having said that, let’s dig into the next section of the Otter Blocks review.
D. How to Install and Activate the Otter Blocks Plugin?
Now that you know about the major features of the Otter Blocks plugin, let’s start with this plugin.
So, please follow these steps serially, and you can quickly get started with the Otter Blocks Plugin. Below we’ll show you how to install and get started with Otter Blocks Free and Pro versions.
I) Install and Activate Free Otter Blocks Plugin
First, we’ll discuss how to install the free version of the Otter Blocks.
To install and activate the Otter Blocks, first of all, log in to your WordPress dashboard. Go to the “Plugins > Add New Plugin” option.
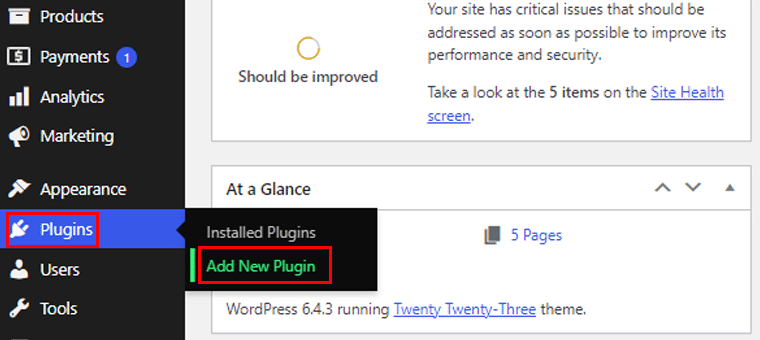
Once you spot the plugin listed in the search results, proceed to click on the “Install Now” button.
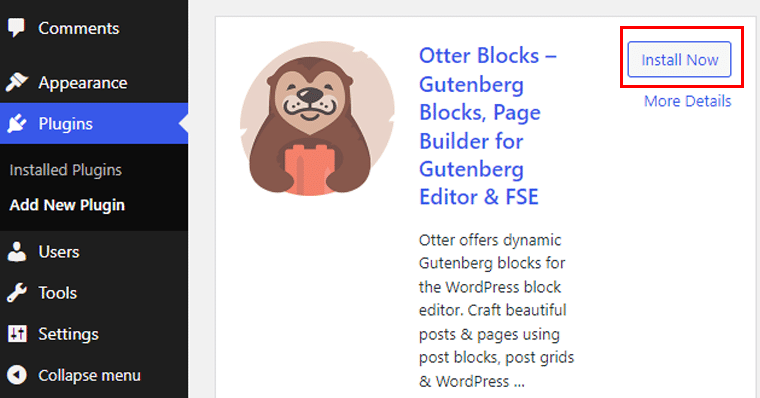
Next, press the “Activate” button when it shows up, just as shown in the example screenshot below.
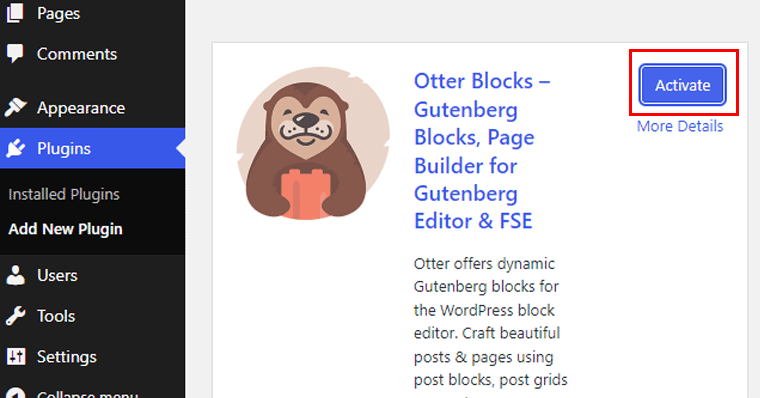
And, that’s it!
II) Purchase the Premium Otter Blocks Plugin
Now to install the premium version, it requires a yearly subscription fee. To install and activate the Otter Blocks plugin, you need to follow these steps:
First, visit the Otter Blocks website and click the ‘Upgrade Now’ button.
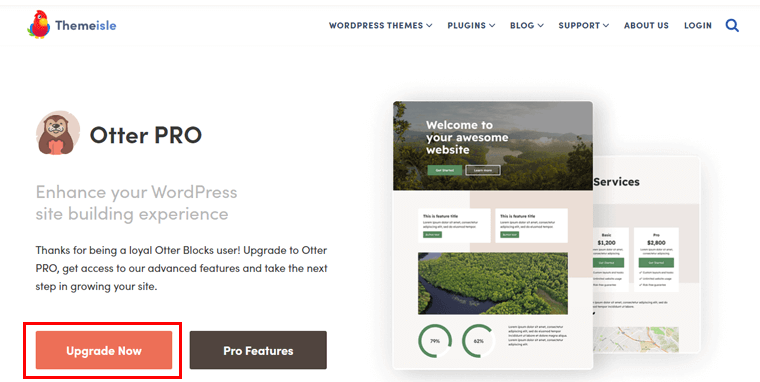
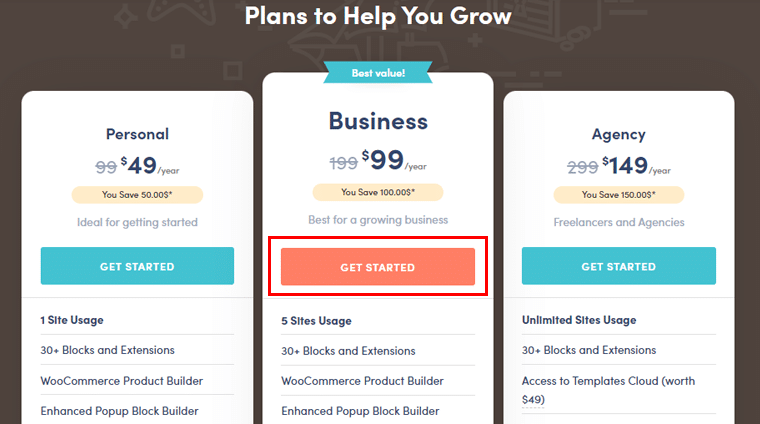
It’ll take you to the pricing page, so choose the one that suits your budget. Then, click on the “Get Started” button.
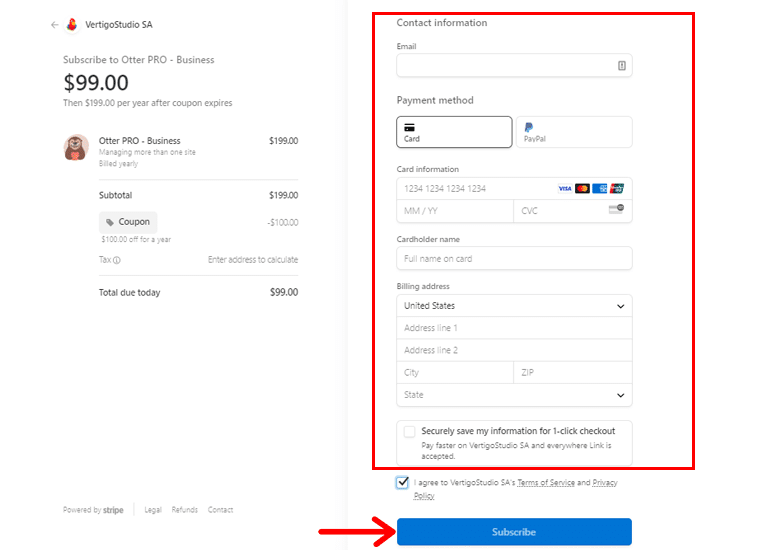
Then, fill in your contact information and payment details on the checkout page. And then click on the “Subscribe” button.
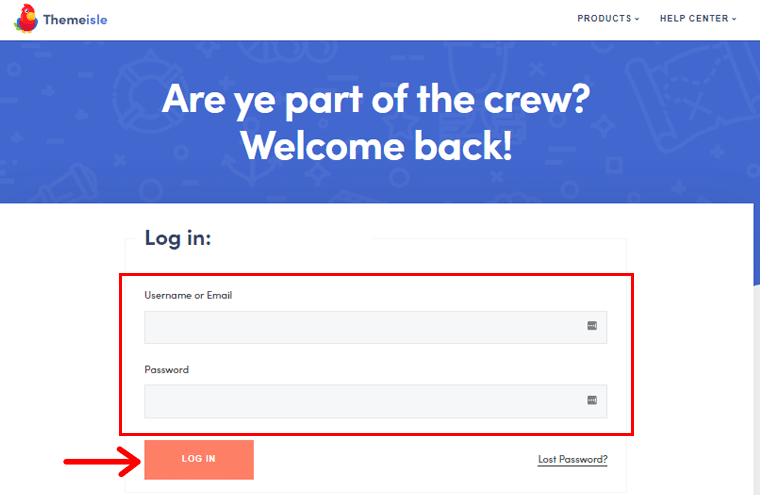
Now, go to the Themeisle Store and then fill in your login credentials, and click the “Log In” button.
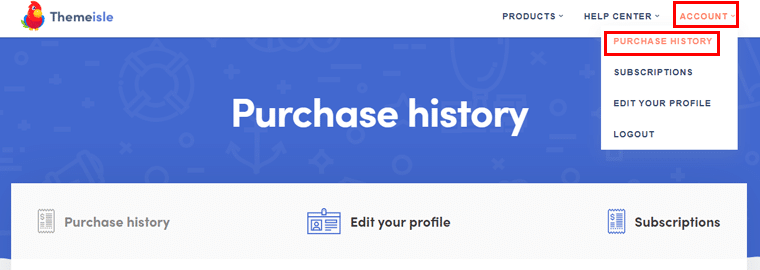
Once logged in, go to the “Account” option and click on the “Purchase History” option.
Scroll down until you see the Otter Blocks Pro plugin and click on the “Download” option.
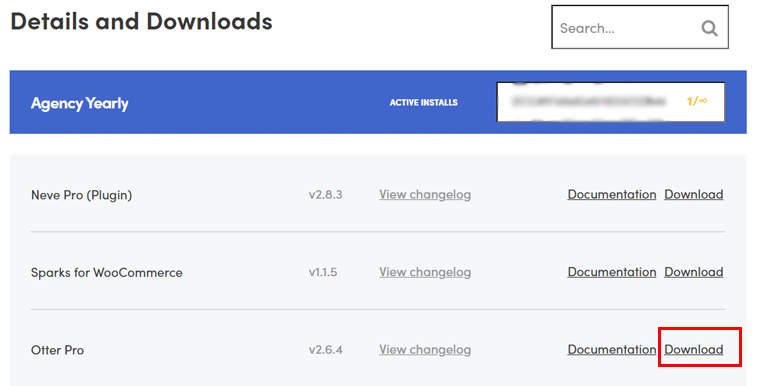
And, that’s it, you’ll find the downloaded zip file on your computer.
III) Install & Activation of Otter Blocks Plugin Pro
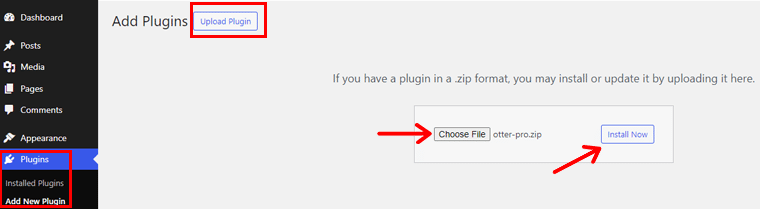
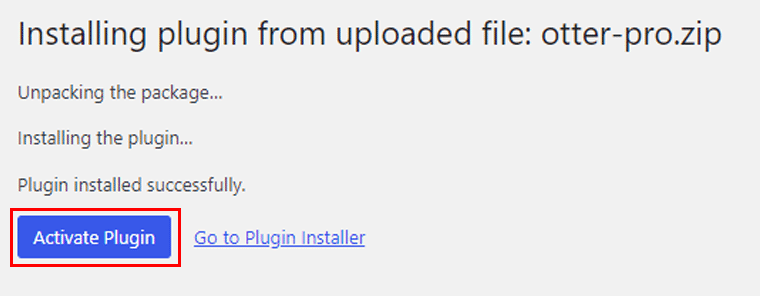
Now to install and activate, first navigate to the dashboard. Then go to the “Plugins > Add New > Upload Plugin” and upload the .zip that you previously downloaded. Then click on the “Install Now” option.
Then, click on the “Activate Plugin” button on the next page.
Now you need to ass your Otter Blocks Pro license and click the “Activate” button.
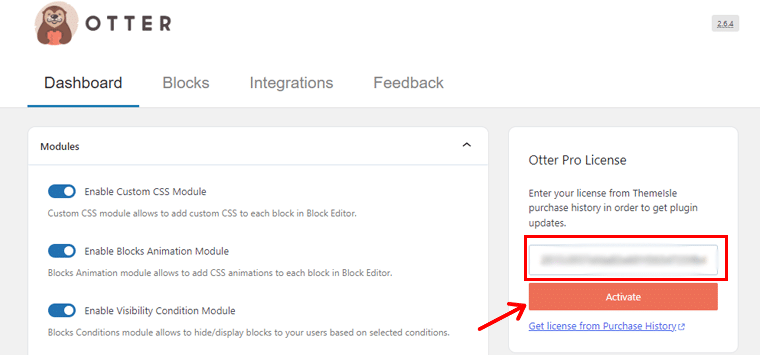
And, you’ve successfully installed and activated the Otter Blocks pro plugin.
Note: You need to install the Otter Blocks free version to use the Otter Blocks Pro.
E. How to Configure Otter Blocks Plugin?
Now, in this section, we’ll show how to set up and configure the Otter Blocks plugin on your website.
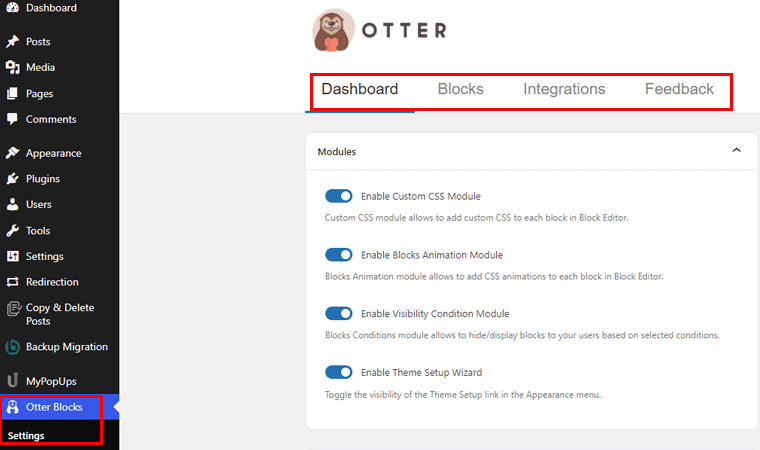
After installing the plugin, an onboarding section in “Otter > Settings” contains options for the Dashboard, Blocks, Integrations, and Feedback.
1. Dashboard Settings
First, let’s go with the Dashboard settings!
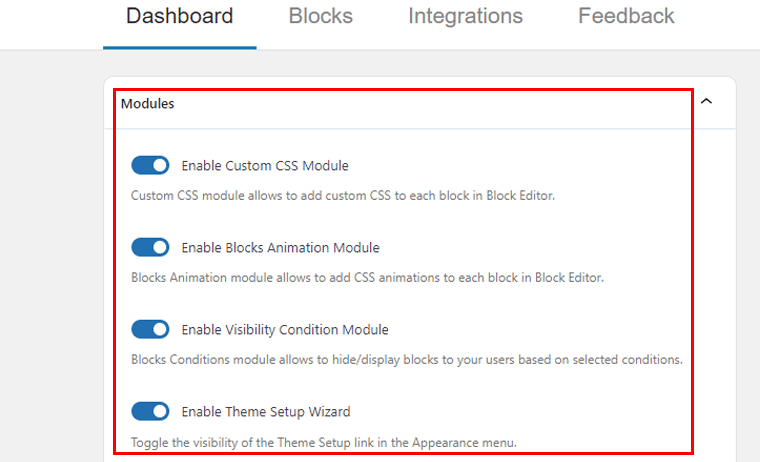
It has a Module option, which contains the following options, enabled by default:
- Enable Custom CSS Module: This allows you to add custom CSS to each block of the library.
- Enable Blocks Animation Module: This allows you to add CSS animation to each block within the library.
- Enable Visibility Condition Module: This allows the visibility conditions of the blocks to work correctly.
- Enable Theme Setup Wizard: This allows toggle the visibility of the Theme Setup link in the Appearance menu.
Other options offered by the Otter Blocks are:
- You can also set the Section block as the default block for Pages so that every time a new Page is generated, the Section block will be appended there.
- Optimize Animation CSS: It loads CSS only if animations are used on the page for better loading.
- Enable Rich Schema: Choose to show the rich schema in the Product Review Block.
- Use 1-5 Scale for Review Block: Modify the default scale of the Review Block.
- Highlight the Dynamic Text: It easily differentiates between dynamic and normal text in the editor.
- Anonymous Data Tracking: It allows the user to become a contributor, with the condition of not collecting private data.
- Regenerate Styles: It deletes all the Otter-generated CSS files.
Next on the Blocks tab, you can disable/enable blocks like Accordion, AI Block, Form, and more.

You can configure the API Keys from the Integrations tab to use the Google Maps block. The Google reCaptcha for the Form block, and the Stripe Checkout block.
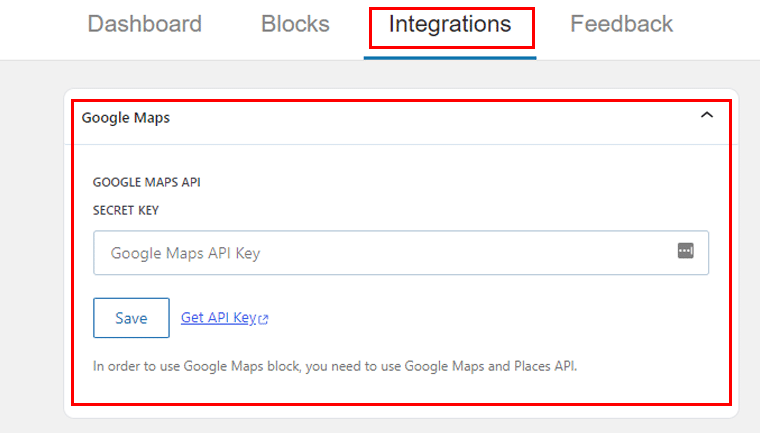
Also, saving Google Fonts Locally can be enabled from here too.
2. Using the Blocks
One of the most important features of Otter Blocks is the drag-and-drop way of functioning. To use the plugin, follow these steps:
Now, to get started, you need to navigate to the “Posts > Add New Post.”
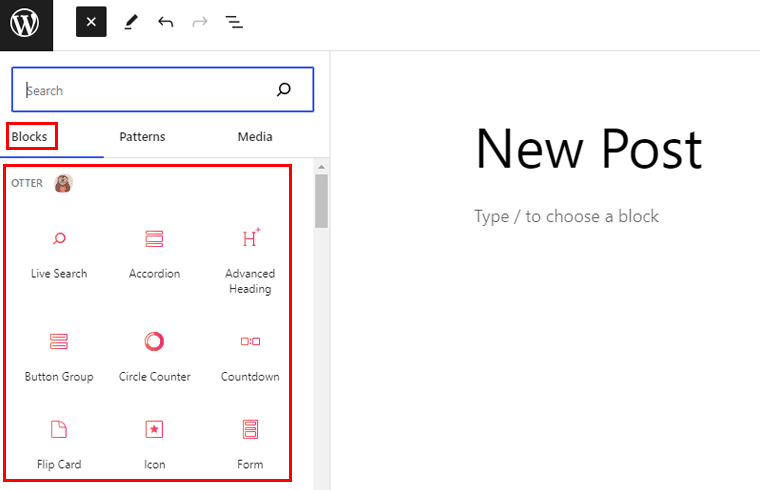
Once the editor is opened, click on the “+” button to add new blocks.
There you’ll see tons of blocks to add.
Now let’s see how to add blocks and how they look on a live website.
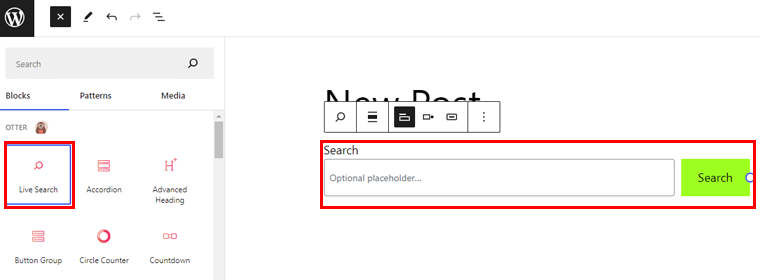
I) Using Live Search Block
First, let’s start with the Live Search Block. To add this block, simply click on it and it’ll appear on your page.
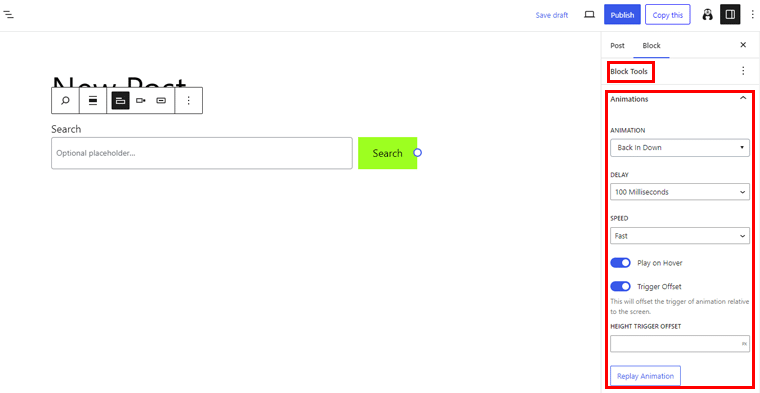
After adding the block, you’ll find the Block Tool option on the right side menu. Which contains a couple of customization options like animations, custom CSS, etc.
a. Animations
Under this option, you can choose the animation type, delay time, and speed of the animation. Also, you can choose to play on hover and trigger Offset. Plus, you can choose to replay the animation as well.
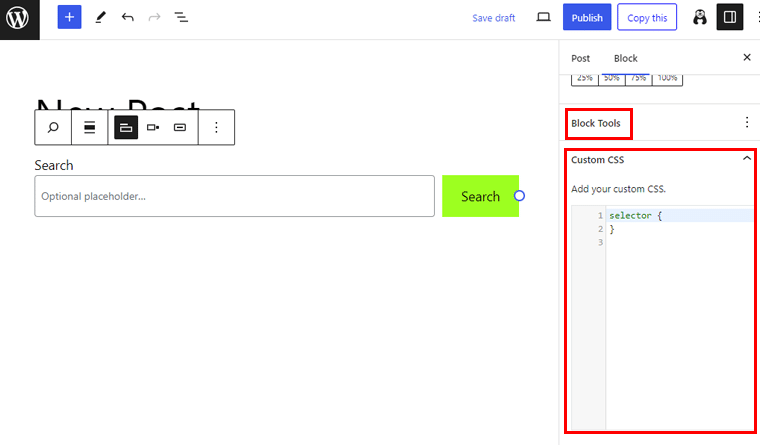
b. Custom CSS
There is also a Custom CSS option, where you can add your custom CSS. You can also use other CSS syntax here, such as media queries.
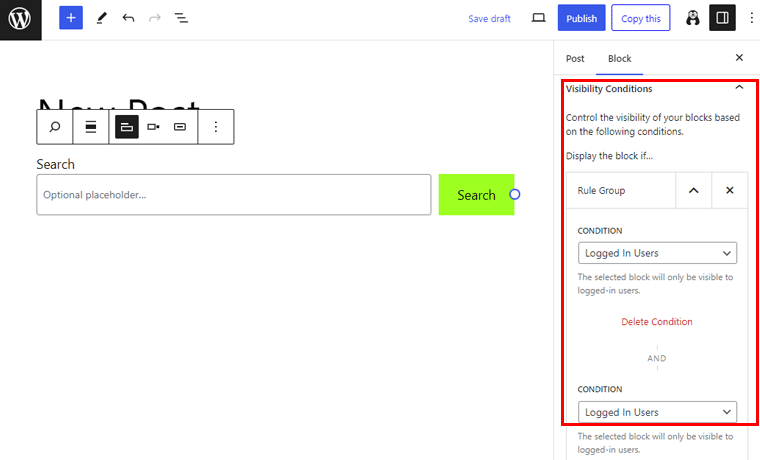
c. Visibility Conditions
Here you can control the visibility of your blocks based on the following conditions. It allows you to add a rule group that will display the block with the mentioned conditions only.
d. Transform to Sticky
With this setting, you can set any block as sticky, so that it sticks to another element on the page. It’s set to screen for the sticky option. You can also make them float. This is available only for root blocks.
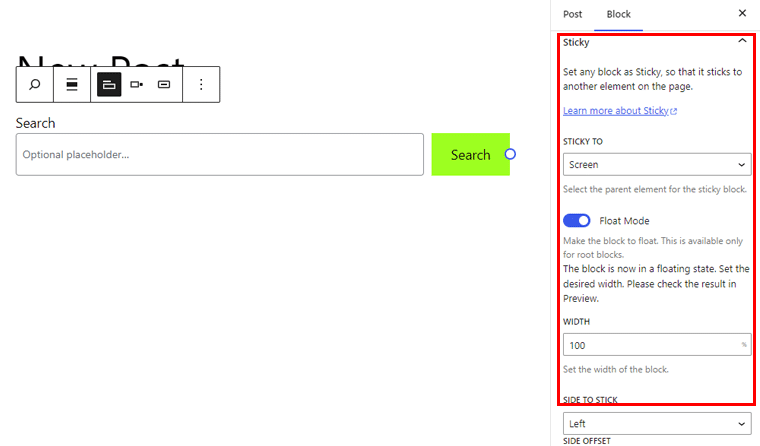
As well as choose the side to stick, set the width of the block, and set the distance between the block and the chosen side.
II) Using Product Review Block
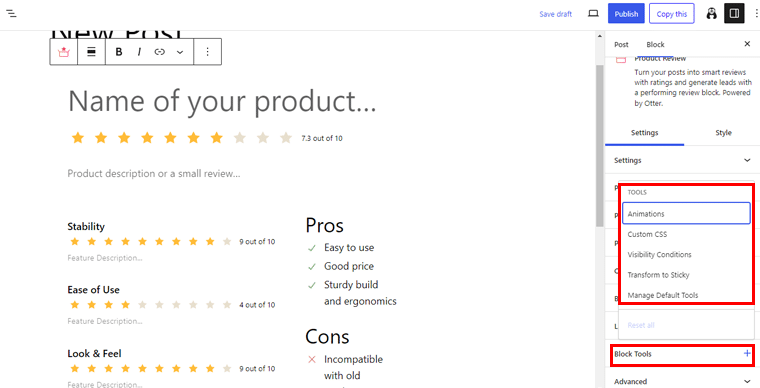
Next, we’ll be adding the Product Review block. Simply click on the block and it’ll be added to your page.
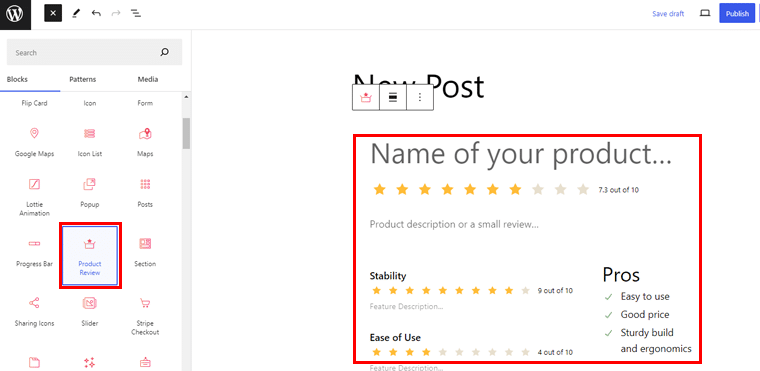
On the right side, you’ll see the “Settings” option where you can choose the Column Structure (One Column and Two Columns.)
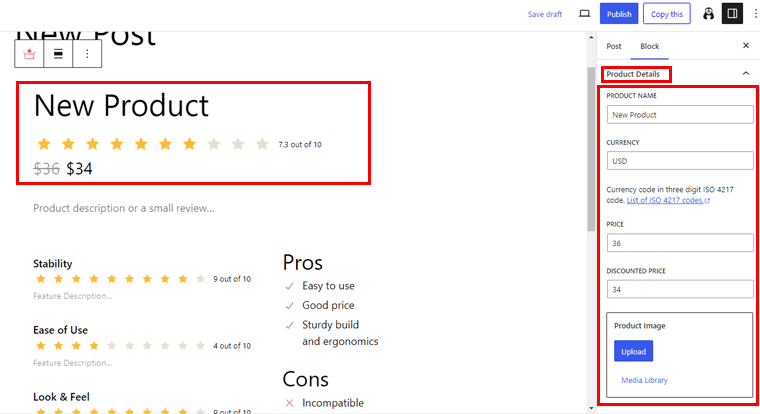
Now under the Product Details option, you can add the product name, currency, price, discounted price, product image, etc.
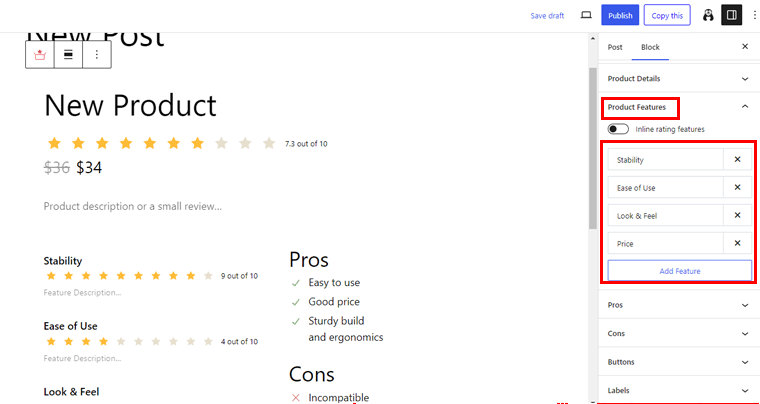
Following that, you can add product features like stability, ease of use, price, etc.
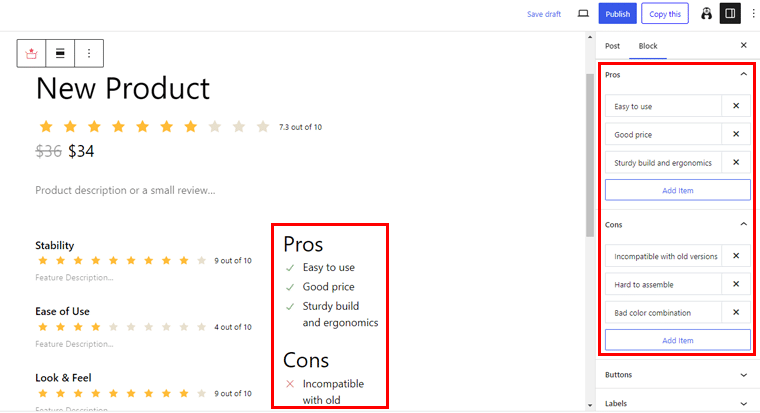
Moving on, you can also add the pros and cons of your product.
Scrolling down, you’ll have the option to add buttons like “Buy on Amazon” or “Buy on eBay,” as well as add labels to your product review.
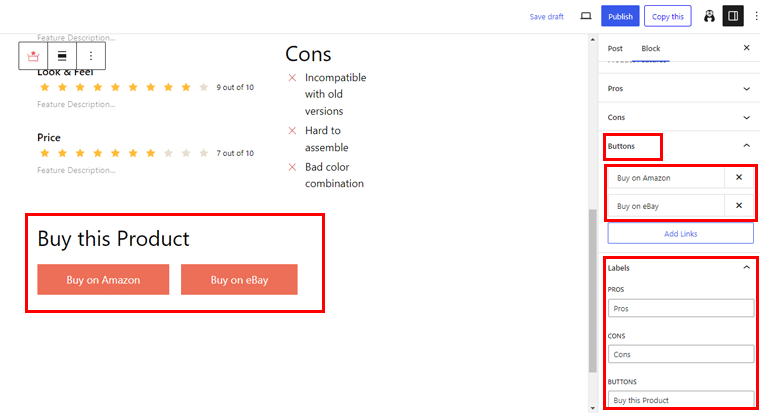
Besides these, there are also block tool settings similar to the Live Search block.
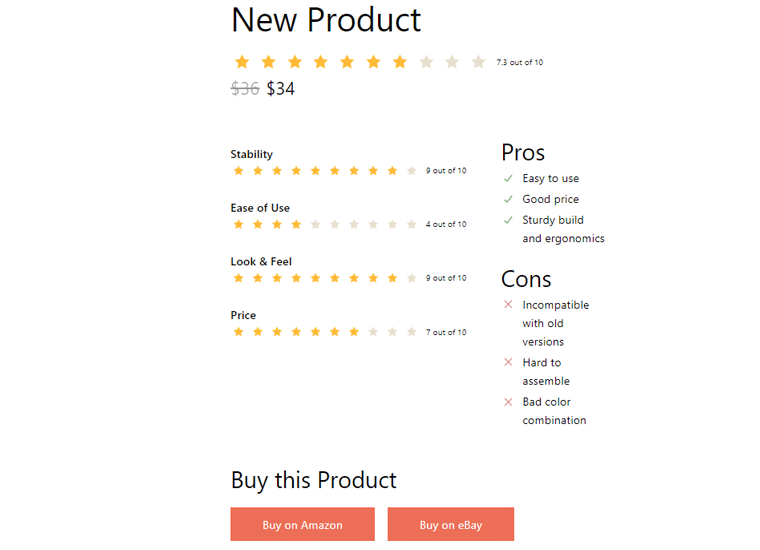
Below is an example of how your product review block will look on your website.
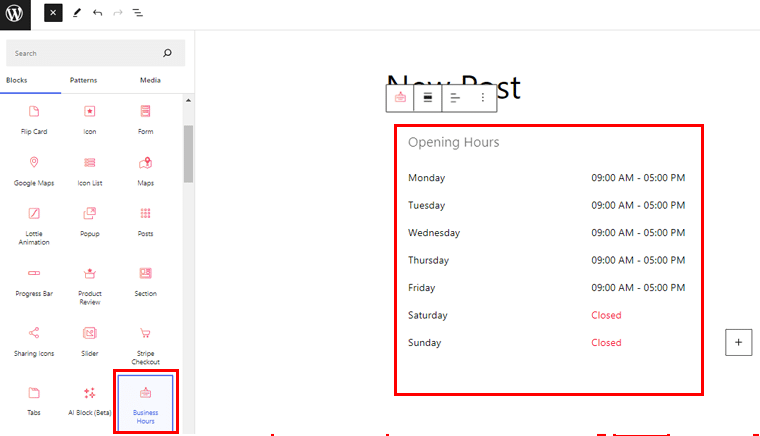
III) Using Business Hours Block
Nest, we’ll be adding the Business Hours block, it helps to display your business’s opening and closing hours anywhere on your website.
Like other blocks, the Business Hours block also has the Block Tools settings. Go through them and customize them as per your preference.
You can set your business hour title styles to default or the Black & White. Also change the gap, title font size, item font size, border radius, and border width.
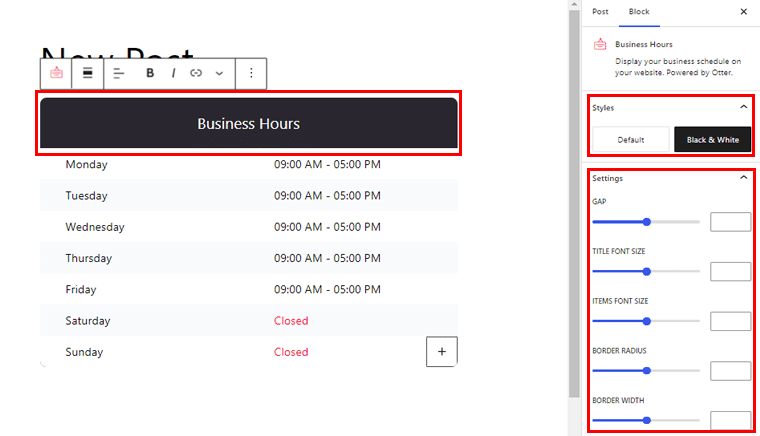
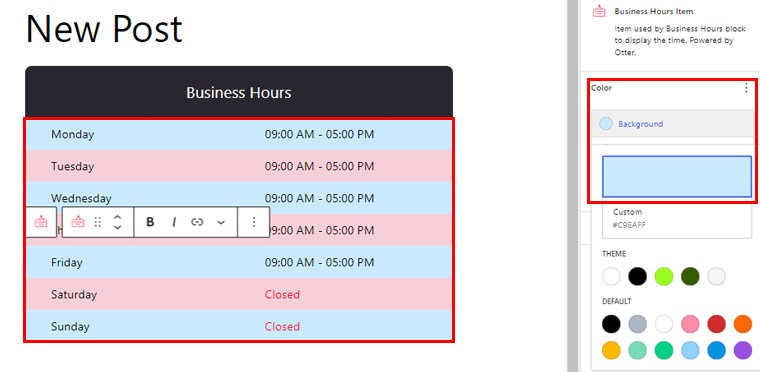
To add the time, you can simply change it from your post editor and it’s pretty simple. You can also change the background color of each day.
Not only that, you can change the color each time and change the label.
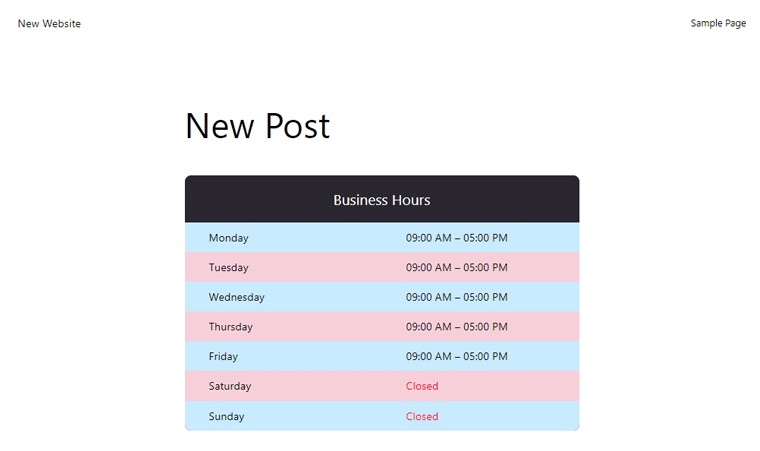
Below is an example of how your Business Hours block looks on your website.
3. Block Tools
It’s some of the common settings that are available for all of the blocks, which appear in the right sidebar when you click on the settings. Next to the Block Tools, click on the “+” icon to open the features on your page editor.
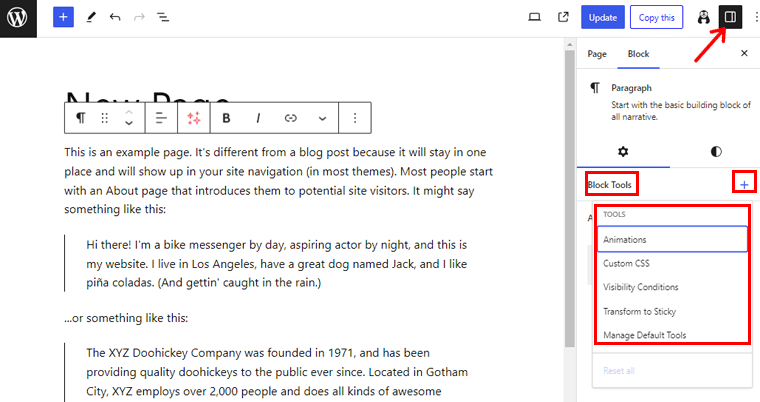
To start using one of the options, click on it, then close the accordion. The option will be added as a new accordion.
Let’s see how it works!
i. Animations
You can use animations to make the content of the block lively. It can be a loading animation, count animation, or typing animation, for which you can set speed and delay.
For this guide, we’ll use the “Business Hours” block. So click the animation option, and choose the one from the list.
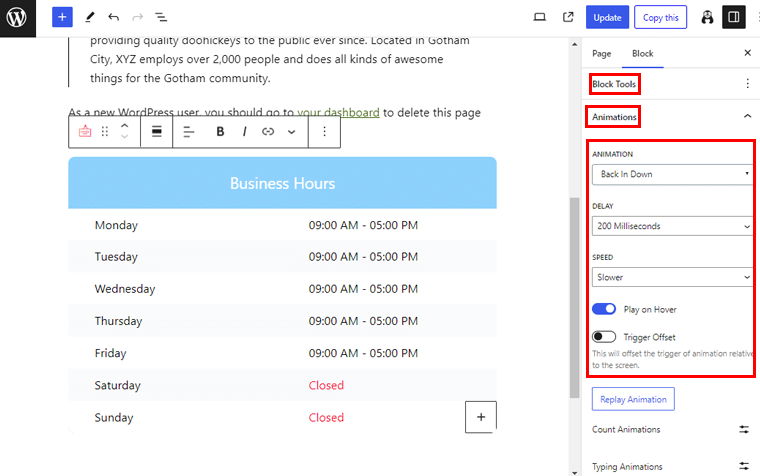
You can choose the delay time of animation and speed. Also, enable/disable the “Play on Hover” and “Trigger Offset.”
Ii. Visibility Conditions
Conditional loading is a feature that applies to all blocks and is represented by the Visibility Condition in the Settings panel.
It gives you control of the visibility of the blocks based on the conditions inserted, such as Users: Logged In and Date Recurring: Monday. This means that the block will only be displayed for Logged-In users on Mondays.
To use this, click on the Visibility condition option and click the “Add Rule Group” option. After that choose the condition from the list.
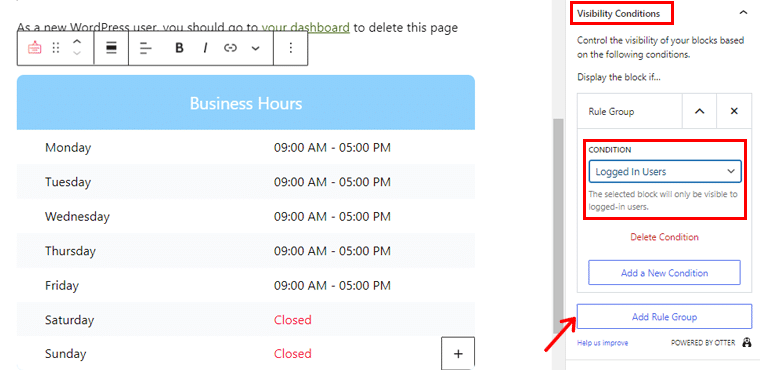
There can be many Rule Groups, but they will not be applied simultaneously, but one or the other ( OR logical operation ).
Iii. Transform To Sticky
This feature makes the block stick to certain website areas after you scroll down. So to use this feature, click on the Sticky option and then select the parent element for the sticky block.
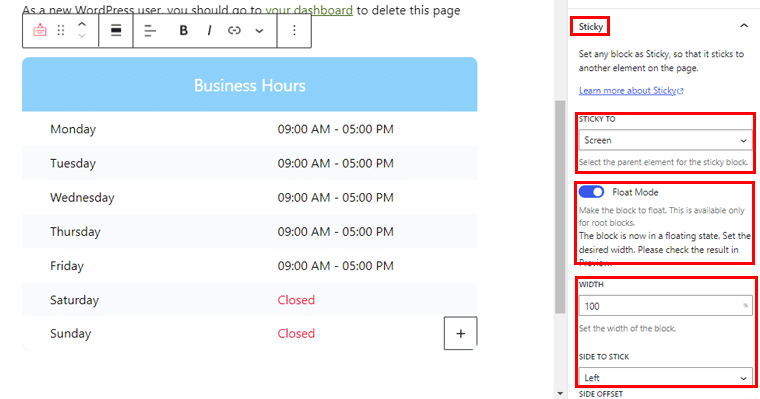
You can also make the block float, choose the position of the block (Top and Bottom), and choose the distance from the block to the screen.
4. Global Settings
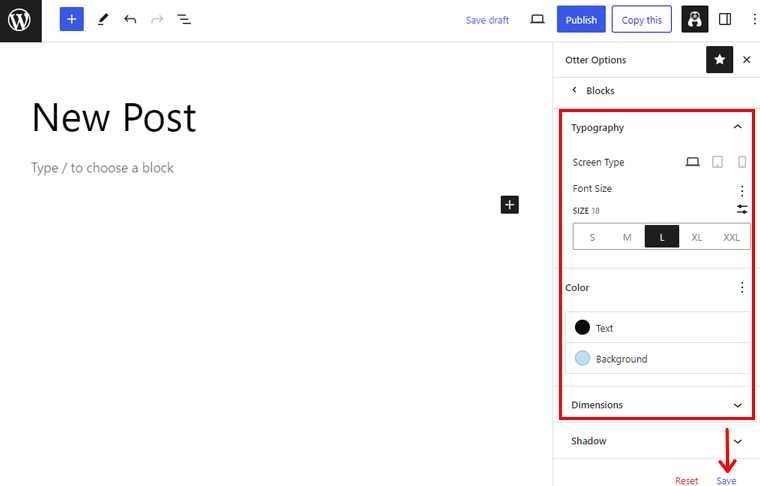
The Global Settings contain the blocks’ default options, which can be set site-wide. These settings become accessible when clicking on the Otter icon next to the setting option.
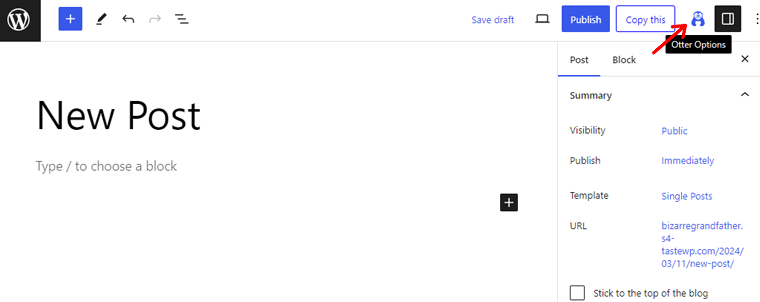
After that, click on Block Settings and select the block for which you want to configure global defaults. You can click on the Open Settings icon to configure or change their visibility.
Here you can go through typography options. So change the font size, text & background color, and dimensions, and enable text-shadow. Once done, click on the “Save” option.
These Global Settings act like a time saver, working well for a long time perspective. You can configure the most common blocks here, and every time you add one of them, they will be shaped as you have previously taken care of.
Also, the configurations that you make here do not affect the already-added content.
F. Pricing Scheme of the Otter Blocks Plugin
When it comes to pricing Otter Blocks is available for both free and premium versions. You can easily download the free version from the WordPress.org official plugin repository.
However, the pro version is available on its official website with 3 pricing plans.
They are:
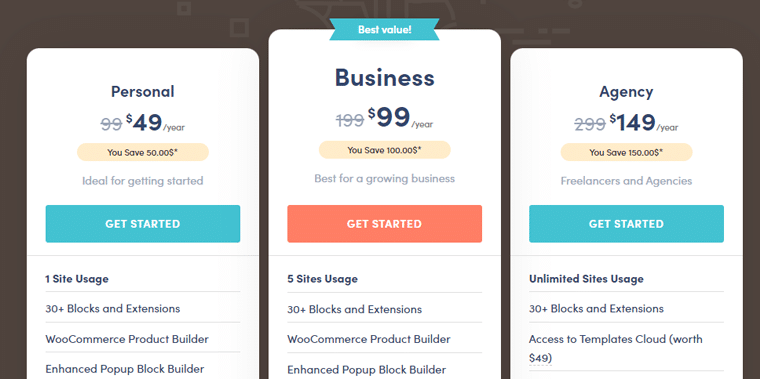
- Personal Plan: Costs $49 per year for a single site, it’s ideal for getting started.
- Business Plan: Costs $99 per year for 5 site usage, it’s ideal for a growing business.
- Agency Plan: Costs $149 per year for unlimited site usage, it’s ideal for freelancers and agencies.
Moreover, you can purchase with peace of mind. If you find out that this plugin does not meet your needs, they offer a 30-day no-questions-asked money-back guarantee.
G. Customer Support Option in Otter Blocks
When it comes to customer support of the Otter Blocks plugin, it provides full documentation on how to work with Otter Blocks. There you can go through how to install, Its feature library, Otter Blocks library, and more.

You’ll also find the blog section where you can find tons of useful articles. As well as you’ll also get answers to the most common questions in their FAQ sections. Or you can contact them for questions regarding the premium product.
Additionally, if you haven’t found a solution in product documentation, their Customer Support Team is ready to help you. So, simply log in to your account for technical support assistance.
H. Best Alternative to Otter Blocks
1. Kadence Blocks
Looking for a powerful alternative to Otter Blocks? Kadence Blocks might just be the solution you’ve been searching for. Kadence Blocks is designed to extend Gutenberg’s editing capabilities, providing users with an extensive array of custom blocks and options.
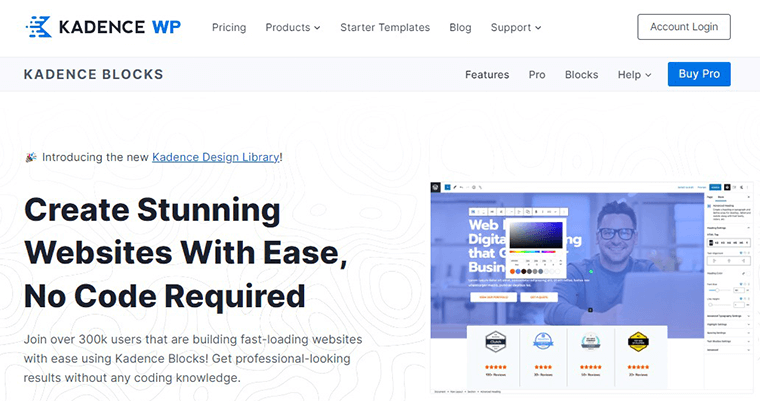
Moreover, it intelligently loads CSS or JavaScript only when necessary, ensuring optimal performance. Furthermore, you have the freedom to unleash your creativity and build custom layouts that match your vision.
Pricing:
Kadence Blocks comes with a freemium model, allowing you to download the free version from the official WordPress.org plugin repository. And, the premium version is available on the official site at $89 per year.
2. Stackable
If you’re seeking a robust alternative to Otter Blocks, Stackable is your answer. This WordPress plugin offers custom blocks, designs, templates, and advanced features. With live response editing and flexible design controls, you have full control over your website.
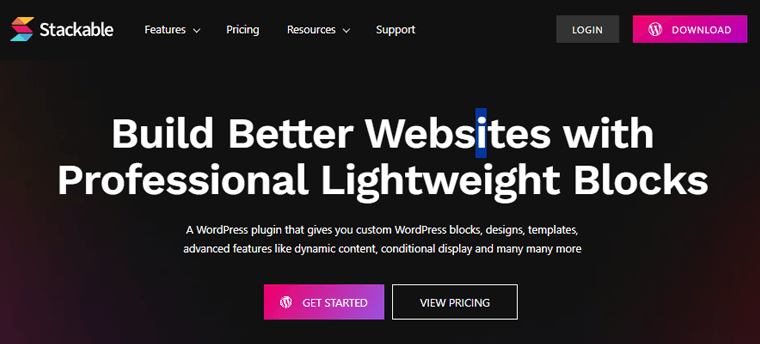
Stackable boasts an extensive collection of over 400 pre-made blocks and ready-made designs. These design-ready UI kits, wireframes, and blocks streamline the process, saving you time and effort.
Pricing:
Stackable also has a freemium model. The free version is available on the official WordPress.org plugin repository.
However, for access to pro features, Stackable offers three pricing plans:
- Personal Plan: Priced at $49 per year, this plan is suitable for individual website owners, allowing usage on one site.
- Business Plan: For small businesses managing multiple sites, this plan is priced at $99 per year and permits usage on up to 10 sites.
- Agency Plan: Tailored for agencies and developers handling numerous client projects, this plan offers unlimited site usage at $149 per year.
3. Spectra
Spectra aims to streamline website creation by offering a versatile toolkit within a single plugin. With over 100 pre-designed templates and page templates, you can kickstart your projects effortlessly. Powered by the React framework, Spectra ensures robust performance and flexibility in design.

Another of Spectra’s notable features is its Wireframe Blocks, which enable users to quickly create page or website mockups. Additionally, the Container block, fueled by flexbox technology, allows creating stunning layouts with ease.
Pricing:
Spectra has a freemium model, offering a free version downloadable from the official WordPress.org plugin repository.
However, for access to all pro features, you can opt for the Spectra Pro version, priced at $59 from its official website.
I. Final Thoughts
Now, it’s time to answer the ultimate question. ‘Is Otter Blocks the Gutenberg Block Plugin?’
Well, we’d say Yes! We have personally used the Otter Blocks plugin and we are impressed by its powerful features. Thus, we can say that Otter Blocks is one of the best options in the market.
It’s power-packed with many blocks like Accordion, Business Hours, Product Reviews, Countdown, Section, Sharing Icons, etc. It comes with excellent support and a 30-day money refund guarantee.
Compared to other block plugins, Otter Blocks is a good value for money as it offers more features and flexibility.
Hence, if you are looking for a block plugin that can do it all, Otter Blocks is the one for you. You can visit the Otter Blocks website and get started today. We are sure you will love it as much as we do.
J. Frequently Asked Questions on Otter Blocks
1. Does the Otter Blocks plugin run on all page builders?
No, Otter Blocks does not support all page builders. At the moment, it’s exclusively compatible with the native WordPress block editor, i.e. Gutenberg.
2. Can I combine different blocks within Otter blocks?
Yes, you can combine different blocks using the Section block. This enables you to create versatile layouts with multiple columns.
3. Are there global settings available in Otter blocks?
Yes, Otter Blocks offers global settings on your custom blocks. You can maintain consistent design elements across your website using this feature.
4. Is Otter Blocks free to use?
While there is a free version available for download on WordPress.org. However, you can opt to purchase the premium version to access all the advanced features.
Conclusion
And that’s all, folks! Thank you for reading our Otter Blocks review and we hope you found it helpful.
Already tried and used the plugin? Then, share your experience to help our fellow readers to make the pick.
If you have any questions or feedback, please let us know in the comments below. We’re happy to help you out.
Do share this article with your friends and family who are looking to purchase a social share plugin.
Browse our other review articles like the Novashare review and Amelia review.
Remember to like and follow us on our social media handles Facebook and Twitter to stay in touch with our content.