Do you want to learn how to use Kadence AI to ease your website creation process and make it even better? If yes, then stay right here!
Gone are the days of spending hours designing and building a website. Today, Artificial Intelligence (AI) has been making waves in various industries – the website creation field is no exception.
Presenting you Kadence AI – the ultimate solution for effortless WordPress site creation using Artificial Intelligence.
Indeed, it’s a real game-changer that helps you transform your website dreams into reality. That too in a matter of minutes. And without doing anything from scratch.
In this article, we’ll cover everything you need to know about Kadence AI. Also, we’ll guide you through setting up your account and getting started with Kadence AI.
Now, let’s dig in!
Video Tutorial – How to Use Kadence AI?
Prefer a video review? We’ve also created a full video tutorial on how to use Kadence AI! Check it out!
Introducing Kadence AI
In the fast-paced digital landscape, creating a captivating website is no longer a luxury, it’s a necessity.
Developed by the Kadence theme, meet Kadence AI, your ultimate weapon for building stunning websites effortlessly.
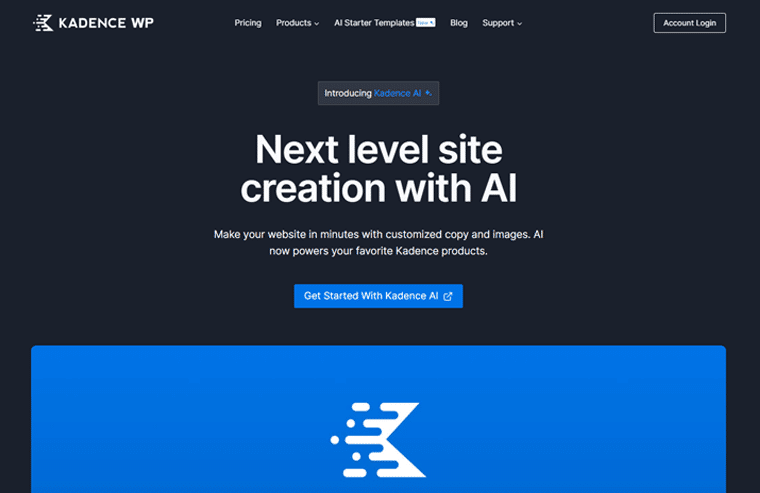
So, how exactly does Kadence AI make site creation effortless? Well, the answer lies in its innovative features and user-friendly interface combined with AI.
Firstly, with Kadence AI, you can give the specifications and details of the website you want to create in a few words. Based on that, it provides you with a wide range of AI-shuffled pre-designed templates.

Now, all you’ve to do is choose the one that meets your needs and drag and drop elements onto the canvas. And voila – your website is ready to go live!
But that’s not all. Kadence AI also comes with a built-in content generation feature. As a result, this generates content in fully designed patterns tailored to your mission and goals.
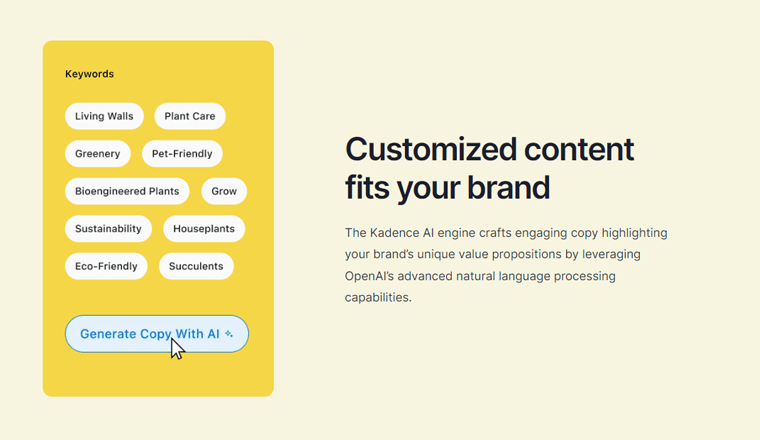
No more staring at blank screens or settling for vague text. With Kadence, your website comes alive with compelling copy that tells a unique story.
Kadence AI’s advanced natural language processing capabilities ensure your brand resonates with your audience.

Moreover, it asks about your business, customers, and brand tone, then magically populates your design library with royalty-free visuals. With that, from day one, your website reflects your brand’s essence, making a lasting impression on visitors.
Is it Expensive?
The best part about Kadence AI is its affordability. Traditionally, hiring a designer or developer to create a website can be incredibly expensive.
However, with Kadence AI, you can create a professional-looking website at a fraction of the cost. Basically, it’s available to you at the following schemes:
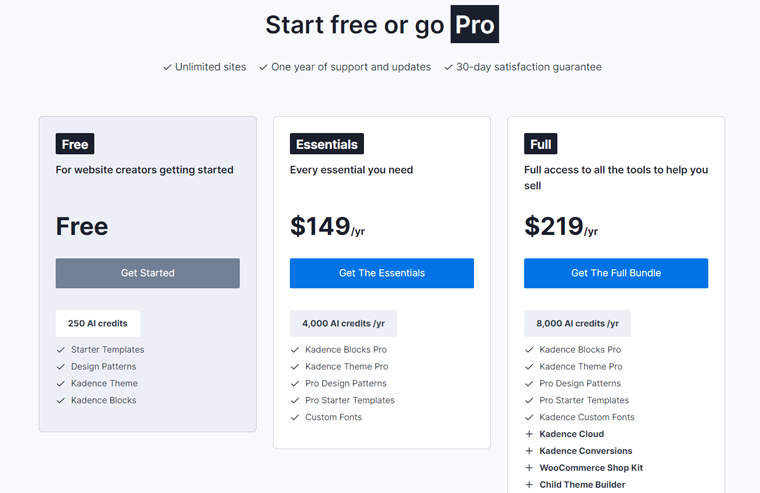
- Free: You get 250 AI credits, starter templates, design patterns, Kadence theme, and Kadence blocks at zero cost.
- Essentials: Costs $149/year with 4000 AI credits/year. Includes Kadence Block Pro, Kadence Theme Pro, Pro Design Patterns, etc.
- Full: Costs $219/year with 8000 AI credits/year. Includes all essential features plus Kadence Cloud, Kadence Conversions, and more.
This makes it an ideal solution for small businesses, entrepreneurs, and even bloggers looking to establish an online presence.
So, say goodbye to the tedious website creation process and hello to Kadence AI.
Never heard of Kadence before? Then, be sure to check our detailed article on Kadence theme review.
How To Use Kadence AI?
Now, let’s check into how to use Kadence AI for effortless site creation. The first step on your web development journey with Kadence AI is installing and activating the Kadence Theme.
As it serves as the backbone by providing a solid framework for building a visually stunning and responsive website.
So, begin by installing and activating the Kadence Theme on your website.
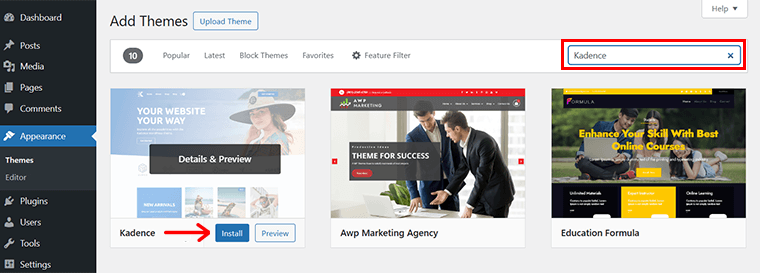
For that, quickly log in to your WordPress dashboard, navigate to the ‘Appearance > Themes’, and click on the ‘Add New Theme’ option.
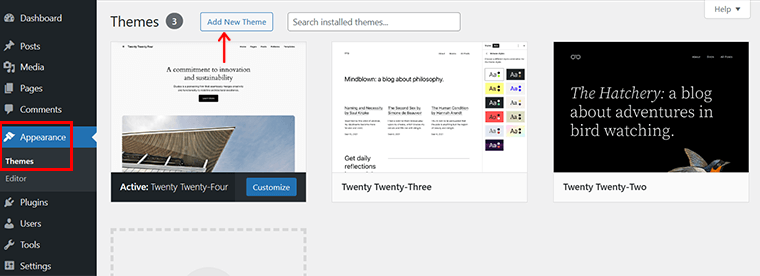
Then, search for ‘Kadence’ in the search bar and click on ‘Install’, followed by the ‘Activate’ button.
For more guidance, you can check our article on how to install a WordPress theme.
Having said that, let’s officially proceed to the following steps:
Step 1: Install & Activate Kadence AI Starter Templates
So, right after the successful activation, you can see a prompt to get started with an AI-powered website.
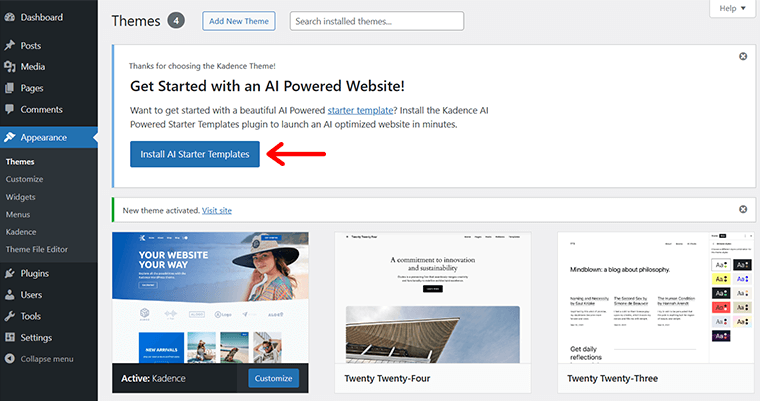
Also, you’ll see an ‘Install AI Starter Templates’ button. Click on it, to access a range of AI-composed pre-designed templates to kickstart your website development.
Following that, you get to see 2 options, i.e., ‘Activate Kadence AI Starter Templates’ or ‘use Classic Starter Templates’.
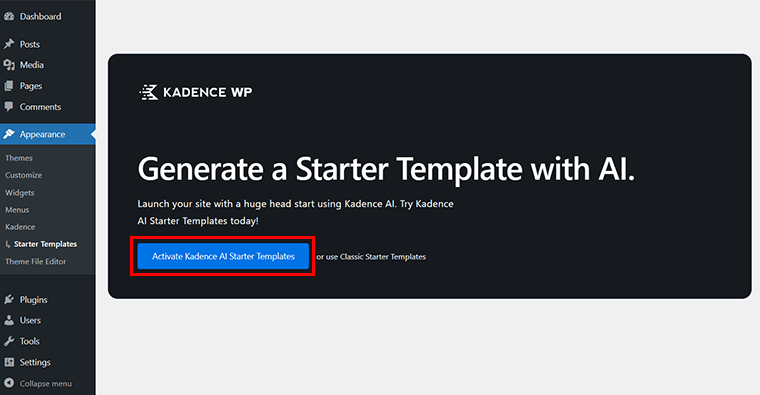
Since we’re learning to use Kadence AI, let’s click on the ‘Activate Kadence AI Starter Templates’ option.
Step 2: Log In or Register to Your Kadence Account
Following that, you’ll see the page as shown below with majorly 2 options i.e. ‘Login’ and ‘Register’.
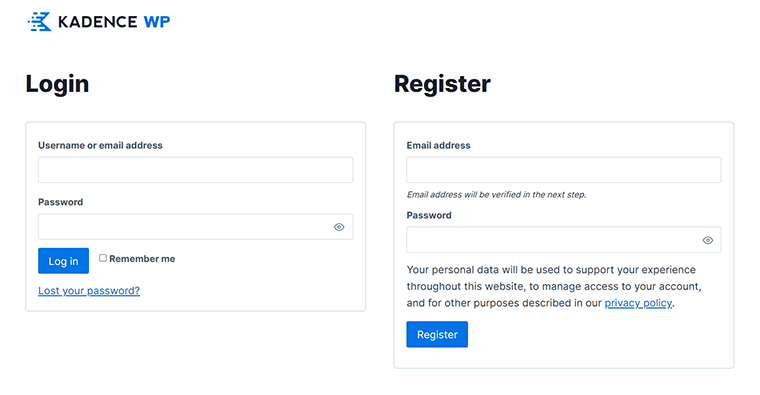
If you’ve already invested in Kadence’s premium version, simply ‘Log in’ using your Kadence account details.
It’s worth noting that the premium version grants access to a full range of benefits. Including increased prompt points, unlike the free version, which only offers 250 credits.
Alternatively, if you’re new to Kadence and wish to explore its features with the free version first, then select the ‘Register’ option. And follow the prompts to register and unlock the platform’s powerful capabilities.
We’ve personally purchased Kadence’s Lifetime full plan, unlocking a handful of advantages such as:
- 16,000 AI Credits
- Every Product Within its Full Bundle
- One-time Payment Convenience
- Lifetime Support
- Access to All Future Products
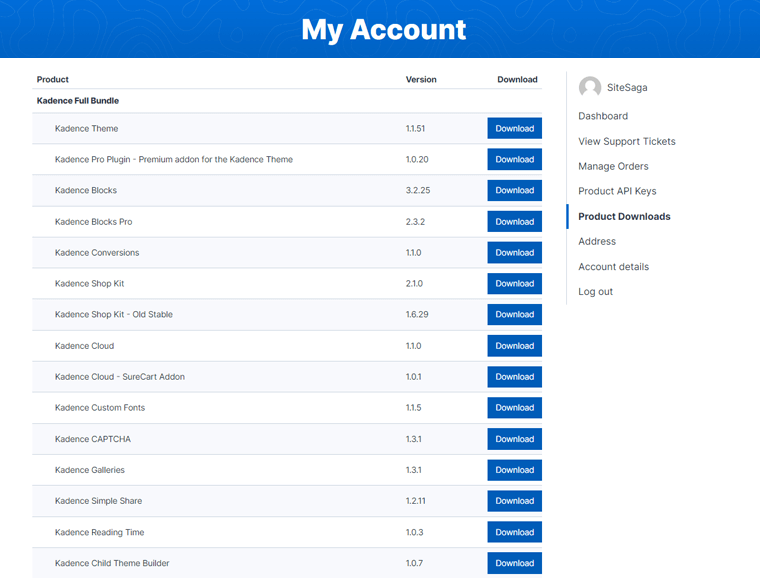
So, here, we’ve logged in via Kadence account details. Once done, you’ll see the page as shown below.
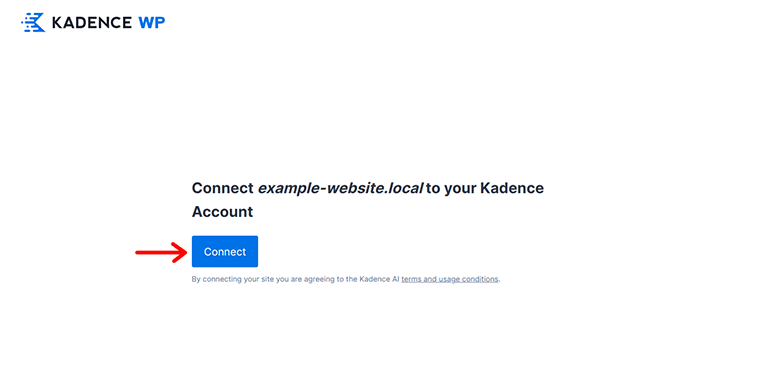
Then, click on the ‘Connect’ option to proceed.
Step 3: Provide Your Business Details to Kadence AI
Now, it’s time to lay the groundwork. Here, you’ll share essential information about your business, allowing Kadence AI to work its magic.
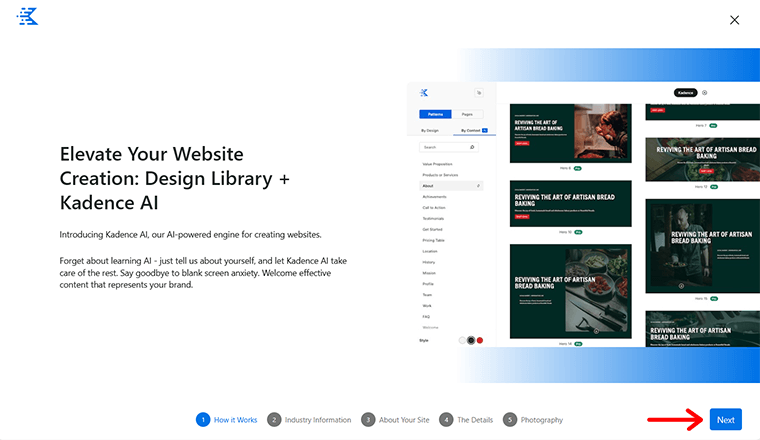
From industry insights to tone preferences, let’s unlock the full potential of effortless site creation. So, click on the ‘Next’ button to proceed.
I) Adding Industry Information
Kadence AI thrives on specificity. So, begin by sharing your website details and other required details.
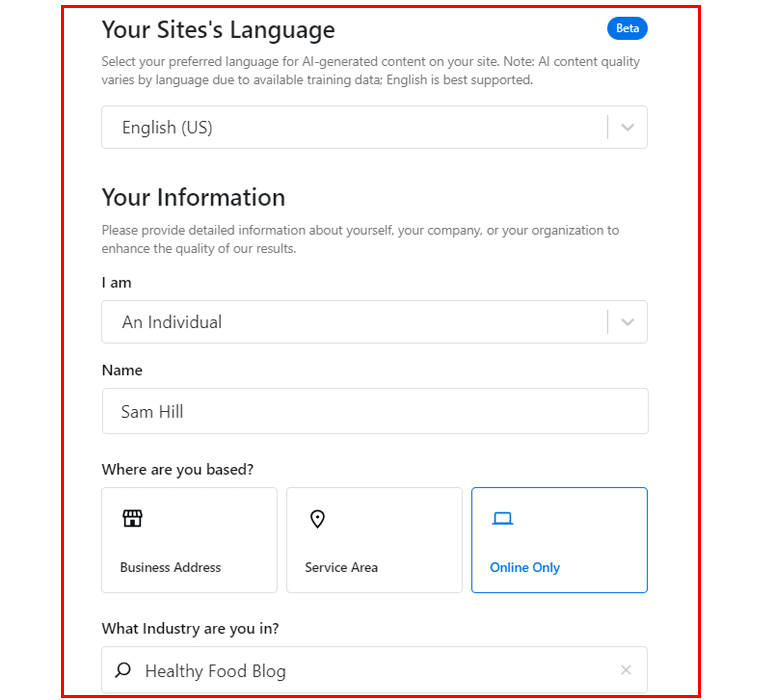
To be precise, here you’ll have options to enter the following details:
- Choose your site’s language whether English, Danish, Dutch, French, German, Italian, Spanish, etc.
- Specify whether you’re an individual, a company, or an organization.
- Type in the exact name that you want to appear on your website. For instance, here, we’ve chosen Sam Hill.
- Add about your industry. Whether you’re in eCommerce, healthcare, creative services, etc.
Suppose, consider you’re a food blogger who loves to explore different cuisines and delicacies. So, let’s add the industry as ‘Healthy Food Blog’.
And click on the ‘Next’ button.
(Be mindful to be precise so you can add unique aspects that set your business apart.)II) Adding About Your Site Information
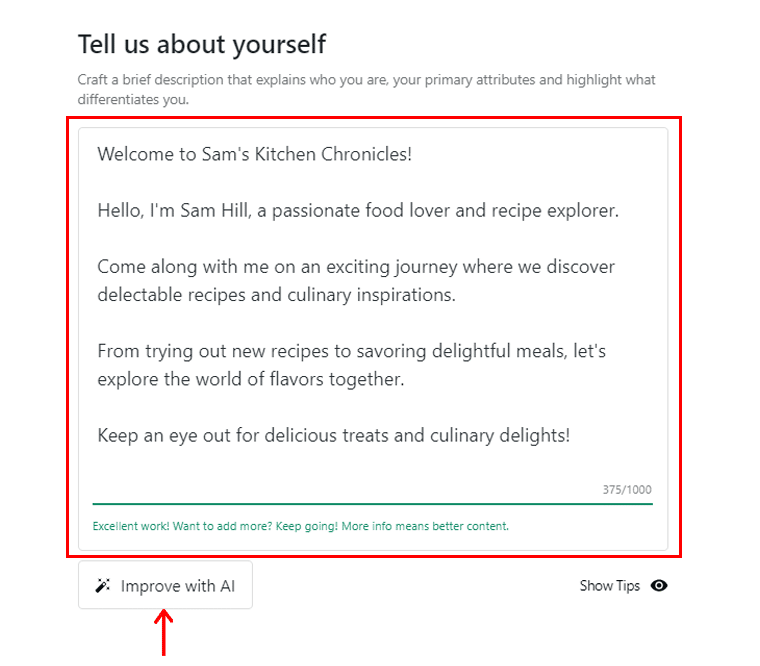
Next, Kadence AI prompts you to craft an engaging narrative. Here, you need to add your site information which also means adding your website’s “About” section. This is where you introduce yourself to visitors.
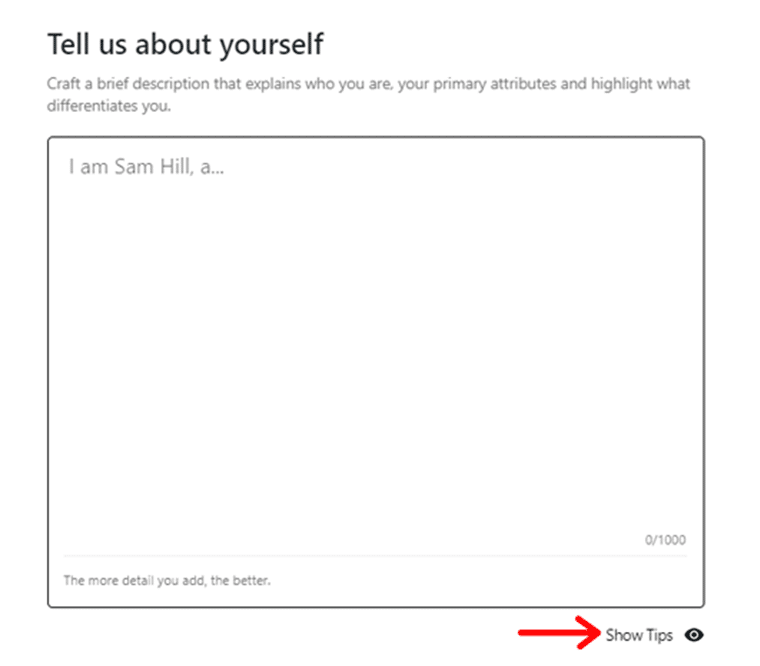
Consider things like:
- What’s your brand story?
- What values drive your business?
You can also click the ‘Show Tips’ option to get more ideas.
Once you add your description, you’ll see the ‘Improve with AI’ option. Click on it to make your content more beautiful.
Next, you’ll see your content is modified. All you’ve to do is click on the ‘Use This Copy’ option.
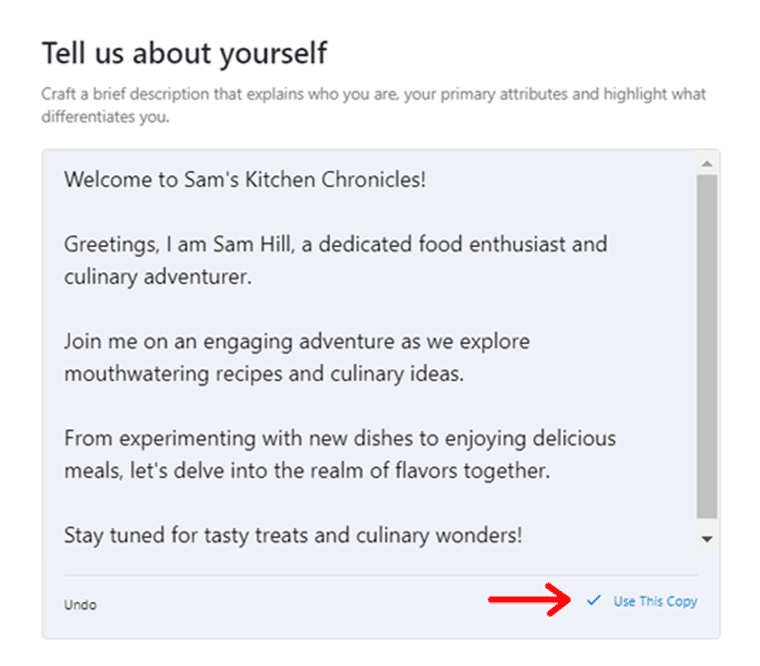
Then, hit the ‘Next’ button.
(Remember to be authentic, concise, and let your personality shine through.)III) Adding the Site Details
Now, it’s time to add some keywords since keywords are essential for SEO (Search Engine Optimization). In fact, the right keywords help to lead search engines and users to your site.
Kadence AI automatically generates relevant keywords related to your business.
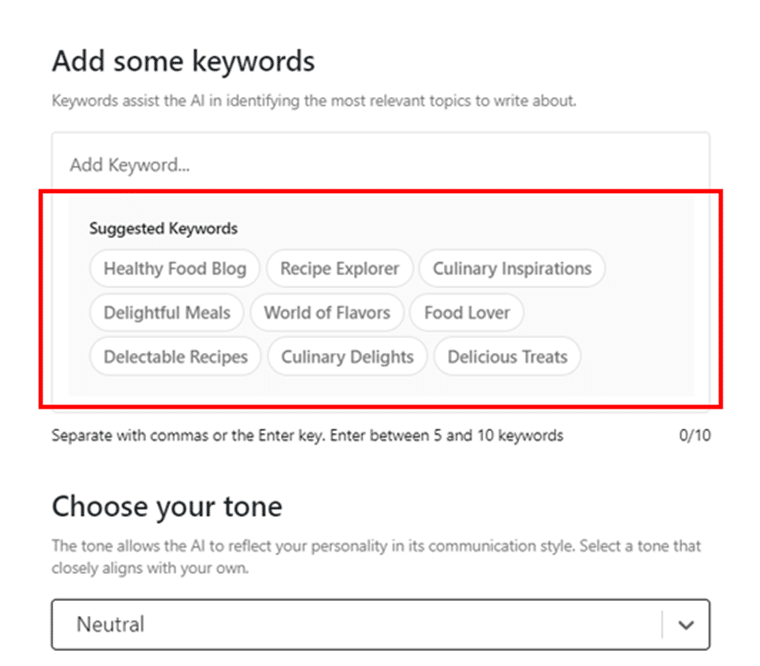
- All you’ve to do is, think about what your potential prospects might search for and select the right keywords. Also, you’re suggested to add between 5 to 10 keywords.
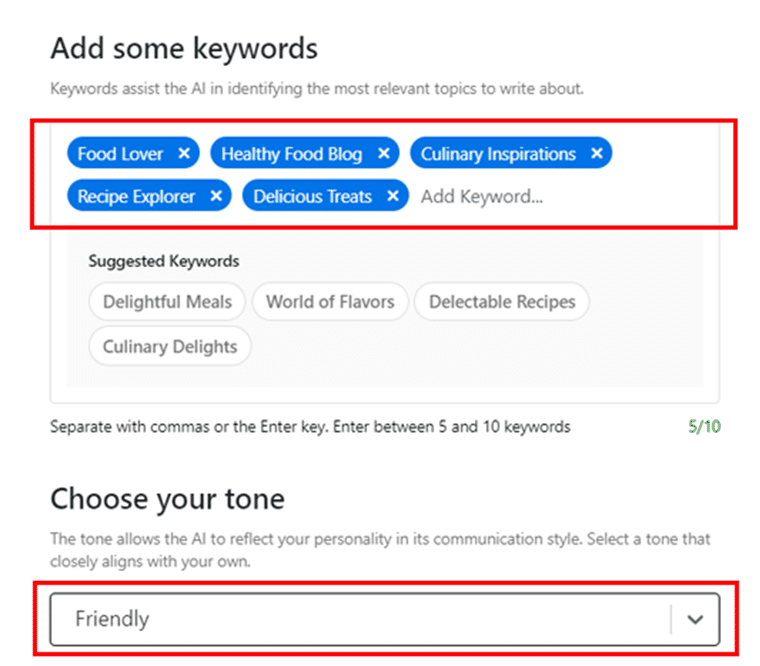
- Additionally, choose your tone among ‘Professional’, ‘Friendly’, ‘Informative’, or somewhere in between. And, click on the ‘Next’ option.
IV) Adding Relevant Photography Images
With that, Kadence AI adapts to your preferences. And curates a collection of royalty-free ‘Featured’ and ‘Background’ images that resonate with your style.
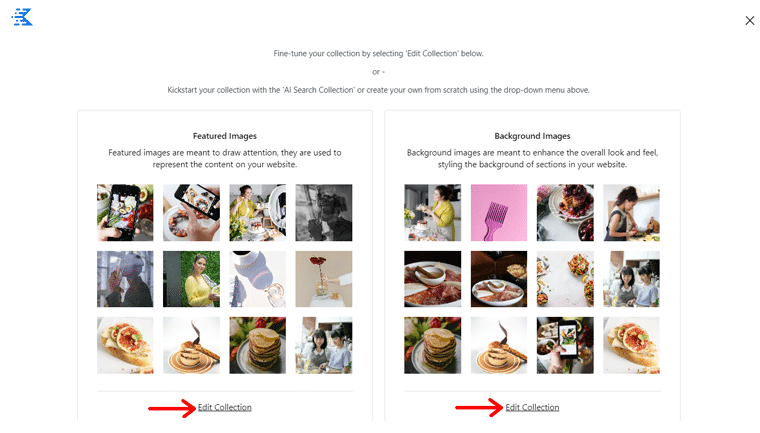
Also, if you’re not satisfied with any of the images, then you can quickly click on the ‘Edit Collection’ option. And remove or add new images as you wish.
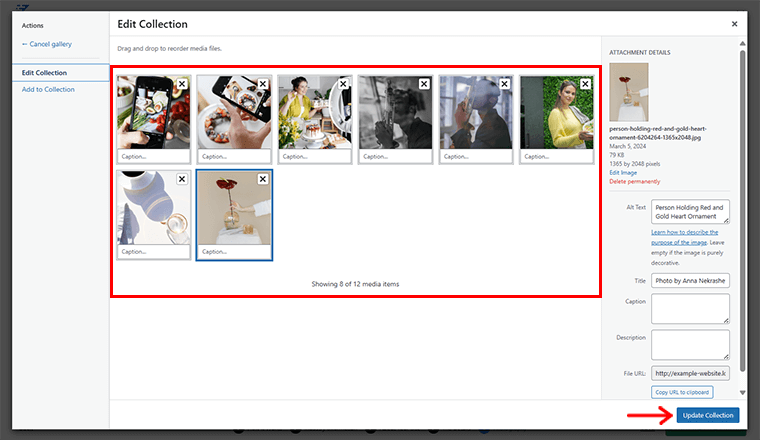
Once done, hit the ‘Update Collection’ option.
V) Generating Base Content
After you’re done with the visuals, click on the ‘Generate Base Content’ option.
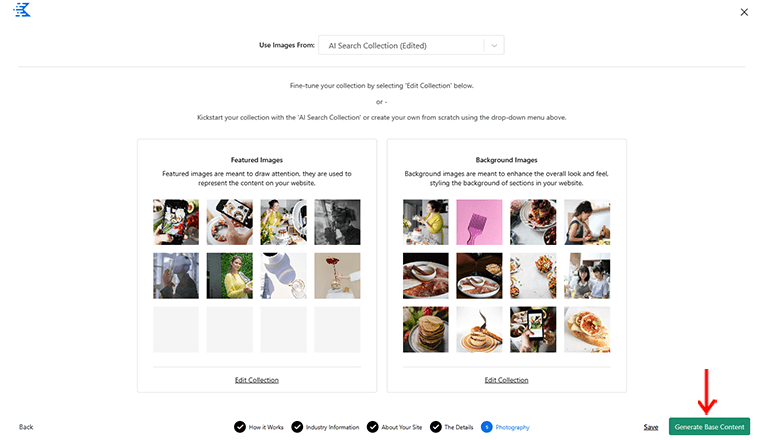
Now comes the exciting part. Kadence AI combines your industry information, and keywords, and chooses a tone to create the base content. It’s like having a skilled copywriter at your fingertips.
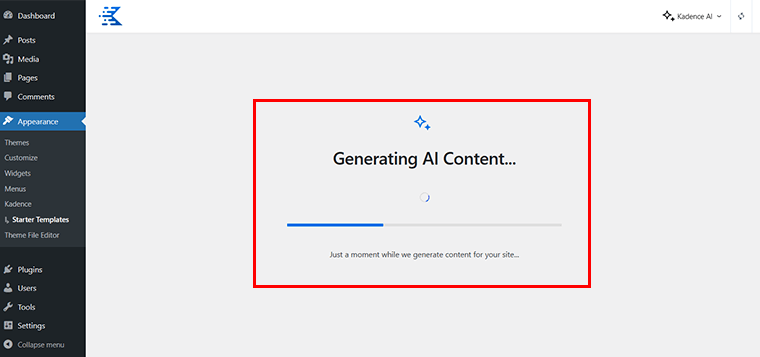
Step 4: Preview & Choose Your Preferred Template
The result? You get clear compelling starter templates with AI-generated text that aligns with your brand and engages your audience.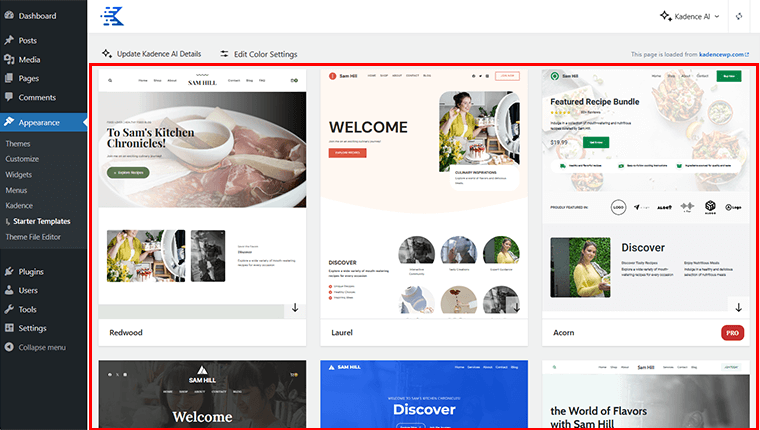
Here, each template incorporates context based on the information you provided for Kadence AI.
So, all you’ve to do is preview different templates and choose the one that resonates with your vision. You can also click on the mini down arrow icon on the right corner for a quick scroll of your template.

Here, we’ve chosen the ‘Redwood’ template.
Step 5: Configure & Import Your Preferred Template
Once you’ve chosen the template, simply click on the chosen template to configure the initial settings. Which includes:
- Style
- Content
- Plugins
On the ‘Style’ tab, you’ll 2 sub option i.e. ‘Colors’ and ‘Fonts’.
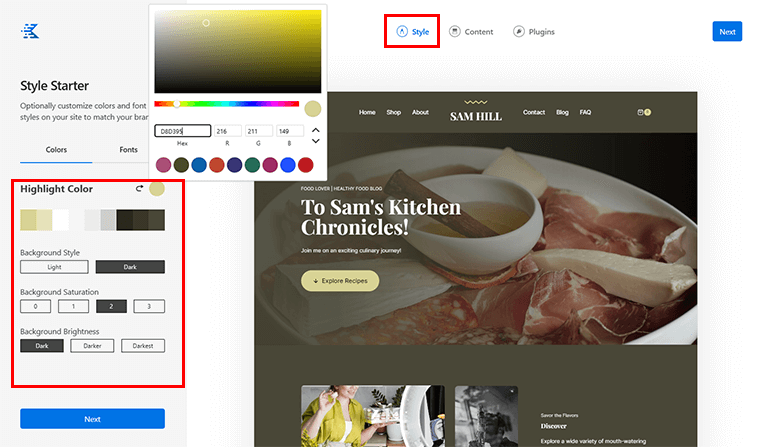
You can configure the highlight color, background style, saturation, and brightness as you wish from the ‘Colors’ option.
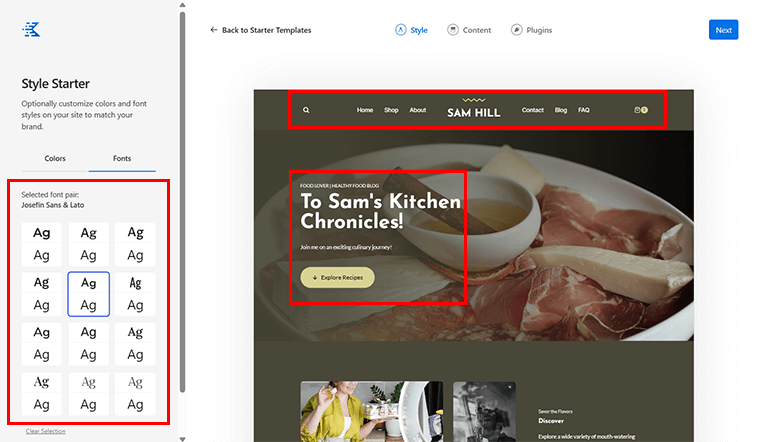
Next, you can specify your preferred font from the ‘Fonts’ option.
Moving forward to the ‘Content’ tab, you can select the ‘Pages’ you want to import.
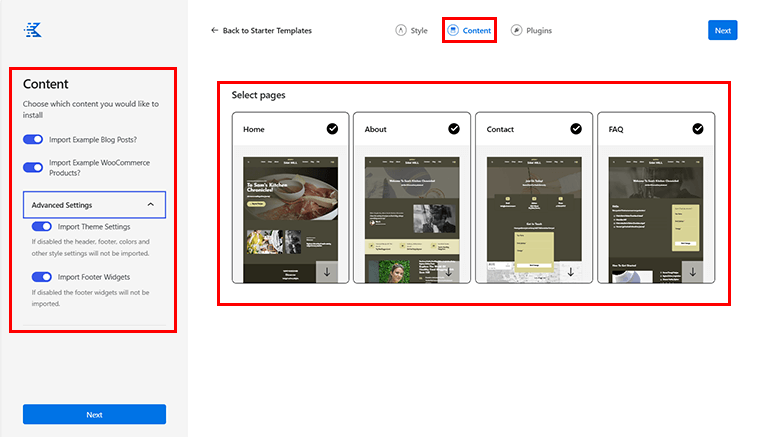
Also, you’ll see options to import example blog posts, example WooCommerce products, and other advanced settings.
Likewise, on the ‘Plugins’ tab, you can select the plugins that you’d like to have on your website.
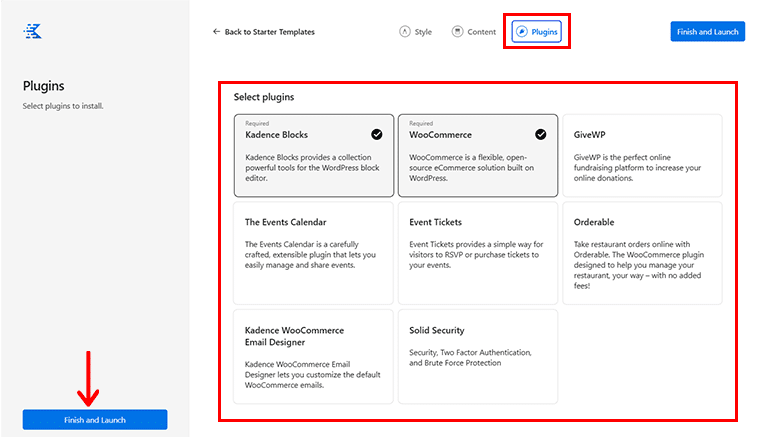
Once done, click on the ‘Finish and Launch’ option. Shortly, you’ll see a prompt that asks you to override the current theme settings and add content.
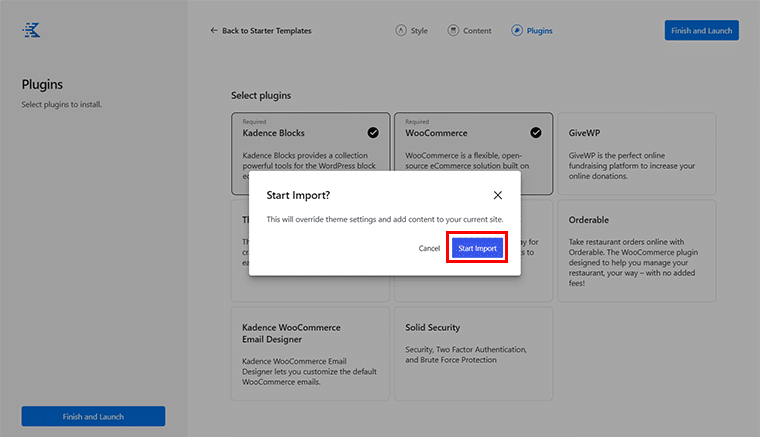
Here, click on the ‘Start Import’ option to proceed with the import process.
Step 6: Customizing the Imported Template
Once your website is successfully imported, you’ll see the Success notification prompt box.

Here, click on the ‘See my site’ option. With that, you can see your website.
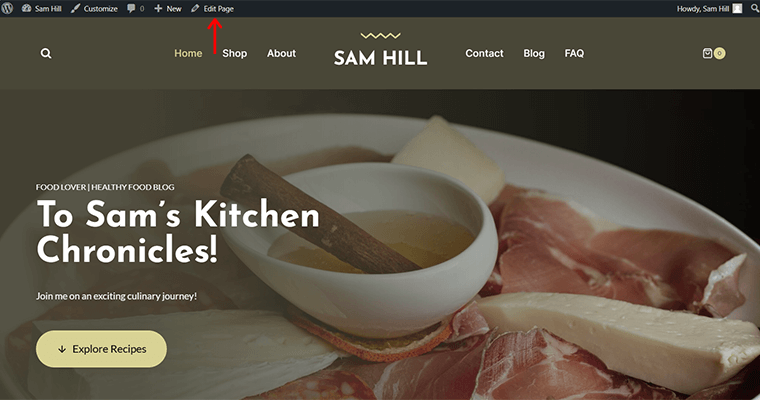
Here, on the top, you can see the ‘Edit Page’ option, click on it to further customize it. With that, you’re directed to the editor panel.
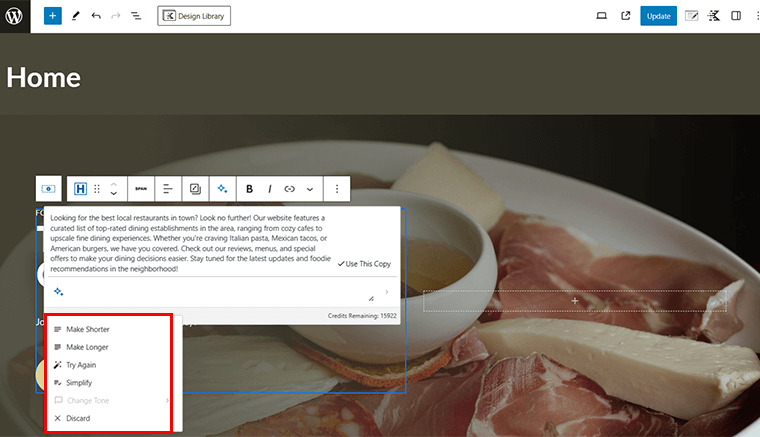
Now, if you click any content, then you’ll see a two-star icon that represents the ‘Kadence AI’ option. Click on it.
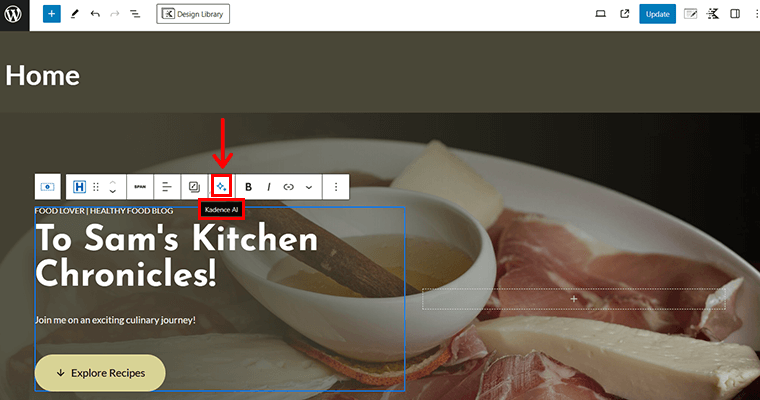
Now, you can give the prompt like ‘Can you add something more relevant here?’ and click on the send ‘>’ icon.
With that, Kadence AI suggests some ideas based on your previous details. Further, you can give the additional prompt like ‘Suggest some content that can be placed here’ and hit send ‘>’ icon.
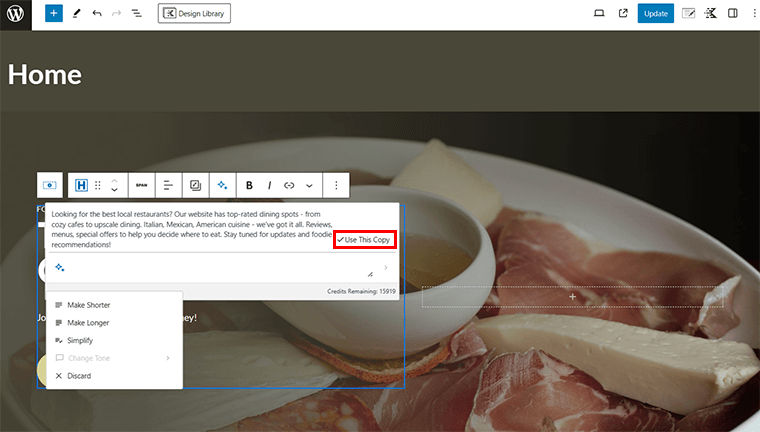
Following that, you’ll see the generated content that you can further specify to make it shorter, longer, try again, or simplify.
Shortly, once you get the required content, click on the ‘Use This Copy’ option.
Further, you can configure the ‘General’ settings of the text from the right-hand side editor panel.
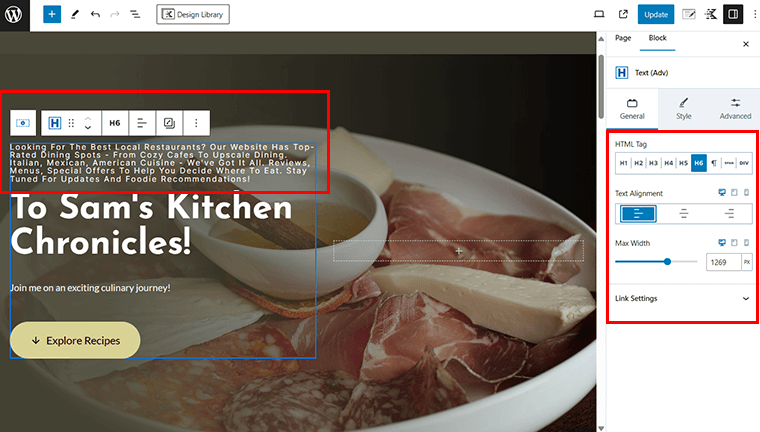
Also, configure the ‘Style’ settings in the same way.

Following the same process, you can easily tailor other content of your website hassle-free using Kadence AI.
Step 7: Update & Preview Your Website
Once done, hit the ‘Update’ button on the top right corner.

Now, preview your website and see the live changes.
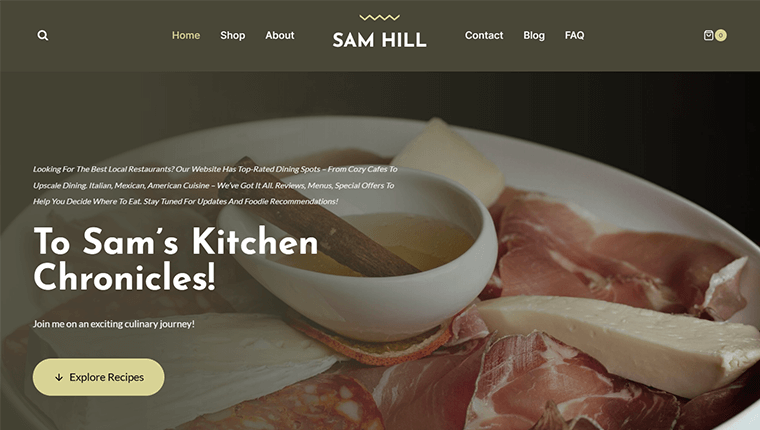
Congratulations! You’ve successfully set the stage for your website using Kadence AI.
Frequently Asked Questions: Clearing the Pathway
Now, let’s check out some of the frequently asked questions along with their answers on Kadence AI.
Q.1 What is Kadence AI?
Kadence AI is an AI-powered website-building tool for WordPress. It simplifies the site creation process with tailored starter templates and content generation options. Based on the WordPress Gutenberg editor and Kadence theme, it’s an advanced AI site creator.
Q.2 What are the key capabilities of Kadence AI?
For site creation, Kadence AI offers you with AI wizard for quick website design and delivery, and AI-shuffled starter templates with customized pages and patterns. Likewise, for site content, you get AI inline-block to effortlessly generate and enhance text content.
Q.3 How does Kadence AI differ from Divi AI?
Kadence AI is based on the native WordPress block editor, Gutenberg. It makes the site creation process easier and faster. On the other hand, Divi AI is based on Divi Builder, a third-party page builder for WordPress. To use Divi AI, you need to buy a paid plan starting from $153 per year.
Q.4 How does Kadence AI differ from Elementor AI?
Kadence AI offers AI-powered starter templates and content generators for the Gutenberg block editor. Meanwhile, Elementor AI is built for Elementor page builder users. It allows for enhancing content within existing layouts with AI Writing Assistant. Elementor AI’s power package is available for $99 per year.
Q.5 Is Kadence AI free to use?
Kadence AI provides a free version with 250 credit prompt points, alongside various premium options. Notably, its lifetime full plan is available for a one-time payment of $799, inclusive of lifetime support and other powerful features.
Conclusion
And that’s it, folks! We’ve come to the end of our article on how to use Kadence AI for effortless site creation.
Kadence AI isn’t just a tool; it’s a transformational partner that can help you speed up your WordPress website creation.
Whether you’re a seasoned pro or a first-time builder, Kadence simplifies the process. Further, allowing you to focus on what truly matters – crafting an online presence that captivates and converts.
If you’ve any questions, then do let us know in the comment section below. We’re happy to help you out.
Also, browse our other articles like the best AI tools for digital marketing and how to use AI for SEO.
Remember to share this article with your friends and family who are looking forward to using Kadence AI in their site creation process.
Follow us on social media handles Facebook and Twitter to stay updated with our content.