

Wondering how to add social media share buttons to WordPress blog? Then, this is the right article for you.
Enabling your visitors to share your content on social media networks is a great way of boosting traffic and pageviews. This helps to build user engagement as well as brings new users to your website. Hence, adding social share buttons is a crucial job for every website.
In this guide, we’ll walk you through the simple steps to add social media share buttons and proudly display those share counts in WordPress.
Ready? Let’s dive in!
Why Add Social Sharing to Your WordPress Website?
If you run a business but don’t have a strong game on social media, then there’s a high chance that you could lose huge numbers of potential customers.
That’s because a large number of people are online via social media platforms. And, some of them may be people with intent to buy from you.

Adding social media share buttons to your WordPress blog helps you reach those people on social media, create interest in your products, and ultimately turn them into buying customers.
The process is simple!
First, the social share buttons encourage your site visitors to share your content on their social media accounts. Once shared on social media, your content will be seen by more new people on the social platform. Then, they may visit your site using that link or reshare the content via their profiles.
As a result, your site will get more traffic, and also you may gain more social media followers. Hence, adding social sharing in WordPress is a simple yet very useful digital marketing strategy nowadays.
Now having said that, let’s look at how easily you can add social share buttons in WordPress.
For this tutorial, we’ll be using two different social media plugins to demonstrate how to add social media share buttons to WordPress blog. They are:
- Novashare
- Shared Counts
Now let’s check out the process of adding social sharing in WordPress step-by-step.
Novashare is a premium, fast and lightweight social sharing plugin designed specifically for WordPress websites. It prioritizes performance and efficiency, ensuring that your site’s speed remains unaffected while enhancing social media visibility.
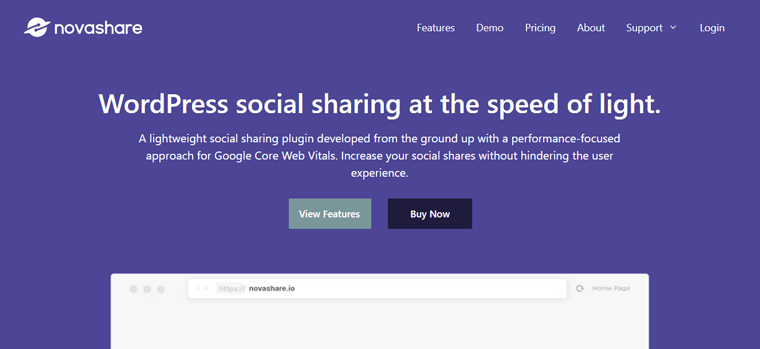
It’s praised for its speed, feature-rich design, and impressive performance. If you’re seeking a no-bloat social media sharing solution for your WordPress site, Novashare is the way to go!
Now, let’s go ahead and add social sharing in WordPress using this plugin step-by-step. Check the video in you want a visual demonstration.
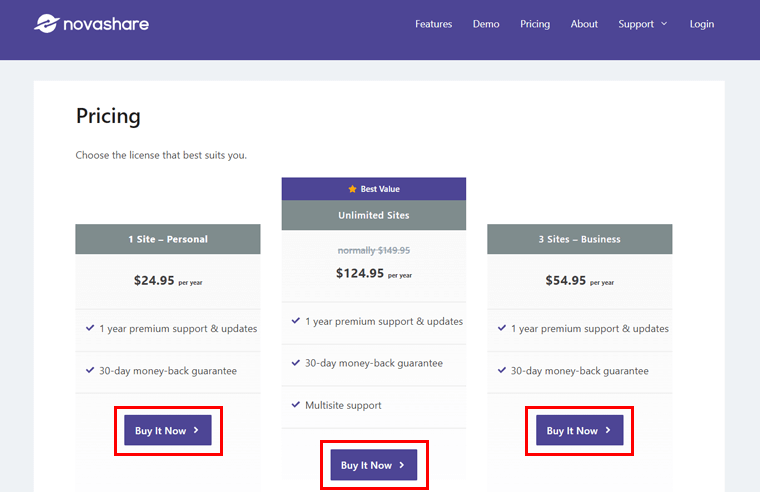
Since Novashare is a premium plugin, the first thing you need to do is to purchase it. For that, go to its official website and click on the ‘Buy Now’ option. Alternatively, you can also go to its ‘Pricing‘ page.
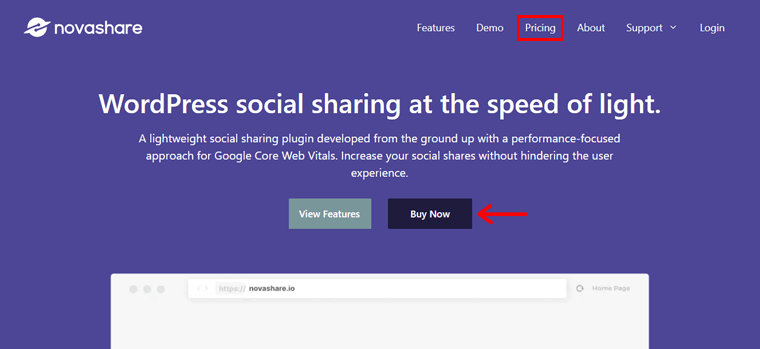
Now, click on the suitable ‘Buy It Now’ button of your preferred package.
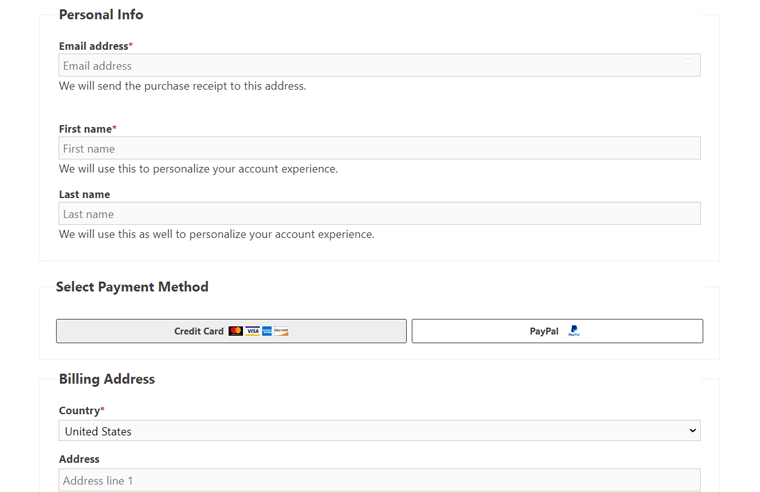
Next, type in your personal and payment details to the checkout process.
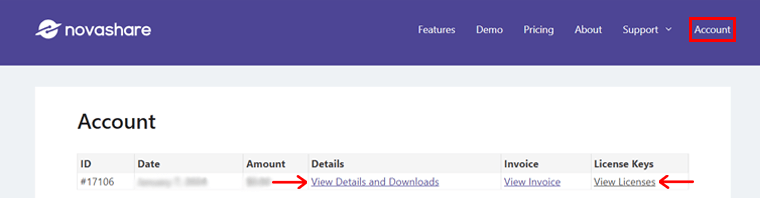
Once done, you’ll get an email to access your Novashare account. Next, you need to log in to your account to access your license key and download the zip file of the plugin.
Moving forward, our next steps involve installing and activating the Novashare plugin. For that, log in to your WordPress dashboard, and go to ‘Plugins > Add New’.
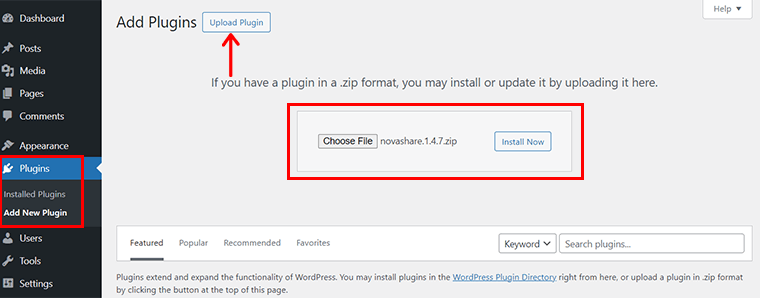
And, click on the ‘Upload Plugin’ option and select the previously downloaded plugin zip file from your computer.
Then, click on the ‘Install Now’ button and wait for the installation to complete.
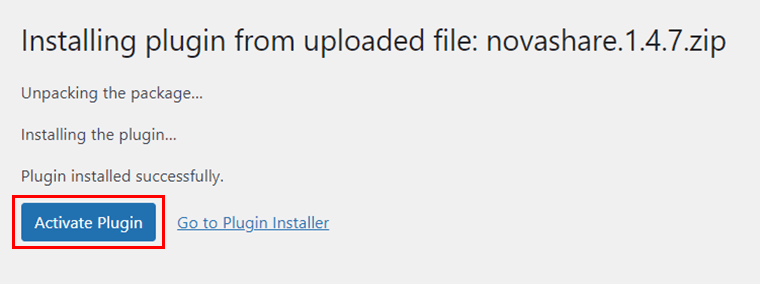
Following that hit on the ‘Activate Plugin’ button and you’ll see that the plugin is activated.
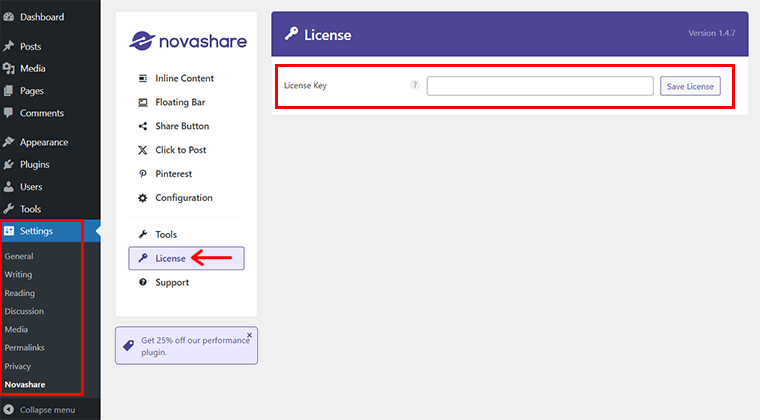
Next, go to ‘Settings > Novashare’ and paste the previously copied license key into the ‘License’ tab.
Once done, you’re all set to add social sharing buttons to your site with Novashare.
For this, you majorly need 2 sub-tabs. They are: ‘Inline Content’ and ‘Floating Bar’. We’ll check how to do it in the upcoming steps.
Inline content share buttons are share buttons within your post, page, or custom content. They can appear above, below, or within your content.
First thing first, go to the ‘Settings > Novashare > Inline Content’ in your WordPress dashboard.
Then, click on the ‘Enable Inline Content’ option. Also, pick which social network share button you want to have.
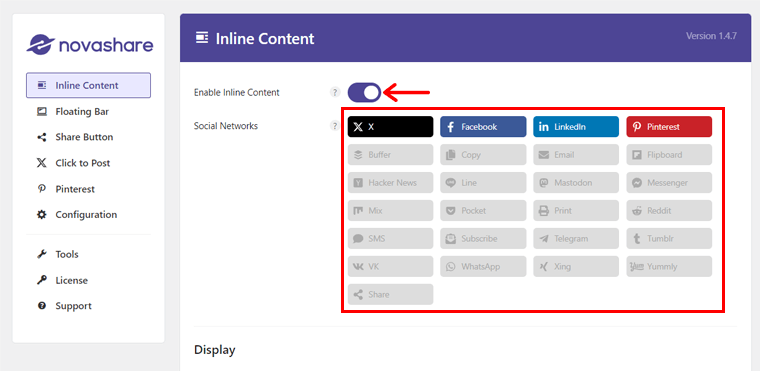
Now, specify your Post Types from 3 options, i.e. ‘Posts’, ‘Pages’, or ‘Media’ under the ‘Display’ option. Here, we’ve enabled ‘Posts’ and ‘Pages’.
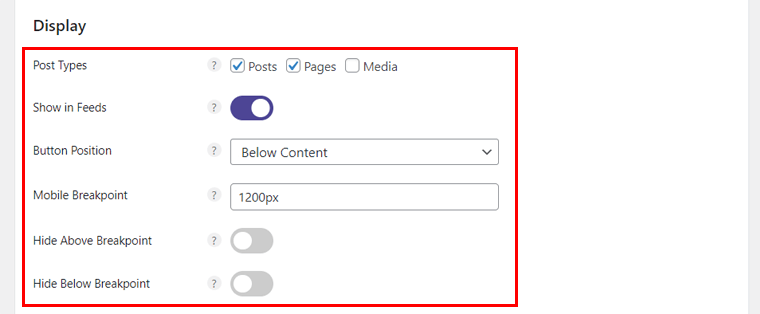
Also, you can specify the button position, and mobile breakpoint. Then, on ‘Design’ option, you can choose the overall style for your share buttons. Such as style, width, layout, alignment, etc.
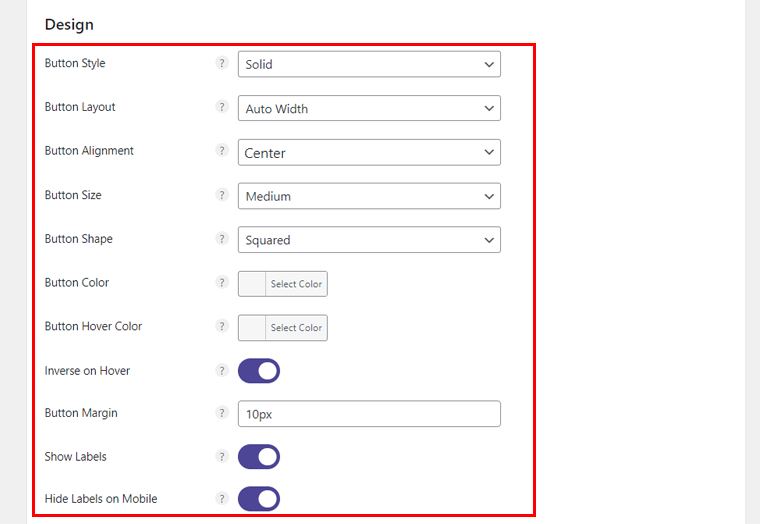
Additionally, you have the option to adjust the button margin and choose whether to display labels, with the ability to hide them on mobile devices.
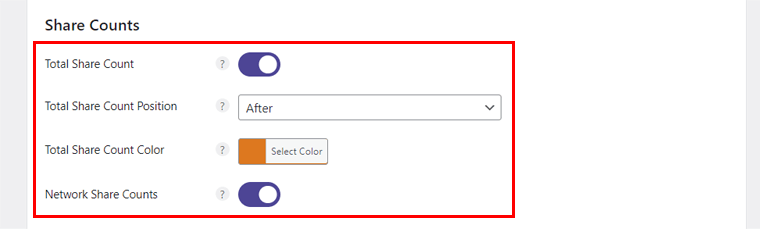
As you scroll down, you’ll find the ‘Share Counts’ section, where you can activate the total share count, define its placement, and customize its color.
In the ‘Call to Action’ section, you can insert prompt text to encourage visitors to click on the share buttons. Additionally, you can customize the font size and color of your prompt to enhance its effectiveness.

After completing these adjustments, click the ‘Save Changes’ button.
Then, navigate to any of your live website pages and select ‘Preview’. Voila! Witness the results firsthand.

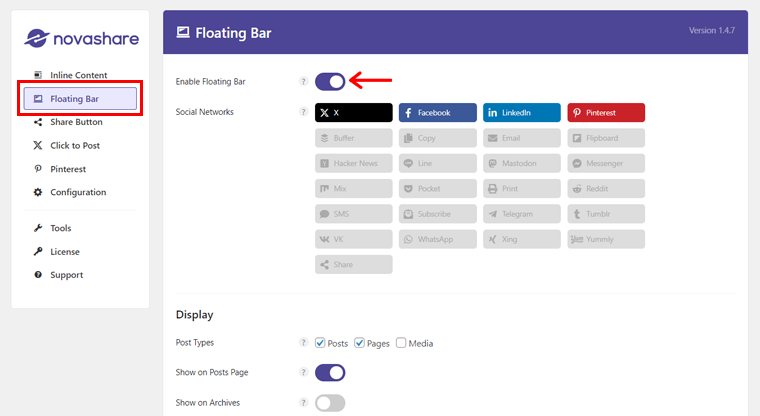
Similarly, to set up floating bar share buttons, first of all, go to ‘Floating Bar’ tab and activate the floating Bar. Then, proceed with the same steps outlined earlier for the Inline Content tab.
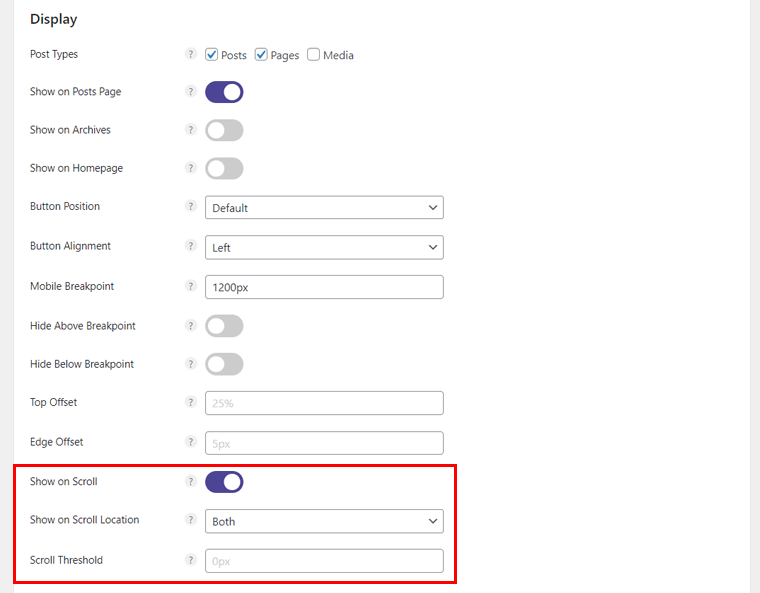
The crucial step is to enable the ‘Show on Scroll’ option. Additionally, you must specify the location for the floating sidebar to appear, selecting whether it shows on mobile, desktop, or both.
Afterward, click on the ‘Save Settings’ button, and your setup is complete. You can now preview the changes.

Step 5: Setting Up Pinterest Sharing
Moreover, you have the option to add a Pin button to all images when hovered over, allowing visitors to easily pin any image from your site to Pinterest.
To activate this feature, navigate to ‘Settings > Novashare > Pinterest’ tab, and enable the image pins option in the Novashare settings.
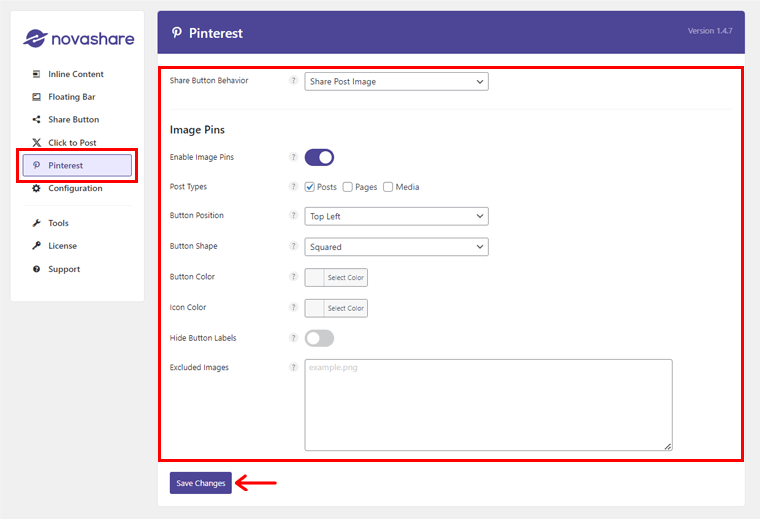
Additionally, customize the display of Pinterest images by selecting specific post types, editing hover pins, adjusting button position, shape, color, and icon color. You can also hide button labels and exclude certain images.
After making these adjustments, click on ‘Save Changes’ and click on ‘Preview’ option.
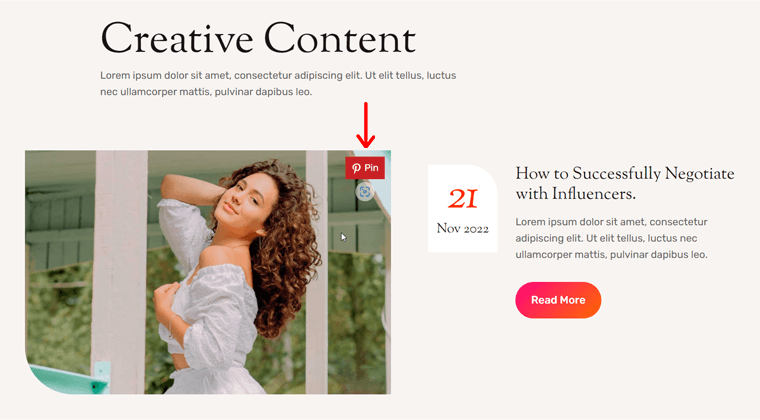
This enhances the Pinterest-friendliness of your site, encouraging visitors to share your content seamlessly.
Similarly, feel free to explore the other tabs and explore the full potential of the Novashare plugin. Experiment with various settings to optimize your social sharing experience.
For more guidance, be sure to check our comprehensive article on the Novashare review.
Next, we’re going to look at the most easy-to-use WordPress plugin – Shared Counts. This plugin allows you to easily add social media share buttons to the WordPress blog.
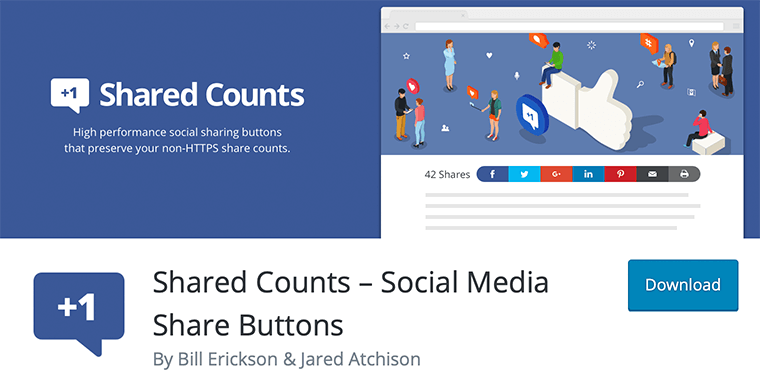
Likewise, it also allows you to display the share counts. The best thing is that it’s built with site performance in mind, so it doesn’t slow down your website.
Now, let’s go ahead and add social sharing in WordPress using Shared Counts step-by-step.
To use this plugin you’ve to install and activate the Shared Counts plugin from WordPress official plugin directory.
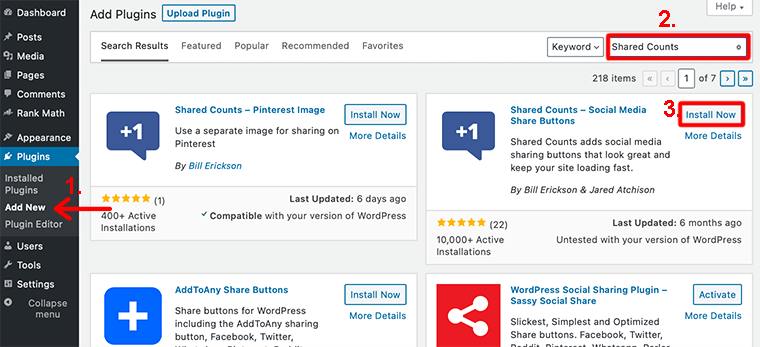
Just like Sassy Social Share, find the plugin from the official WordPress plugin repository. And then click on the Install Now button.
Step 2: Choose the Social Networks
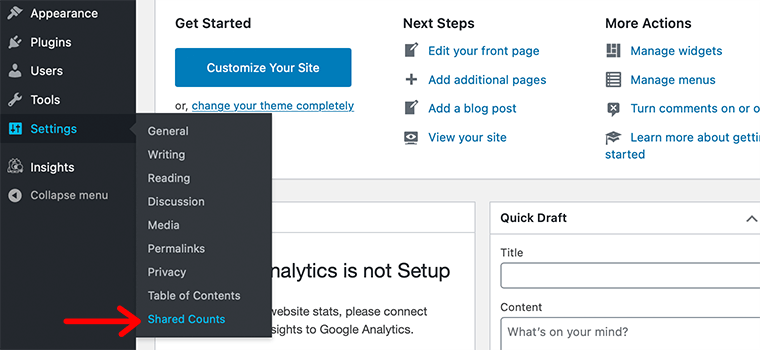
Once you have installed the plugin, you need to go to Settings > Shared Counts menu. This will take you to the plugin settings page.
After that scroll down a bit to the Display section.
There, you’ll be able to choose different share buttons that you want to display on your website. It supports social services like Facebook, Twitter, Pinterest, and more.
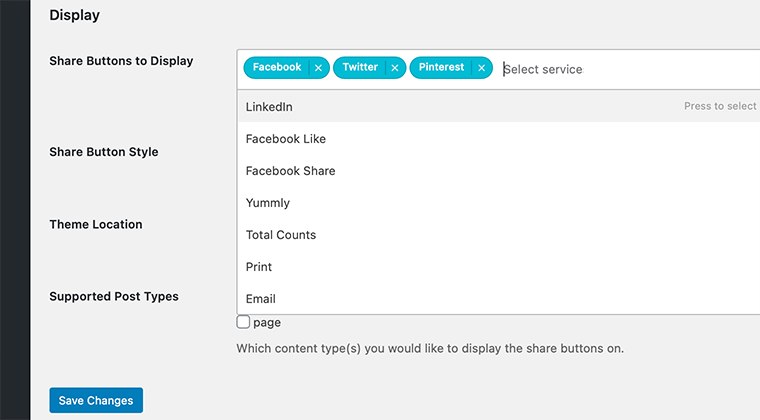
By default, it’ll have already selected three buttons for you (i.e. Facebook, Twitter, and Pinterest). But, if you want to add more then click on the search field and search for the share buttons that you want.
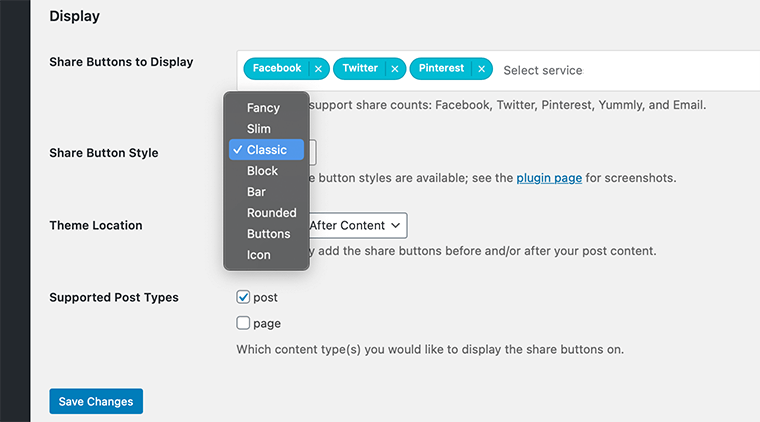
Similarly, you can also style your share button. For that, you need to click on the dropdown menu next to Share Button Style. It’ll then list eight different beautiful share button styles.
Step 4: Choose the Theme Location to Display the Buttons
After that, just below it, you can select the theme location where you want to display the social share buttons. It provides three options – Before Content, After Content, or Before and After Content.
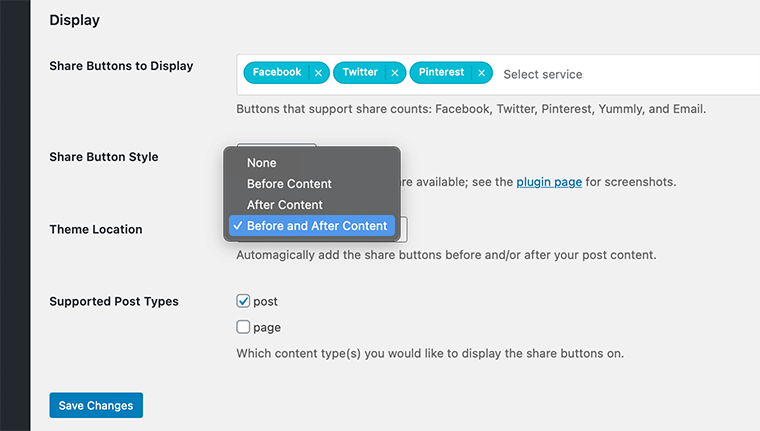
You can also select which content types you would like to display the share button on. Finally, you can now click on the Save Changes button to save your settings.
That’s it! This is how you easily add social share buttons to your WordPress blog. As you can see, it takes just a few steps!
As we said earlier, Shared Counts also allows you to display your social share counts without slowing down your website. For that, you have to go to Settings > Shared Counts menu.
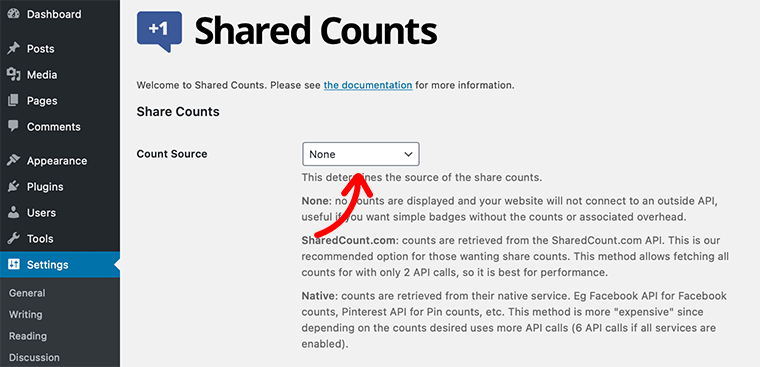
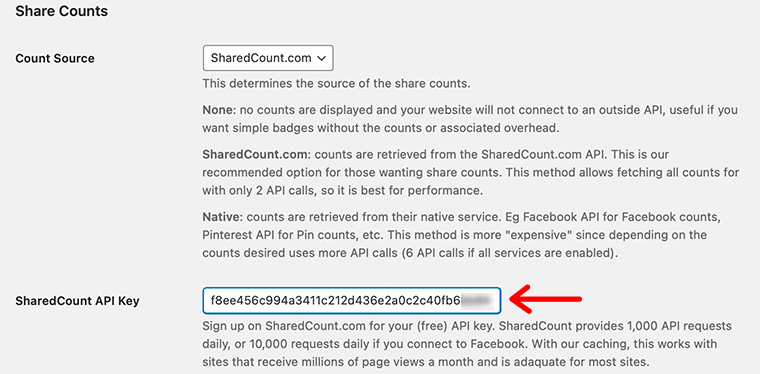
Step 1: Choose the Source of Share Counts
At the top of the settings page, you’ll find the Share Counts section. There in the Count Source, you’ll see the None option selected by default. This means that it’ll not be able to display the share counts on your website.
Therefore, if you want to display the social share counts then you’ll be provided with two options i.e. SharedCount.com or Native.
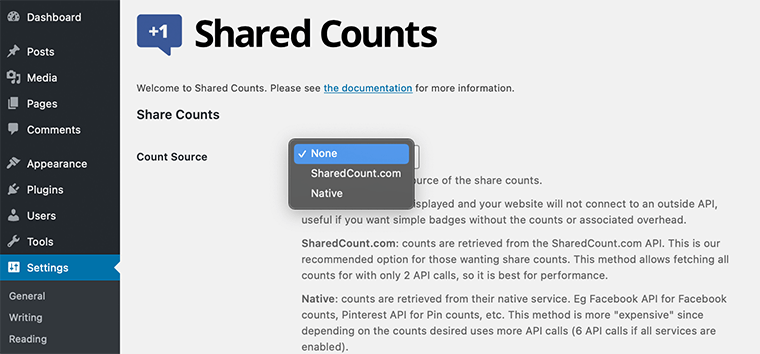
If you go with ‘SharedCount.com’ then your social share counts will be retrieved from the SharedCount.com API.
Likewise, Native will retrieve the counts from their native service. For example, Facebook API for Facebook counts and Pinterest API for Pin counts.
However, the most recommended one would be to go with SharedCount.com. So, we’ll show you how you can add share counts using SharedCount.com.
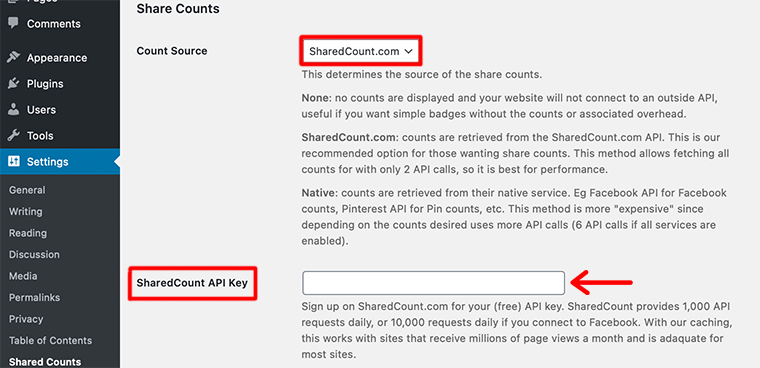
Once you select it, more options will be popped up just below the Count Share field. There you’ll find an option for adding a SharedCount API Key.
Therefore, you need to sign up on SharedCount.com for your free API key.
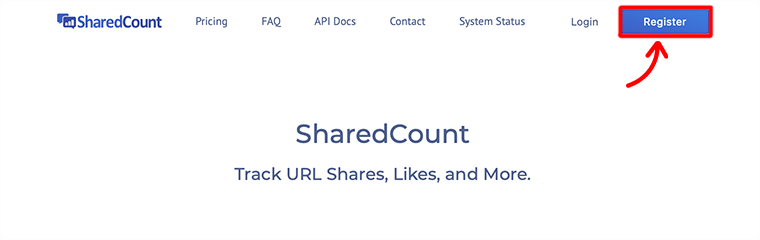
Step 2: Create an Account in SharedCount.com
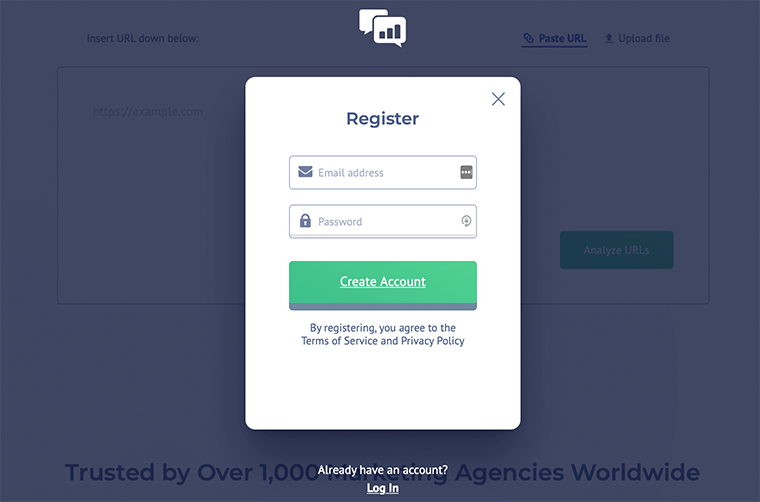
While signing up it’ll ask you for your email id and password and then click on Create Account.
Step 3: Find Your SharedCount API Key
Once you have created the account, it’ll take you to the Account Settings page and there you’ll find your SharedCount API key.
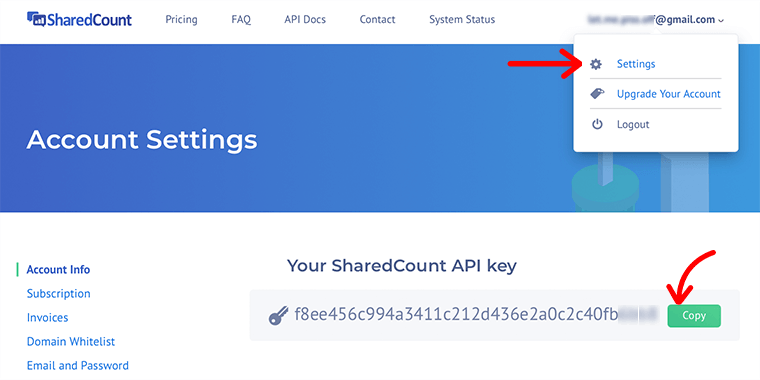
Step 4: Copy and Paste Your SharedCount API Key
You need to then copy that API key and paste it in the SharedCount API Key field.
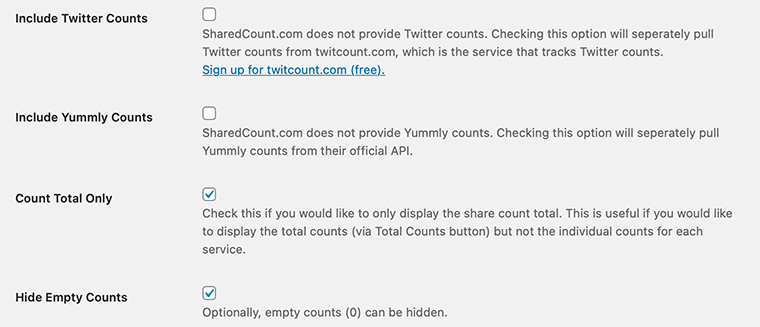
Likewise, just below it, you would also get an option whether to enable counts for Twitter and Yummly. If you enable it then it’ll separately pull the counts from their official API.
Step 5: Enable Count Total Only
After that, you can also enable the box next to Count Total Only if you want to show the total count. Besides that, we also recommend you all to enable Hide Empty Counts. Because this allows you to hide empty counts instead of displaying zero (0) counts.
Finally, don’t forget to click on the Save Changes button to save your settings.
This is how you add social share buttons with share count in the WordPress blog using the Shared Counts plugin.
Wondering if there are more social share plugins? Then, be sure to check our article on the best social media social share plugins. Also, browse our social media marketing guide for small businesses.
Conclusion
We hope this article has helped you with how to add social media share buttons to a WordPress blog.
Using this guide, you can easily add social sharing options above and below content in your WordPress articles. Also, you learned how to add a floating social bar on your WordPress site.
We also believe that you can now display share counts on your website without any hassle.
If you’ve any further queries about how to add a social share button to a WordPress blog, then please leave a comment below. We’ll try to get back to you as soon as possible.
And, if you need help getting started, then make sure to check our step-by-step guide on how to make a website. Also, take a look at our article on what is digital marketing to promote your business and grow.
If you like this article, then please share it with your friends and colleagues. Also, don’t forget to follow us on Twitter and Facebook.