

Do you want to learn how to add keywords to the website so it can show up at the top of search pages? If yes, then stay right here.
Keywords are terms and phrases that people use to search online. This means, adding relevant keywords to your website can help your site rank higher in the Search Engine Results Pages (SERPs). As a result, you get more visitors and organic traffic to your site.
But how do you add keywords to your website in a way that’s effective and super easy? That’s what this article is all about.
Here, we’ll walk you through the process of adding keywords to your website, step by step. Majorly in 4 different platforms, i.e., WordPress, Wix, Shopify, and Webflow. So, let’s dive in!
Why Do You Need to Add Keywords to Your Website?
Before we move ahead, let’s explore some reasons that state why adding keywords to your website is important:

- Improved Ranking: Incorporating relevant keywords boosts your website’s search engine ranking. This increases your website’s visibility.
- Targeted Traffic: By using specific keywords, you attract interested visitors, enhancing engagement and conversion rates for your site.
- Enhanced Relevance: Keyword optimization aligns your content with user searches. This improves their experience by delivering the content they seek.
- Distinctive Identity: Strategic keywords set you apart from competitors. Further, helping your website stand out and attract a specialized audience.
- Effective Organization: Keywords aid in structuring content logically, benefiting both users’ navigation and search engine indexing.
Check out our article on the definitive Search Engine Optimization (SEO) guide to learn more about website optimization.
Having said that, let’s move forward to the main portion of the article.
How to Add Keywords to Websites? (4 Platforms)
Here, we’ll focus on four different website platforms and their in-depth instructions for adding keywords.
1. Adding Keywords to WordPress.org
WordPress is a popular Content Management System (CMS) that allows you to create and manage your own websites without coding. One of the most important aspects of SEO for WordPress websites is adding keywords to your content.

And the best part is that WordPress offers an efficient way to incorporate keywords into your website’s content. Further, helping to improve its visibility on search engines.
Here are the steps on how to add keywords to your website on WordPress.org:
Step 1: Access the WordPress Dashboard
To access your WordPress dashboard, you can open your web browser. And navigate to your website’s admin login page (usually at ‘yoursite.com/wp-admin’).
Then, successfully, log in to your WordPress dashboard by entering your credentials.
Once logged in, you’ll have access to all the tools needed to optimize your website’s content.
You can check out our article on how to log in to the WordPress dashboard for detailed guidance.
Step 2: Add Keywords to Posts and Pages
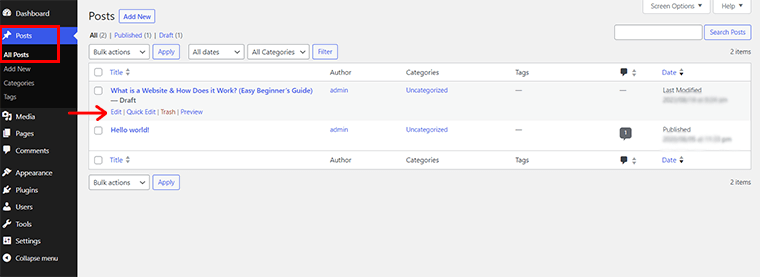
From the dashboard, click on ‘Posts’ or ‘Pages’, depending on where you want to add keywords.
You can either select an existing post/page to edit or create a new one.
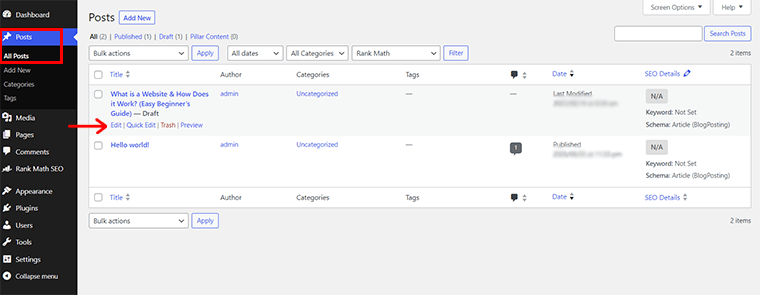
Let’s use one of our current blog posts, ‘What is a Website & How Does it Work?’ as a demo. Start by navigating to ‘Posts’ > ‘All Posts’. Then, click on the ‘Edit’ option of the blog post where you want to add keywords.
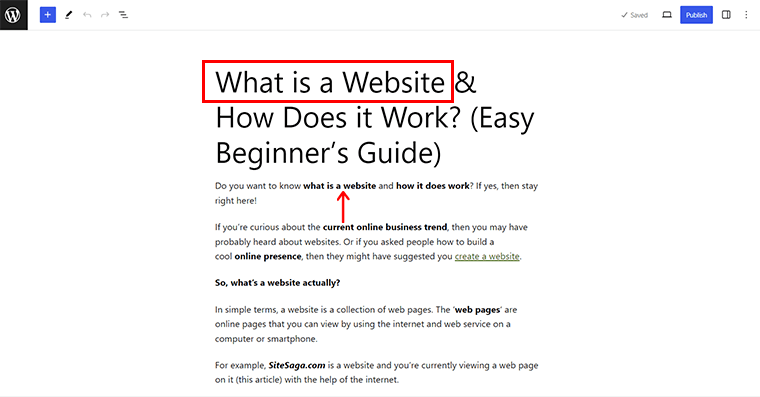
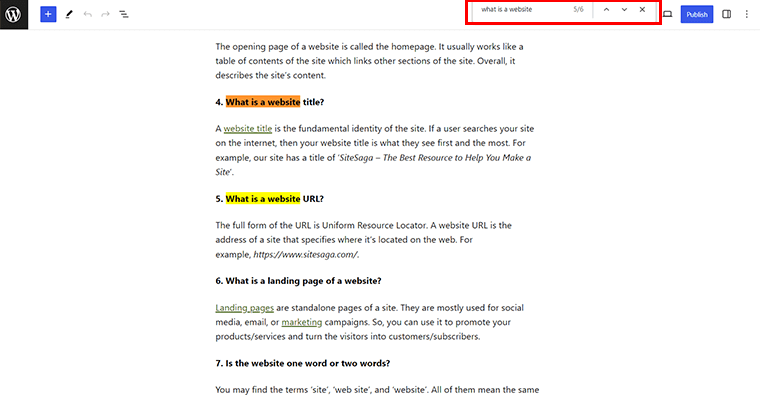
Within the content editor, identify relevant points where you can naturally incorporate keywords. Here, our keyword for the post is ‘what is a website’.
Now, you can place keywords in strategic positions, such as the title and introduction.
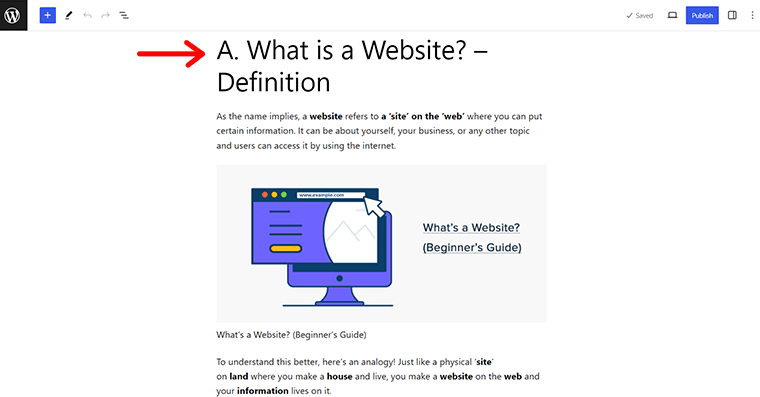
Similarly, place keywords in headings (H1, H2, etc.), and within the content itself. Aim for a natural flow of content that incorporates keywords contextually.
For ease, you can even do a quick search via (Ctrl + F) and type your keyword. Then, explore the places where you’ve added keywords and check their relevance. Also, you can add the keywords manually where you feel they’re important and necessary.
Once done, don’t forget to Save your existing draft or Update it if it’s already published.
Step 3: Utilizing SEO Plugins
There are several SEO plugins available for WordPress that can help you with keyword research and optimization.
One popular plugin is Rank Math. With Rank Math, you can easily add keywords to your posts and pages. And the plugin also helps you optimize your content for search engines.
Let’s begin with the installation of the Rank Math plugin.
From your WordPress dashboard, navigate to ‘Plugins’ and ‘Add New’. Then, search for the ‘Rank Math’ plugin and click on the ‘Install Now’ option.
Shortly, ‘Activate’ it.
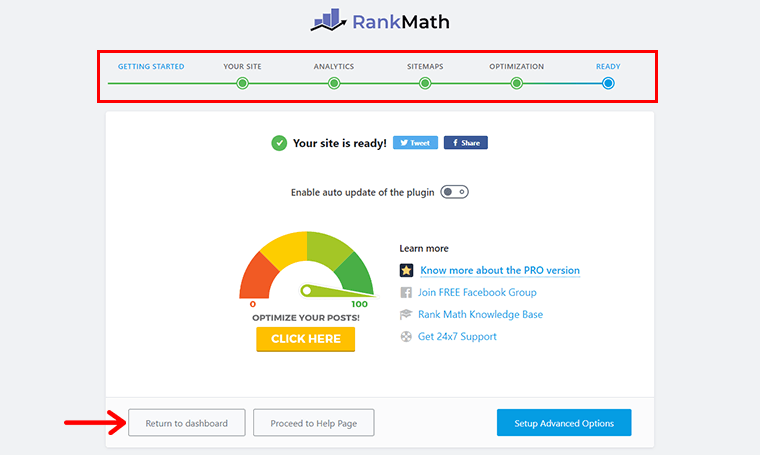
Then, you’ll see a ‘Setup Wizard’. You can quickly select from the choices available to complete the process.
And click on the ‘Return to Dashboard’ option.
Step 4: Optimize Your Content According to Keyword
Now, as done earlier, go to ‘Posts’ > ‘All Posts’. And, click on the ‘Edit’ option of the post where you wish to add the keywords.
With that, you’ll be taken to the content editor. Here, you can see a separate Rank Math editor box on the right-hand side as shown below.
Now, on the Focus Keyword box, add your keywords. Like, ‘what is a website’ for this article.
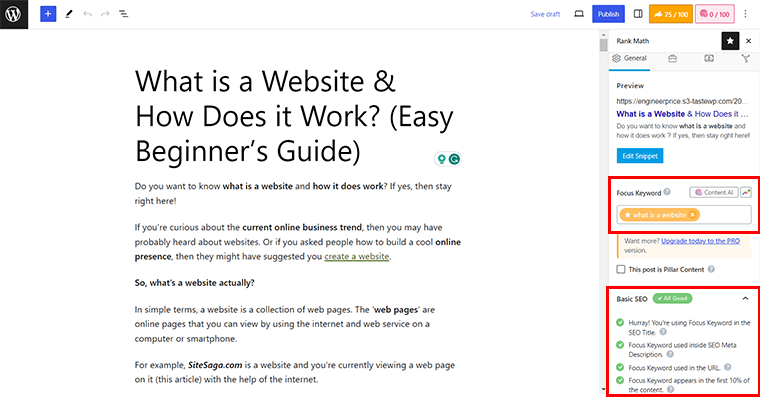
With that, you’ll see whether your content has successfully optimized for Basic SEO or not for the given keywords.
Also, you’ll see the context where you need to optimize your keywords as Errors. Further, categorized into sections like Additional, Title Readability, and Content Readability.
Now, your next task is to optimize your content using the keyword and the given suggestions.
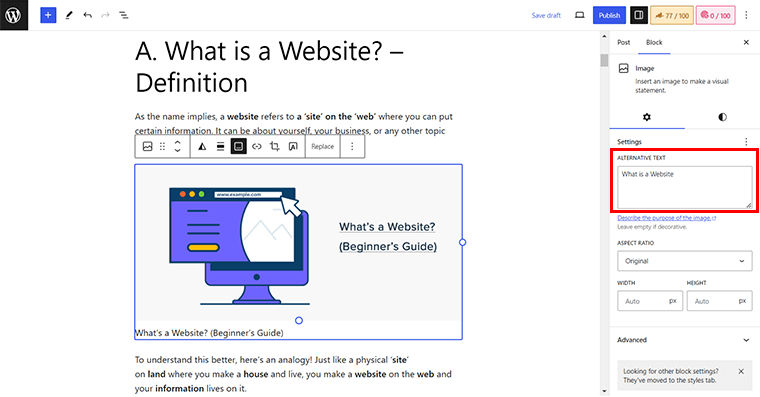
For instance, you can add keywords on the ‘Alt text of your images’.
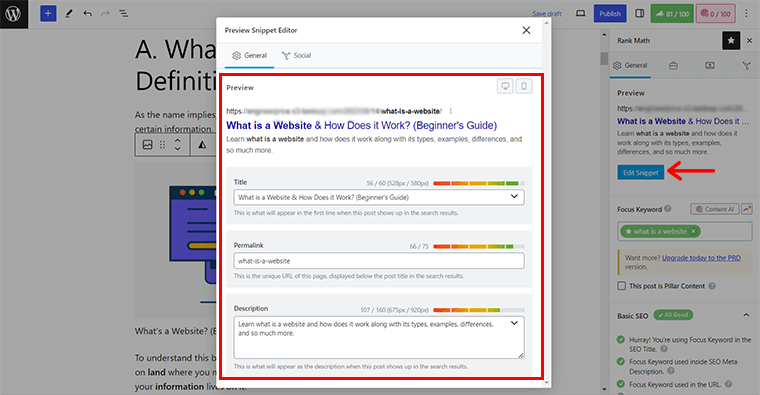
Also, you can ‘Edit Snippet’ where you can add the Title, Permalink, and Meta Description focusing on the keywords.
Further, you can gradually optimize your content following the Rank Math keyword optimization guidelines one by one. To the point where you can see your Content Score as 80+ or in green color.
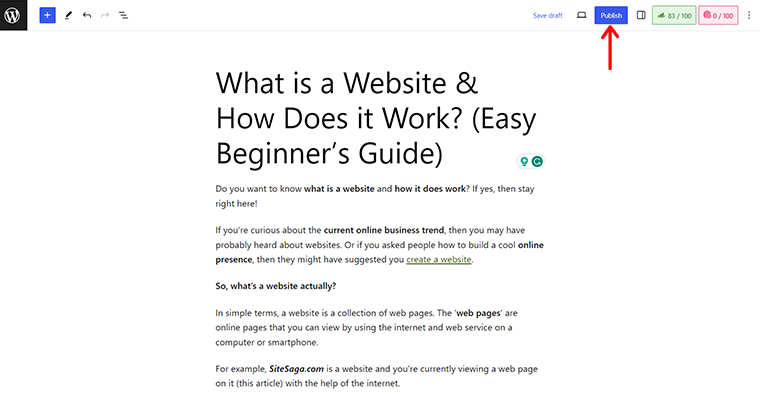
Step 5: Publish Your Content
Last but not least, once you’re satisfied with your content and keyword optimization, click on the ‘Publish’ button. This makes your post/page live on your website.
With these steps, you’ll effectively add keywords to your WordPress.org website. Further, enhancing its SEO performance and increasing the likelihood of your content ranking higher in search engine results.
2. Adding Keywords to Wix
Wix is another popular website builder that allows you to create and manage your websites without any coding knowledge. One of the most important aspects of SEO for Wix websites is adding keywords to your content.

Here are the steps on how to add keywords to your website on Wix:
Step 1: Log into Your Wix Account
Open your web browser and go to the Wix login page on its official website www.wix.com. If you’re new to Wix, then you can quickly create one with the ‘Get Started’ option.

Meanwhile, for those of you who already have a Wix website, simply click on the ‘Log In’ option. And, enter your username and password to access your Wix account dashboard.
Step 2: Adding Keywords to Wix Editor
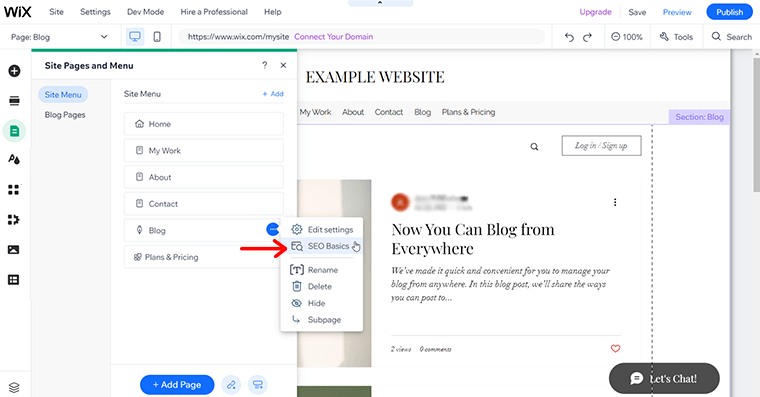
Now, you need to go to your Wix Editor. Then, navigate to the ‘Pages & Menu’ as shown in the below image.
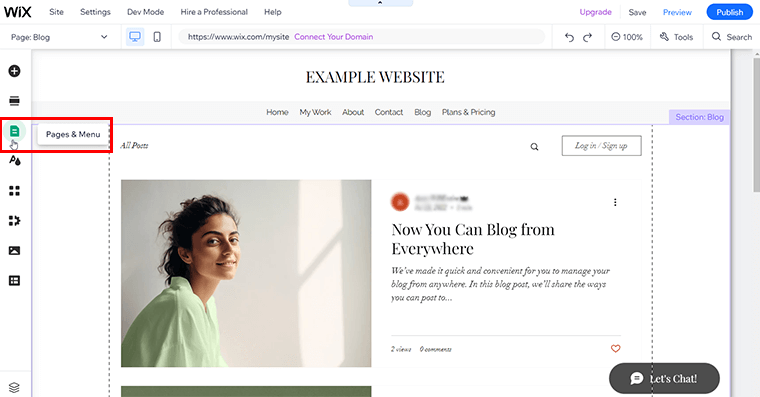
Next, click on the respective page where you want to add keywords on ‘Site Menu’. For now, we’ll see the ‘Blog’ page.
Following that, you’ll also find the ‘three-dot icon’ button right to the Blog. Then, you’ll see the ‘SEO Basics’ option. Click on it.
Here, you’ll find the following settings:
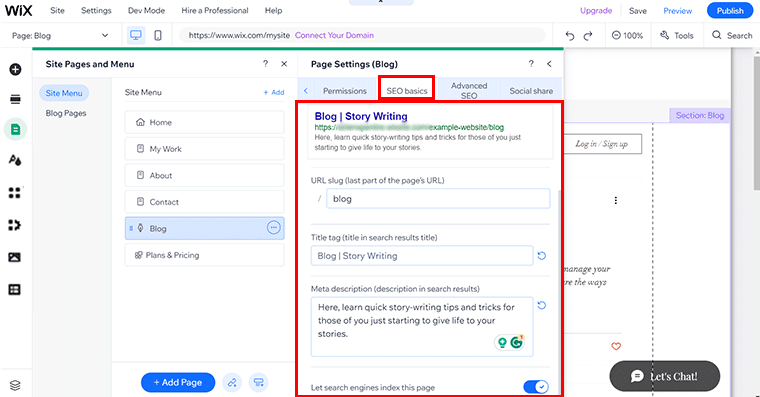
i) URL Slug: Every page URL ends with a slug that tells people what this page is about. For example, if it’s a blog page, then you can keep it as a blog (which is there by default).
ii) Title Tag: This option helps you tell people what this page is about. As it’s the first thing visitors will see when they find a particular page in the search results. For instance, consider, you provide tips and techniques to newbies on story writing.
Now, here you can put the keyword ‘Story Writing’. So, if anyone is looking for story writing insights, then they can quickly navigate your site.
iii) Meta Description: From this option, you can tell more about what your site has to offer and encourage them to view this page. Again, you should clearly mention your keywords here.
Also, don’t forget to enable the ‘Let search engine index this page’ option.
Step 3: Optimizing Meta Tags with Relevant Keywords
When you’re creating a new page or post on Wix, you’ll have the opportunity to add meta tags.
Meta tags are snippets of HTML code that provide information about your page to search engines. It’s vital for SEO, so make sure to include relevant keywords in them.
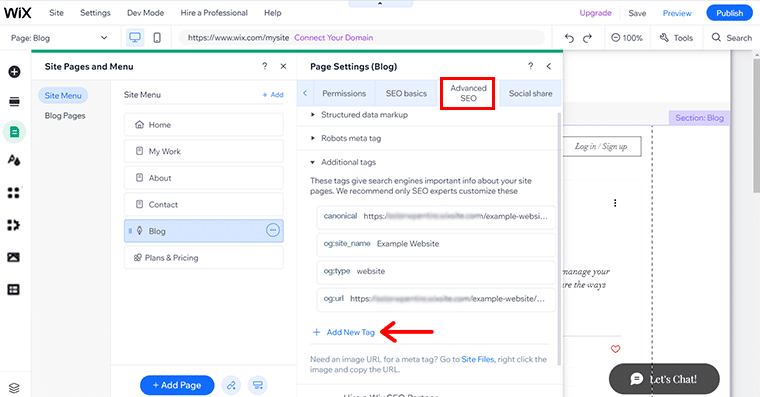
As for now, we’ll add meta tags to the pre-existing pages. For that, all you’ve to do is open ‘Advanced SEO’. Then, click on the ‘Add New Tag’ option.
Now, you need to add your keywords as meta tag codes in the HTML Code field. You need to use the following format:
<meta name=’keywords’ content=’keyword1, keyword2, keyword3’/>
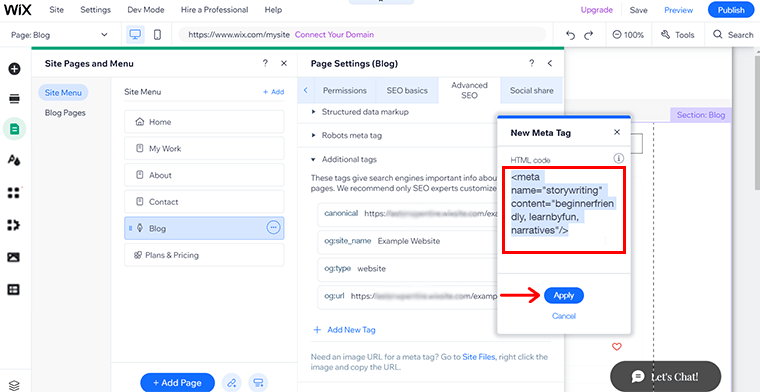
Once you’ve kept your relevant keywords following the above format, click on the ‘Apply’ button. And there you have meta tags optimized with your relevant keywords.
Step 4: Utilizing Wix SEO Wiz to Add Keywords
Did you know that the Wix platform also offers Wix SEO Wiz to add keywords?
It basically consists of a step-by-step checklist that assists you to enhance the SEO of your website based on the details of your keywords. You can inspect the keywords for your checklist once you’ve built it and change them as necessary.
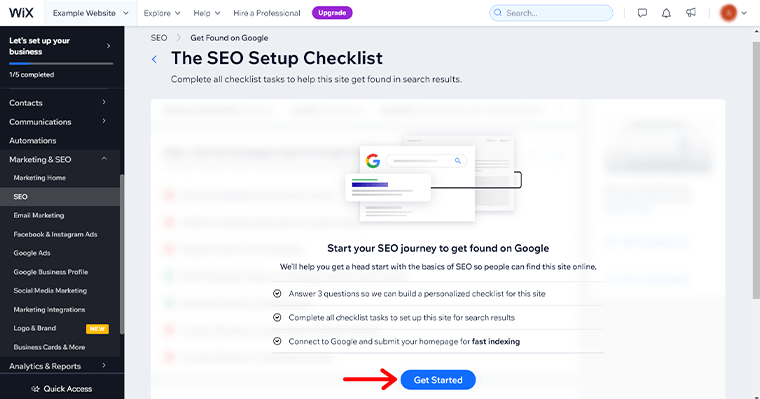
You can easily access SEO Wiz right from your Wix dashboard. Go to ‘Marketing & SEO’ > ‘SEO’. Then, click on the ‘Start Setup’ option as shown in the image below.

Following that, you’ll see the page as shown below. Here, all you’ve to do is click on the ‘Get Started’ option.
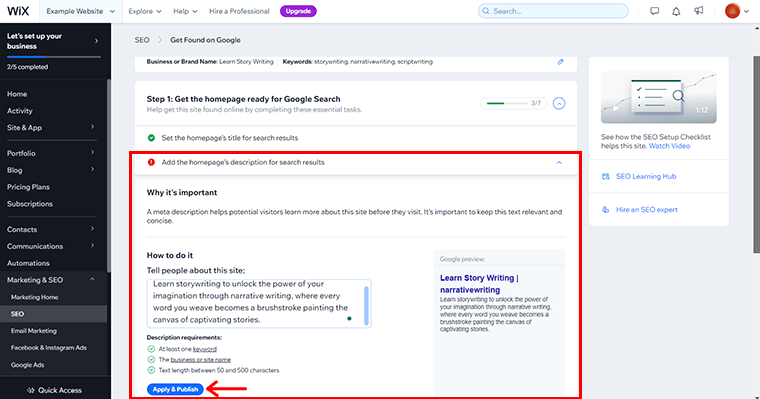
Then, you need to provide your business or brand name’s details.
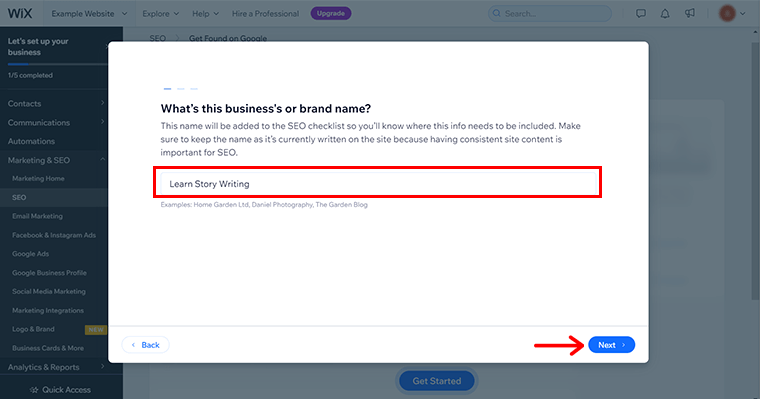
In other words, enter the exact keywords that define your business. For instance, if your website teaches story writing skills then you can write ‘Learn Story Writing’. Proceed with the ‘Next’ button.
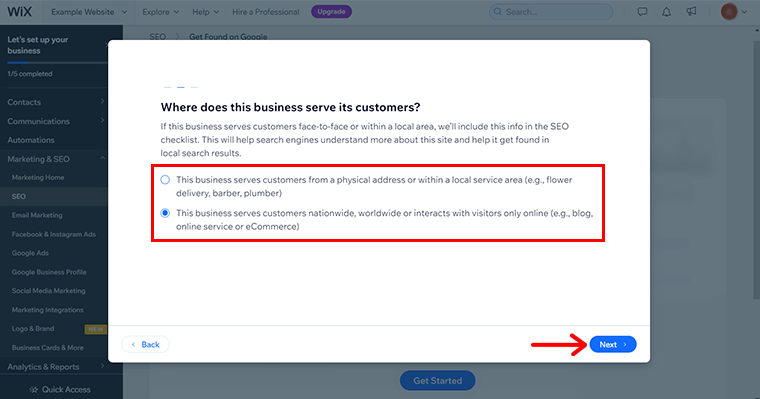
Then, also specify how your business operates i.e. either physically, virtually, or both. And, click on the ‘Next’ button.
After that, you need to type in the exact keywords that you want to use for your site’s checklist. Here, you can go for 3 to 5 keywords each separated by a comma.

Then, click on the ‘Next’ button.
Step 5: Apply & Publish
Now, based on your provided keywords, Wix SEO Wix provides you with several suggestions that you must work on. To have the needed impact on your keywords and increase your site’s visibility.
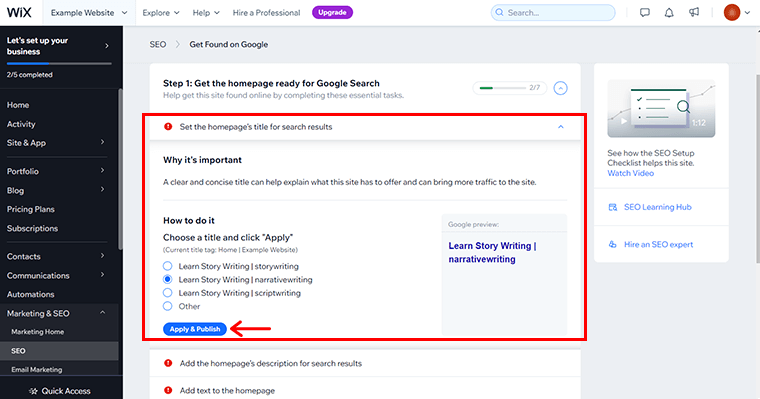
You can individually work on each suggestion as shown in the image above. And simply click on the ‘Apply & Publish’ button.
Hence, with these steps, you can add keywords to your Wix website in a way that is effective and beneficial. This will help you improve your website’s SEO, increase traffic, and boost conversions.
Onto the next platform!
3. Adding Keywords to Shopify
In the bustling world of online retail, Shopify is a leading eCommerce platform. It offers a range of robust tools to elevate your website’s SEO through effective keyword integration. Therefore, seamlessly incorporate relevant keywords into your product titles and descriptions.

With Shopify’s intuitive interface, you can effortlessly manage and fine-tune your keyword strategy to attract organic traffic and drive conversions.
Let’s look at the steps for adding keywords to your online store on Shopify:
Step 1: Log into Shopify Admin
You can log in to your Shopify admin page by accessing Shopify.com. Notably, go to the login page and log in to your admin dashboard there.

Step 2: Optimizing Product Titles & Descriptions
A crucial aspect of effective keyword integration is optimizing your product titles and descriptions.
Begin by thoroughly researching relevant keywords related to your products. Also, these keywords should reflect what potential customers are likely to search for.
To do so, go to the ‘Product’ option from your Shopify dashboard. There, you can add a new product or choose the existing one. Here, we’ll add a new product.
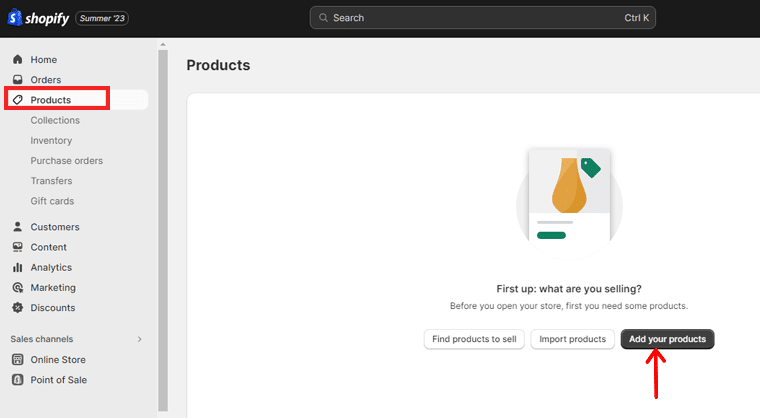
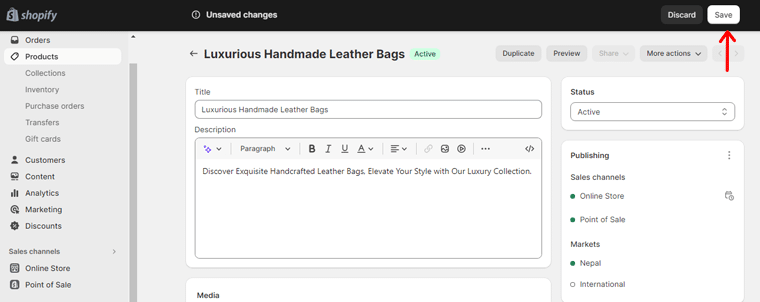
So, click on the ‘Add Your Product’ option. Now you can add the title for the new product.
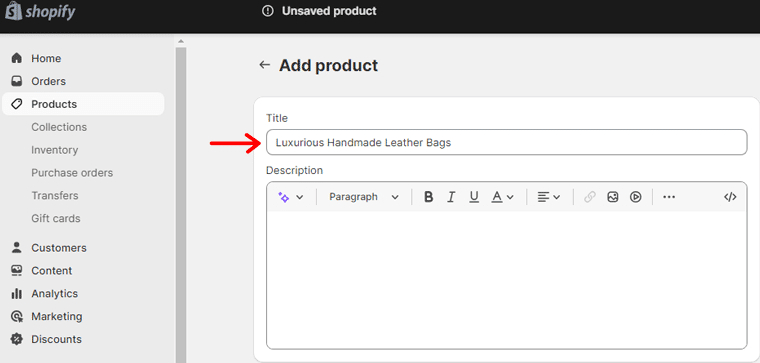
So, if you’re selling handmade leather bags, then your keyword is ‘Handmade Bags.’
For instance, ‘Luxurious Handmade Leather Bags’ can be your title. It captures both the essence of the product and keywords that potential customers might use.
Simply, click on the title bar and add your title for the product.
Moving on to product descriptions, weave in your chosen keywords while ensuring that the content remains engaging and informative. Address the product’s features, benefits, and how it meets the needs of your customers.
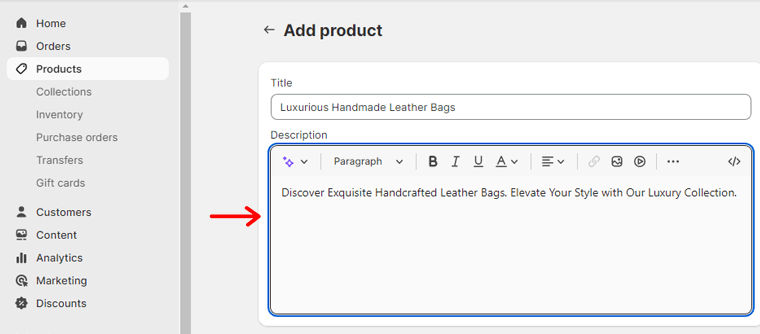
Additionally, utilize long-tail keywords, which are longer and more specific phrases. So it’ll help to cater to niche searches and improve your chances of ranking higher.
Once done, click ‘Save’ to make the changes to your product.

Step 3: Using Shopify SEO Apps
Shopify offers a range of SEO apps designed to simplify the process of optimizing your store for search engines. These apps provide valuable insights and recommendations to enhance your keyword strategy.
Here, we’ll use SEO King for this guide. This plugin helps to unlock the potential of your online store with its robust toolkit. It’ll help you to optimize your products, pages, and images.

Also, it’ll seamlessly scan and enhance every aspect of your shop. Hence, ensuring a top-notch SEO performance.
Let’s begin with installing the SEO King.
Start by clicking the ‘Add APP’ option from your dashboard menu.
After that, a popup box will open with tons of apps. There click on the ‘Shopify App Store’ option.

On the next page search the ‘SEO King’ and click on the ‘Install’ option.
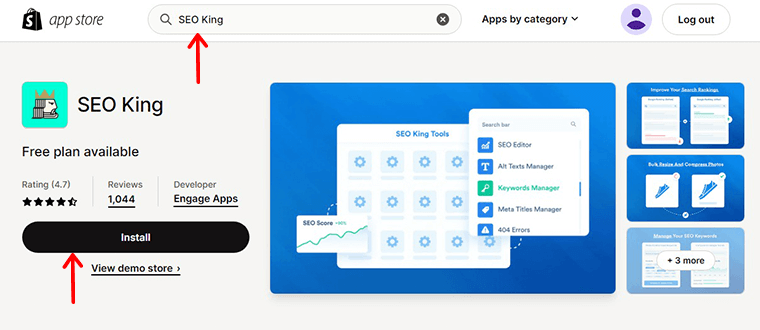
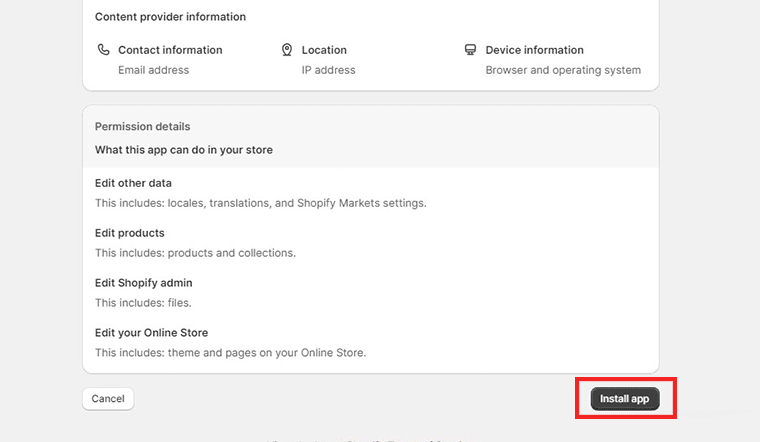
Then it’ll direct you to your dashboard where you can install the app. Simply click on the ‘Install App’ option. And you’re done!
Now open the app and go to the ‘Keywords’ option.
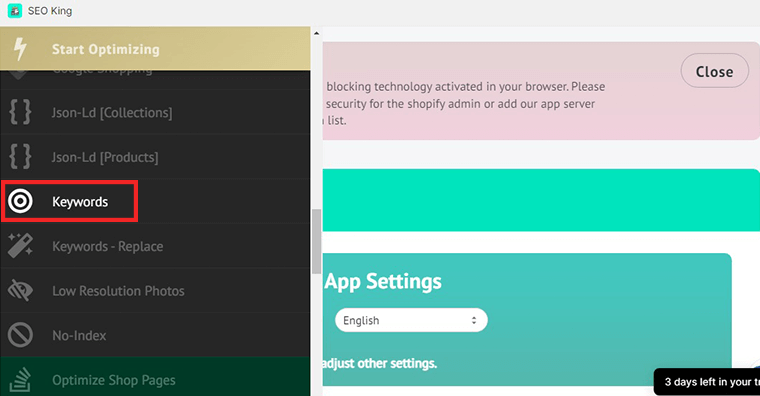
There, you can select from the sections to see your various statistics concerning keywords.
It also has a ‘Keyword Replace’ tool, it’ll replace keywords across one or more of your product descriptions. Every replacement will keep the same capitalization and placement as the word it replaces.
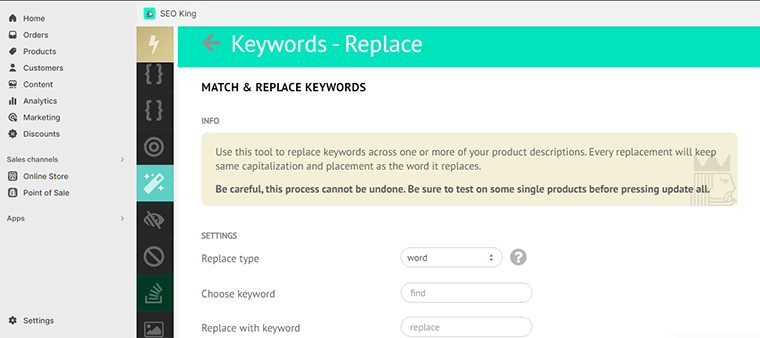
However, you need to be careful, this process cannot be undone. Therefore, make sure to test on some single products before pressing update all.
Besides these, there are other options to optimize your website and products. Go through them and make your products visible on the search engine result page.
Step 4: Update & Publish
Once you’ve fine-tuned your product titles, descriptions, and incorporated keywords, it’s time to update and publish your changes.
Navigate to the product page, and review your changes. After that, hit the ‘Save’ button.
By following these steps, you can easily elevate your online store’s visibility and attract targeted traffic. And ultimately drive your business toward greater success.
4. Adding Keywords to Webflow
The strategic use of keywords remains a cornerstone of enhancing your website’s discoverability. Whether you’re a webmaster or just new to the online presence. Understanding how to effectively add keywords to your website is paramount.

So, we’ll walk you through the process of seamlessly integrating keywords into your Webflow project. Hence, ensuring your content shines brightly in search engine results.
Now, let’s go through the steps to add keywords to your website.
Step 1: Access Your Webflow Project
To enhance the SEO of a specific page on your Webflow website, you can follow these steps:
Log in to your Webflow account and navigate to the project where you want to make SEO changes. Once logged in, open the specific project to which the target page belongs.

Go to the ‘Pages’ panel, and locate the page for which you wish to modify the SEO settings.
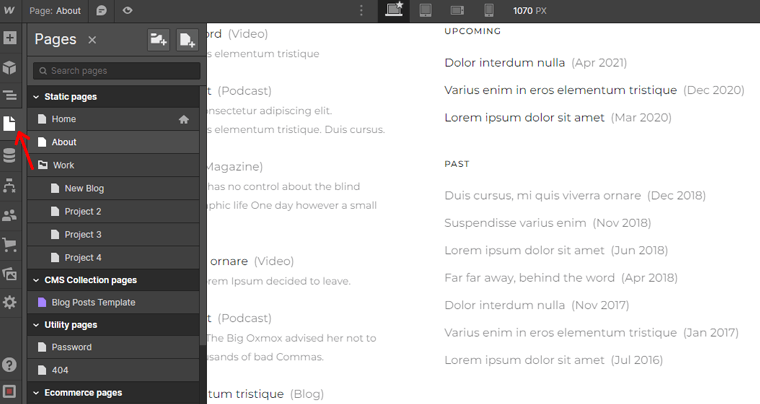
Hover your cursor over the name of the target page. As you hover, a small settings icon will appear to the right of the page name.
Click on the ‘Setting icon’ that has appeared next to the page name.
This action will open up the ‘Page Settings’ menu, allowing you to configure various settings related to the selected page.
Within the Page Settings menu, locate the ‘SEO setting’ option.
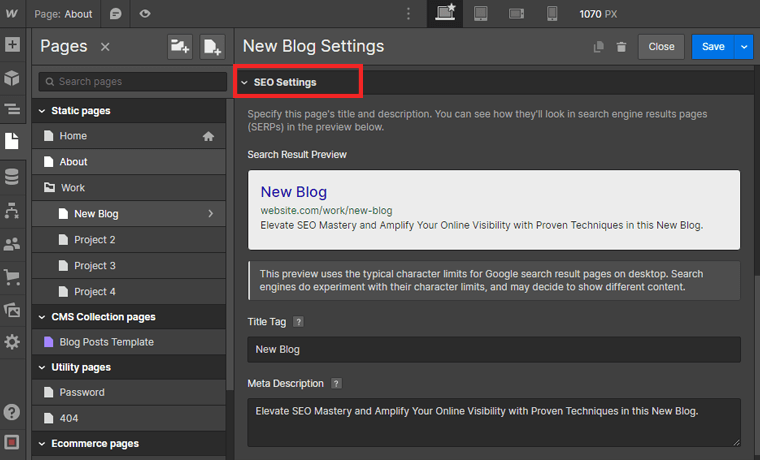
In the SEO settings section, you’ll find fields to customize the SEO elements for the page.
Now, look for the field designated for the ‘Title Tag’. This is where you can input a relevant title for the page that includes important keywords.

Below the title tag field, you should see a field for ‘Meta Description.’ In this field, provide an informative description of the page’s content.
Also, including relevant keywords here can help attract users’ attention and improve the page’s click-through rate.
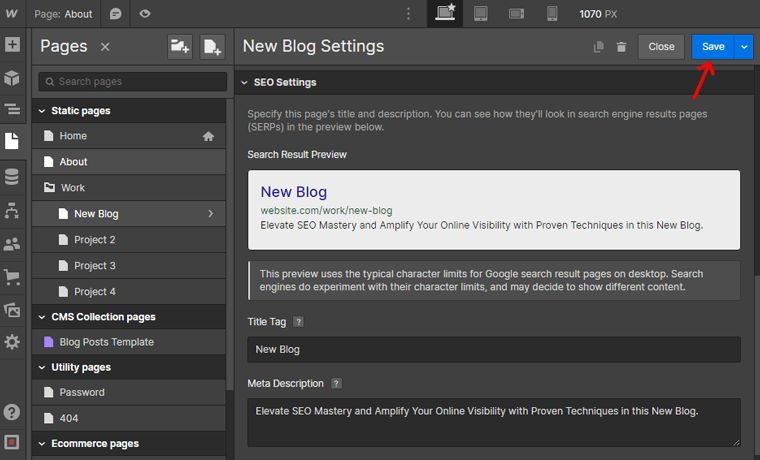
Once you have added the title tag and meta description, make sure to save your changes. Click on the ‘Save’ button within the Page Settings menu.
Step 3: Utilizing Webflow’s SEO Features
Moreover, Webflow is known for its intuitive design capabilities, extends its prowess to SEO optimization. Unlock the potential of your website’s SEO by mastering Webflow SEO features.
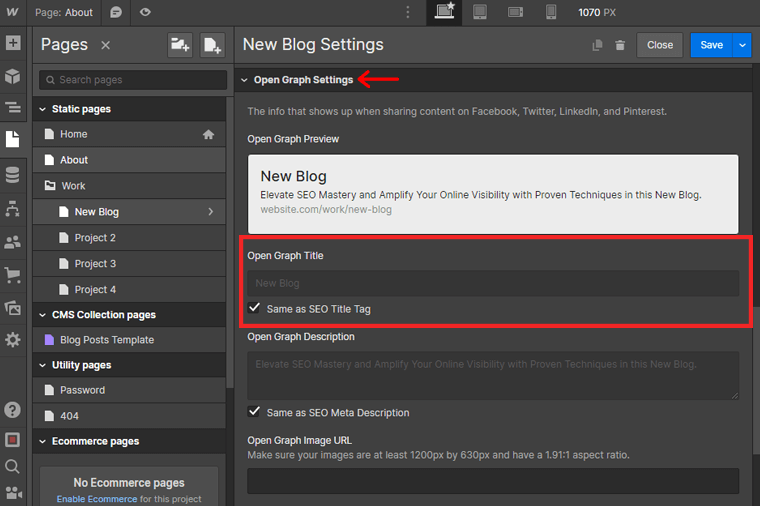
Open Graph Settings
Here. you’ll see the ‘Open Graph Title’ option. This setting helps to show the page’s information when sharing on Facebook, Twitter, LinkedIn, and Pinterest. Also, you can keep the open graph title the same as the SEO title, or change it as you prefer.
You’ll also see a box to add the ‘Open Graph Description.’ Similar to Open Graph Title, you can choose to keep the description as the SEO meta description or make the change.
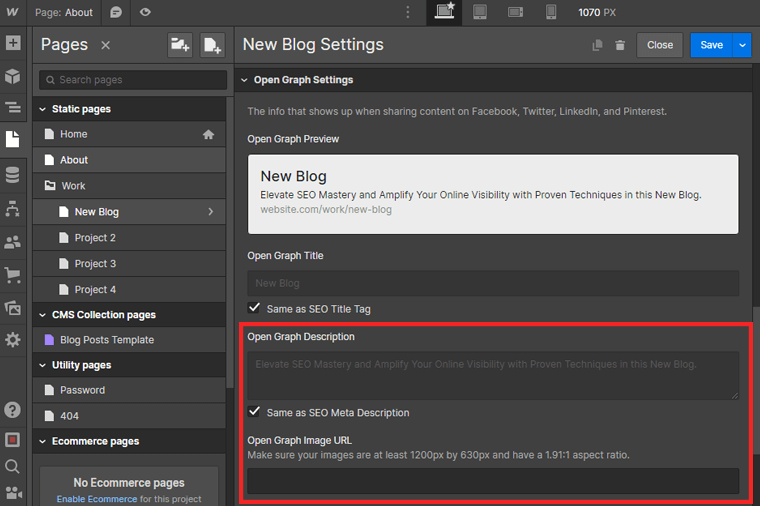
Further, you’ll have the option to add an ‘Open Graph Image URL.’ Make sure your images are at least 1200px by 630px and have a 1.91:1 aspect ratio.
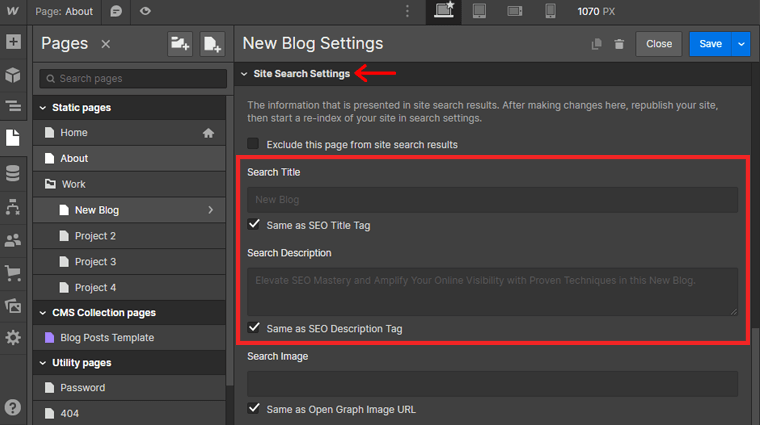
Site Search Setting
Likewise, the Site Search Setting has the option to add a ‘Search Title and Search Description.’ Also, you can opt to keep it the same as the SEO Meta Description. Or you can change it as per your preference.
It also has the option to add a ‘Search Image.’ Here you can add the new image URL or the same as the Open Graph Image URL.
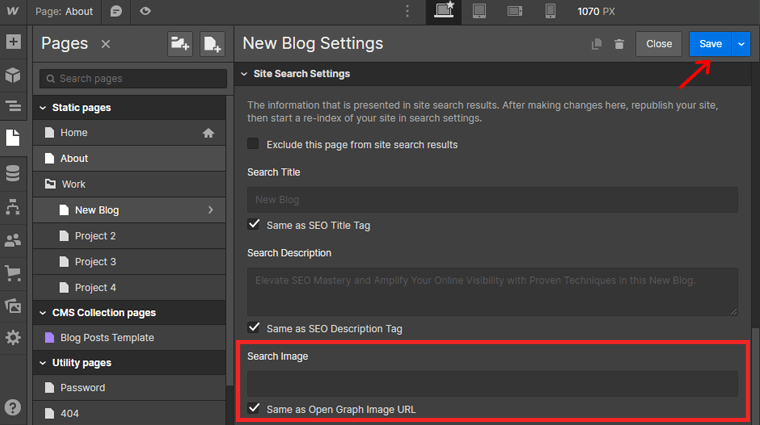
Once done, click on the ‘Save’ button to make the changes.
Step 4: Publish Changes
Finally, when you’re happy with your content and keywords, just press the ‘Publish’ button. This will put your page on your website for everyone to see.

By following these steps, you’ll successfully add keywords to your Webflow website. This will help improve its SEO and make it more likely for your content to show up higher in search results.
FAQs (Frequently Asked Questions)
Keywords are vital in website optimization as they act as bridges between user queries and your content. Well-chosen keywords enhance visibility, driving targeted traffic and aiding search engines in understanding your site’s relevance.
Keywords directly influence search engine ranking. Relevant keywords in titles, headings, and content signal relevance to search engines. Hence, boosting your chances of ranking higher in search results.
Skillful keyword integration involves placing them naturally in titles, headings, and body content. Prioritize user experience while ensuring keywords align with the topic, resonating with both users and search algorithms.
The ideal keyword density varies but generally aims for 1-2% of total content. Focus on meaningful content flow rather than overloading keywords, maintaining readability and engagement.
Internal links connect relevant pages, enhancing user navigation and spreading SEO equity. By using descriptive anchor text with targeted keywords, you create an organized structure that both users and search engines appreciate.
Conclusion
Well, that’s all for now! In this article, we’ve shown how to add keywords to a website.
We hope that this guide helps you to know all the steps to add keywords to your website easily. If we missed any other method you use, then comment on them.
Moreover, if you’ve any queries or suggestions regarding this article, then let us know in the comment below. Besides, you can also share your experience of adding keywords to the website.
You can also check out our other tutorial guides like how to do SEO yourself and how to use AI for SEO.
If you like this article, then please share it with your friends and colleagues. Also, don’t forget to follow us on Twitter and Facebook.