Why does my website say Not Secure? Is this question confusing or worrying you? Then, learn everything about it here!
When your site says “Not Secure,” it’s like a red flag. It means there may be some problems with how safe it is for people to use. This can scare away visitors, and you don’t want that, right?
Moreover, that’s also like a warning that your personal information could be in danger. So, you’d probably leave that website and find a safer one.
Don’t worry! We’re here to help you understand why a website says Not Secure and how to make your website safe again. So, let’s get right into it!
A. What Does Not Secure on a Website Mean?
Have you ever visited a website and seen a message that says, “Not Secure” in your browser’s address bar? It might sound intimidating, but let’s break it down in simple terms.
The “Not Secure” message means that the connection between your device and the website isn’t protected. In other words, the information you share with that website could potentially be intercepted by unauthorized individuals.

Moreover, this “Not Secure” warning is there to protect you from potential security risks. It’s a reminder to exercise caution when sharing sensitive information on such websites.
In the next sections, we’ll delve deeper into why websites display this warning.
B. Reasons Why My Website Says Not Secure
The “Not Secure” message on your website can be a real head-scratcher. It’s essential to understand the reasons behind this label.
Here, we’ll shed light on why websites sometimes declare themselves as “Not Secure.”
1. Lack of SSL/TLS certificate
The main reason for a website to display a not “Not Secure” warning is the absence of an SSL/TLS certificate. Here, SSL stands for Secure Sockets Layer and TSL means Transport Layer Security. Now, don’t let the technical term intimidate you.
Think of an SSL/TLS certificate as a digital passport for your website. So, when you connect to a website, your browser and the site’s server engage in a conversation.
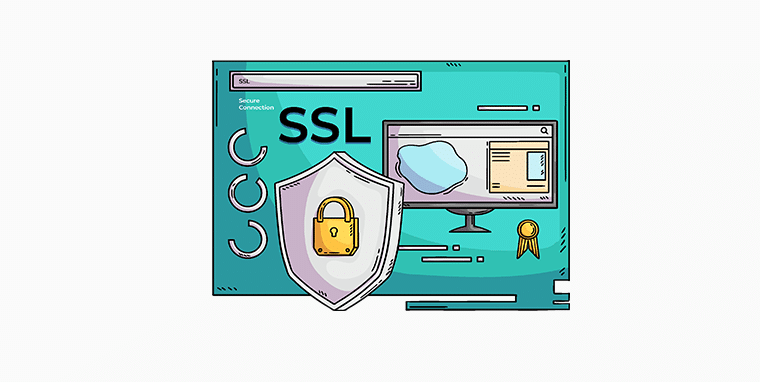
Besides, this conversation contains sensitive information, like login details or credit card numbers. And without an SSL/TLS certificate, this information can be accessed by everyone.
Having an SSL/TLS certificate is important because:
- It scrambles the information, making it unreadable to prying eyes.
- Furthermore, search engines like Google consider SSL/TLS certificates as a trust signal.
- Also, sites with these certificates rank higher in search results.
So, it’s not just about security, it’s also about visibility and trustworthiness.
2. Mixed Content Issues
Next on our list is mixed content issues. And to understand this issue, let’s start with a simple breakdown.
While visiting a website, your browser expects all the elements on that page to be either secure with Hypertext Transfer Protocol Secure (HTTPS). Or “Not Secure” (HTTP) Hypertext Transfer Protocol.
Besides, these elements include images, scripts, and stylesheets. And mixed content occurs when a web page is served over a secure connection (HTTPS).
However, it includes elements fetched from an insecure connection HTTP. This inconsistency triggers the “Not Secure” warning.
Moreover, mixed content can risk your website’s security. While the main page may be secure, the insecure elements can become gateways for cybercriminals to exploit. This can jeopardize user trust, and browsers are quick to alert users to potential risks.
So, what are these insecure elements?
They can be images, JavaScript files, or even CSS (Cascading Style Sheets) hosted on non-secure domains.
For instance, your website’s main page is secure (HTTPS), but it tries to load an image from an insecure source (HTTP). Then the browsers will raise the “Not Secure” flag.
Hence, by addressing mixed content issues, you bid farewell to the “Not Secure” warning and strengthen your website’s security. Ensuring a safer and more trustworthy online experience for your visitors.
One common reason behind this “Not Secure” message is something known as a shared hosting issue. Let’s break it down in simpler terms to ensure everyone can understand the concept.
A shared hosting plan is like renting a small part of a big internet connection. Many websites, including yours, share the same space and resources on one computer. It’s cost-effective but can sometimes lead to security issues if a neighbor’s website isn’t secure.
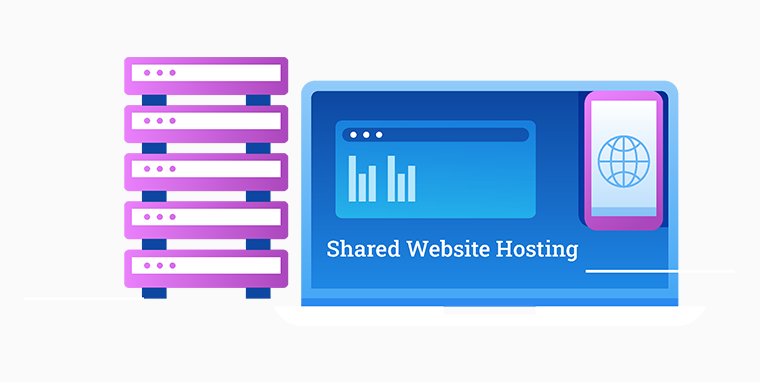
Here’s when the problem can sneak in. When one of your neighbor’s websites on the same server doesn’t prioritize security and becomes vulnerable.
Hence, it potentially affects the security of all the other websites on the same server. Also, can create opportunities for cyber threats that can affect your website.
So, when your website says “Not Secure,” it could be because of issues with the shared hosting environment.
4. Disabled HTTPS Encryption
Another key reason your website might be displaying the unsettling “Not Secure” message is the absence of HTTPS encryption.
Because HTTPS is like a protective shield for your website. It ensures that the information exchanged between your site and its visitors is kept private and secure. Besides, when HTTPS encryption is disabled, it’s likely to let potential intruders into your website.
Here’s how it can harm your website:
- Without HTTPS, any data transmitted between your website and its users can be intercepted by cybercriminals.
- Also, if your website lacks this secure connection, it may rank lower in search results.
- Plus, users seeing a “Not Secure” warning can break their trust in your website. Hence, they bounce away in search of a safer online haven.
5. Not Configuring Security Settings Properly
When you see a not “Not Secure” warning on a website, it’s often because the security settings aren’t in order. There can be various common mistakes, like:
- Your website uses old and vulnerable ways to encrypt data.
- Also, you’re ignoring regular software updates.
Likewise, your website is a house and the security settings are like locks on doors and windows. So, it helps to keep unwanted visitors out.
When these security settings are not configured properly, it’ll cause various problems.
- Data can be easily accessed by cyber-criminals.
- Also, visitors hesitate to stay on a site that’s “Not Secure.”
In a nutshell, not configuring security settings properly can leave your website vulnerable. Consequently triggering that “Not Secure” warning.
6. Outdated Server Software
Not being secure is a common issue, and one of the reasons behind it can be outdated server software. Before we dive into the topic, let’s learn some basics.
A server is like the engine that powers your website. And it stores all the files and data and sends them to your visitors when they come to your site. Therefore, server software is the set of programs and instructions that make this happen.
Furthermore, your server software needs updates to stay secure. So, when it becomes outdated, it might not stop threats effectively.
Henceforth, outdated server software often has known security holes that hackers can exploit. And these vulnerabilities make it easier for cybercriminals to sneak in and cause trouble.
C. Impact of a Not Secure Website
Now that we know the reasons behind the “Not Secure” label, let’s talk about why it matters.
The impact of a “Not Secure” website extends beyond just inconvenience. It can have significant effects on your online presence and reputation.
Here, we’ll dive into the various consequences of running a website marked as “Not Secure.”
- Visitors doubt credibility, fear data risk, and abandon your site, impacting trust and engagement.
- Users are less likely to stay and engage with your content.
- Also, the “Not Secure” warning can lower rankings and reduce visibility.
- It’ll harm conversion, as visitors are less likely to engage in any monetary transaction.
- Also data breaches due to insecurity can lead to legal issues, emphasizing compliance with data protection laws.
Hence, the impact of a “Not Secure” website is like a chain reaction of distrust, poor visibility, and customer loss. Fixing this issue isn’t just about security, it’s about safeguarding your online presence and business.
Now in the next section, we’ll learn how to fix this issue. Here we go!
D. How to Secure Your Website?
Securing your website is like locking the doors and windows of your digital home. It keeps your visitors safe and protects your online space from unwanted intruders.
Here, we’ll walk you through the essential steps to make your website a secure and trustworthy place for everyone.
1. Install Secure Sockets Layer (SSL) Certificate
To make your website say secure instead of “Not Secure,” you need to get an SSL/TLS certificate. Many web hosting providers offer them, and you can often get one for free.
Once installed, your website will proudly display that reassuring padlock symbol and “https://” in the address bar.

For example, our website www.sitesaga.com has the padlock symbol and https:// in the address bar. So, you can rest assured that your data is safe with us.
Having an SSL certificate not only boosts your website’s security but also improves your search engine ranking. Plus, it builds trust with your visitors. When they see that reassuring padlock icon in their browser’s address bar, they’ll know your site is safe.
So, to secure your website and make it trustworthy for everyone, getting an SSL certificate is a smart move.
Here’s a list of the best website hosting services with free SSL certificates.
2. Make Sure Outgoing Links are Pointing to HTTPS
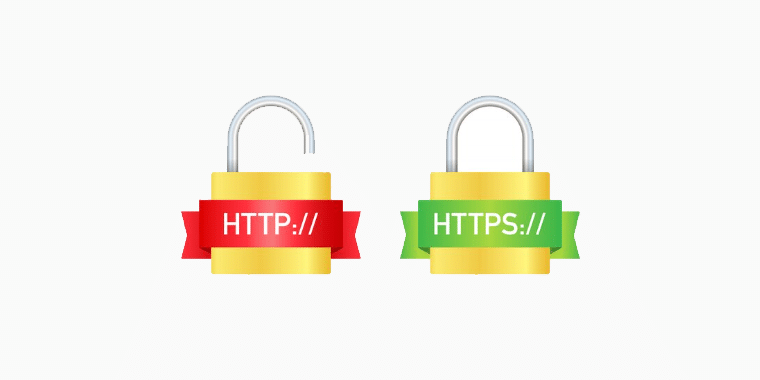
As we have mentioned before, HTTP stands for Hypertext Transfer Protocol. Which is the foundation of data communication on the World Wide Web.
However, it’s not very secure on its own. That’s where the “S” in HTTPS comes in, it stands for “Secure.” So, you can say HTTPS is an advanced version of HTTP, adding an essential layer of security to your website.
In a nutshell, to ensure outgoing links are secure, follow these steps:
The first step is to review all the links on your website, both internal and external. Make a list of the external links that lead to other websites.
Now, visit the websites you’ve linked to and check if they use HTTPS. If they do, great! Your links are already secure. If not, it’s essential to change those links to the HTTPS versions of the websites.
If you’re using a CMS Content Management System like WordPress, then consider using a plugin. For example, Broken Link Checker by AIOSEO can help you find and update insecure links automatically.
This plugin conducts regular scans of your website. Identifying broken links, both internal and external, which lead to 404 pages.
After making changes, thoroughly test your website to ensure all outgoing links now point to secure, HTTPS destinations.
By following these steps, you’ll not only enhance the security of your website but also provide a safer and more trustworthy browsing experience for your visitors.
Remember, in the world of web security, every little step counts toward a safer online environment.
Learn how to check and fix broken permalinks in WordPress here!
3. Add Redirects to Non-HTTPS URLs
When it comes to securing your website, adding redirects to non-HTTPS URLs is a critical step. This may sound a bit technical, but we’ll break it down in simple terms.
Non-HTTPS URLs are web addresses that begin with “http://” instead of “https://”. The “s” in “https” stands for “secure”. This means data transferred between the user’s browser and your website is protected.
Even if you’ve changed your website’s URL to https, most visitors might remember it as http. Or even bookmarked your site with HTTP URLs. To resolve this issue, simply instruct your WordPress to redirect all HTTP traffic to your new HTTPS URL.
To do this, you can use plugins like 301 Redirects if you’re using WordPress CMS. This plugin helps you manage and create 301, 302, and 307 redirects to improve user experience.
Ensuring your website has HTTPS and proper redirects is a crucial step in securing it. It not only protects your visitors but also boosts your site’s credibility.
So, don’t delay to make your website safer today!
4. Update Your XML Sitemaps
In order to boost your website’s security, updating your XML sitemaps may not be the first thing that comes to mind. But it’s a crucial step.
First thing first, XML sitemaps are like maps for search engines. They tell search engines where to find all the important pages on your website.
However an outdated map can lead to confusion. Similarly, if your XML sitemaps are outdated, search engines might not accurately index your content
Here’s How to Update Your XML Sitemaps in WordPress with simple steps:
Step 1: Access Your Website’s Backend and Install a SEO Plugin
You’ll need to log in to your WordPress dashboard to access your website’s backend. Here, we’ll use Yoast SEO for this guide.
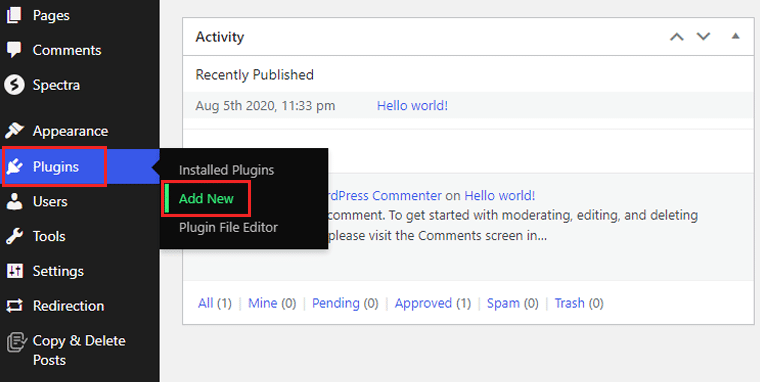
To install the plugin, go to “Plugins > Add New” options.
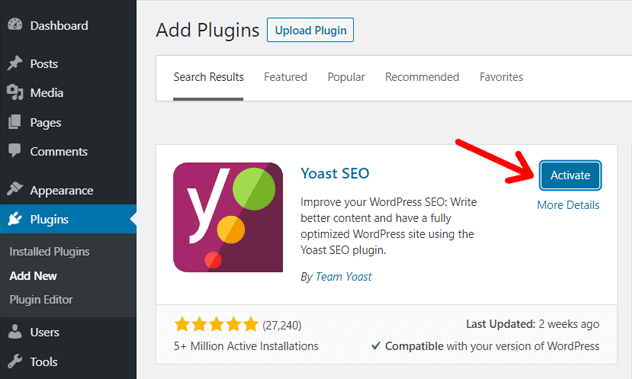
There search for the Yoast SEO and click the “Install Now” option.

Once done, click the “Activate” button to start using it.
Step 2: Navigate to Your Sitemap Files
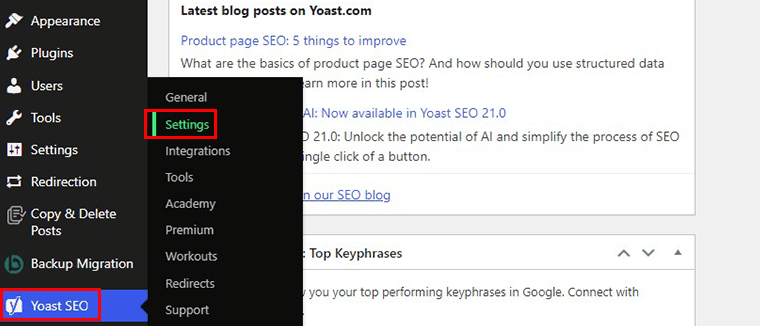
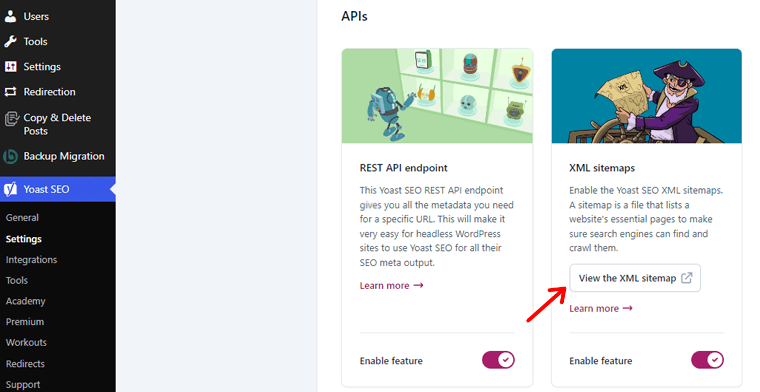
Once your SEO plugin is installed and activated, navigate to the “Yoast SEO > Settings” option.
There on the “APIs” option, enable the “XML Sitemaps” option.
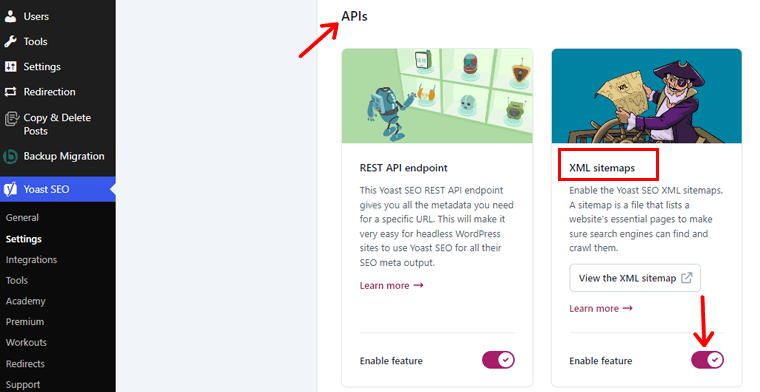
Once enabled, you can click on the “Visit the XML Sitemap” button.
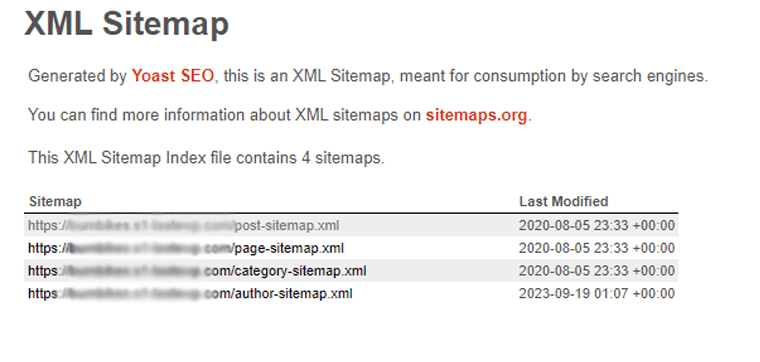
This is what your XML sitemaps generated by Yoast SEO look like.
Step 3: Update Your XML Sitemaps
In some cases, you may need to update your sitemap manually. If you’ve added new pages or made significant changes to your site, then create a new sitemap file or update the existing one.
However, Yoast SEO doesn’t recommend manual updates. There are also static generator tools that can help you make a sitemap whenever you want. But, you’ll have to do this every time you add or change content.
The easiest way to handle this is by enabling the XML sitemap in Yoast SEO. And everything will update automatically whenever you make changes to your website.
And want to know why this matters for security?
- A well-maintained XML sitemap helps search engines understand your website’s structure.
- Also, proper indexing can improve security by ensuring that all your pages are accounted for and accessible.
Updating your XML sitemaps plays a vital role in maintaining a well-organized and secure online presence. Think of it as keeping an updated road map for your visitors and search engines to navigate your website effectively.
For more detailed insights, check out our Yoast SEO plugin review. Also, here’s a list of the best WordPress sitemap plugins to choose from.
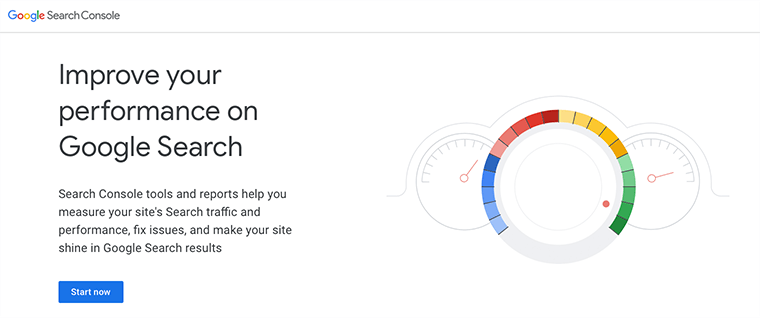
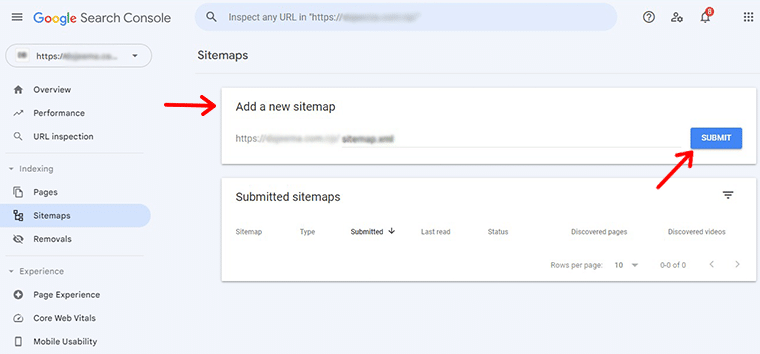
5. Submit your Website in the Google Search Console
Once your sitemaps are updated, don’t forget to notify search engines. You can do this through Google Search Console. This step ensures that search engines are aware of the changes and can crawl your site efficiently.
Here’s how you can do it:
Start by navigating to the “Yoast SEO > Settings > Site Connections” option.

There click on the Google Search Console link on the Google option. This will redirect you to a page.
There you need to select your website. So, click on your website link available under the “Search Property” option.
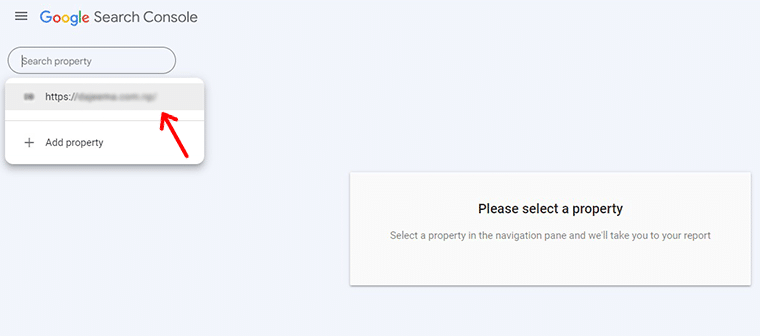
Now enter your website sitemap URL and click on the “Submit” button.
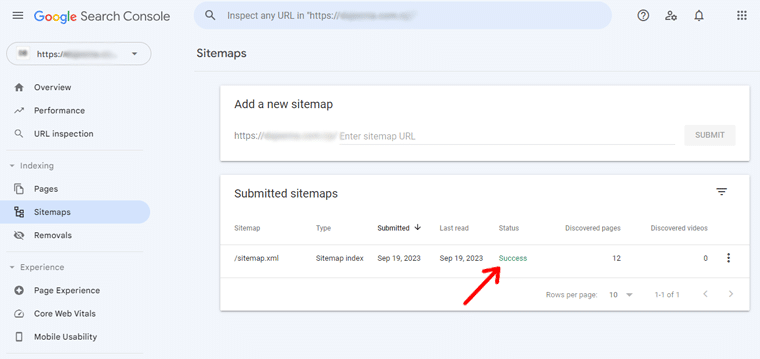
Google will now process your sitemap. Although, it can take some time for Google to crawl and index your site’s pages. But you can easily check the status of your submitted sitemap on the same page.
Regularly monitoring your website helps to enhance your site’s security. It also ensures that your website gets attention in search results.
That’s all for our article on why my website says not secure. Below, we’ll answer some of your burning questions.
Frequently Asked Questions FAQs
Using a “Not Secure” website can pose risks to your online safety and privacy. When a website is labeled as “Not Secure,” it means that the data transmitted between your browser and the website is not encrypted.
You can determine by checking for “HTTPS” in the URL. Also, secure websites have a padlock icon in their address bar. Additionally, reputable websites often display trust badges on their website.
Many older or less reputable websites may not use HTTPS. These could include personal blogs, small local businesses, or outdated platforms. However, it’s becoming increasingly important for all websites to adopt HTTPS for security reasons.
HTTPS provides a high level of security, encrypting data between your browser and the website’s server. However, it’s not entirely immune to hacking. Therefore, regular updates, strong passwords, and security measures are essential to protect against hacking.
First, ensure the website has an SSL certificate and uses HTTPS. You can contact the website administrator to request HTTPS adoption. If you are the site owner, consult your hosting provider for SSL certificate installation and configuration.
Learn everything about website creation in this guide on how to make a website.
Conclusion
That’s all! We’re at the end of this guide on why my website says not secure. Hopefully, you can understand the reason and find a solution to fix the issue.
To sum up, understanding and addressing “Not Secure” errors is crucial for maintaining a user-friendly website. These errors can stem from various sources, including a lack of SSL certificates, outdated server software, or improperly shared hosting issues.
Ignoring or mishandling them can result in unsafe website usage, losing credibility, and negative impacts on search engine rankings. However, by implementing proactive strategies, you can significantly reduce the occurrence of “Not Secure” errors.
If you’ve any further queries regarding this article, then please leave a comment below. We’ll try to get back to you as soon as possible.
You might also want to check our other article on why 404 error occurs & how to fix them and how to secure a domain name.
Do share this post with your friends and family if you find this article fruitful. For more insightful articles, like us on Facebook and follow us on Twitter.