

Do you want to accept donations on your WordPress website without any hassle? Look no further!
Today, it’s essential to have a user-friendly and secure online donation system. Whether you’re involved in a charitable initiative, fundraising for a personal project, or seeking to monetize your website’s content.
With Stripe’s robust features and WordPress’s flexibility, you can now create a seamless donation experience for your users. This helps to build trust and increase donor participation.
Here, we’ll show you how to integrate the powerful payment platform Stripe using a plugin. So that you can effortlessly accept donations and support your cause right from your WordPress site.
Now, let’s dig in!
A) Benefits of Using WordPress for Collecting Donations
When it comes to collecting donations online, there are various platforms and tools available, such as GoFundMe, PayPal, or even social media. However, using WordPress for your donation website offers significant perks for your cause or organization.
Firstly, having your website means you have full control over the donation process. You can tailor the design and content to your needs, add custom features and plugins, and more. This gives you more flexibility and branding opportunities compared to a third-party platform.

Secondly, using WordPress for donations helps you grip its vast community. Plus, it’s one of the most loved Content Management Systems (CMS) with a sea of plugins and themes. What’s more, you can find robust donation plugins that blend with popular payment gateways such as Stripe.
Meanwhile, other fundraising platforms, like GoFundMe, have different pros and cons. As it’s ideal for individual campaigns or emergencies. Where you need to reach a large audience quickly and easily. Yet, they might also charge higher fees, and have more restrictions.
Overall, if you want to collect donations online, then using WordPress is a powerful option that gives you more control and flexibility. With the right plugin and strategy, you can create an amazing donation experience for your donors. And make a bigger impact on your cause.
B) Stripe: Secure Gateway for WordPress Donations

Again, when it comes to securely processing online payments for your WordPress donation website, Stripe is a popular and reliable option.
Here’s, why:
| Benefit | Description |
| Security | Stripe offers a secure payment gateway with robust security measures like encryption and tokenization. This safeguards donors’ sensitive information against fraud and unauthorized access. |
| User-Friendly | Provides a user-friendly WordPress integration via a Stripe plugin. This means you can easily accept donations without requiring complex coding or technical expertise. |
| Recurring Donations | Efficiently manage recurring donations, allowing donors to automate contributions on a monthly, quarterly, or yearly basis. Further, this streamlines the process for consistent and predictable funding. |
| Reporting & Analytics | Provides detailed transaction reporting and analytics. So, you can track donation amounts, view donor information, etc. for data-driven decisions to maximize your impact. |
Overall, Stripe offers a secure and user-friendly payment gateway solution for your WordPress donation website. Its seamless integration, recurring donation capabilities, and robust reporting features make it an ideal choice.
Hence, choosing Stripe as your payment gateway for WordPress donations is the right way to enhance the success of your fundraising efforts.
C) Best WordPress Stripe Donation Plugins
There are several WordPress donation plugins available in the market that can help you accept donations with Stripe. Nevertheless, here we’re our top picks:
1. AidWP
AidWP stands out as one of the finest donation plugins available today for WordPress sites. It comes with a user-friendly interface and uses Stripe as the payment gateway. So, you can effortlessly collect and manage donations for your charitable causes.

Moreover, the setup process is also quite simple. This makes it easy for non-techies to create customizable donation forms and connect with potential donors. Plus, you get powerful reporting and analytics capabilities that give important insights into donation trends.
Pricing:
You’ll be glad to know that AidWP is a freemium plugin. Quickly download the free version from the WordPress.org plugin repository. Or, install it right away from your dashboard.
However, you can opt for the premium version to maximize its full potential. It’s available to you at the starting price of $39.99 per year. That includes normal support, show-hide ‘donation for’ in form, etc.
2. GiveWP
GiveWP is another highly-rated WordPress donation plugin that’s widely used in the market. Besides Stripe, it also works smoothly with other payment options like offline donations and PayPal.
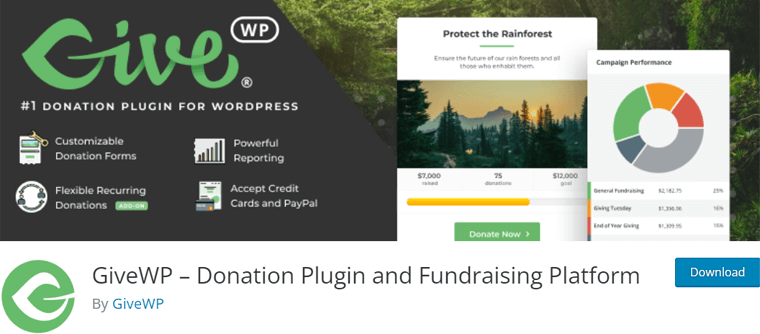
Moreover, it helps you keep tabs on your donors and gain insights from fundraising reports. This boosts your online donations and simplifies managing your supporters. Plus, it’s easy to gauge your donation progress for potential improvements.
Pricing:
GiveWP is also available in both free and paid versions. You can easily download the free version from the WordPress.org plugin repository.
Meanwhile, for the premium version, the pricing starts from $149 per year for 1 site license. That comes with basic add-ons, all payment gateways, and priority support.
Explore more about this plugin from our comprehensive article on the GiveWP review.
3. WP Simple Pay
WP Simple Pay is another lightweight donation plugin in the market. It works quite well for accepting one-time donations via Stripe on your WordPress site. With its simplicity, you can quickly set up a donation form without compromising on security and functionality.
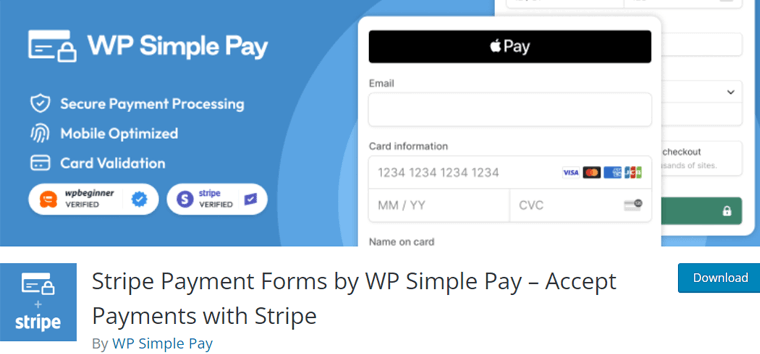
Furthermore, it has several tools to monitor your transactions and gain insights from payment reports. This enhances your online payment processing and simplifies financial tracking. Hence, measuring your payment progress is a breeze.
Pricing:
WP Simple Pay is also a freemium plugin. You can easily download the free version and install it right away on your dashboard.
Yet, you can also opt for the premium version at the starting cost of $49.50/year for 1 site. That includes unlimited payment forms, unlimited transactions, no transaction fee, and more.
Nevertheless, you can refer to our guide article on how to choose the right plugin for detailed information.
Our Recommendation: AidWP Plugin
If you’d like us to recommend it, then we’d go for the AidWP plugin for accepting donations on WordPress with Stripe.
AidWP is quite new in the market, yet it offers offers a comprehensive set of tools, customizable options, and flexible pricing plans.
And the best part is, AidWP is super easy to use. This makes it an ideal choice for organizations of all sizes.
With that, you can seamlessly accept donations, engage your supporters, and maximize the impact of your cause.
Having said that, let’s proceed to learn how you can accept donations on WordPress with Stripe using the AidWP plugin.
D) How to Accept Donations on WordPress with Stripe Using AidWP?
Gone are the days of complicated setups or technical know-how. Even if you’re not a tech-savvy individual, you can now set up Stripe on your WordPress site with ease.
What’s more, accepting donations on your WordPress website with the help of AidWP and Stripe is a straightforward and hassle-free process.
By following a few simple steps, you can start collecting online donations efficiently. Here’s a step-by-step guide to help you get started:
Step 1: Purchasing and Installing the AidWP Plugin
As mentioned earlier, AidWP offers both a free version and a premium version with additional features. So, you must choose between one of the options to move ahead.
Let’s explore the installation process of both options:
I) Free Version of the AidWP Plugin
Similar to any other WordPress plugin, you can quickly install and activate the free version of the AidWP plugin. That too right from your WordPress dashboard.
i) Install the AidWP Plugin
As soon as you log into your WordPress dashboard, go to the ‘Plugins > Add New’ menu.
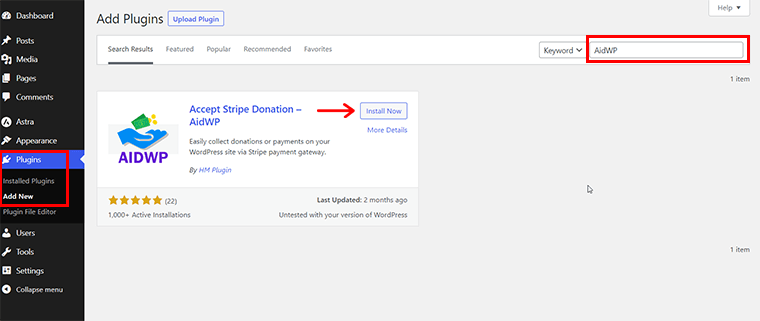
Then, search for the keyword ‘AidWP’ in the search bar. Once you find it, click on its ‘Install Now’ button. Shortly, it gets installed!
ii) Activate the AidWP Plugin
Afterward, activate the plugin by clicking the ‘Activate’ button, which replaces the ‘Install Now’ button.
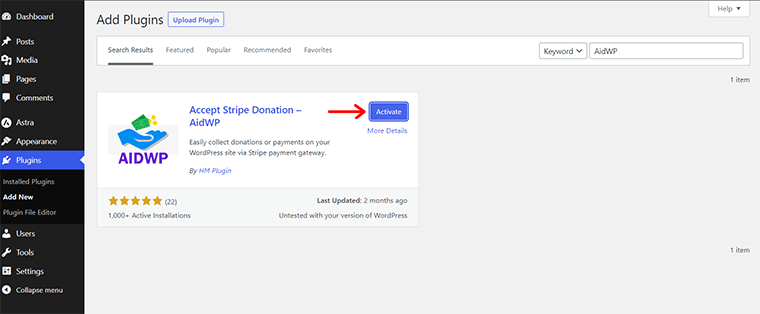
Done? Congratulations! You’ve now successfully installed and activated the free AidWP plugin.
If you’d like to explore an alternative method, then please refer to our guide on how to install a WordPress plugin.
Also, you might notice a newly added menu on your panel, labeled ‘WP Stripe Donation’. This menu currently displays a notification.
Within this menu, you can choose to receive email notifications by clicking the ‘Allow & Continue’ button. These notifications pertain to security and feature updates, educational content, and so forth.
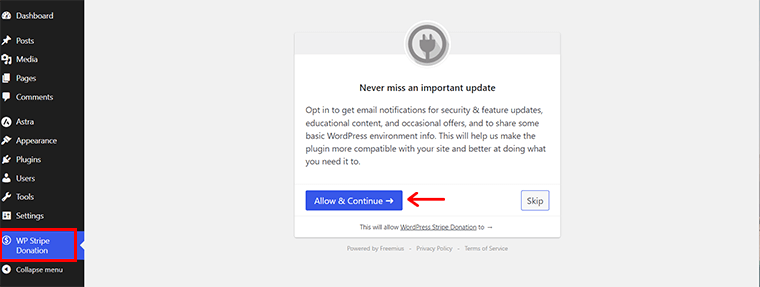
Alternatively, you can click the ‘Skip’ button to disregard the notification.
II) Premium Version of the AidWP Plugin
For a premium plan, you must first purchase it from the official website, and then proceed with installing and activating the plugin. Carefully follow these steps:
i) Purchase the AidWP Plugin
To begin, visit the AidWP website and click on the ‘Buy Now’ button located in the navigation menu.
On the Pricing page, you’ll find three premium pricing options for AidWP. Choose the one that best suits your needs. Once you’ve made your decision, click on the ‘Purchase’ button.

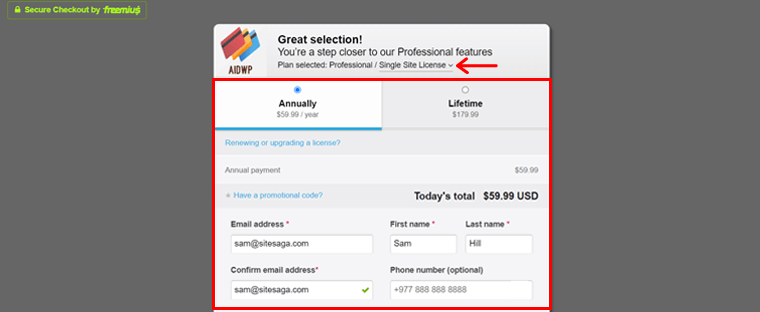
You’re then directed to the secure checkout page provided by Freemius. Here, select the type of license you require, which can be a Single Site, 5-Sites, or 20-Sites license. Also, decide whether you prefer an annual or lifetime plan.
If you have a promotional code, then enter it at this stage. Following that, provide your personal information and choose your preferred payment method, either credit card or PayPal.
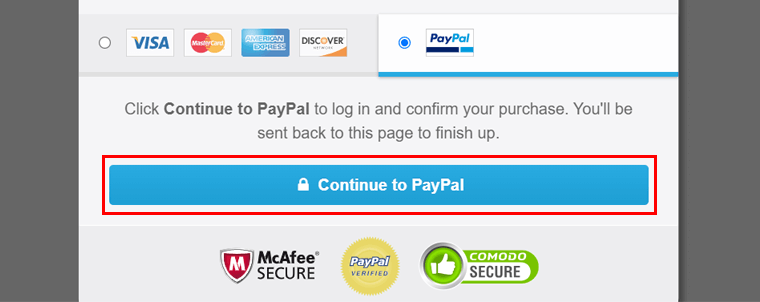
If you opt for a credit card payment, then enter your payment details. Lastly, click the ‘Review Order’ button to complete the purchase.
Alternatively, if you choose PayPal, then click on the ‘Continue to PayPal’ option to finalize the transaction.
Once the process is finished, you’ll receive a notification about an email containing your account and payment details.
There, you’ll find the download link, license key, and installation instructions. Now, download the premium AidWP plugin from the provided link and save your activation key.
ii) Upload and Activate the AidWP Plugin
Again, come back to your WordPress dashboard and navigate to the ‘Plugins > Add New’ menu. From there, click the ‘Upload Plugin’ button.
Next, press the ‘Choose File’ button and upload the downloaded ZIP file. Then, click the ‘Install Now’ button adjacent to it.
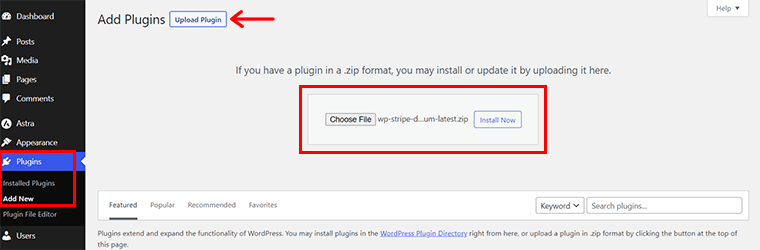
Once the installation process is completed, click the ‘Activate Plugin’ button.
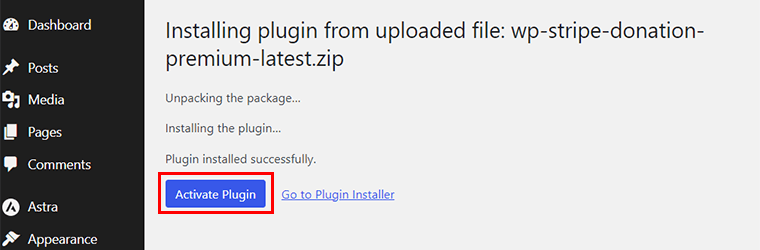
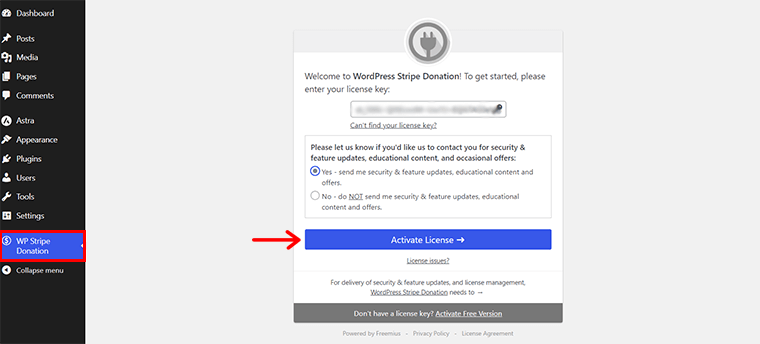
Now, you’ll notice the new ‘WP Stripe Donation’ menu on your admin panel. Here, you should input the license key to activate the plugin.
To do this, enter the license key from the email into the text box. Following that, select whether you want to receive notifications about new features and updates. Finally, click the ‘Activate License’ button.
With these steps completed, the premium AidWP is now ready for use on your WordPress site.
Step 2: Connecting the Stripe Payment Gateway
Before you can start accepting donations, you need to connect AidWP with your Stripe account.
To do so, all you’ve to do is navigate to the ‘WP Stripe Donation > Key Settings’ menu.
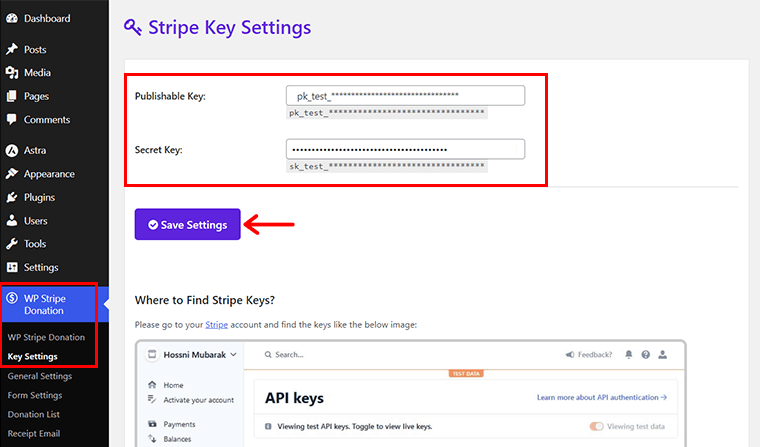
In this section, you will encounter a brief form to complete. Simply input the ‘Publishable Key’ and ‘Secret Key’ from your Stripe account. Then, click the ‘Save Settings’ button to establish the connection.

Afterward, expect to receive a notification message on this interface confirming a successful update shortly.
Step 3: Configuring the AidWP Plugin
To tailor the AidWP plugin to your specific requirements, you’ll need to configure its settings. There are different sections to consider:
I) General Settings
The first one we’re configuring here is General Settings. For that, simply navigate to the ‘WP Stripe Donation > General Settings’ menu. Here, you will find essential configurations for the plugin’s functionality.
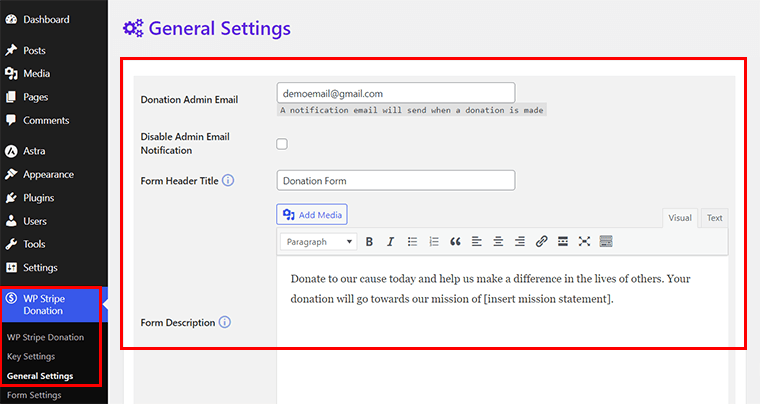
Here’s a breakdown of the key settings you’ll find in this menu:
- In the ‘Donation Admin Email’ textbox, input the email address where you wish to receive donation notifications.
- Check the ‘Disable Admin Email Notification’ option if you prefer not to receive these notifications.
- Add a title to your form in the ‘Form Header Title’ field, such as ‘Donation Form.’
- Provide a description for the purpose of your donation requests in the ‘Form Description’ text area.
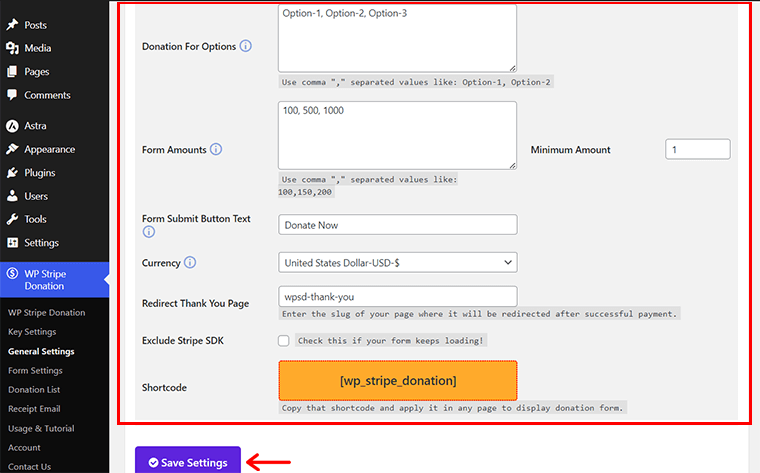
- Under ‘Donation For Options’, specify the various donation choices you want to offer, separating them with commas (e.g., Option-1, Option-2, Option-3).
- Likewise, you can establish predefined donation amounts in ‘Form Amounts’, such as 100, 500, 1000, and so forth.
- Set the minimum donation amount in the ‘Minimum Amount’ field.
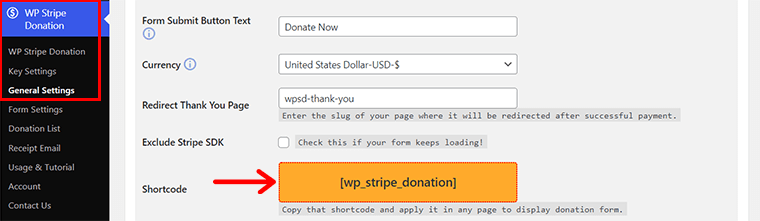
- Enter the text you want on the form’s submit button in the ‘Form Submit Button Text’, such as ‘Donate Now.’
- Choose a currency from the dropdown menu, which offers more than 150 options, in the ‘Currency’ section.
- Input the slug of the ‘Thank You’ page in the ‘Redirect Thank You Page’ field.
Finally, save these general settings by clicking the ‘Save Settings’ button. Once done, you’ll see the success notification of information updated.
Moving forward to the next configuration.
II) Form Settings
It’s time to set up the donation form settings. To do this, go to ‘WP Stripe Donation > Form Settings‘ in your admin panel.
You’ll find two tabs there: Content and Styles.
With the free plan, you’ll have access to basic form settings, but with a paid plan, you’ll unlock more options for customization.
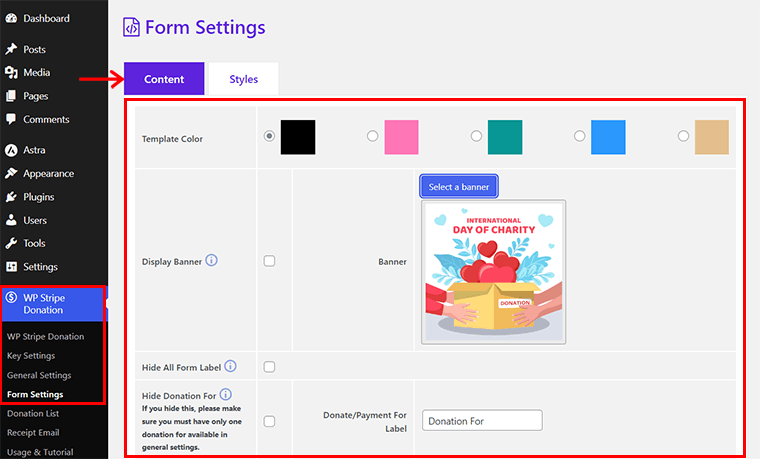
Firstly, let’s explore and configure the ‘Content’ tab:
- Choose one of five template colors.
- Enable the ‘Display Banner’ option and click ‘Select a banner’ to add an attractive banner image.
- Customize labels for fields like comments, captcha, address, and donation/payment.
- Set the width for the form and button.
- Select one of three ‘Form Header Types’: Title-Description-Banner, Banner-Title-Description, or Title-Banner-Description.
- Toggle the option to display total donations made today.
- Apply conditions to donors if needed.
Once you’ve configured the Content tab, save your settings by clicking ‘Save Settings’.
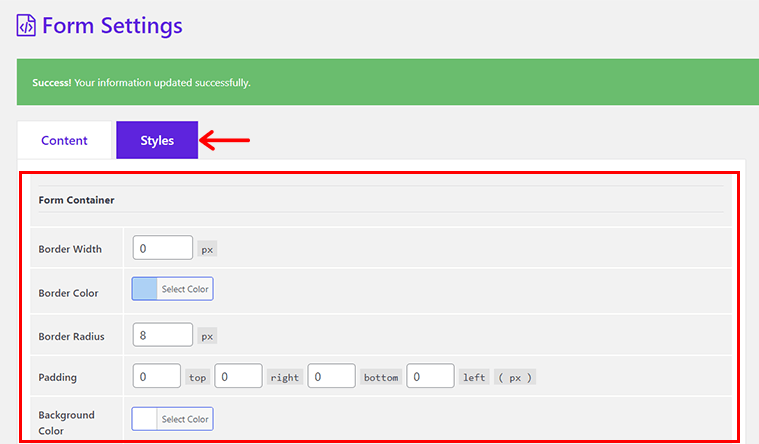
Next, head to the ‘Styles’ tab and use the customization options for the form container, input fields, and button. Here, you can adjust colors, sizes, radius, width, and other design aspects.
Finally, don’t forget to save your styling choices by clicking ‘Save Settings’.
Having said that, let’s proceed to last but not least configuration.
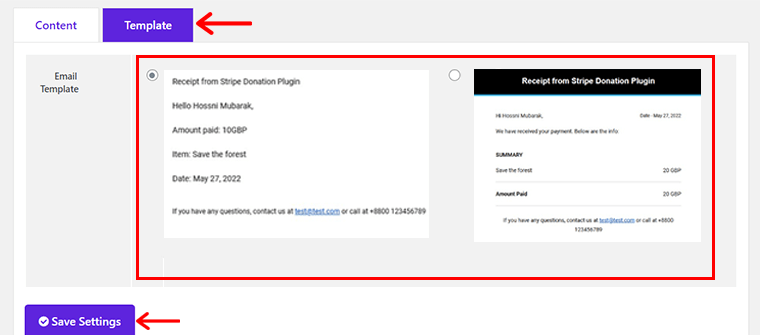
III) Receipt Email Settings
If you previously activated the email notification feature, then now it’s time to ensure you adjust the email receipt settings. For that, all you’ve to do is navigate to the ‘WP Stripe Donation > Receipt Email’ menu.
Now, within your interface, you will find two tabs: Content and Templates.
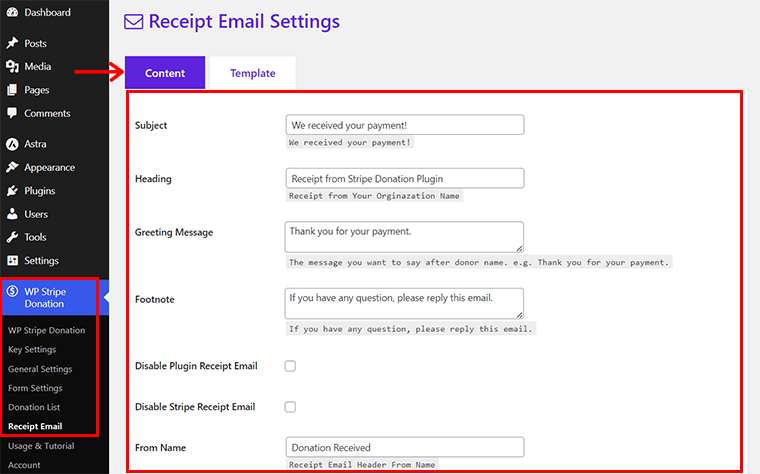
Here, you can configure the entire email on the ‘Content’ tab. Follow these steps:
- Subject: Enter the subject you wish to display in the email notifications.
- Heading: Include the email’s heading.
- Greeting Message: Keep the greeting message focused on the email’s main content.
- Footnote: Add a call-to-action for donors to respond to the email.
- From Name: Specify the name from which donors will receive the email.
- From Email: Indicate the email address donors will see when they receive a notification.
Once you have completed these steps, click the ‘Save Settings’ button.
Meanwhile, on the ‘Templates’ tab, simply select one of the two email templates to use. And, then click ‘Save Settings’.
With that, we’ve successfully completed the configuration process. Now, let’s move forward to inserting a donation form on a page.
Step 4: Create a Donation Form Using a Shortcode
Once you’re done with the installation and configuration, your next step is to create a donation form. Thankfully, AidWP provides a shortcode feature that can easily help you create a donation form via shortcodes.
To begin, access the ‘WP Stripe Donation > General Settings’ menu.
At the bottom of this interface, you will find a ‘Shortcode’ option. Proceed by copying the shortcode ‘[wp_stripe_donation]’.
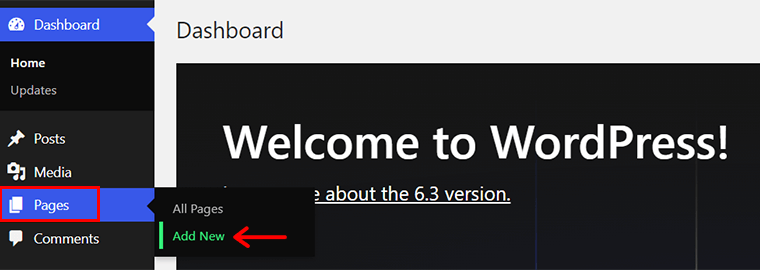
Following this step, navigate to the ‘Pages > Add New’ menu to create a new page.
Within the page editor, provide a title such as ‘Fundraising Effort’.

Next, locate and insert a ‘Shortcode’ block using the ‘+’ option located at the top-left corner. Paste the previously copied shortcode into this block.
Lastly, click the ‘Publish’ button to activate and live your donation form.
Step 5: Sneak Peek of the Donation Process
Last but not least, your job is to preview the page to ensure the donation form appears correctly on your website. This will help you picture the processes that your donors will take on your website. Let’s begin!
First, your website visitors will open your site and locate a menu item in the navigation labeled ‘Fundraising Effort‘.
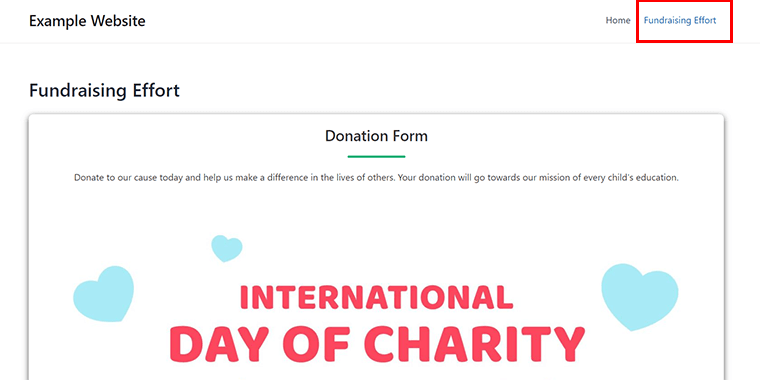
Upon clicking it, the pages will load, presenting the donation form. Here, individuals can select their preferred donation amount from the available choices. Also, choose a donation category you have added.
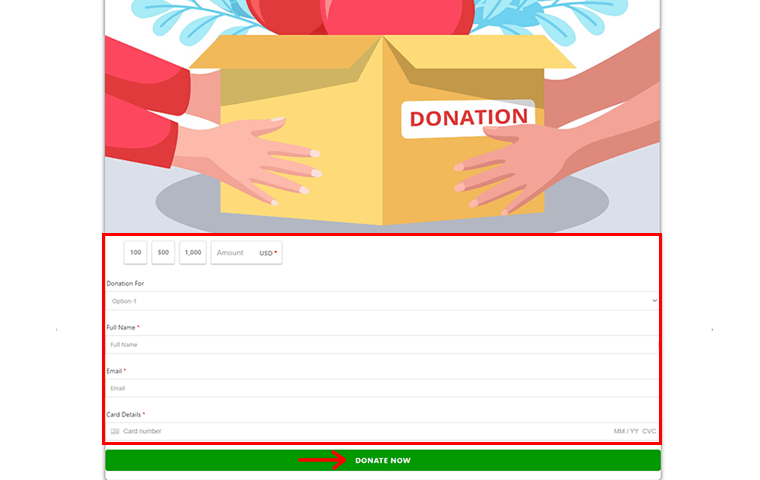
Following this, they will input their personal details based on the enabled fields. Subsequently, donors will be prompted to enter their card information. Lastly, they must click the ‘Donate Now’ button to finalize the transaction.
What’s more, donors will receive a ‘Thank You’ page and a confirmation email upon completing the donation.

Similarly, you can also access donation information via the ‘WP Stripe Donation > Donation List’ menu in your dashboard. Furthermore, you’ll also receive an email notification regarding the donation.
That’s all for now! Hopefully, you have completed the entire process of accepting donations on WordPress with Stripe using AidWP.
E) Frequently Asked Questions (FAQs)
Here are some relevant FAQs on accepting donations on WordPress with Stripe:
A: Stripe is a secure and popular payment gateway that allows you to accept online donations. Its ease of use and robust security make it an excellent choice for WordPress donations.
A: Yes, you need a WordPress website to integrate Stripe for accepting donations. WordPress offers a user-friendly platform for creating a professional donation page.
A: No, you don’t need coding skills. Many WordPress plugins, like AidWP, GiveWP, etc simplify the integration process. Further, making it accessible to users with various technical backgrounds.
A: Yes, Stripe is highly secure and PCI compliant. It employs encryption and other security measures to protect payment data and donor information.
A: Most WordPress donation plugins, including AidWP, offer features to send automated thank-you emails and donation receipts to donors.
A: Yes, Stripe charges transaction fees for each donation processed. The fees can vary depending on your location and the type of Stripe account you have.
Are you wondering what makes a good website so you can easily opt for potential donors? Well, you can check our article on the ultimate checklist to a good website.
Conclusion
And that’s all, folks! This wraps up our article on how to accept donations on WordPress with Stripe.
We believe we’ve covered all the essential details to accept donations on WordPress with Stripe in the easiest way possible. We hope you now have a clear grasp of how to accept one.
Also, here we’ve used the AidWP plugin to accept donations on WordPress. If this plugin aligns with your needs, then we encourage you to give it a try for accepting donations.
Do share your experience of accepting donations on your WordPress website if you’ve already used AidWP.
Still, any further queries related to how to accept donations on WordPress? Then, please don’t hesitate to post them in the comment section. We’ll guide you to our best.
Browse our other articles such as best web hosting for nonprofits and how to make money with a website without selling anything.
Finally, follow us on our social media handles Facebook and Twitter to view similar articles like this.