Do you want to know how to backup your WordPress site for free? If yes, then stay right here.
Imagine waking up one day to find your website in trouble. It can be a cyberattack, a problematic update, or a simple error. These unexpected problems can happen at any time.
Hence, it’s crucial to keep your website safe. For that, you must regularly take site backups. This makes sure your website’s content, design, and settings are safe. And the good news is, you can do this for free when it comes to WordPress websites!
In this beginner’s guide, we’ll show you how to backup your WordPress site for free. So, go through these simple steps to ensure your WordPress site is secure. Let’s begin!
What is a WordPress Site Backup?
Before diving right into the steps, let’s learn about what a WordPress site backup is.
A WordPress backup is the process of making a copy of your WordPress website. This secures your website’s files and database from data loss or destruction.
When you take a WordPress site backup, you can include all your files, like the WordPress core, theme, plugin, media, and database. Also, your pages, posts, comments, etc.
Some reasons for taking backups are to prevent your website from:
- Data loss by accidental deletion of content or files.
- Security breaches like hacking or malware.
- Server issues like hardware failures, server crashes, or hosting service problems.
- Problems caused by updates to the WordPress core, theme, or plugin.
- Natural disasters.
In addition, backing up your WordPress site lets you restore your website to a previous state in case of unexpected events. Hence, if you don’t want to lose your website, then you should regularly take site backups.
Learn all the different ways to secure your website in this ultimate guide.
Why is it Important to Backup Your WordPress Site?
By the definition itself, you should have figured out that backing up your WordPress site is crucial. Also, you may have guessed some reasons why it’s important.
Have a better look at the significance of taking WordPress website backups below:
- A backup recovers your website in case of data loss from all the unexpected events.
- If you changed something on your site that you don’t like, then you can restore a previous version from the backup.
- Suppose you want to migrate your website to a new host. Then, you can backup your website, letting you smoothly move it without losing data.
- Let’s say you want to test new changes on your site without affecting the live version. Then, you can use the backup to restore your site to its original state.
- Without backups, recovering your website can be time-consuming and expensive.
- Having regular backups gives peace of mind. Now, you can focus on your business without worrying about data loss.
Note: There are many ways to create a WordPress backup. You can use your web host’s backup feature or manually create a backup. The easiest of all is to use a dedicated WordPress backup plugin.
No matter which method you use, ensure backups are stored in a safe place. Also, don’t store your backups on the same server as your site. Because this can put them at risk of being lost or corrupted.
3 Free WordPress Backup Plugins
Now, we’ll list some of the best WordPress backup plugins you can use on your site for free. Because picking the ideal plugin for your WordPress website can be a bit hectic. So, you can use one of the following 3 suggestions, which meet your requirements the most.
Without further delay, let’s get to know them!
1. UpdraftPlus
UpdraftPlus is one of the most popular and trusted WordPress backup plugins, with over 3 million active installations. Using its free version, you can backup your website to a storage location like Dropbox, Google Drive, DreamObjects, Rackspace Cloud, etc.
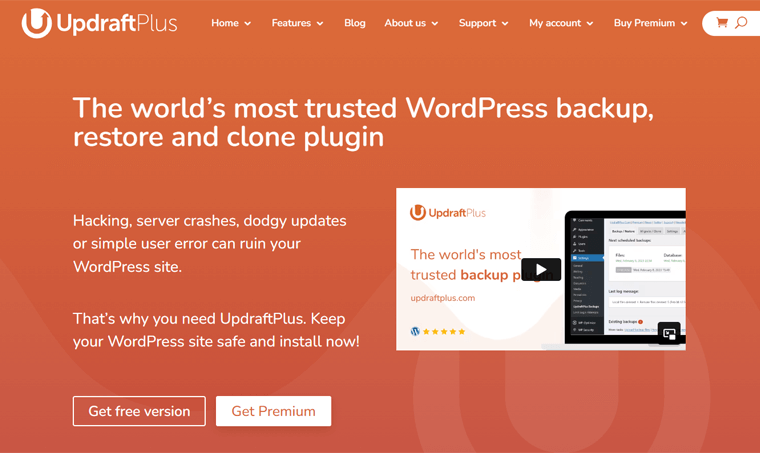
Moreover, it lets you restore your WordPress site with just 3 clicks. Simply put, you must select which components to restore, such as plugins, themes, databases, etc. Then, click to start the restoration process. Lastly, click again to return to the main screen; that’s it!
Key Features:
- You can take backups manually or schedule them to run every 2, 4, 8, or 12 hours, daily, weekly, monthly, or fortnightly.
- Easily migrate your website to another host, server, or domain. Meaning, you can download the files from the source and upload them to your destination.
- Also, its built-in search-and-replace engine finds old strings and replaces them to reflect the new location. This reduces the risk of broken links or missing files.
- Its premium version offers 1 GB of integrated storage with UpdraftVault.
- Check the detailed reports from its paid version to verify the integrity of the backup files.
Pricing:
UpdraftPlus is a freemium WordPress backup plugin. This means you can find both free and premium versions of it. The free plugin is downloadable from the WordPress.org plugin repository. Another way is to simply install the plugin from your admin dashboard.
If you want more features, then go with the paid version. In fact, it contains the following pricing plans to choose from:
- Personal: $70 per year, up to 2 websites, and all the premium features.
- Business: $95 per year, up to 10 websites, and all Personal plan features.
- Agency: $145 per year, up to 35 websites, and each Business plan feature.
- Enterprise: $195 per year, unlimited sites, and every Agency plan feature.
- Gold: $399 per year, all Enterprise plan features, 50 GB UpdraftVault storage.
2. Everest Backup
If you want to store your website’s backups in the cloud for free, then use Everest Backup. This plugin seamlessly integrates with your cloud storage and stores your backup files.
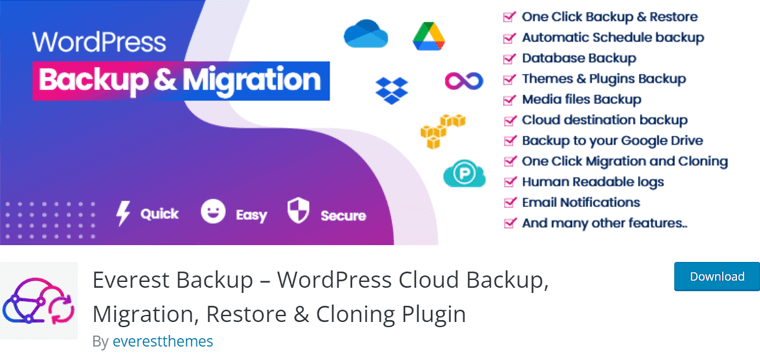
Suppose you’re uploading your backup files to a folder in Google Drive. Then, you can manage all those files from your WordPress dashboard. With its premium version, you can integrate this plugin with OneDrive, Dropbox, Amazon S3, etc.
Key Features:
- You can take manual or automated backups with just a simple click.
- Also, it lets you restore your backup data with a click of a button.
- If you use this plugin on your original and destination hosts, then you can create and transfer backup files using a simple migration key.
- Gives advanced reports with notifications about backup completion and vital events.
- Shows human-readable logs to let you know what’s happening on your backup files.
- Supports WordPress multisite installations. So, you can backup and restore the entire multisite network at once.
Pricing:
Everest Backup is also a freemium WordPress plugin. You can download the free plugin from WordPress.org’s plugin directory or install it right from your dashboard.
To purchase Everest Backup Pro, you must select one of these premium pricing schemes:
- Personal Plan: $59 per year, 2 websites, yearly updates, cloud storage add-ons, etc.
- Business Plan: $79 per year, 21 websites, and all Personal plan features.
- Agency Plan: $129 per year, 99 websites, and every Business plan feature.
If you want to know more about this plugin, then read our Everest Backup review here.
3. Duplicator
Duplicator is a reliable and free WordPress backup plugin that creates a ZIP file of the files of your site, called a package. You can use this package to migrate your WordPress site to any location. It can be on the same server, across servers, or on any WordPress host with zero downtime.
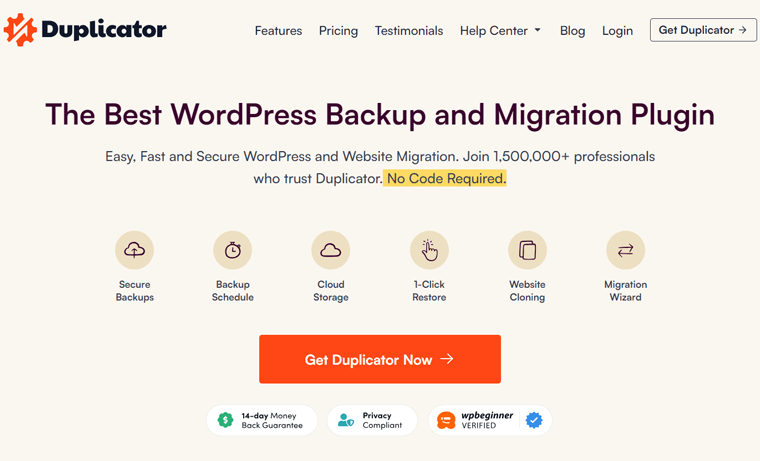
In addition, Duplicator lets you use your pre-configured sites in multiple locations. With that, you don’t have to configure your favorite theme, plugins, or content. This eliminates rework and speeds up the creation of websites.
Key Features:
- You can download a live site to localhost for development.
- Also, it lets you duplicate your website in a staging area or vice versa.
- Manually backing up your WordPress website or parts of a website is possible.
- Using its paid version, you can schedule backups automatically.
- The pro plugin stores your website on cloud services like Dropbox, Google Drive, Microsoft OneDrive, etc.
Pricing:
Similarly, Duplicator is also a freemium WordPress backup solution. You can install the free plan from your admin dashboard or get it from WordPress.org’s plugin repository.
In addition, Duplicator contains the following premium pricing options for more features:
- Basic: $49.5 per year, up to 2 sites, unlimited backups, standard support, etc.
- Plus: $99.5 per year, up to 5 sites, Basic features, hourly scheduling, and more.
- Pro: $199.5 per year, up to 20 sites, Plus features, multisite network, priority support, etc.
- Elite: $299.5 per year, up to 100 sites, Pro features, and premium support.
Our Recommendation: UpdraftPlus
Among the above-mentioned 3 free WordPress backup plugin suggestions, we recommend going with UpdraftPlus. Because we tested and researched this plugin thoroughly.
Accordingly, here are some of the reasons why we prefer this plugin:
- It’s simple to configure and use.
- Currently, it’s one of the most well-known backup plugins.
- You can take manual and automatic backups with its free version.
- Unlike other plugins, its free version supports various storage locations.
- Lets you select the files you want to add to a backup.
With that, let’s jump into our main topic of interest!
How to Backup Your WordPress Site for Free? (Using UpdraftPlus)
Now, let’s start our guide on how to backup your WordPress site for free! For this tutorial, we’ll be using our recommended UpdraftPlus plugin.
In a nutshell, you must install and activate the plugin. After that, configure it to schedule the backups. We’ll also have a look at its process of taking manual backups and restoring them.
So, let’s begin!
Step 1: Install and Activate UpdraftPlus
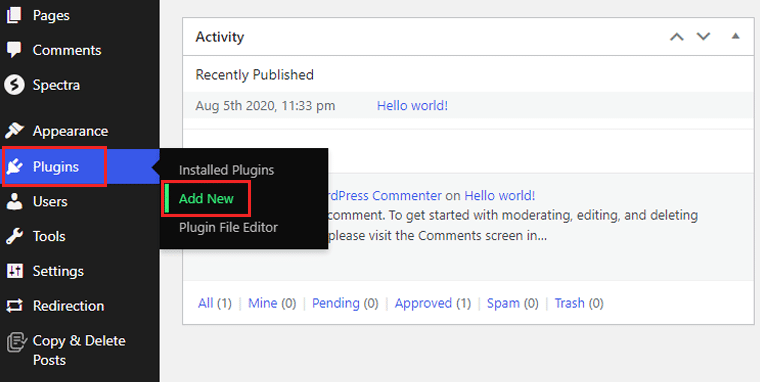
First, log into your WordPress dashboard and navigate to the ‘Plugins > Add New’ menu.
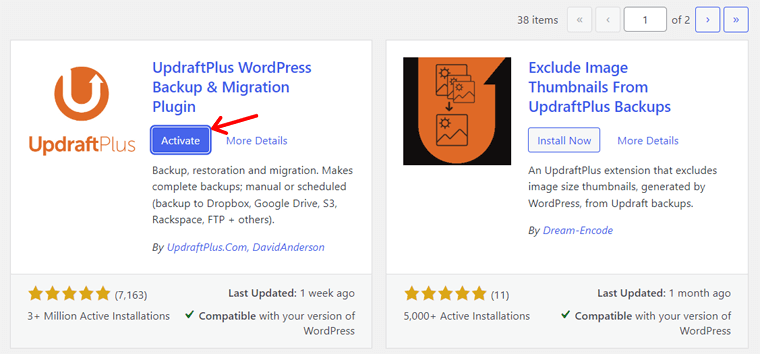
There, type the keyword ‘UpdraftPlus’ on the search bar. Then, search for ‘UpdraftPlus WordPress Backup Plugin’ in the results. Once you find it, hit its ‘Install Now’ button.
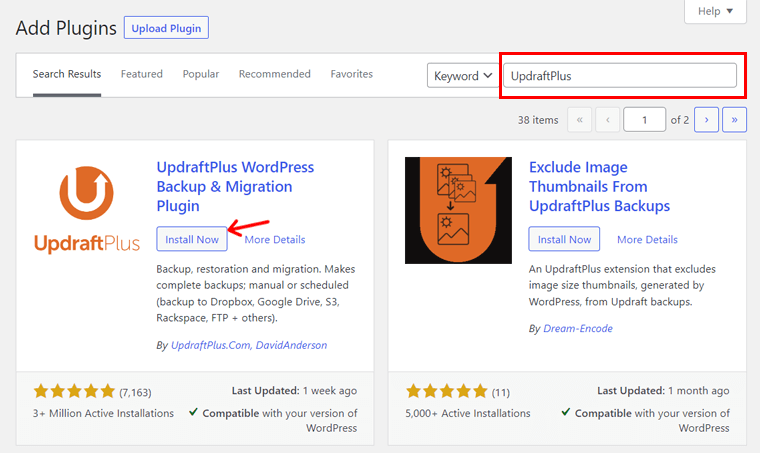
Afterward, make sure to click the ‘Activate’ button. That’s how UpdraftPlus installs and activates on your WordPress website.
If you want to use a premium version of the plugin, then the installation process is different. For that, you can read our guide on how to install a WordPress plugin.
Step 2: Schedule Your WordPress Backups
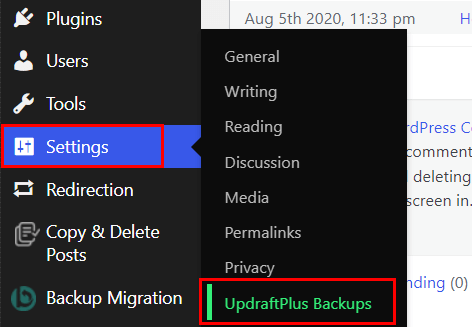
After the activation completes, you can open the ‘Settings > UpdraftPlus Backups’ menu.
As we know, UpdraftPlus lets you take both manual and automatic backups with its free plan. Here, we’ll go through the process of scheduling your WordPress backups.
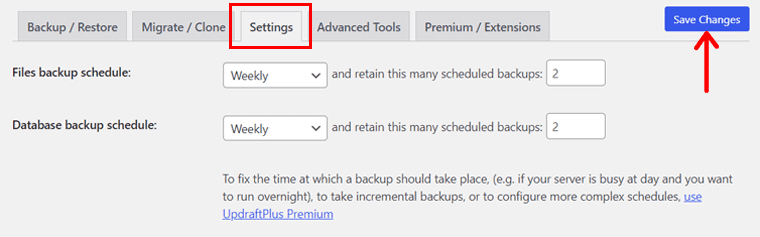
For that, go to the ‘Settings’ tab. There, you can find various options for scheduling file and database backups. And they are to configure how often you want a backup. So, you can select any of them to have regular intervals. The options are:
- Manual
- Every hour, 2 hours, 4 hours, 8 hours, or 12 hours
- Daily
- Weekly
- Fortnightly
- Monthly
On top of that, you can adjust how many backups are stored at once. But remember, new backups can override the old ones.
Don’t forget to click the ‘Save Changes’ button so that your adjustments get saved.
Step 3: Choose Your Storage Location
Following that, you can select a secure storage location to store the backups. This ensures that your files and databases are safe.
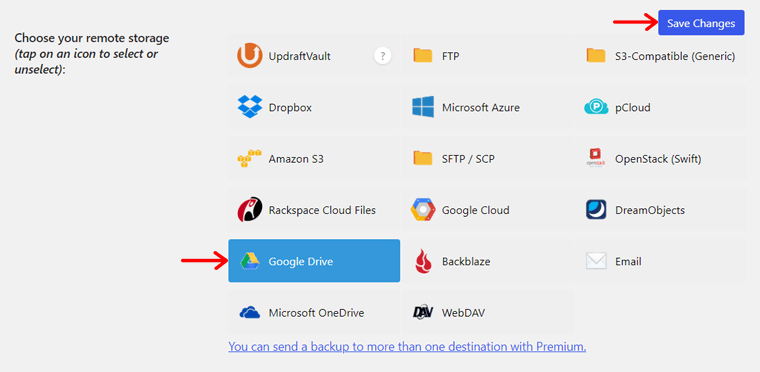
Check the list below to find some available storage locations when using the free plugin:
- Dropbox
- FTP
- Amazon S3 (or compatible)
- Google Drive
- Rackspace Cloud
- OpenStack (Swift)
- DreamObjects
Depending on the remote location you select, you must follow the instructions given. For example, let’s click on ‘Google Drive’. Then, hit the ‘Save Changes’ button.
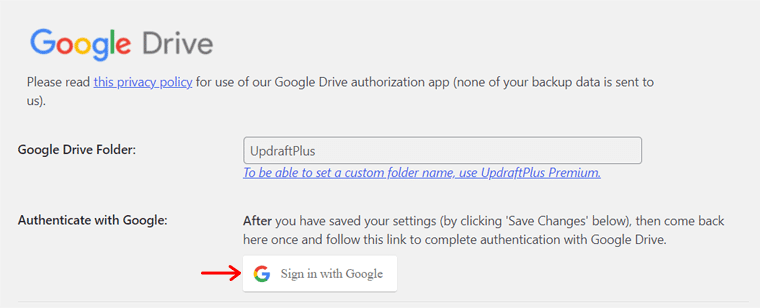
Below , you can find the configuration steps to complete. With the free version, you have to use the automated Google Drive folder name made for you.
Next, you must authenticate with your Google account. So, click on the ‘Sign in with Google’ button. Now, you’ll be prompted to log into your Google Drive account.
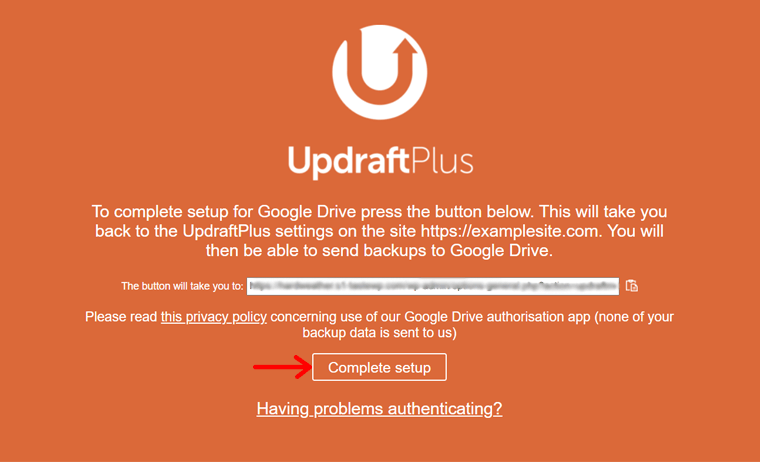
Once you finish the steps, hit the ‘Allow’ button to let UpdraftPlus have access to your Google Drive. Ultimately, this plugin will send site backups to your account automatically.

So, you can then click the ‘Complete setup’ button to move back to the plugin settings.
Step 4: Select Files to Include on Your Backup
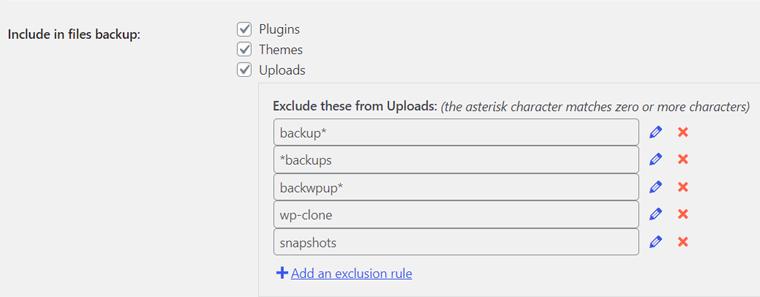
When you’re back in the settings, you can choose the files you want to include in your backups. By default, UpdraftPlus saves all your WordPress plugins, themes, uploads, and other directories inside wp-content.
But you can decide and select the files you want on your backups. However, we recommend keeping all the files on your WordPress site as a backup.
If you decide to take backups of your website’s uploads, then you’ll find a section titled ‘Exclude these from Uploads’. There, you can create some rules on what kinds of uploads you want to exclude when taking backups.
Likewise, if you decide to take backups of other directories within wp-content, then you’ll see the section ‘Exclude these from Others’. Similarly, you can create rules for what kinds of directories you want to exclude from backups.
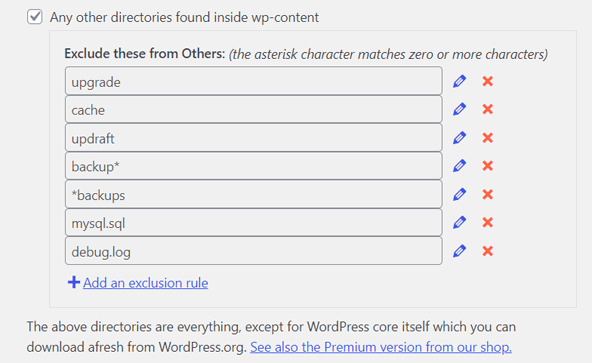
Once you make these adjustments, click the ‘Save Changes’ button present at the bottom.
Step 5: Setup Basic Backup Reports
Scrolling down, you’ll find an ‘Email’ option. If you check the box, then you’ll receive basic backup reports directly to your admin address.

Last but not least, click the ‘Save Changes’ button again. And that’s all you have to do to take an automated backup of your WordPress site.
How to Take a WordPress Site Backup Manually?
Automatic backups help you take regular backups, saving you time. However, a manual backup is necessary when making a lot of changes to your website.
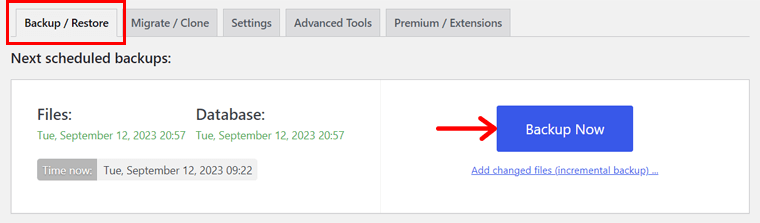
Suppose you want to instantly take a backup right now. Then, you must go to the ‘Settings > UpdraftPlus Backups’ menu from your admin dashboard. Afterward, open the ‘Backup/Restore’ tab. There, click the ‘Backup Now’ button for the manual backup.
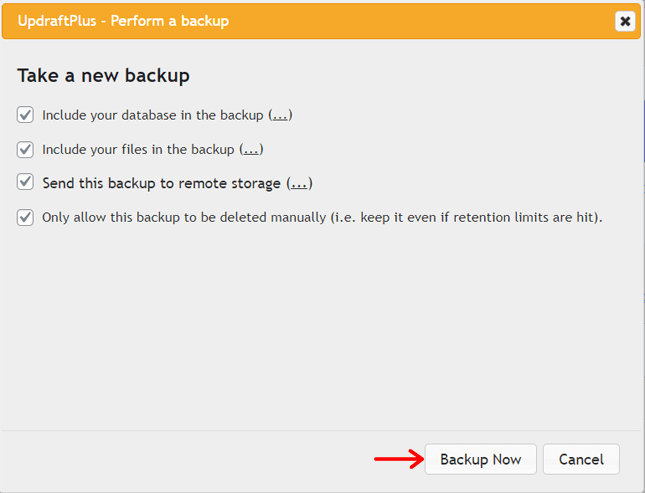
By doing so, a popup opens with settings to configure. According to your needs, you can choose to backup the database and the different files as mentioned before.
By default, the manual backup saves your files and database in the previously configured location. In our case, it’s Google Drive.
Moving forward, you can find an additional option. If you tick it, then your manual backups won’t be deleted even if the retention limits cross. And only manual deletion is possible.
After you complete these steps, you can click the ‘Backup Now’ button.
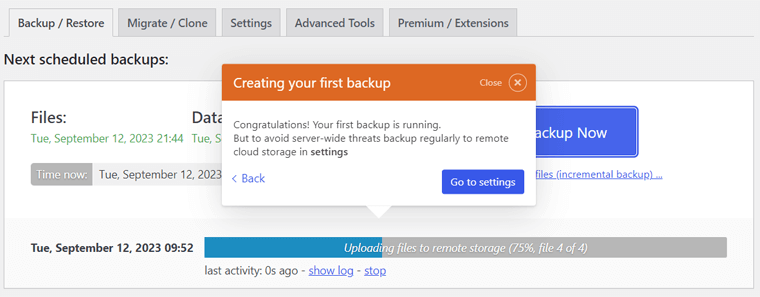
Now, you can see the plugin’s backup progress bar. When the process ends, you’ll see the backup information under the ‘Existing backups’ section. That’s it!
How to Restore Your WordPress Backup?
Hopefully, you can effortlessly take manual and automated backups of your WordPress site for free. But knowing that isn’t enough!
You must also learn how to restore a backup from your storage location back to the website. And we’re here to guide you!
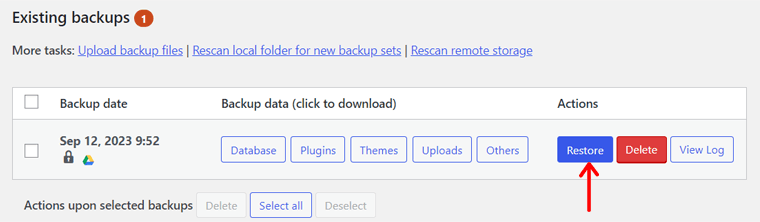
First, open the ‘Settings > UpdraftPlus Backups’ menu from the WordPress dashboard. Now, find the ‘Existing backups’ section.
There, you can see a list of existing backups in a table with various options to manage them. Under the ‘Actions’ column, you’ll find the ‘Restore’ button for each backup.
Hence, you must click the ‘Restore’ button on the backup you want to restore.
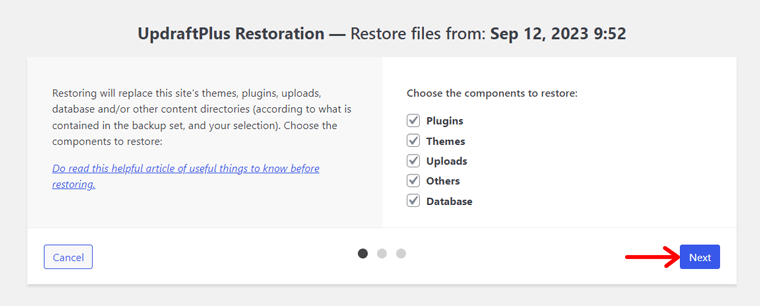
Consequently, you’ll be redirected to a different page with some questions. First, you must select the site components you want to restore, i.e., plugins, themes, uploads, others, and the database. Then, go ahead and click the ‘Next’ button.
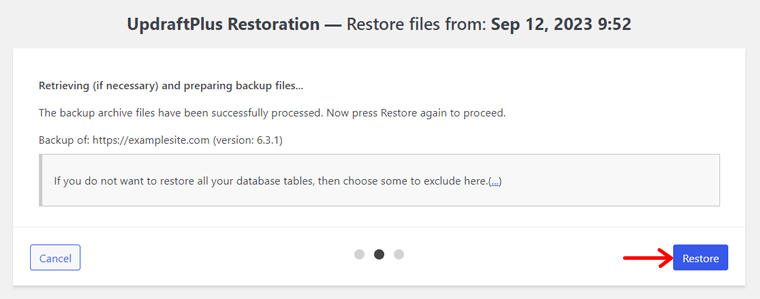
Following that, you can exclude some files that you may not want to restore. Once you’re done, hit the ‘Restore’ button.
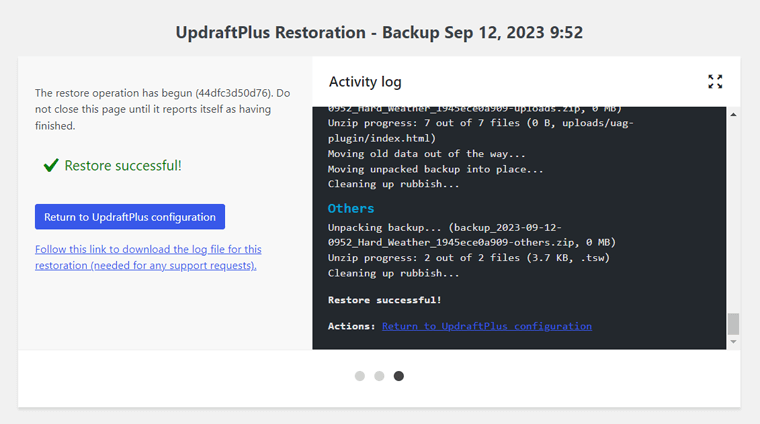
Now, UpdraftPlus will start the restoration process. When the process ends, you’ll find a ‘Restore successful’ message. Meaning, you can now click the ‘Return to UpdraftPlus configuration’ button to navigate back to your dashboard.
That’s all you have to do to successfully restore your WordPress site for free.
Frequently Asked Questions (FAQs) on Backups
Did we miss anything that you wanted to know? Well, you may find them here! Check out some of the FAQs on WordPress site backup now!
Many WordPress hosts offer website backup services as part of their services. So, you can backup your WordPress site directly through their control panel or dashboard. But make sure you check your host’s policy and features before using them.
Yes, you can manually take a backup of our WordPress site without using a plugin. That’s by using FTP, or the file manager, in your hosting control panel. Meaning, you can download your website files and export your database via phpMyAdmin.
The frequency of your backups depends on the size and complexity of your website. If you have a static website, then you don’t need daily or weekly backups. On the other hand, if you have a regularly updated blog, then you may need daily backups. Overall, it’s a good practice to take backups at least once a week.
Depending on how you store your WordPress site backups, you’ll have various storage options. Although you can store them on your local computer, the best location would be in the cloud. Some popular cloud storage services are DropBox, Google Drive, OneDrive, etc.
While some free WordPress backup plugins are trustworthy, it’s vital to research and read reviews about them. In comparison, paid backup solutions offer more reliable support and advanced features for critical websites.
Conclusion
That’s all for now! We’re at the end of this beginner’s guide on how to backup a WordPress site for free. Hopefully, you can backup your site by following these steps.
Among the different methods of taking backups, using a trustworthy WordPress plugin is our suggestion. And we recommend going with UpdraftPlus because of its simpler process. Also, it’s one of the most popular WordPress backup plugins on the market.
While going through the process, if you get stuck, then mention it in the comment. We’ll try to resolve your queries, hoping you can then take backups smoothly.
Moreover, please read some of our other articles. They are on the best WordPress Captcha plugins and reasons why 404 errors occur on websites.
Last but not least, follow us on Facebook and Twitter to stay connected with us.