Do you want to know how to hide the WordPress site until ready? If yes, then you’ve come to the right spot to learn some of such easy ways.
While you’re in the process of building your website, it’s very obvious that you might want to hide your WordPress site from the users. So that, you can work on it without having to worry about your visitors seeing any broken or unfinished pages.
To put it another way, rather than displaying an unfinished website, it would be excellent to inform your visitors that you’re currently working on it. Also, you can add a countdown timer and reveal when your site will go live.
Fortunately, there are a variety of techniques to hide your WordPress site until ready. In this article, we’ll show you the easy and effective ways to hide your WordPress site until it’s ready.
Let’s get started!
Why Hide Your WordPress Website Until Ready?
Before getting into several ways to hide your WordPress site until it’s ready, it’s important to understand why you should do so.
The following are a few of the most convincing reasons:
- Creating New Website: When you’re creating a brand new WordPress website, you might want to hide it until it’s finished. So that, you can expose your website to your site visitors at the right time.
- Solving Technical Issues: Sometimes, your WordPress site may encounter technical issues. And that’s where you’ve to troubleshoot and fix the technical errors that occurred. Meanwhile, you’ll want to hide your WordPress site and also notify search engines that it’s down for maintenance.
- Switching WordPress Themes: You’ll need some time to analyze the site’s operation after switching WordPress themes. So, you can hide your WordPress site from visitors to not harm their experience.
- Testing New Features on your Site: After you’ve built a WordPress site, you may want to add more features and capabilities. To avoid errors/bugs, you can then hide your WordPress site.
With that, let’s get back to the main point, which is easy ways to hide your WordPress site until it’s ready.
Video Tutorial – Hide WordPress Site Until Ready
Do you prefer watching a video tutorial for learning this? Here we go!
If you want a detailed guide for hiding your WordPress website until ready, then keep reading our content below. We have a stepwise tutorial on the different methods to do so!
5 Easy Ways to Hide WordPress Site Until Ready
There are several ways to hide the WordPress site until it’s ready. So, we’ve come up with 5 easy and effective ways to hide your WordPress site until ready. You can use any one of them at your convenience.
Let’s look at each of these methods individually now.
1. Use a Coming Soon or Maintenance Mode WordPress Plugin.
One of the easiest ways to hide your WordPress site until it’s ready is using a coming soon or maintenance mode plugin. There are several coming soon and maintenance page plugins available on the market.
With its help, you can create attractive coming soon and maintenance mode pages. Consequently, you can not only hide your WordPress site until it’s ready, but you can also build buzz among users.
So, let’s look at the following steps to hide your WordPress site using a coming soon or maintenance mode plugin.
Step I: Install the Coming Soon or Maintenance Mode plugin
The very first thing that you should do is install the coming soon or maintenance mode plugin. Out of many, we’re choosing the SeedProd plugin for illustration.
Moreover, SeedProd is not just a simple coming soon and maintenance mode plugin. It has been growing and now it’s also a page builder plugin with extra elements to design various pages.

So, if you like its features, then you can continue using it to create websites when the site is under construction. For now, let’s use this plugin to use its coming soon mode functionality.
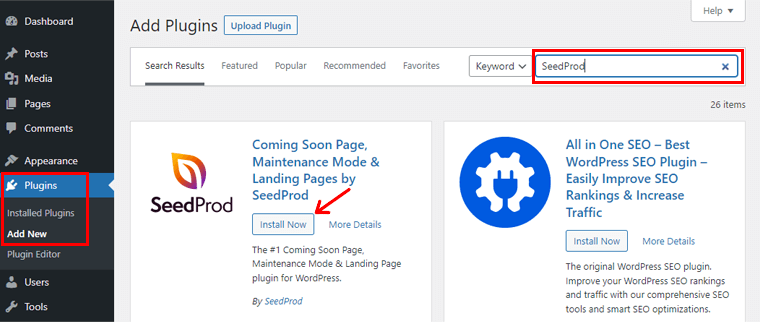
Firstly, log in to the WordPress dashboard, then navigate towards the left side navigation of the dashboard. Then, go to the ‘Plugins’ section and click on the ‘Add New’ button.
After that, on the search bar in the top right corner, type “SeedProd”. Following that, click on the ‘Install Now’ button and ‘Activate’ it.
For a more detailed guide, here’s our blog on how to install a WordPress plugin.
Step II: Set up a Coming Soon Mode
Once you’ve activated the plugin, you’ll see the ‘SeedProd’ in the left-side navigation menu. On clicking SeedProd, you’ll see a page as shown below.
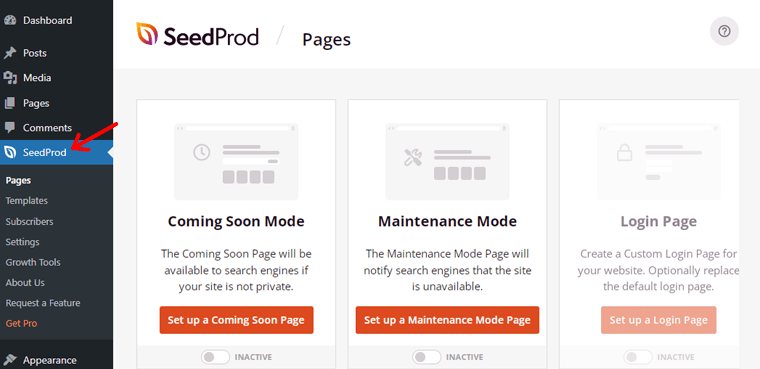
If your website is yet to be launched, then you can click on ‘Coming Soon Mode’. And if your website is under maintenance, then you can click on ‘Maintenance Mode’.
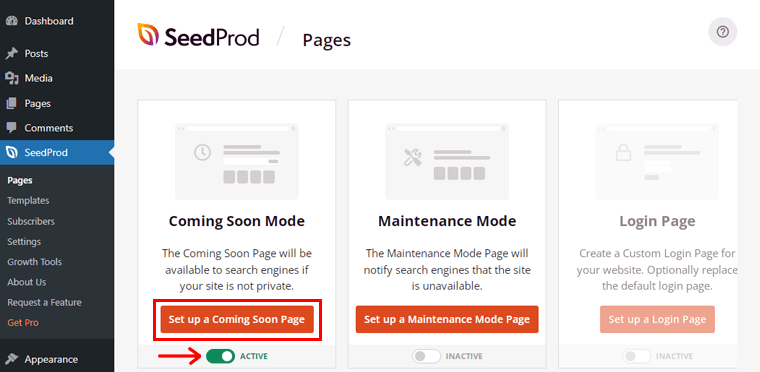
For now, we suppose that you’re wanting to hide a brand-new WordPress site. So, as the button is already inactive by default, click on it to make it ‘Active’. Then, click on the ‘Set up a Coming Soon Page’ option.
Step III: Choose a Coming Soon template
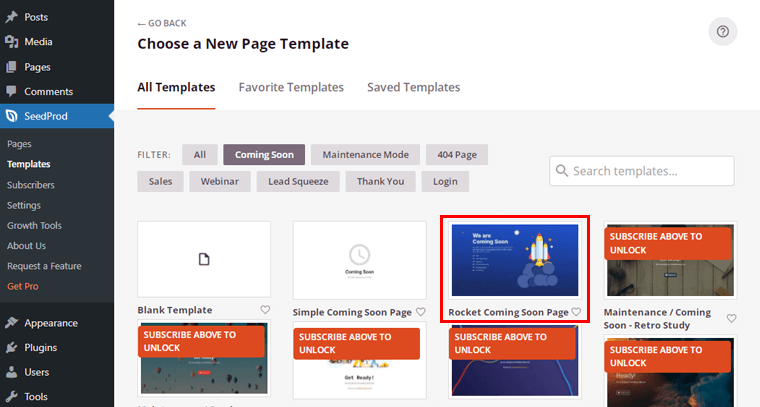
After that, you’ll be directed to a page as soon as below. You can choose a blank template to create a coming soon page from scratch.
For more advanced templates, you’ve to upgrade the SeedProd plugin to its pro version. Check out the premium price options from the SeedProd pricing page.
For now, let’s choose a ‘Rocket Coming Soon Page’ template.
Step IV: Edit the Coming Soon Page template
Once you click on it, you’ll see SeedProd’s visual editor section. Here, you can create new content and change various elements of your pre-launch website. You can further edit the page as you wish.
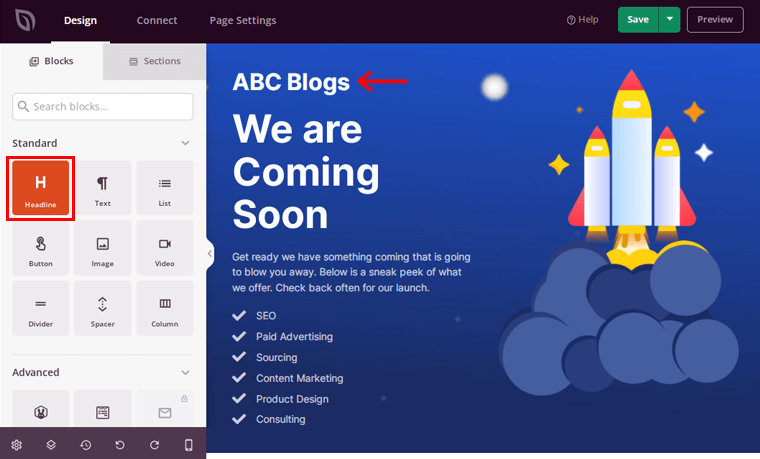
To add new content, click on the ‘Blocks or Sections’ tab on the left-hand side. A live preview of your website’s coming soon page is shown on the right.
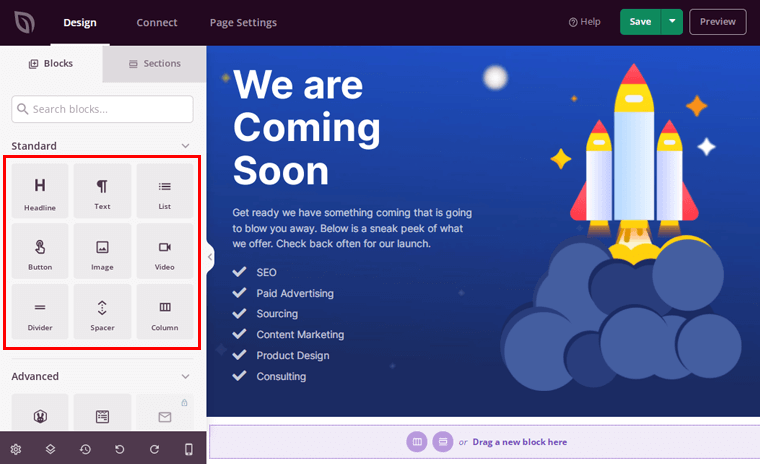
For example, if you’re starting a blog website named ‘ABC Blogs’, then you can drag the ‘Headline’ field from the left to the template on the right. After that, edit its content to ‘ABC Blogs’ just as shown above.
You can also drag the ‘Text’ field to add text on the coming soon template. For instance, we’ve added ‘Mind-blowing blogs are on the way!’ as shown in the above image.
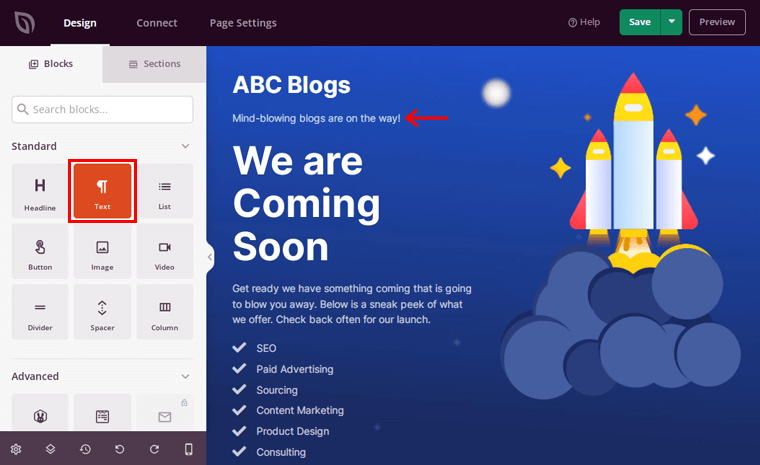
Similarly, you can add a list, buttons, images, videos, and much more and create an elegant coming soon page for your website.
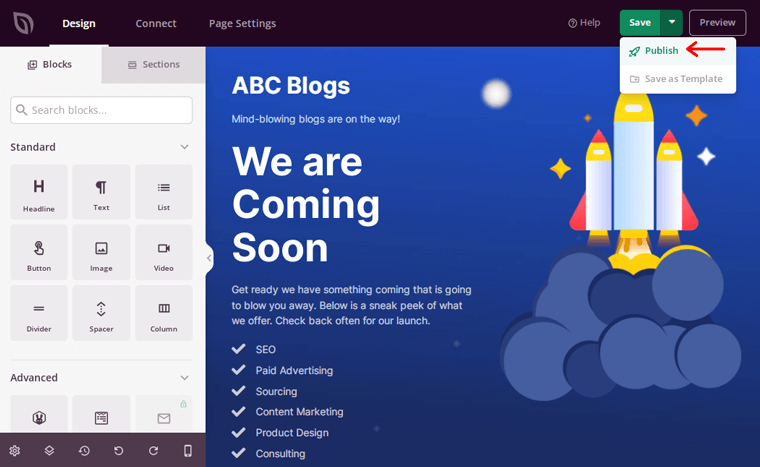
Step V: Publish Your Coming Soon Page
Following that, click on the side arrow of the ‘Save’ button at the top right corner. Afterward, click on the ‘Publish’ button.
Lastly, you’ll see the page as soon below. Click on ‘See Live Page’ to see the Coming Soon Page of your site.
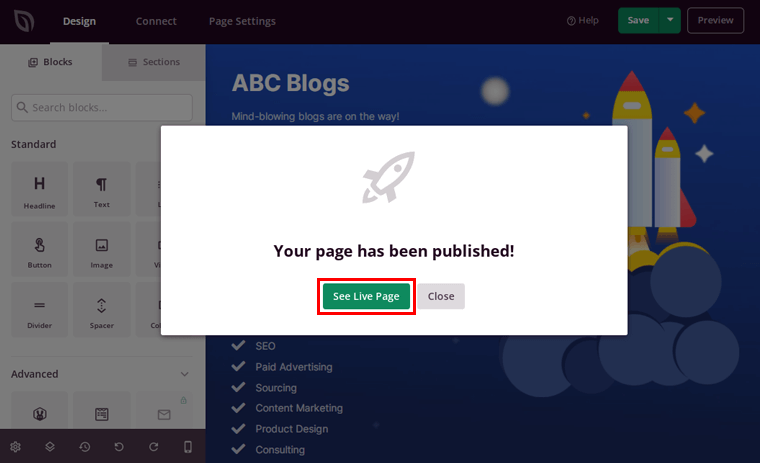
This concludes the steps of adding a coming soon or maintenance page to your website using SeedProd. Now, you can conveniently work or resolve issues on your site.
2. Private your Post or Pages.
Similarly, if you’re working on a certain post, then you can hide that particular post until it’s ready.
When you do so, only the site administrators and editors will have access to a post that is private and published. This way, you won’t have to hide your entire WordPress website, just the posts or pages you’re working on.
Importantly, this method is particularly helpful when site administrators and editors are working together on a page or post as a team. They can publish the page privately, preview it, make any necessary modifications, and then make it public once it’s ready for users.
Now, let’s look into the following steps to apply this method:
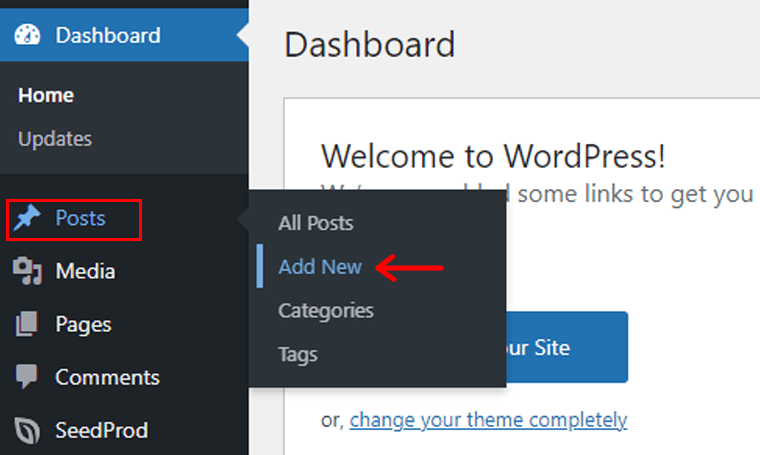
For now, let’s create a new post that you want to hide from your visitors until it’s ready. To do so, go to ‘Posts’ and click on the ‘Add New’ option.
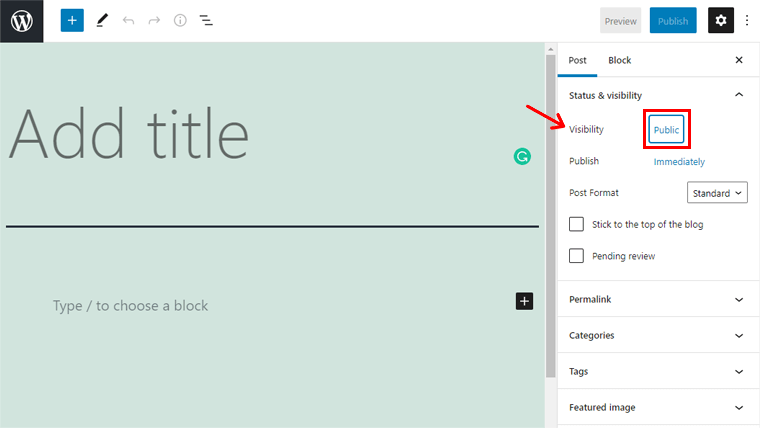
Next, you’ll get a new post editor. On the right navigation, you’ll see the ‘Visibility’ option where there’s Public by default.
Now, you need to change it to Private. To do so, click on it, the same ‘Public’ button.
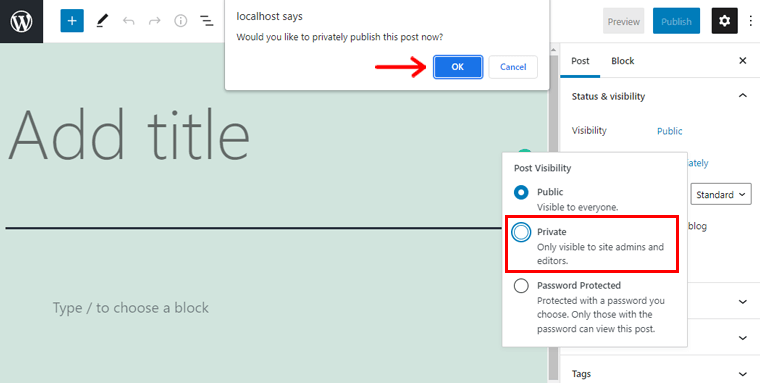
Afterward, click on the ‘Private’ option. Once you click on it, you’ll be asked if you’d like to privately post it.
Then click on ‘OK’ and there you go with a private post. That’s all!
3. Password Protect your WordPress Website.
Another method is to utilize password protection to conceal your WordPress site until it’s ready.
Anyone who wants to use or access your WordPress website will need to enter a password. This way, you can use a password to log in and work on your website while keeping it hidden from visitors.
This method is particularly helpful when you’re building a website for a client. You can provide your clients with the password so they can view how their site is being built. However, general internet users cannot see it.
There are various WordPress plugins available to password-protect your WordPress website. Here, we’re using the “Password Protected” plugin to hide your WordPress site. Now, let’s look at the following steps to do so.
Step I: Install Password Protected Plugin
First things first, once you log in to your WordPress dashboard, you’ll need to install the “Password Protected” plugin.
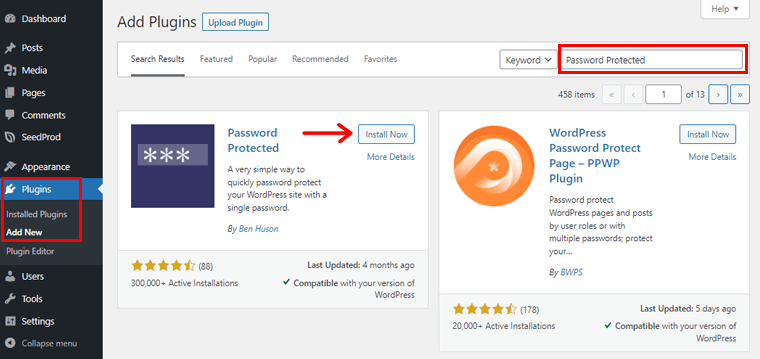
To do so, go to the ‘Plugins’ section in the left navigation and click on the ‘Add New’ button. After that, on the search bar in the top right corner, type ‘Password Protected’.
Following that, click on the ‘Install Now’ button and ‘Activate’ it.
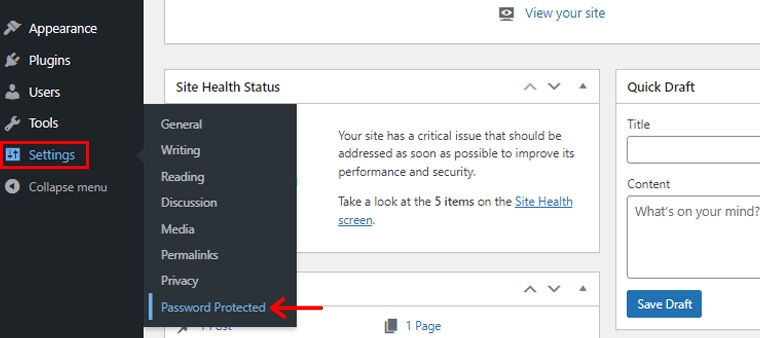
Once you’ve activated the plugin, go to the ‘Setting’ section in the left navigation of your dashboard. On clicking it, you’ll find the option ‘Password Protected’ at the bottom. Click on the ‘Password Protected’ option.
Step II: Make the necessary changes and click on the ‘Save Changes’ option
Now, you are directed toward the page as shown above. On that page, you need to make certain changes. Here’s what it all means:
- Password Protected Status: By default, this option is disabled. You can enable it to make your site password protected.
- Protected Permissions: You can find various sub-boxes in this option such as “Allow Administrators”, “Allow Logged In Users”, and so on. If you check any one of these boxes, then users with that access will not be required to enter a password. They will simply view your website as usual.
- New Password: Here, you need to type in the password you’d want to use for your website.
- Allow IP Addresses: You can specify which IP addresses can visit your website in this field. In other words, visitors from that IP address will not be asked to enter a password in order to browse your site. Anyone accessing your website from any other IP address will be prompted to enter a password.
- Allow Remember me: You can enable this button so that you can easily work on your website without consuming time on entering a password.
- Remember for this many days: Here, you can set the number of days to keep the same settings constant to hide your WordPress site.
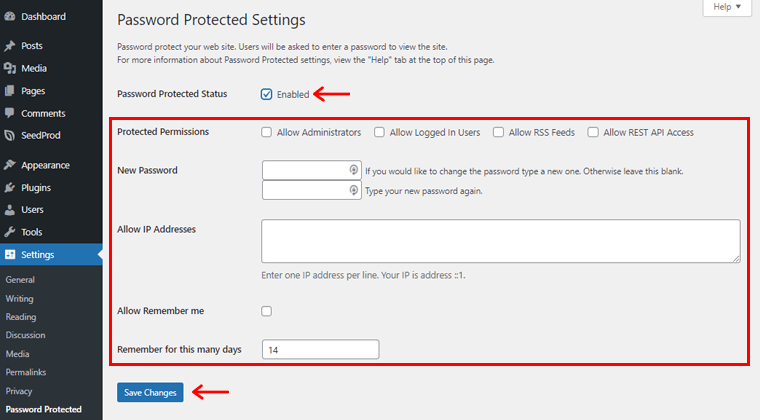
After you’ve made the above necessary changes click on the ‘Save Changes’ option at the bottom. That’s all you’ve to do!
4. Turn Off the Search Engine Visibility of your website.
Another method to hide your WordPress site from mass internet users is by turning off the search engine visibility of your website.
To be more precise, this method will prevent your website from showing up on search engine results pages.
However, if someone has your website URL and attempts to access it directly using a browser, then they’ll be able to see it.
So, let’s look at the following steps to turn off the search engine visibility of your website.
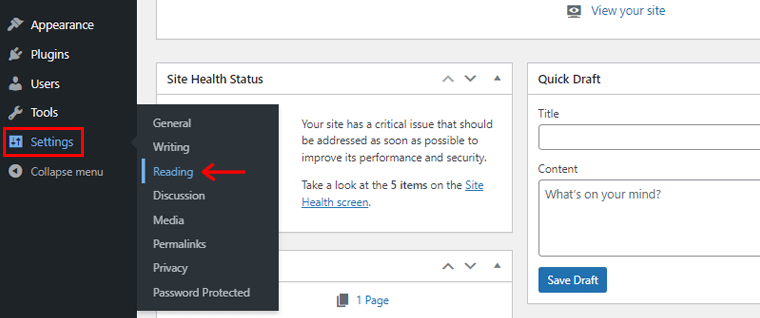
First of all, go to the ‘Setting’ section in the left navigation of your dashboard. On clicking it, you’ll find the option ‘Reading’. Then, click on the ‘Reading’ option.
After you click on the reading option, you’ll see the page as shown below. At the bottom, you can see the option ‘Discourage search engines from indexing this site.’
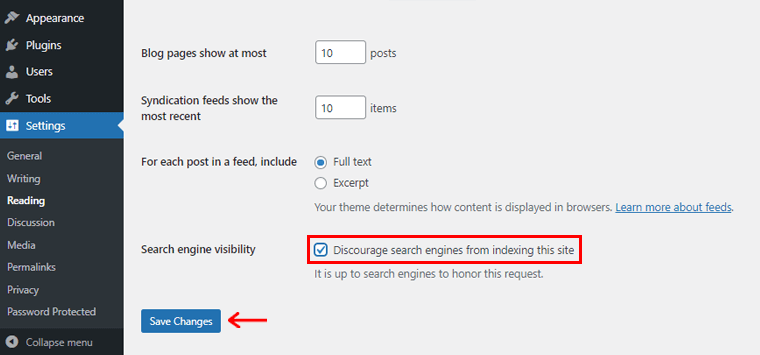
Now, you need to enable this option and click on the ‘Save Changes’ option at the bottom.
Once search engines accept this request, your WordPress site will be hidden from search engines. Easy, isn’t it?
5. Build your WordPress Website Locally.
Lastly, you can build your WordPress website locally on your own computer. It means using your local device i.e. computer as the host and installing WordPress on it.

When you set up a local site, you aren’t using a real web hosting service, so your site won’t be visible to online users. But still, you can use all WordPress features and functionalities, and develop a site.
It’s mainly useful when you’re building a new site. You can develop a site, make necessary changes on the local site and then take it online when it’s ready.
To create a local site, you need the following things:
- XAMPP – This is application software that helps to run WordPress on your local computer. You can download the XAMPP free of cost from Apachefriends.org and install it on your computer.
- WordPress – You can download the latest version of WordPress from WordPress.org for free.
After that, you need to create a database for your WordPress site and then install WordPress.
For more comprehensive guidance, you can check out our guide article on how to install WordPress locally.
This way, only you’ll be able to access your website and it’ll be hidden from other site users. After everything is set and finalized, you can get hosting for your WordPress website and launch it.
Conclusion
That’s it, for the time being, everyone! This article has come to an end.
We believe this post has given you some insight into how to hide a WordPress site until ready. You can hide your site using any of the ways listed above, depending on the needs of your site. And further, launch it at the appropriate moment.
Also, do leave a comment below if you’ve tried any of the methods listed above. Please do not hesitate to contact us if you have any further questions regarding how to hide the WordPress site until ready. We’ll respond as soon as possible.
Feel free to share this post with your friends and family. You might also be interested in our other articles on how to check if a website is built on WordPress and how to upload PDFs to WordPress websites.
Don’t forget to like us on Facebook and follow us on Twitter for more useful content.