Are you looking for an honest review on the Avada theme? Or undecided whether this most popular WordPress theme is worth it or not for your site?
Developed by ThemeFusion, Avada is the best-selling WordPress theme on the ThemeForest marketplace. It’s a powerful multipurpose WordPress theme useful for creating any type of website. It’s a complete website builder with great flexibility and styling tools to make large-scale adjustments.
It has made over 780,000 sales so far. Also, it has an impressive 4.7 out of 5-star rating evaluated by 24,000+ real users.
It sounds like a fantastic theme, right? But is it as great as it sounds, or is it just hype?
In this article, we’ll tell you everything you need to know about the Avada theme. We’ll go through its features, purchase process, installation, cost, customization, support, and more in this in-depth Avada review. Let’s begin!
A. Avada Theme Overview
First and foremost, Avada is the #1 selling WordPress theme on the market for the past 9 years. It’s trusted by 780,000+ beginners, professionals, agencies, enterprises, and creatives for complete design flexibility.
Moreover, it’s constructed to a top standard, with a wide range of options and features. Using this versatile and user-friendly theme, anyone can create a website with ease.
It’s a very adaptable theme with a variety of demo layouts for various types of websites. You can import a suitable demo website with a single click. And, further customize using its page builder tool: Avada Builder (previously known as Fusion Builder).
In addition, it’s simple to create custom page layouts. You can easily add various elements to your websites. Such as messages, buttons, pricing tables, and more using simple addons.
Not only that, but it also offers an easy connection with any external plugin to increase your site’s functionality.
You also get other standard features like frequent updates, responsiveness, quality support, accessibility, etc. And, to help you easily get started, there’s extensive documentation available.
Having said that, let’s move forward to the next section of the Avada theme review.
B. Key Features of Avada Theme
You’ll require a theme with a plethora of useful features to make your website stand out from the crowd. Avada is a feature-rich theme that helps you bring the best ideas to life and construct a fully functional site.
So, in this review section, we’ll take a deeper look at the key features of the Avada theme.
1. 86 Pre Built Website Templates
Building a website from the bottom up takes time and effort. It’s especially difficult if you’re not tech-savvy.
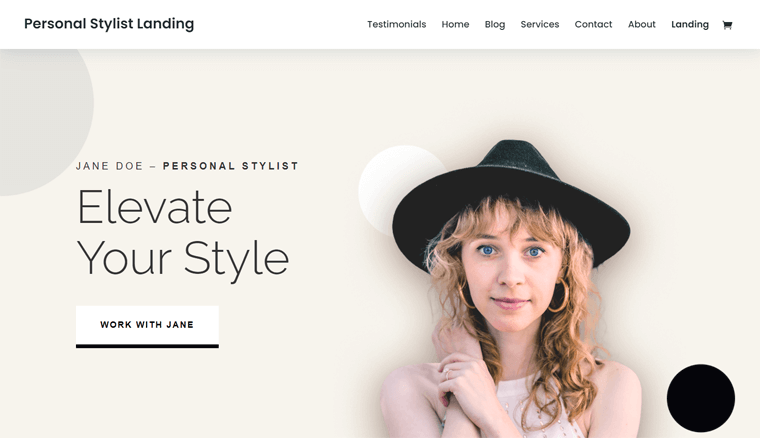
Meanwhile, Avada addresses this issue by providing access to 86+ beautifully designed prebuilt example websites. These websites cover a variety of topics, including blogs, business, eCommerce stores, portfolios, and much more.
Here are some examples of pre-built Avada templates.
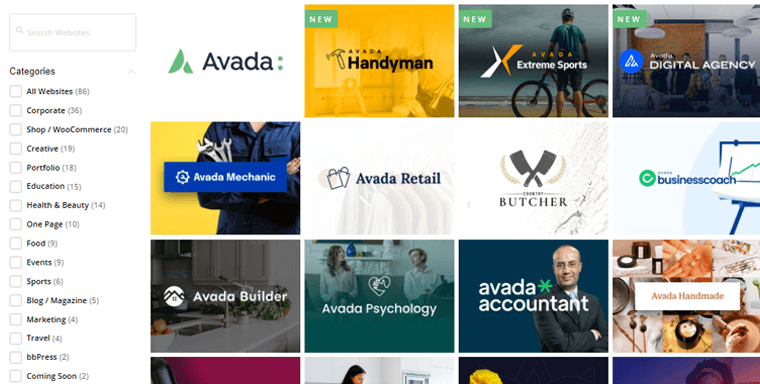
With a simple click, you can import any one of these demo websites. Furthermore, you may update the information and adjust it to your liking. This way, you can make a great-looking website within 5 minutes!
2. Avada’s Own Page Builder: Avada Builder
Another best thing about Avada is that it has its page builder i.e. Avada Builder. It was previously known as Fusion Builder.
You can understand Avada Builder as a simple drag-and-drop page builder for creating a unique web layout. That was previously also known as back-end wireframe editor as you make changes via backend.
With the help of Avada Builder, you can create almost any design style, with your imagination serving as the sole limit. You can easily create content utilizing containers, columns, and elements framework. Without necessitating any coding knowledge.
Moreover, it offers Avada Live to customize your website in real-time from the front end.
3. Avada’s Advanced Options Network
With the plethora of Avada’s customization possibilities, you can entirely change every nook and cranny of your WordPress website.
Its most advanced Options network and quick graphic design and editing put everything at your fingertips. It comes with 90+ design elements such as Avada Form, Avada Slider, chart, button, etc. Consequently, you can design the layout of your pages as desired, then preview the output in a separate window.
Without a doubt, you can fine-tune every aspect of your website’s design and development with Avada. Thus, it’s also known as the ultimate website-building toolkit.
4. WooCommerce Support
Are you planning on creating an eCommerce website? So that you can put your shop accessible 24/7 from any location.
If you answered yes, then the Avada theme is a great option with deep WooCommerce integration.
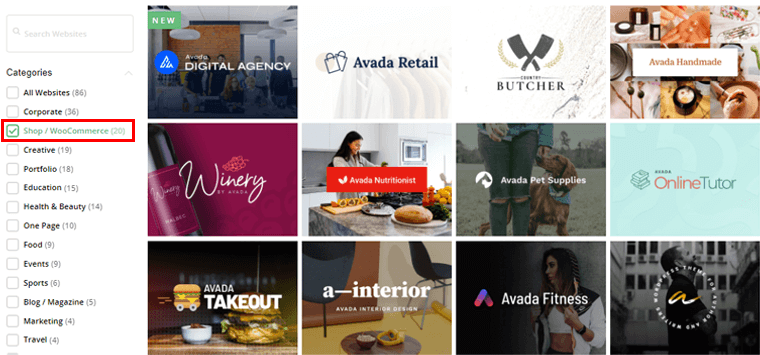
Moreover, it includes carefully designed WooCommerce prebuilt website templates. As a result, you can quickly import them and start creating an online store in no time.
5. Integration with Popular Plugins
Another significant key of the Avada theme is that its design is integrated with major popular plugins. Such as The Events Calendar, Contact Form 7, bbPress, and so on. This provides enhanced functionality to your WordPress website.
With the purchase of the Avada theme, you’ll also get various premium plugins. Such as Slider Revolution, Fusion White Label Branding, Convert Plus, FileBird, and more. Not to mention, you can install these plugins free of cost.
6. Performance-Optimized
Avada theme is built for performance. You can check your Avada site speed with speed testing programs such as Google PageSpeed Insights, GTMetrix, etc. Case studies so far suggest cool site speed.
Moreover, you get an exclusive performance wizard on your WordPress dashboard with Avada. It’s a step-by-step guide that will assist you in optimizing the performance of your Avada site.
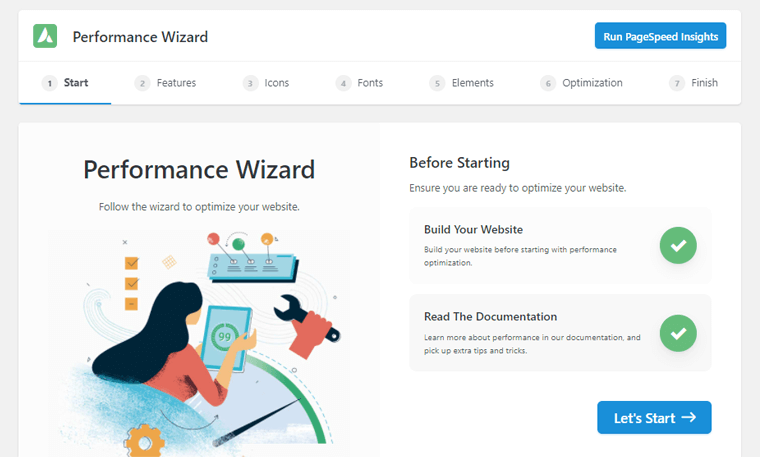
For example, you can disable unused features, optimize images and video, do icon scans, and more. As a result, you’ll get better performance.
7. Built-in GDPR and Privacy Support
The General Data Protection Regulation (GDPR) is Europe’s new data protection regulatory framework. Avada theme includes built-in GDPR and privacy support. Hence, you can choose not to gather any kind of data fully complying with GDPR requirements.
In addition, you can customize your privacy banner, control contact form consent, Google font management, and custom registration messages. Besides, you can also control third-party embeds, tracking code consent, and contact form consent.
8. Translation and RTL Ready
As you may be aware, having many languages supported on your WordPress site is advantageous. This allows your site to reach a global audience of people who speak and comprehend a variety of languages.
And you’ll be glad to know, Avada is a translation-ready theme that supports 30+ languages. In addition, it includes built-in RTL support that makes your site readable in both Right to Left and Left to Right scripts.
Besides, it has WPML, a translation plugin integrated. This gives you a full theme settings panel for each language you use to set language-specific options.
9. Other Additional Features
Besides the above-mentioned features, Avada comes with a slew of extra features to help you build a dynamic website. Such as:
- Smooth & responsive across all device kinds, from mobile to desktop & tablets.
- Provides dynamic content functionality to create a unique page and post layouts for your website.
- Easy to use the dashboard to manage various layout sections of your website.
- Offers beautifully designed custom widgets such as a Social Link widget, Recent Works widget, etc.
- Advanced search option with dedicated search results page and a search icon.
- Custom responsive image arrangement that creates the ideal scenario for each picture automatically.
- Color choices are extremely extensive, allowing you to select colors across the theme.
- Search engine and accessibility-ready theme for your WordPress site.
With that, let’s move forward to the next section of the Avada theme review i.e. purchase process.
C. Purchasing Avada Theme
As you know, Avada is a premium theme so the first thing to do is purchase the Avada theme. The purchase process is quite simple.
So, here’s a step-by-step guide on how to do it in this portion of the Avada theme review.
Step 1: Add to Cart
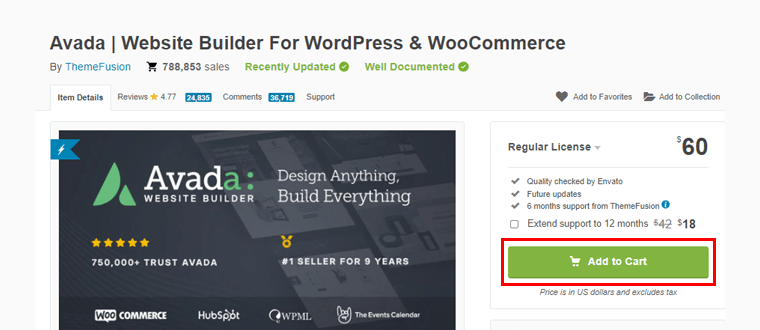
The first thing you need to do is simply go to Avada’s ThemeForest page and click on the ‘Add to Cart’ option.
Step 2: Creating Account, Billing, Checkout
Following that, you’ve to create an Envato account and fill in the billing details and select the payment method as shown in the above image. Then, click on the ‘Checkout on Credit’ option.
Step 3: Downloads page on the Dashboard
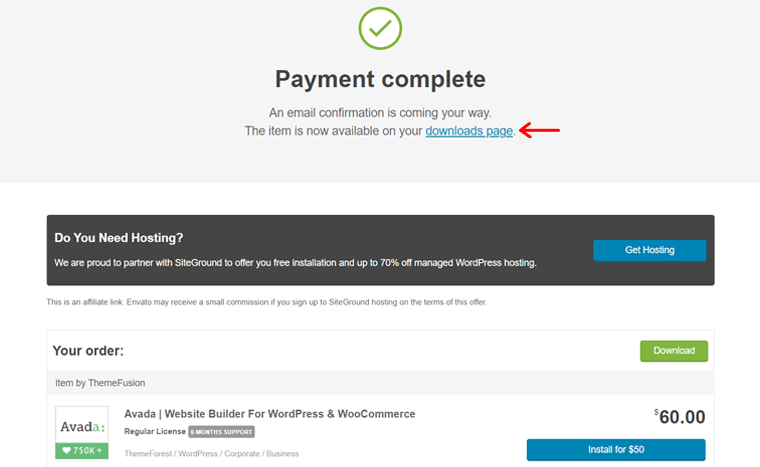
Once your payment is completed, you’ll be directed to go to the ‘Downloads page’. Click on it.
Step 4: Downloading the Theme File and License Key
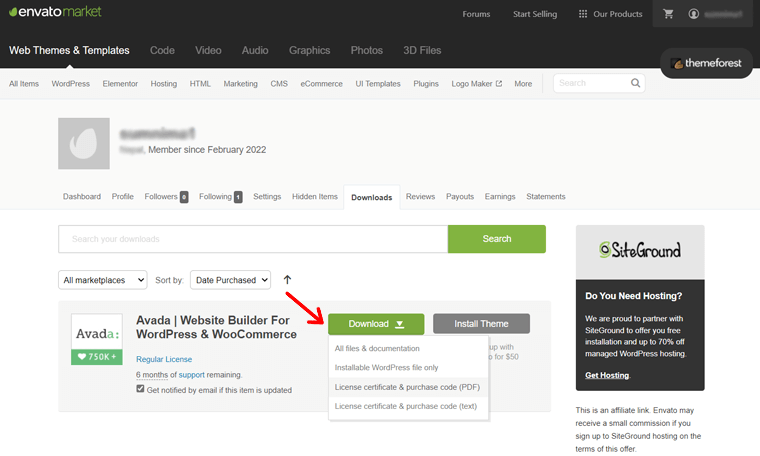
On the directed page, you’ll see the Download option that includes drag-down options. From there, download the theme file and the license key i.e. Purchase Code that you’ll need later.
And that’s how you can purchase the Avada theme from ThemeForest easily.
D. Installing Avada Theme
We’ll look at how to install the Avada theme in this review section.
Now the first thing to do is log in to your WordPress dashboard to install the Avada theme.
Following that, you can follow the stepwise guide below to install this theme easily:
Step 1: Go to Appearance to Add a New Theme.
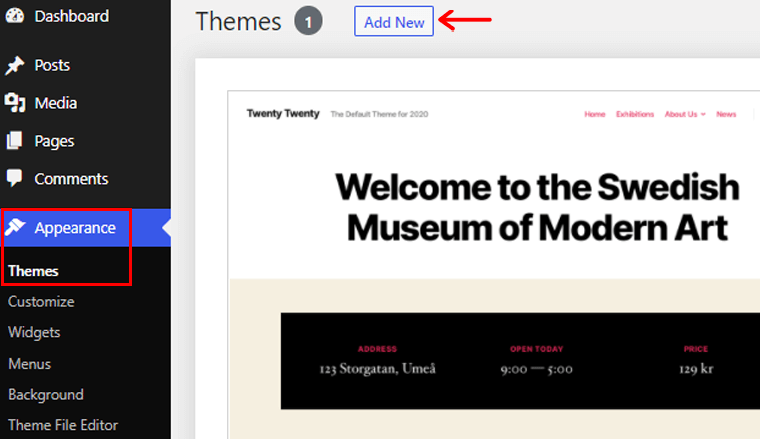
From the left navigation of your WordPress dashboard, go to the ‘Appearance’ option. And, then click on the ‘Themes’ option. On the top, you’ll find the ‘Add New’ option, click on it.
Step 2: Upload the Theme and Install it.
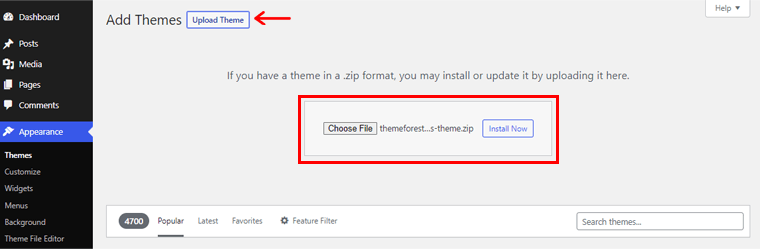
Following that, click the ‘Upload Theme’ button. Then you’ll see the ‘Choose File’ option. Here you must upload the previously downloaded theme’s zip file. Then click the ‘Install Now’ option.
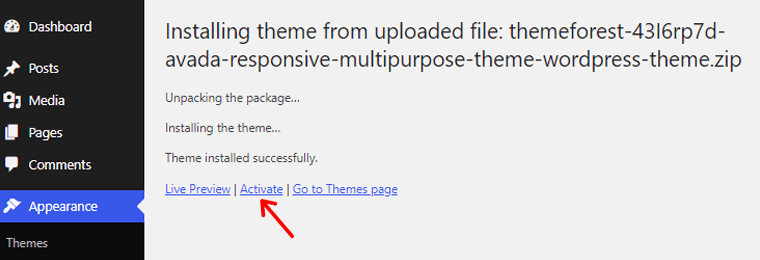
After that, click the ‘Activate’ option as shown above. For more details, check our guide on installing a WordPress theme.
Step 3: Put your Purchase Code and Activate Theme
Once the theme is activated, you’ll see Avada’s Welcome page.
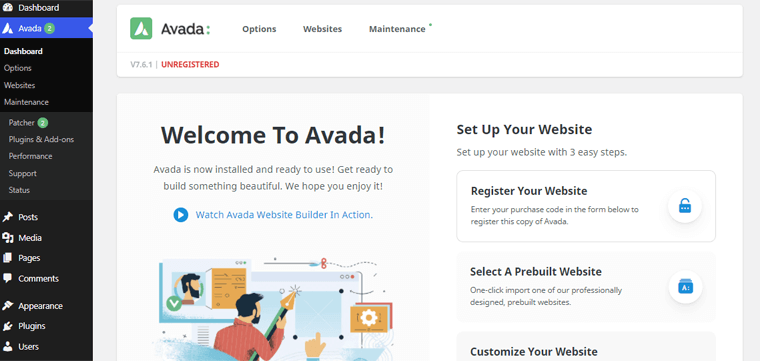
On scrolling down the Welcome page navigation, you’ll see the ‘Register Your Website’ option. There, you need to put your ‘Purchase Code’ that you previously got while purchasing the theme.
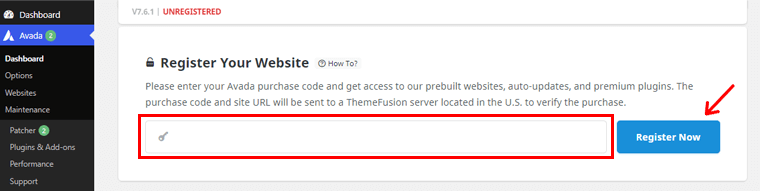
Then, click on the ‘Register Now’ option.
And there you go with the Avada theme installed and activated on your site.
Step 4: Install Recommended Plugins
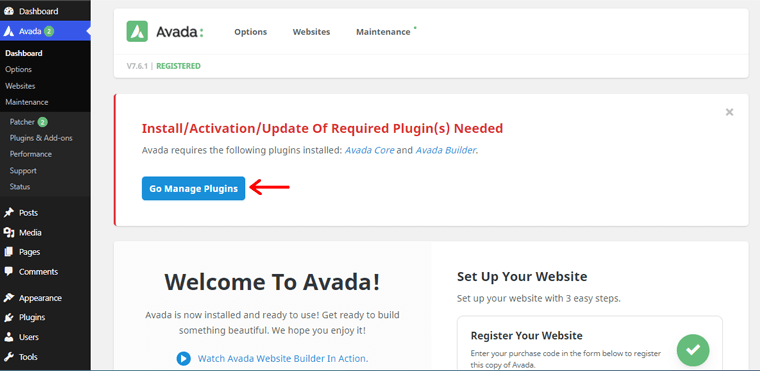
Now, you’ll get the notification to install a few of its recommended plugins. To be precise, they are Avada Core and Avada Builder. For that, click on the ‘Go Manage Plugins’ option.
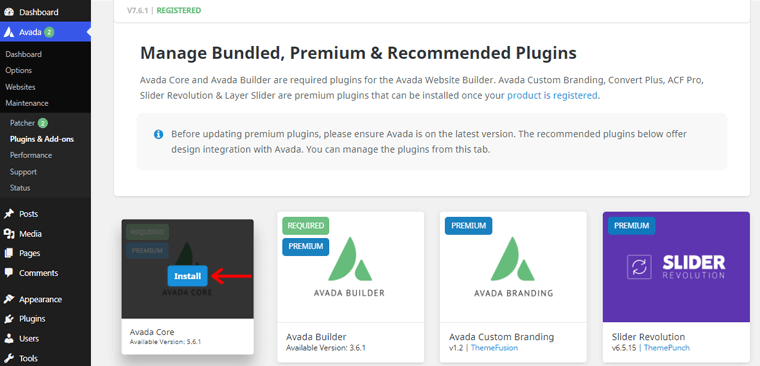
Following that, you’ll see the page as shown above. Then, hover your mouse over the Avada Core option. There, you’ll see the ‘Install’ option. Click on it to install the plugin. In the same way, you’ll also need to install the Avada Builder plugin.
With that, now let’s see how we can import the prebuilt demo sites in the next portion of our Avada theme review.
E. Importing Avada Demo Sites
As mentioned before, the Avada theme comes with tons of beautiful demo sites that you can quickly import.
So, let’s look at how to import these demo sites in this Avada theme review section.
Now, you need to come back to the Welcome page for importing Avada demo sites.
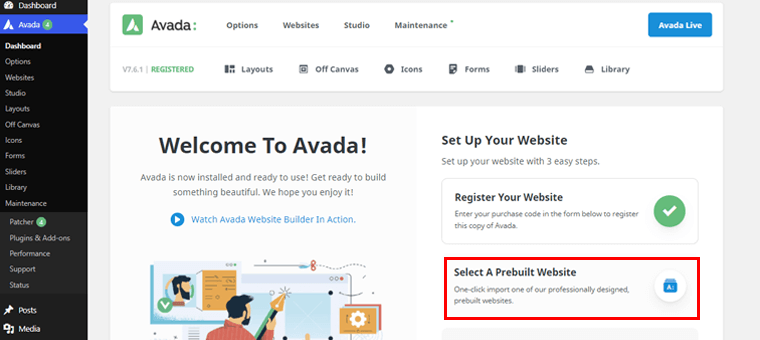
From there, you need to click on the ‘Select a Prebuilt Website’.
Following that, you’ll see tons of demo sites available. You can import the demo site that best suits your needs.
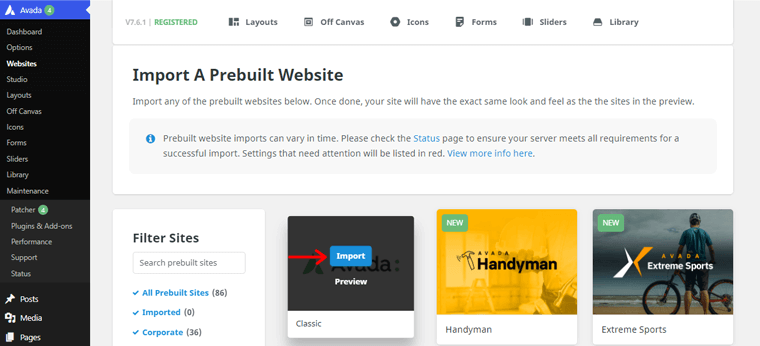
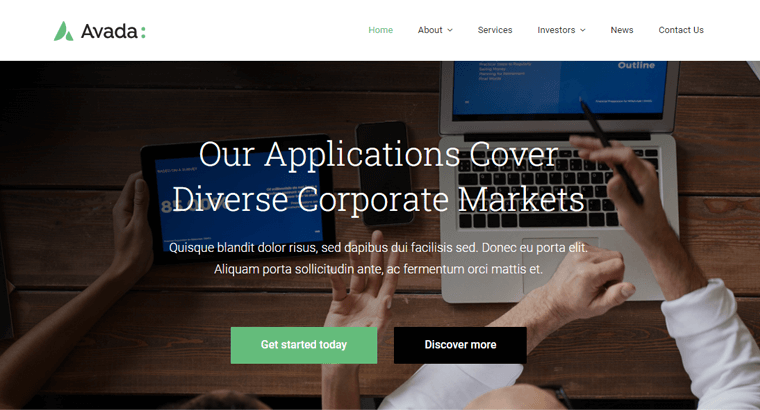
Here we are going to import the ‘Classic’ demo website. Once you hover your mouse over the demo, you’ll see the ‘Import’ option, click on it.
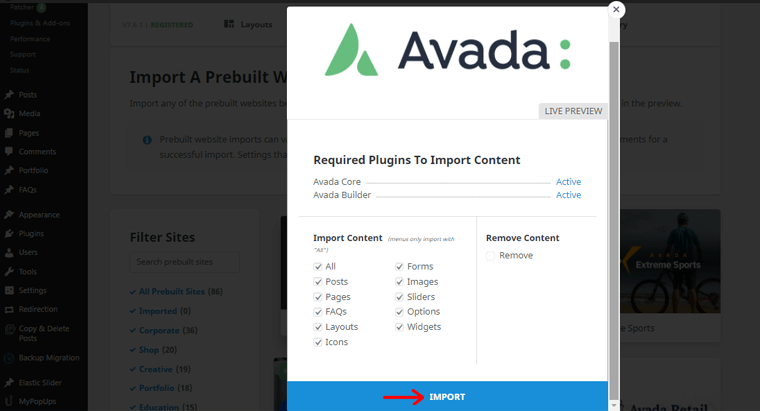
Afterward, you’ll see the page as shown above. Here, you have the option to choose which content to import from your demo site. You can click on the ‘All’ option to import the demo content. Further, click on the ‘Import’ option.
Then, you’ll see the Warning option that lists the requirements for importing that very particular demo site. Click on the ‘Ok’ option.
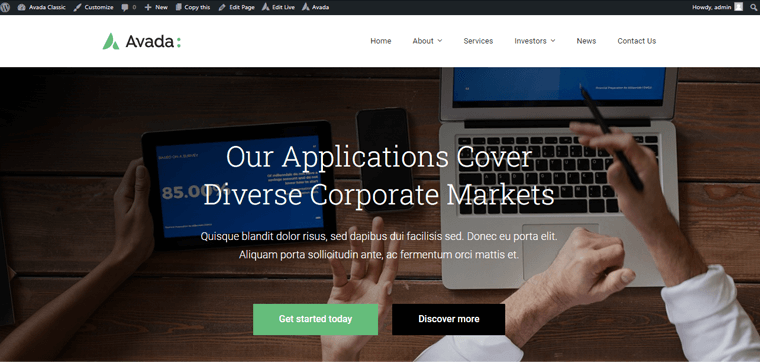
Now, if you check out your website, then you’ll find the Avada Classic demo website is live. See, it’s that simple.
Having said that, now let’s move on to the customization process of the Avada theme in the coming section of the review.
F. Customizing Your Avada Website
As previously mentioned, the Avada theme offers vast customization options for creating a fully functional and feature-rich website.
It comes with Avada Live which lets you customize your website right from your front end. So, it’s now time to put it into action.
Now, we’ll adjust several fundamental customizer options of the Avada theme in this review section.
1. Customizing Header with Avada Theme
So, the first customization option that we’ll be looking into is Header. To customize the header of your site, open a preview of your site first. Then, click on the ‘Edit Live’ option on the top of the front-end of your dashboard.

On hovering over it, you’ll see various options. Now, you need to click on the ‘Edit Header’ option.
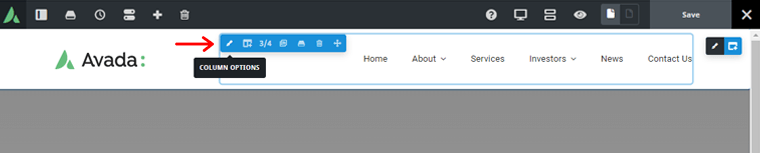
Following that, you’ll see the page as shown above. There, if you click on the navigation of your header area, you’ll find that it covers around ¾ of the total header area.
So, on clicking the column option, you can customize the general alignment, content layout, and content alignment of the navigation.
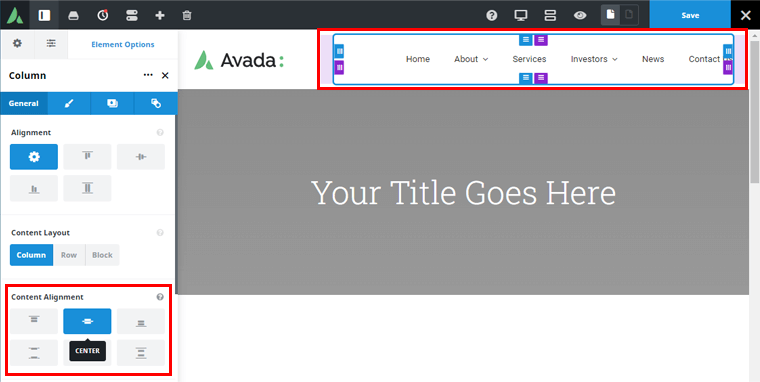
Here, we’ve customized the Content Alignment to the Center position. You can also tailor it to various other options as per your choice.
Again, if you come back to the header area, you’ll see the logo image of Avada. To customize it, hover your mouse inside the image.

There, you’ll find the ‘Image’ Options, click on them.
Following that, you’ll see the page as shown above. So to put your logo on the header area, firstly you’ll need to remove the current logo image of Avada. To do so, click on the ‘Remove’ option on the left.
Afterward, you can put your very own logo image. For instance, here we’ve put the logo image of our website SiteSaga. Once done, don’t forget to ‘Save’ the changes at the top right corner.
And, the best thing about live editing is you can see the changes on the right section as you make it through.
Likewise, you can also customize the menu section of the header area. On hovering your mouse on the menu, you can find the ‘Menu Options’, click on it. Then, on the right-hand side, you’ll find exactly which menu is located in the header area.
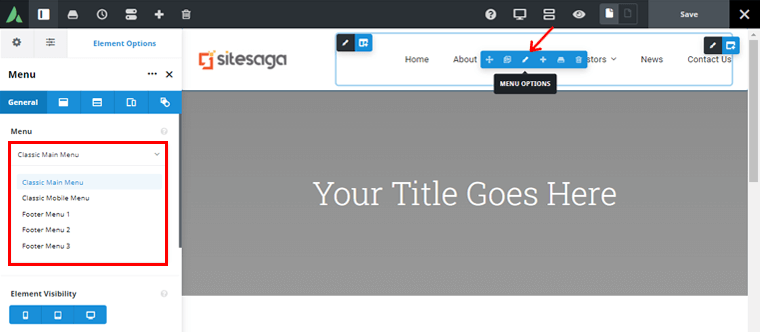
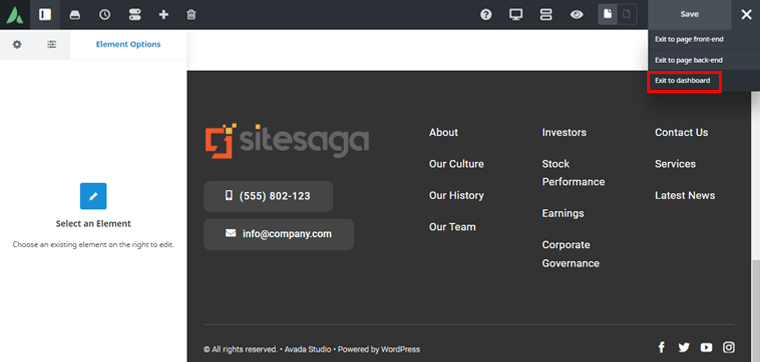
As shown in the image above, we can see that the menu in the header area is Classic Main Menu. You can further customize the menu from the backend of your dashboard.
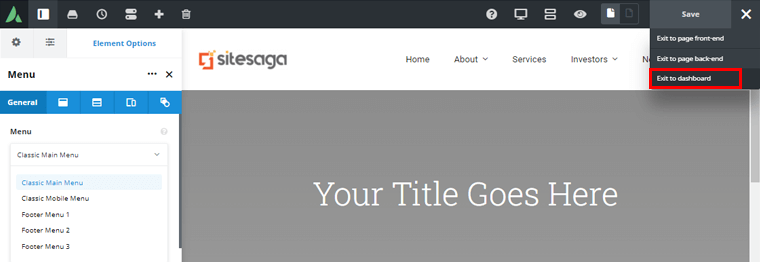
To do so, click on the (X) option in the top right corner. Then, you’ll see various exit options. Click on the ‘Exit to dashboard’ option.
Editing Your WordPress Menu
Now, from your dashboard, go to the ‘Appearance’ and click on the ‘Menus’ option.
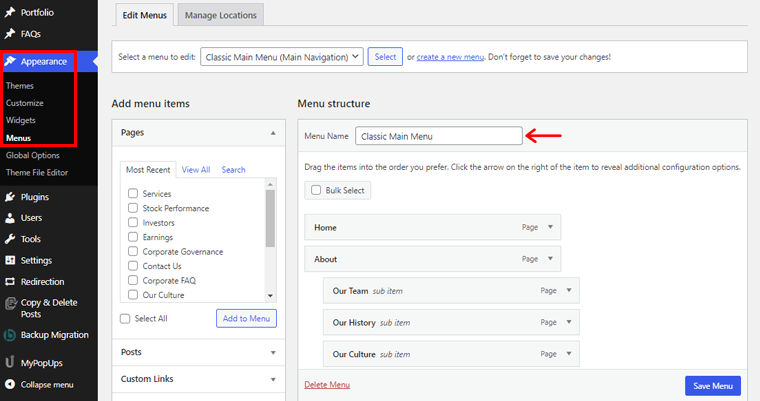
From here, you can add/remove any of the sections that you don’t want from your demo website. But make sure the right menu is selected!
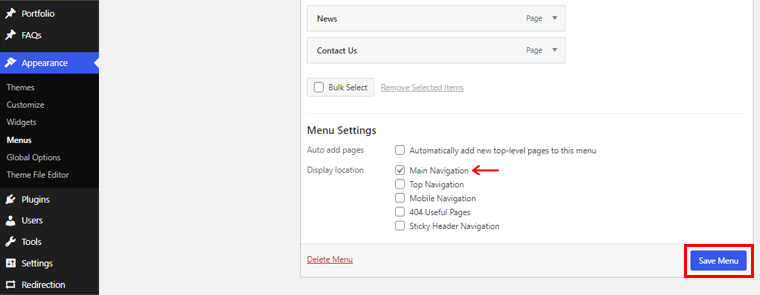
Further, you can make other various changes in Menu Settings like the menu display location area. Here, we’ve set it into the ‘Main Navigation’ area. Once done, click on the ‘Save Menu’ option located right below it.
Changing Your WordPress Header Style
Likewise, you can import a different header style to your website with Avada.
To do so, you need to click on the Library icon at the top navigation of your front-end dashboard.
Following that, if you go to the ‘Studio’ option, then you’ll find tons of prebuilt header templates. From there, you can choose the ideal header template that best suits the needs of your website.
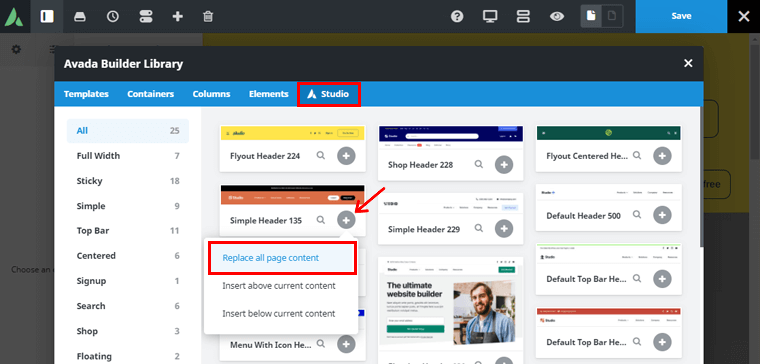
For example, here we’re importing the ‘Simple Header 135’ template. To import, simply click on the + button on its right. You’ll see the various options, click on the ‘Replace all page content’ option.
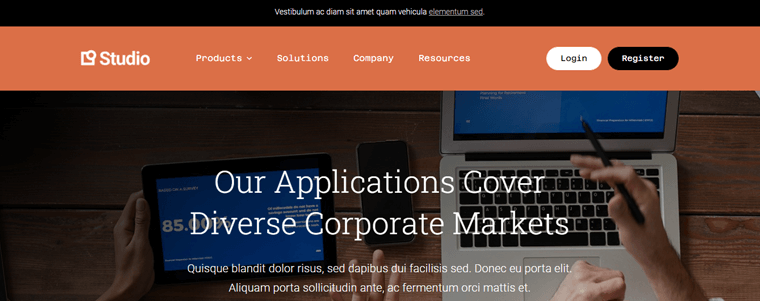
Now, if you preview your live website, then you can see the header that you’ve just selected.
Further, you can customize the header that you just imported by following the same process as shown above.
2. Customizing Footer with Avada
Another customization option that we’ll be looking into is Footer.
Like before, to do so, go to the front end of your dashboard. On the top, you need to hover your mouse on the ‘Edit Live’ option.

And, then you need to click on the ‘Edit Footer’ option just as shown above.
Following that, you need to scroll down the page to see the footer area of your website.
There, if you click on the right-hand side are of the footer navigation, then you can see it covers ⅖ of the total footer area.
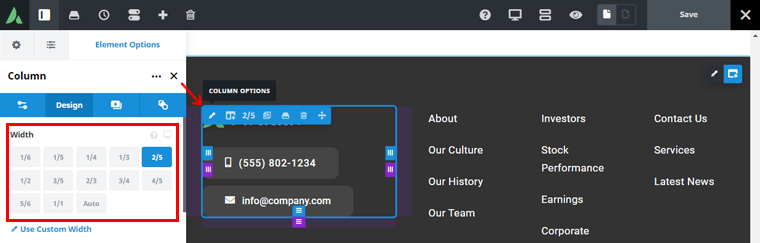
On clicking it, you can see the design option on the right. From there, you can change the width area of that particular section to your choice.
Similarly, you need to hover your mouse over the Avada logo to change the logo image of the footer area. On hovering, you’ll see the Image option, click on it.
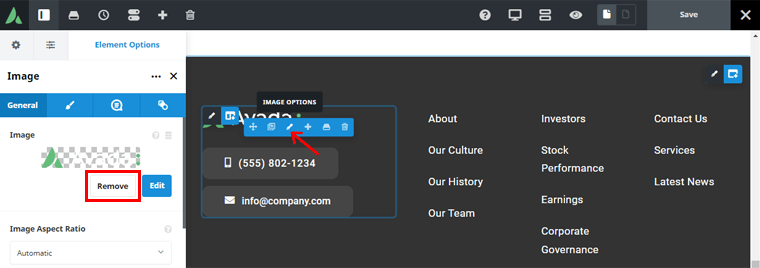
Then, on the right-hand side, click on the ‘Remove’ option to remove the preset logo image of Avada.
Following that, you can upload your logo image.
For instance, here we’ve uploaded the logo image of our website SiteSaga. On the right-hand side, you can see the changes as you make through. Then, click on the ‘Save’ button at the top right corner.
Similarly, you can click on the particular container to get the Container Options.

This way, you can tailor the color of your container to your choice. You can also change the link hover color, border size, and more.
Likewise, you can easily the other edits by simply double-clicking on the number itself. Such as changing contact numbers, social icons, email addresses, and so on.
Also, if you don’t want any column section of the footer area, then you can simply click on that particular column.
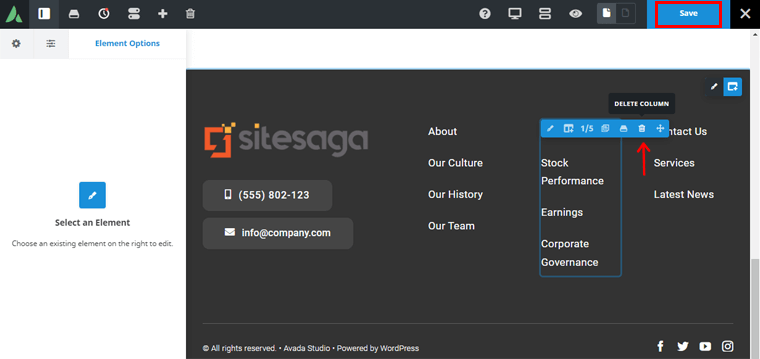
On clicking it, you can see the Delete Column button in the second last option. Simply, click on it to delete the concerned column and ‘Save’ the changes.
Editing Footer Widgets
In addition, you can also edit the footer widgets of the footer area of your demo website.
For that, click on the (X) button in the top right corner and click on the ‘Exit the dashboard’ option.
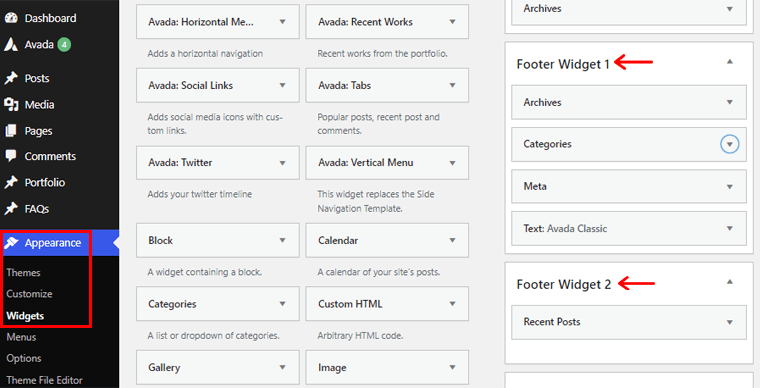
Now, go to the ‘Appearance’ and click on the ‘Widgets’ options from your dashboard. On scrolling a little down, you can find various Footer widgets.
On clicking the particular footer widget, you can see the available customization options.
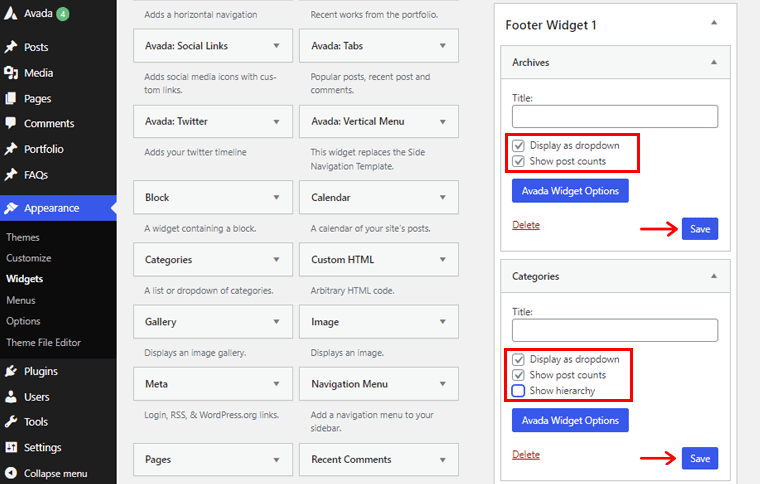
Following that, you can make all the customization on the footer widgets as per the requirement of your website. And, once done click on the ‘Save’ button.
Changing Footer Style
Likewise, if you want a different footer, then also not a problem. Avada provides you with many beautiful footers that might best suit your requirements.
To do so, you need to come back to your front-end dashboard, click on the ‘Edit Footer’ option as before.
Then, click on the ‘Library’ icon as shown above.
Following that, you can easily import your desired footer template from the ‘Studio’ option. Just like how you did while importing the header template before. It’s easy as that.
Following that, you can customize the footer that you just imported by following the same process as shown above.
3. Customizing Your Homepage Content
Similarly, let’s look into another customization capability of the Avada theme i.e. customizing your homepage content.
To do so, go to the front end of your dashboard, as you did before. Hover your cursor over the ‘Edit Live’ option at the top of the page.

Then, as shown above, you need to click on the ‘Edit Page’ from the drop-down menu.
So, here let’s change the background image of the homepage of your website. For that, hover your mouse on the background image. Then, you’ll see the ‘Container’ option, click on it.
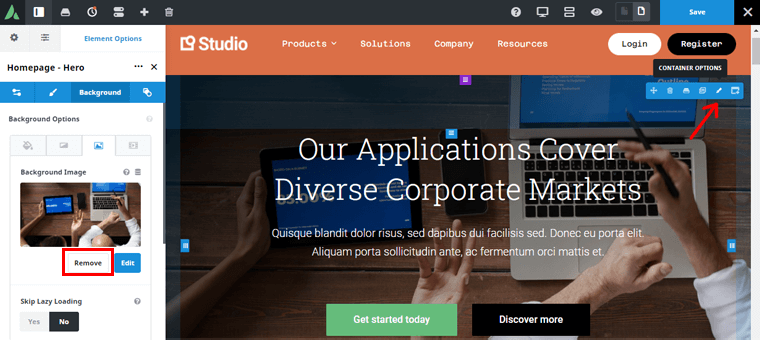
On the left navigation, you’ll find various settings. Go to the Background option and click on the ‘Remove’ option. On clicking it, the default background image is removed.
Following that, you can upload a suitable background image for your homepage.

For the demo, here we’ve uploaded one of the default background images from the media library. On the right-hand side, you can see the changes as you make through. Then, click on the ‘Save’ button at the top right corner.
Similarly, you can change the title of your homepage. You can directly double-tap the title and edit the content.

Or, simply hover on the title and click on the pen icon as shown in the above image. And on the right, you’ll see the Title box.
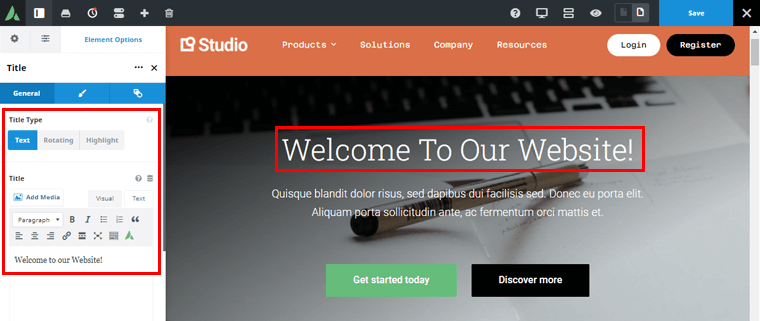
There, you can edit the content. For example, let’s say, ‘Welcome to our Website!’ You can see the changes as you make through on the right side of your screen.
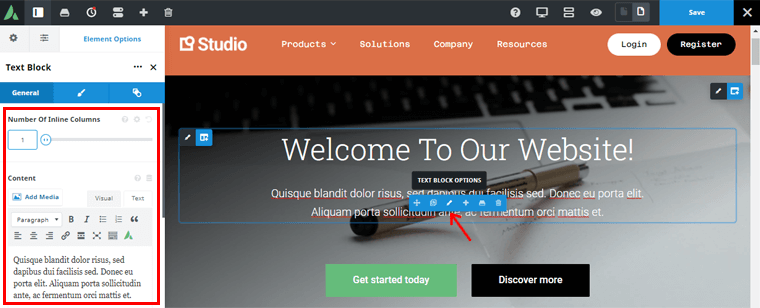
In the same way, you can further edit the text content that’s located just below the title.
Likewise, you can edit the buttons. Just hover your mouse on the respective buttons.
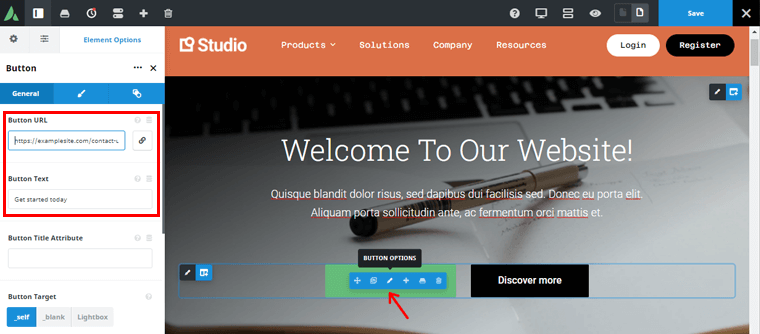
On clicking the pen icon, you’ll get the customization possibility on the left side of your screen. There, you can change the Button URL and Button Text.
In addition, you can change the separator style. By default, there is a big half-circle separator in the demo. Then, hover your mouse on the separator. And click on the pen icon that’ll open the customization possibility on the left.
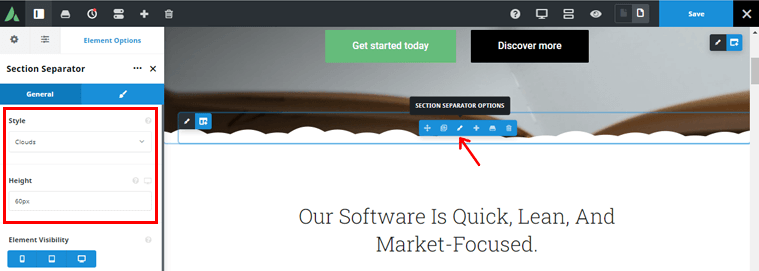
Here, we’ve changed the separator style into Clouds. You can see the changes on the right-hand side. This way, you can put the separator that best suits the need of your site.
Following the same process, you can customize the entire nook and cranny of your homepage to your choice.
4. Additional Customization Options
Similarly, now let’s check out the additional customization options offered by the Avada theme.
For that, from the back end of your dashboard, go to ‘Avada’ on the left navigation and click on the ‘Options’ button.
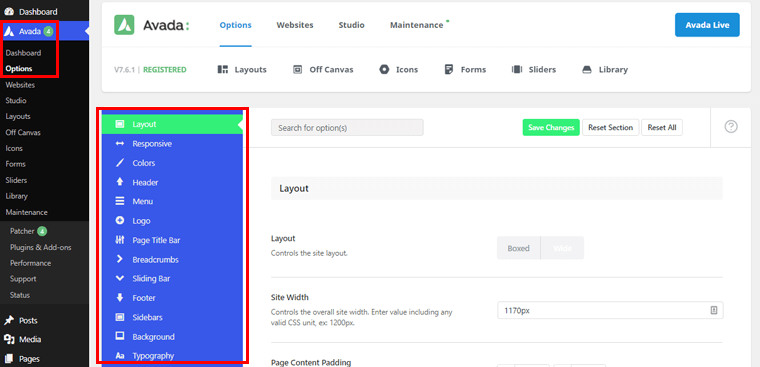
On clicking it, you’ll find a plethora of additional customization options. You can play with these customization options to exactly tailor the site to your choice.
Here, let’s customize a few of the essential ones:
Layout
So, the first customization option that you can find here is ‘Layout’. From here, you can control the entire layout of your website.
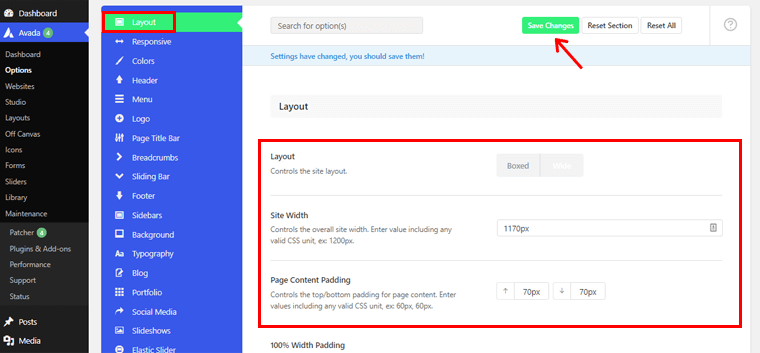
You can choose whether you want your layout to be Boxed or Wide. Also, you can change the overall width of your site using the Side Width box. Besides, it also provides you with the option to customize the Single Sidebar Layout and Dual Sidebar Layout.
Once done, click on the ‘Save Changes’ option at the top. Further, you can view if the changes have occurred or not on your live site.
Responsive
Another customization option that we’ll be looking into is the ‘Responsive’ option. As you might already know, Avada is widely known for its responsiveness. So, if you click on the Responsive option, then you’ll see the following page.
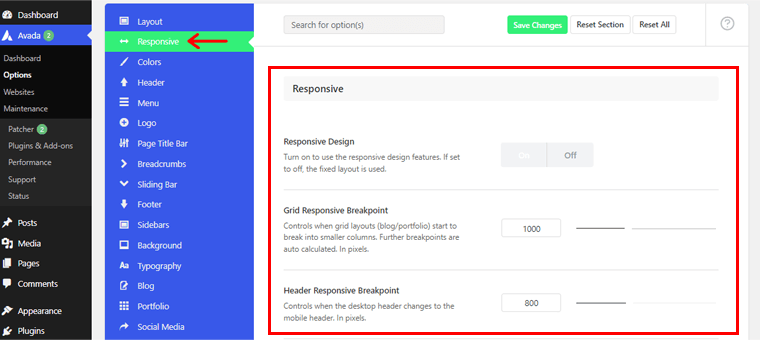
From here, you can customize turn on/off the responsive design. If you turn it on, then your website will adjust according to your site visitors’ respective devices. Meanwhile, if you turn it off, then a fixed layout is used.
Similarly, you can also find grid responsive breakpoints, header responsive breakpoints, site content responsive breakpoints, and so on. These customization options help you create a fully responsive website.
Once done, you can click on the ‘Save Changes’ option.
Search
Likewise, on clicking the ‘Search’ option, you can customize the following settings:
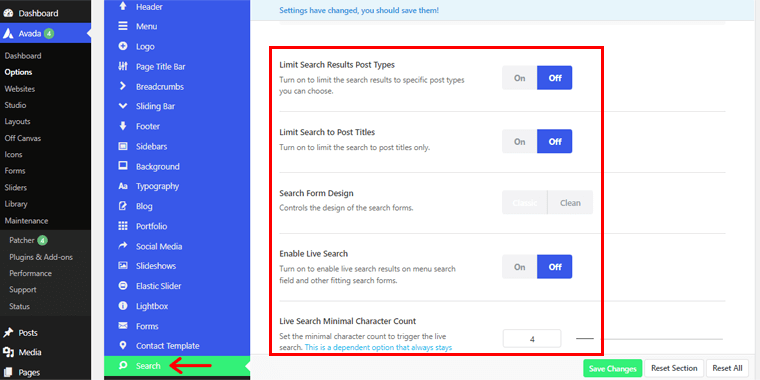
- Limit Search Results Post Types: Enable/disable to limit the search results to specific post kinds.
- Limit Search to Post Titles: Activate this option to limit the search to only post titles.
- Search Form Design: Control how the search forms are designed whether Classic or Clean from this field.
- Enable Live Search: Turn this option on to see real-time search results in the menu search field and other appropriate search forms.
Besides, it also has options like live search number of posts, live search results container height, etc.
Privacy
Another customization option, that we’ll be looking into is ‘Privacy’. So, once you click on the Privacy button, you’ll be able to change the following settings:
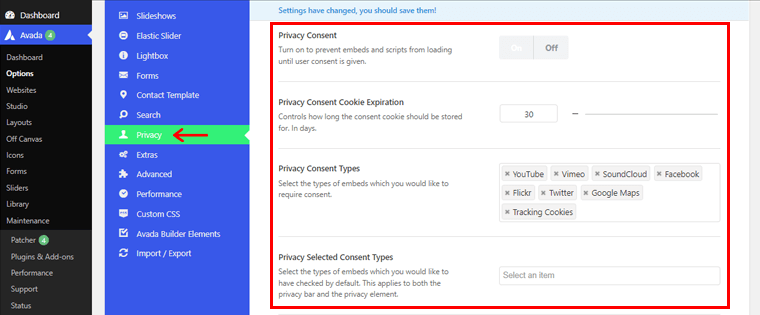
- Turn Privacy Consent on to prevent embeds and scripts from loading unless the user gives his or her permission.
- Set the number of days duration for which the consent cookie shall be stored via Privacy Consent Cookie Expiration .
- Privacy Consent Types to choose which embeds you want to require permission for. Such as Tracking Cookies, YouTube, etc.
- Choose which sorts of embeds should be checked by default from Privacy Selected Consent Types. For both the privacy bar and the privacy element.
Besides, you can personalize privacy placeholder background color, privacy placeholder text control, and enable/disable the privacy bar.
Custom CSS
Similarly, the Custom CSS option comes in handy if you’re a tech whiz.
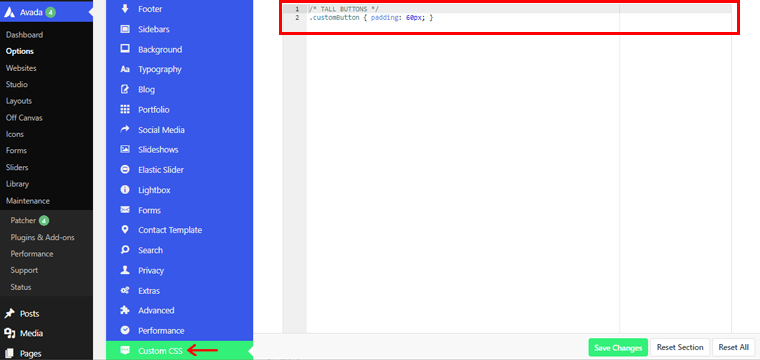
By adding your CSS codes, you can change the look and feel of your website.
5. Adding New Page on Your Avada Website using Avada Builder
Now, let’s look further into adding new content to your Avada website. For that, you need to create a new page on your website.
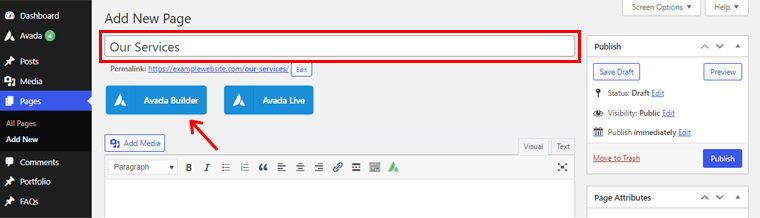
To do so, go to the ‘Pages’ option on the left navigation of your dashboard. And, then click on the ‘Add New’ option.

Now, let’s give it the title ‘Our Services’ in the Add Title section just as shown in the above picture. Following that, you need to click on the ‘Avada Builder’ option.
On clicking it, you’ll see 2 options. One is Container and another is Avada Studio.
If you want to build your page from scratch, then you can click on the Container option.
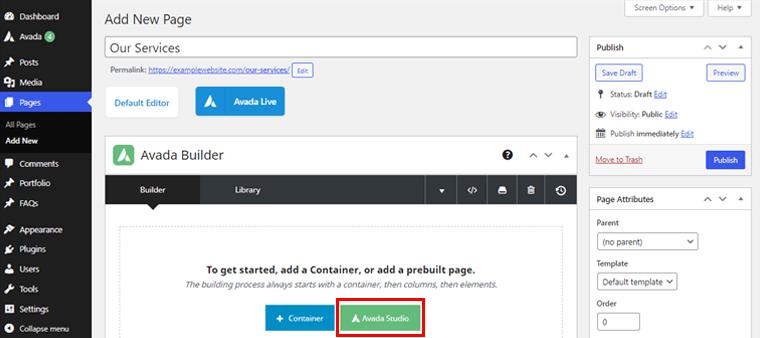
Meanwhile, Avada Studio provides tons of beautiful prebuilt page templates that you can use. As a result, you don’t have to build your page from scratch. So, here we’ve clicked the ‘Avada Studio’ option.
On clicking it, you’ll see the page as shown below that includes beautiful prebuilt pages:
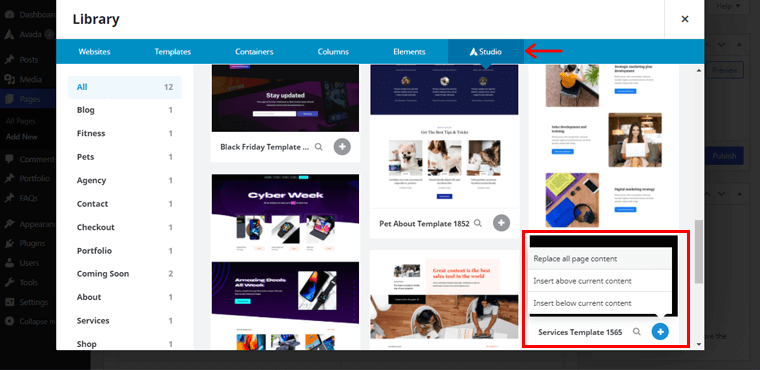
So, here we’ve chosen the ‘Services Template 1565’ page template. On clicking the (+) icon, you’ll see various options. Then, you need to click on the ‘Replace all page content’ option.
You can now further customize the imported page template to your choice.
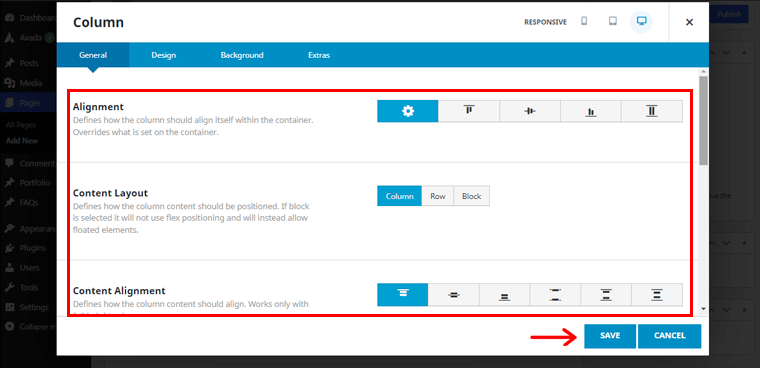
As shown above, you can change the general settings of the column of the imported page. From the general settings, you can customize the alignment, content layout, content alignment, etc. Once done, click on the ‘Save’ option.
Similarly, you can remove the default images of the template.
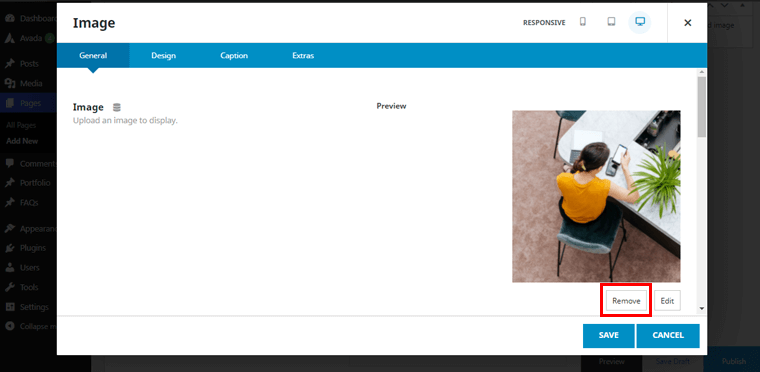
To do so, click on the ‘Remove’ option. Further, you can put the image of your choice from the same location.
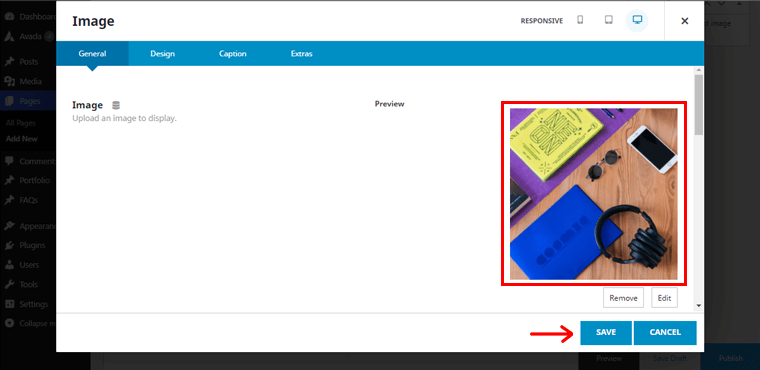
Once done, click on the ‘Save’ button.
In the same way, you can edit other various contents of the imported page. And create the page for your site exactly how you thought of using Avada Builder.
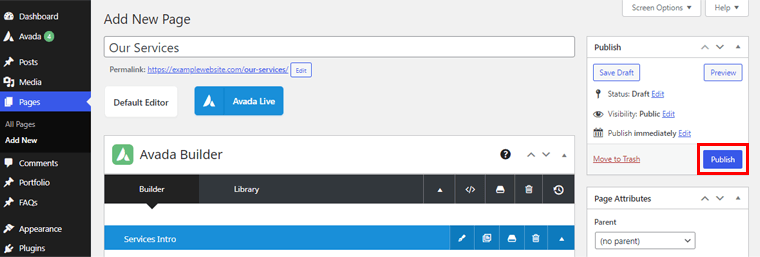
After everything is finalized, you can click on the ‘Publish’ button in the top right corner.
Aside from the above customization options, you can easily alter many more areas of your website effortlessly.
With that out of the way, let’s move on to the Avada theme’s support service in the following section of our review.
G. Avada Theme Support
Another factor to think about while using any theme is customer support or support service offered.
Even though Avada is an easy-to-use theme, you may run into certain problems while using it. This is why the support team is so crucial.
So, let’s have a look at the Avada theme’s support service.
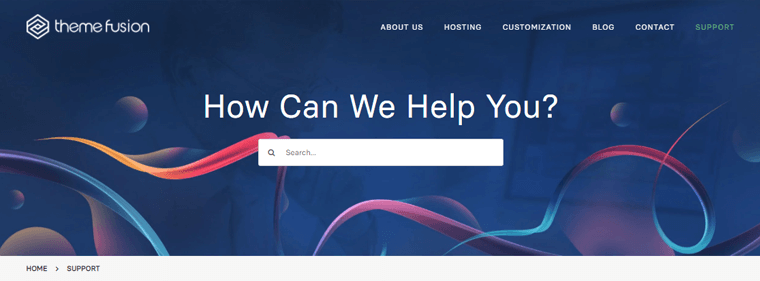
On Themeforest, Avada has its support section. All of the common troubles with this theme are listed here, along with links to solutions.
Moreover, it also comes with a comprehensive documentation reference. There are numerous knowledge bases available to learn more about this topic in a detailed and comprehensive manner.
You can also check out its many video tutorials if you’re interested in learning through video.
Moreover, you can also submit a ticket for immediate assistance if the problem is urgent. For that, you need to create a support account first. See this documentation for a step-by-step process.
Without a doubt, you can rely on the support service provided by Avada theme.
With that, let’s move forward to the next portion of this Avada theme review.
H. Avada Theme Pricing
Up until now, you might have known that Avada is a premium theme. That means you’ll have to pay a certain fee to use it. Now it’s time to check out how much the Avada theme will cost you at least in this portion of the Avada review.
On the Envato ThemeForest marketplace, the Avada WordPress theme is available for USD 60. This purchase includes 6 months of ThemeFusion support and all future theme upgrades.

By paying an additional $18, you can extend the 6-month support period for another six months. As a result, you’ll have a total of 12 months to contact the developer with any Avada WordPress theme-related difficulties.
Let’s move on to the next section of our Avada WordPress theme review now.
I. Pros & Cons of Avada Theme
You should be aware of all of the positive and bad aspects of a theme before deciding on it. With this in mind, we’ve put up a rundown of the pros and cons of the Avada theme. Let’s have a glance at this section of the Avada theme review.
Pros of Avada Theme:
- Multipurpose WordPress theme that you can create any kind of website hassle-free.
- A performance-optimized theme for smooth and healthy running of your website.
- Entirely compliant with the Web Content Accessibility Guidelines. This ensures that your website is accessible to a wide range of audiences.
- Offers Avada Live so that you don’t have to switch back and forth to the front and backend for customization.
- Comes with its own page builder i.e. Avada Builder for creating beautiful pages for your site.
- Provides beautiful and visually-appealing demo sites without needing to build the website from scratch.
- Includes various premium plugins bundled with it for additional functionality.
- This theme is completely responsive and works on any device.
- Retina-ready features to help your website look incredibly sharp and crisp on high-resolution devices.
Cons of Avada Theme:
- There is a limit of one license per website with the regular plan.
- Premium support is only available for six months. After that, you should pay extra money.
- Avada theme has a learning curve. Its plethora of customizing options may be overwhelming to newcomers.
J. Avada Theme Alternatives
You don’t have to be concerned if the Avada theme fails to fascinate you. There are some great alternatives to the Avada theme that can be used in its place.
So, in this segment of the Avada theme review, let’s get to know them a little better.
1. Kadence
Kadence is a multipurpose WordPress theme that’s both beginner and expert-friendly. This drag and drop theme makes it effortless to create sophisticated websites.

Just like Avada, Kadence also offers pre-designed demo websites. And, you can also customize your own, including font, color, social icons, drop-down menus, and more. You may also use the live editing option to see how your design looks while editing.
In addition, you have complete control over the design of your website. There are various layouts available, including site-wide options for pages and posts. On top of everything, it has a simple and beginner-friendly header and footer builder.
Not to forget, it’s a fully Gutenberg-based theme powered by the powerful Kadence Blocks plugin. The plugin includes extra blocks for your content editor and lets you make advanced pages without any coding.
Pricing:
The Kadence theme is available for free download from the WordPress.org theme repository.
Similarly, the premium version is available at the following prices:
- Kadence Pro Plan: In $59/year, you receive header add-ons, WooCommerce add-ons, and more features. You can also use it on an infinite number of sites and get a year of upgrades and support for free.
- Essential Bundle Plan: It costs you $129 per year. And includes Kadence Theme Pro, Kadence Block Pro, Pro starter templates, one year of support, and updates.
2. Divi
Divi WordPress theme is yet another multipurpose theme with tons of website-building possibilities. It comes with over 800 pre-built design elements to help you create the website of your dreams.
Importantly, the Divi theme comes with its own page builder ‘Divi Builder’. This makes Divi one of the greatest competitors of Avada. Using it, you can simply add, delete, and move things around on the front end of the website. Thus, you can construct your page in real-time and instantly see the results.
Pricing:
This premium WordPress theme is available at the following prices:
- Yearly Access: $89 with hundreds of website packs, product updates, premium support, and unlimited website usage.
- Lifetime Access: $249 with hundreds of website packs, lifetime updates, lifetime premium support, and unlimited website usage.
3. Astra
Astra is a popular WordPress theme that’s fast, lightweight, and multifunctional. Importantly, it’s integrated with major page builders like Elementor, Beaver Builder. This makes it one of the most powerful WordPress themes and a significant competitor of Avada.

Along with page builder integration, Astra also offers ‘Ultimate Addons’ plugins to extend features for each page builder. Such as Ultimate Addons for Elementor.
Not to mention, this theme includes pre-built templates and websites for the most of website kinds. You can further customize the website container, header, archives, single pages, articles, sidebar, and more.
Pricing:
Astra is a freemium WordPress theme with both free and paid versions available. WordPress.org has a free version of Astra available for download.
You can upgrade to the premium version at the following pricing plans:
- Astra Pro Plan: Costs you $49/year ($239 if paid lifetime). Comes with a white-label, sticky header, mega menu, and more.
- Essential Bundle Plan: Costs $169/year ($499 if paid lifetime). It includes all Astra Pro features, Elementor/Beaver Builder addons, and 180+ premium starter templates.
You might want to check our detailed Astra theme review to get more insight into it.
K. Avada- Most Popular WordPress Theme But Is it Worth it?- Our Verdict
So, your long wait is finally over! It’s now time to respond to your most critical question: Is Avada, the most popular WordPress theme, worth it?
Absolutely, yes! Avada theme opens up a world of opportunities for building the website of your dreams. The advantages of the Avada theme significantly outweigh a fraction of its disadvantages. You should go ahead and use the Avada theme without any hesitation.
Hey, but wait if you’re not a non-technical person, then importing a demo site is the best option you have. If you don’t want to use a pre-built site, then be ready to invest some time to learn!
In a nutshell, the Avada theme is one of the most versatile WordPress themes available. We believe it’s most suitable for agencies who build websites for their clients! Or individuals who want to make a sophisticated, powerful website!
We tried our utmost to show the Avada theme from every aspect possible in this review. So, whatever type of business you run, you can rely on this theme to get your site up and running.
Going to make your first website? No need to worry at all! Click the button below to access our step-by-step guide!
Conclusion
And that concludes our Avada theme review! We’ve reached the end of this Avada theme review article. We truly hope it was beneficial to you.
If you’re using the Avada theme, then please share your review with us in the comments section below.
Do feel free to reach out to us if you have any questions or concerns about this Avada theme review.
Are you a beginner who has not created a website before? We’ve got your back! Check our step-by-step guide on How to Make a Website from Scratch – Beginner’s Guide.
If you enjoyed our Avada theme review, please share it with your friends and family. Lastly, do follow us on Facebook and Twitter for similar content.