

Are you wondering how to create a membership website? Well, you’re in the right place.
Membership websites have become a driving force in the digital world, catering to various niches and interests. It lets you offer valuable content and unique perks to your members.
In return, you’ll earn recurring revenue! However, creating a membership website can be daunting, especially if you’re a beginner.
That’s why this guide explains how to create a membership website. Also, we provide you with insights, tools, and tips to make it successful. So, without any delay, let’s dive in!
What Type of Membership Website to Build? (Popular Ideas + Examples)
First, a membership website is a popular niche website that offers exclusive content to its members. This exclusive content is accessible to your members only after they register or pay a fee. But you can also provide free content on the website that’s available to everyone.

Before you start building, you must decide what type of membership website to create. For that, consider famous ideas and examples. Don’t you know any? We’re here for the rescue!
Here are some popular types of membership websites, with examples you can consider:
1. Online Course Membership Websites
Online course membership sites offer education and training on one or more topics. If you own an educational institute or a business, then you can create this site for students and professionals. Even as an individual with expertise, you can create and run such a membership website.
To create an online course membership website, WordPress has many LMS plugins (Learning Management System). These plugins have all the membership and online course functions.
The table below shows some online course membership site ideas and examples:
| Online Course Ideas | Description | Examples |
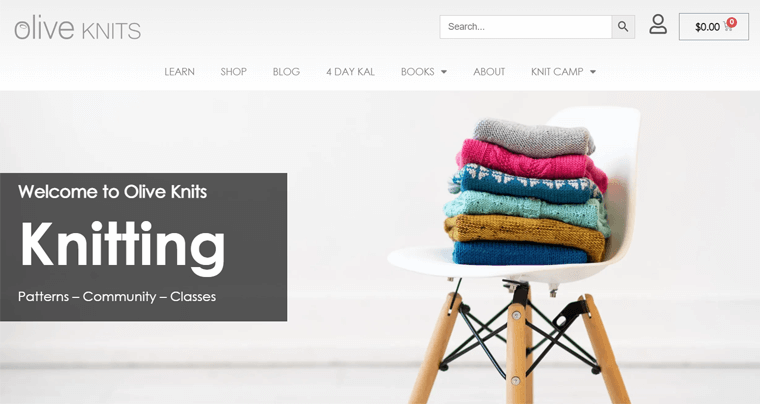
| Life Skills Training | Share basic life skills and business hacks. | Olive Knits provides skills and resources for sweater knitting. |
| Coding Courses or Training | Teach students coding or improve their coding skills. | Skillcrush offers free coding camps and paid courses for aspiring front-end developers and designers. |
| Marketing and Business Training | Teach businesses the proper way to market their product. | Smart Passive Income offers courses on affiliate marketing, email marketing, etc. |
| Health and Fitness Course | Share fitness plans, meditation courses, yoga training, etc. | Lasater Yoga includes meditative and yoga techniques in its courses. |
2. Content Library Membership Websites
A content library membership site offers a valuable repository of diverse and exclusive content to its subscribers. Hence, you can deliver content like blogs, videos, or audio.

Moreover, you can grant full access to paying members or provide some content for free. Mostly, such websites provide some content to starter plan members and all content for the highest plan members.
The following table includes some content library membership website ideas and examples to create:
| Content Library Ideas | Description | Examples |
| Template and Stock | Stock content can be photos, videos, illustrations, templates, etc. | ThemeForest lets you create an account for free. But it contains a collection of premium themes. |
| Recipe and Cooking | Share your unique recipes, weekly meal plans, shopping lists, and courses. | 40 Aprons is a food blog with diet plans and recipes for many cuisines. |
3. Group and Community Membership Websites
Group and community membership websites excel at fostering member relationships. These sites include features for socializing, knowledge sharing, and chatting.
To create such a website, you can opt for any membership plugin and complement it with a forum plugin. For WordPress sites, bbPress or BuddyPress can be the best choices. Using a forum plugin lets your community connect, interact, and engage in conversations.
Check out some potential group and community membership website ideas and examples to create:
| Group and Community Ideas | Description | Examples |
| Fan and Fandom | Either share news about celebrities or support loved entertainers. | Patreon is for digital creators to engage with their fans through their work. |
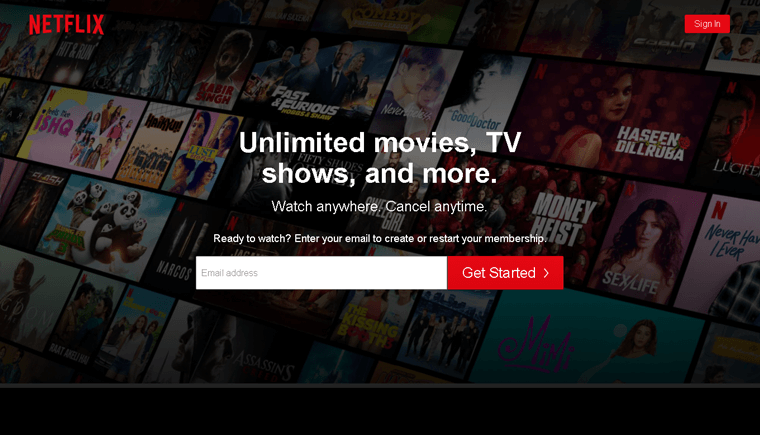
| Entertainment and Video Streaming | Stream video, music, or live events for entertainment. | Netflix streams premium shows, documentaries, and movies. |
Also, find the best WordPress community plugins and the best community themes.
4. Serial Content Membership Websites
A serial content membership website consistently produces a series of content of related genres. You can use this site to let people read news, view magazines, or watch podcasts.

So, if you can regularly deliver content in a sequential manner, then this could be the ideal choice for you. Undoubtedly, these sites attract a vast audience of readers and listeners.
Here are some serial content membership website ideas and examples to get inspiration and create:
| Serial Content Ideas | Description | Examples |
| News and Journalism | Provide news through means like video series, blog posts, live streams, etc. | BizNews shares opinions, boardroom talks, and blogs on health, investment, etc. |
| Podcast | It’s best for those who are well-spoken. It can be about exclusive interviews, live discussions, etc. | Podcasters’ Paradise shares premium podcasts with free training on creating and growing podcasts. |
Learn all the other membership website ideas in this guide. Also, get inspiration from the best membership website examples here!
What Membership Model Can You Use?
After you decide your niche for the membership website, you must ask yourself 2 questions:
- How will I deliver the content?
- What access levels will I offer to members?
Hence, you must identify the different membership models for your website. Your selection depends on your goals and the content or services you offer.
In fact, there are several membership models you can use for a membership website. So, knowing about them and making a decision can be difficult.
For your guidance, we present key points about some renowned membership models. Have a look at them and recognize your membership website model. Get set, go!
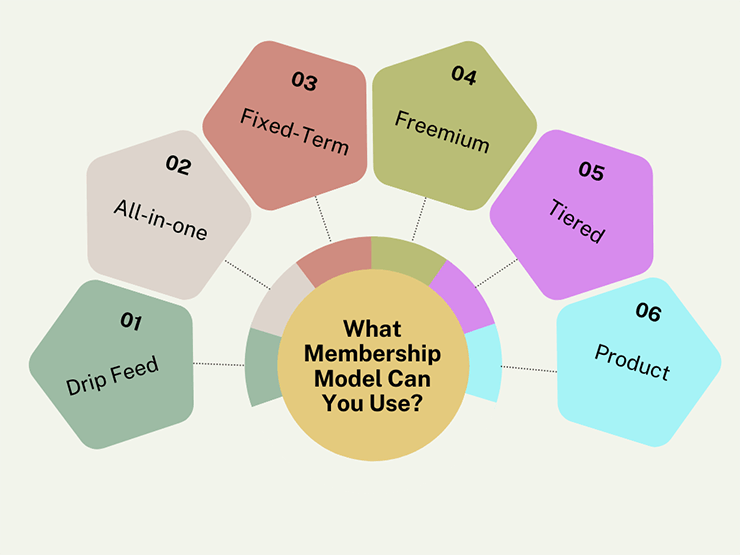
1. Drip Feed Membership
- Gradually release content to members daily, weekly, or monthly.
- Members can consume content at a manageable pace and stick to a schedule.
- Retains users’ interest and engagement.
- Extends the membership duration.
For example, your online course website can use this model. You can release materials incrementally to keep members committed and perceive the content as more valuable.
2. All-in-One Membership
- Immediate access to all content upon signing up.
- You don’t have to schedule content releases often.
- Members can explore the content at their own pace.
- You can offer monthly bonus content to maintain engagement.
- Simplifies the prediction of revenue growth as all members pay the same amount.
For example, your training website can use this model. On your website, let your members pay a single flat fee to access all content every month.
3. Fixed-Term Membership
- Includes a predetermined and automated expiration date.
- The duration can vary, ranging from months to years, depending on the service.
- Ideal for people who want to acquire a skill within a timeframe.
- Full or installment payments are applicable, depending on your requirements.
For example, your health and wellness website can offer a 30-day body detox program. So, such a membership model is suitable for gyms, yoga centers, educational institutes, etc.
4. Freemium Model
- Combination of free and premium options for memberships.
- The free plan gives access to some features.
- Members can start with a free trial before considering a premium subscription.
- Free plan users can upgrade to a premium plan.
- Premium plan users get complete access and additional benefits.
For example, your online graphic design tool lets people use its basic features. However, after payment, they can access advanced features for better design options.
5. Tiered Membership Model
- Offers multiple membership levels.
- Each level has a distinct price and corresponding benefits.
- Higher-tier members enjoy greater access to exclusive content and privileges.
- Members can upgrade their plans according to their demands.
For example, your digital marketing community website can use this model. A free tier allows entry-level users to access the community forum. The different premium tiers can contain increasing features, like Q&A sessions, one-on-one sessions, job listings, etc.
6. Product Model
- Suitable for selling and distributing products of any kind.
- Let customers become members to grant special and exclusive offers and sales.
- Sell a product requiring monthly or yearly recurring fees.
- You can predict revenue and easily enhance customer retention.
For example, your music membership website can let members listen to your songs as long as they pay. Also, you can include a free tier with access to songs with ad support.
Hence, these are some popular membership models. In a nutshell, you use any one or more of them for your site. Find all the other membership models in this complete guide here!
Creating a Membership Website From Scratch (In 6 Steps)
Hopefully, you’ve chosen your website’s niche and model. Now, you can start creating your membership website. But you should also select some reliable platforms to begin with.
Don’t worry! We’ve come up with some suggestions for you. So, follow the steps below and kickstart your membership website. Let’s go!
Step 1: Choose a Membership Website Builder
First, you must pick a website builder that lets you create a membership website. Not all site builders are suitable for this niche, so choose one of the following recommendations:
1. WordPress.org
WordPress is the #1 CMS (Content Management System), powering more than 43% of sites on the web. WordPress.org is 1 of the 2 versions of the WordPress CMS that’s open-source and free. Overall, this website builder lets you create any type of website easily and quickly.
For your membership website, WordPress contains many WordPress membership plugins. On top of that, you’ll also find various WordPress membership themes for the front end.
In addition, WordPress.org is a self-hosting platform. Meaning, you must buy a web hosting plan and domain name for your website yourself.
Features
- Includes almost 60,000 free plugins that let you add any feature you want to the site.
- Offers over 11,000 free themes and more premium themes for various kinds of sites.
- Gives a beginner-friendly interface with drag-and-drop functionality to make sites.
- Consists of a wide range of patterns to easily build sections of your website.
- Comes with powerful SEO plugins (Search Engine Optimization) for online visibility.
Discover the differences between the 2 versions, WordPress.com vs WordPress.org, here.
Pricing
As said before, WordPress.org is a free and open-source platform. Simply put, you can download the software for free and start building your site.
But it doesn’t come with web hosting features to make the website available online. So, you must purchase a hosting plan and domain name from any provider.
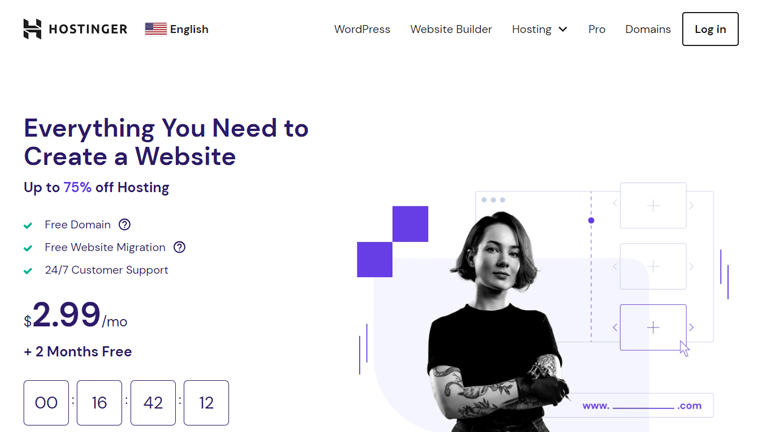
Unquestionably, it’s ideal if you get both of them from the same platform. For example, Hostinger offers a WordPress hosting plan at $2.99 per month with 1 year of free domain.
Not to mention, the price varies based on the free or premium plugins and themes you use.
2. Webflow
Webflow is a cloud-based, hosted website builder. Meaning, you can design, build, and launch your site without worrying about finding and managing the hosting infrastructure.
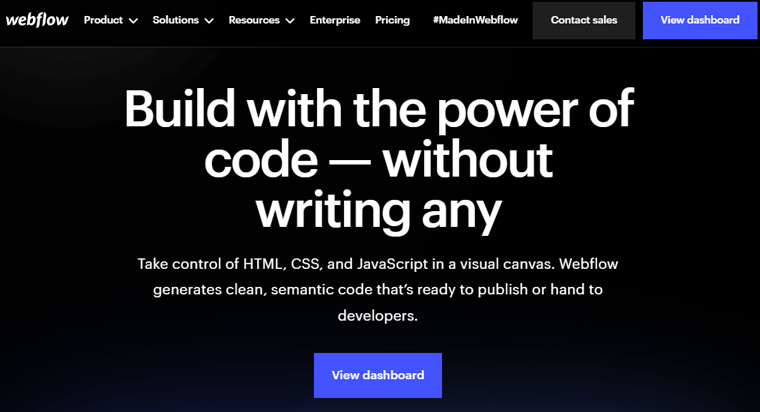
Further, it offers 500+ free and paid Webflow templates for various website niches. Among them, you’ll find several templates just for your membership site. Also, you can customize and style every page of your website the way you want.
Features
- It’s so easy that anyone can begin the website creation process without coding.
- Includes flexible content management tools and fine-tuned controls for improving your website’s SEO.
- Integrates with popular platforms to extend your membership site’s capabilities.
- Lets you collaborate with your team members on your website projects.
- Includes everything you need to develop an interactive website. That can be popups, sliders, animations, etc.
Pricing
Webflow is a freemium website builder with both free and premium plans. The free plan called Starter includes 50 CMS items, supports 50 form submissions, 1 GB of bandwidth, and the webflow.io domain.
For your membership website, you can go with one of the following General plans:
- Basic: $18 per month billed monthly, $14 per month billed yearly, 500 monthly form submissions, custom domain, 50 GB bandwidth, and all free features.
- CMS: $29 per month billed monthly, $23 per month billed yearly, 3 content editors, Basic plan features, 2000 CMS items, etc.
- Business: $49 per month billed monthly, $39 per month billed yearly, form file upload, CMS plan features, accelerated speed, etc.
- Enterprise: Contact sales to get enterprise-level security and custom features.
Find out more about it in our guide to what Webflow is. Know the differences between WordPress and Webflow if you’re confused. For a better platform, check out the best Webflow alternatives!
3. Wix
Another quick and easy-to-use website builder for membership sites is Wix. It’s perfect for beginners who want the drag-and-drop functionality to create a professional website.
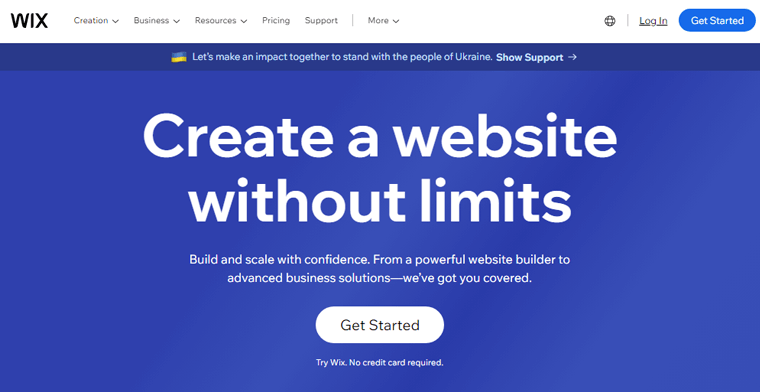
In addition, Wix provides many customizable templates for your membership website. However, ensure you select the right template among the given options. Because once your site goes live, switching the template is difficult.
Features
- A fully-hosted platform where you don’t have to find a hosting platform.
- You can connect your domain with a premium plan. While the free plan gives your website a domain like yoursite.wixsite.com.
- Includes 250+ free and paid apps to add additional website features.
- A built-in SEO toolkit lets your website rank better in search engine results.
- It has security features like SSL (Secure Socket Layer), site security monitoring, etc.
Pricing
Wix is also a freemium website builder. Simply put, it has both free and premium plans. That too falls under various categories like Website Plans, Business and eCommerce plans, and Enterprise plans.
Among them, you can go for Business and eCommerce plans that accept online payments and are ideal for membership businesses. Here are the premium plans to choose from:
- Basic: $17 per month, recurring payments, customer accounts, custom domain, etc.
- Unlimited: $25 per month, Basic plan features, 35GB storage, subscriptions, etc.
- VIP: $35 per month, Unlimited plan features, customized reports, priority support, unlimited dropshipping, and more.
Confused between WordPress and Wix? Find out their differences in this comparison blog.
Our Recommendation – WordPress.org
When comparing these membership website builders, WordPress.org stood out the most. That’s why we recommend using WordPress. Here’s a bunch of reasons to justify:
- Provides a user-friendly interface with drag-and-drop functionality.
- Comparatively, it includes more powerful membership themes and plugins.
- Relatively, it contains several free plugins to let you add any functionality you want.
- Lets you choose an affordable yet reliable hosting platform on your own.
Hence, we’ll be using WordPress moving forward in our other steps. Whether you do the same or not, follow the steps below, as they’re equally helpful for your membership site.
Step 2: Pick a Domain Name and Web Hosting
Moving forward, you must register a domain name for your membership website. And in the case of WordPress, purchase a web hosting plan too.
So, let’s look at the process of configuring a domain and web hosting plan. Here we go!
Step i: Register a Domain for Your Membership Site
A domain name is the address of your membership website that specifies your brand. It opens your site when visitors use it in search engines.
For instance, ‘sitesaga.com’ is the domain for our blog website.

First, pick a unique domain using the domain name generators. Once you decide on that, check its availability and register it with a domain registrar. For that, you can use one of the best domain registrars.
Guess what? You can get domain registration services from your hosting provider. So, why get them separately?
Step ii: Buy a Web Hosting Plan for Your Membership Site
A web hosting provider gives you a server to store your membership site files connected to the web. This makes your exclusive content accessible to members globally.

If you’re using a self-hosting platform like WordPress.org, then you must buy a web hosting plan. For that, you can learn how to pick a web hosting provider. Afterward, choose one of the best web hosting services available.
For WordPress membership websites, you can directly grab one of the popular WordPress hosting services. These hosts have pre-configured the WordPress CMS functionalities.
Among a long list, we truly recommend providers like Hostinger, Kinsta, Cloudways, etc. Most of these services offer incredible hosting solutions and domain registration. For example, Hostinger plans also include a free domain for 1 year.
Learn about these services and know how to purchase and configure a plan from our guides. We have Hostinger review and Kinsta review.
Hence, you can pick a host, select its suitable pricing scheme, and purchase it. For instance, Hostinger is one of the top choices for WordPress hosting. The starting price of its hosting plan is $2.99 per month.
Step iii: Configure Your Web Hosting Solution
Now, let’s learn how to configure a hosting plan using Hostinger. Similarly, you can set up your hosting plan with any provider.
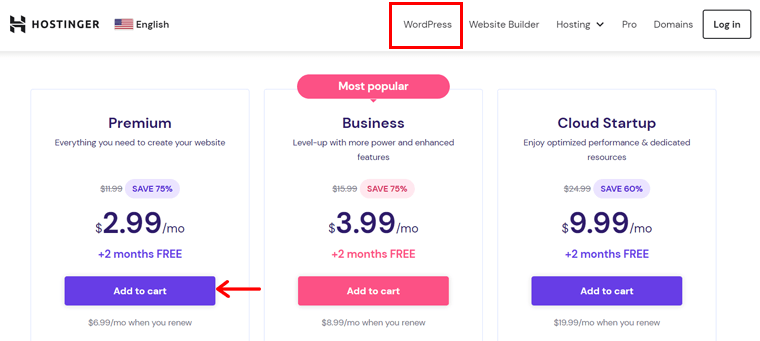
First, visit the Hostinger website and navigate to ‘WordPress’ on the navigation. There, you can find the various pricing options available. Now, hit the ‘Add to cart’ button for the most suitable plan.
Now, you’ll be redirected to the cart page where you must select the period. Afterward, create a Hostinger account. Then, enter the payment information after choosing a given payment method and hit the ‘Submit Secure Payment’ button.
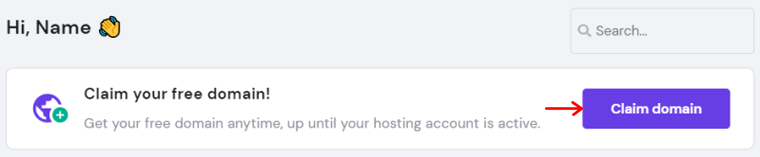
Following that, open your account and configure the hosting plan. There, add a new website for your membership business. When doing that, you should claim your domain. It can be the free domain by Hostinger or any existing domain.
Congratulations! This is how your web hosting environment and domain are ready to use. You can take the help of the Hostinger review guide for details.
Without further delay, open the ‘Websites’ menu on your Hostinger panel. There, click the ‘Admin Panel’ option on your membership site.
Now, you can log into the WordPress dashboard to start making your website. That’s what we’re doing next!
Step 3: Select a Suitable Membership Plugin
Once you’re done, you can select a WordPress membership plugin for your website. The WordPress core doesn’t have the membership function, so using a plugin lets you get it.
In fact, you’ll find several WordPress membership plugins to choose from. If you don’t have a big budget, then you can go with one of the free WordPress membership plugins.
To make the right decision, read our guide on how to choose a WordPress plugin.
Want to know our choice? Then, here’s a list of membership plugins we recommend:
1. MemberPress
MemberPress is an all-in-one WordPress membership plugin popular among thousands of creators. You can use it to easily build, manage, and track memberships on your website. Also, add as many pages, categories, posts, and feeds as you want without any hesitation.

Surprisingly, this plugin has a built-in LMS builder with drag-and-drop functionality. So, you can build and manage online course materials like lessons, quizzes, etc. on your website. Indeed, with the combination of offering memberships.
Features
- Supports payment gateways such as Accept Apple Pay, credit cards, etc.
- Attract customers and sell more by creating custom coupons.
- Includes affiliate plugin functionality to carry out affiliate marketing and earn more.
- Contains attractive pricing page templates. Also, it integrates with WordPress themes.
- Lets you drip content after configuring the time and content access expiration date.
Pricing
MemberPress is a premium WordPress plugin. Meaning, you must purchase a plan among the following MemberPress price options:
- Basic: $179.5 per year, 1 website, unlimited members and courses, email automation, coupon codes, etc.
- Plus: $299.5 per year, 2 sites, Basic plan features, unlimited quizzes and certificates, advanced customization, and more.
- Pro: $399.5 per year, 5 websites, all Plus plan features, sells corporate accounts, gifted memberships, etc.
Do you want to learn about MemberPress in detail? Then, go through our MemberPress review article. Also, learn the best MemberPress alternatives to find other competitors.
2. Paid Memberships Pro
Do you want a free WordPress membership plugin? If yes, then Paid Memberships Pro (PMPro) can be right for you!
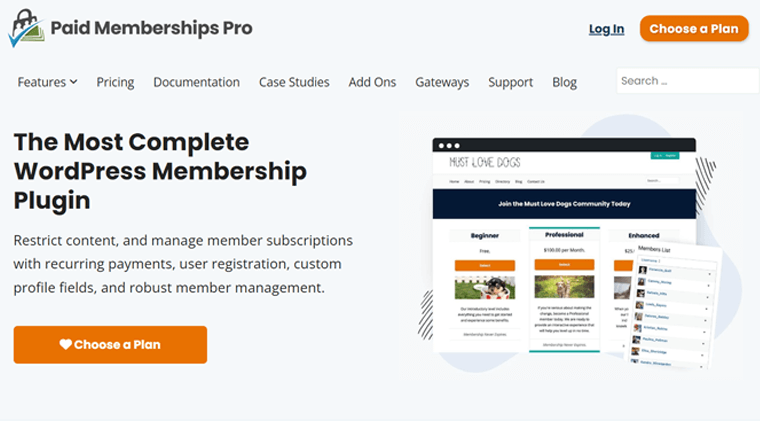
PMPro lets you create any membership website, whether it’s related to courses, coaching, podcasts, or news. Because you’ll get many tools to start, manage, and grow those websites.
Additionally, you can restrict your website content, like post types, single pages, blocks, and categories. And if guest members are trying to access them, then your site shows a custom message. This entices them to get a membership and see your valuable content.
Features
- Insert unlimited membership levels with distinct pricing and valuable content.
- Supports different pricing levels, like free, recurring subscriptions, one-time, etc.
- Shows sales and revenue reports with filters based on membership level and time.
- You can build profiles and directories for users to browse and search for members.
- Contains conversion features like discounts, gifts, sales, and invite codes.
Pricing
Despite the name, Paid Memberships Pro is a freemium WordPress plugin with both free and paid pricing plans. So, you can download the free PMPro plugin from the WordPress.org plugin repository. Also, plugin installation from the dashboard is possible.
In addition, PMPro comes with a variety of free and premium PMPro add-ons. To get a package of premium add-ons, you can buy one of the following PMPro premium plans:
- Standard: $247 per year, 1 website, 20 Standard add-ons, membership cards, etc.
- Plus: $397 per year, 2 websites, Standard plan features, 29 Plus add-ons, and more.
- Enterprise: $5000+ per year, 50+ sites, Plus plan features, performance scaling, etc.
Learn more about this plugin in our complete Paid Memberships Pro review.
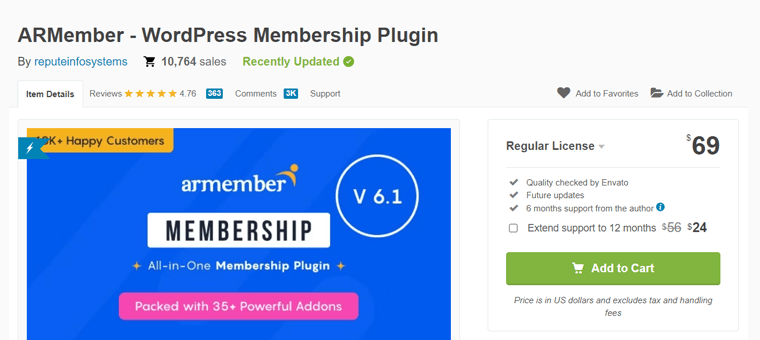
3. ARMember
ARMember is another powerful WordPress plugin to create and manage a full-fledged site. Overall, it’s ideal for membership sites like subscriptions, online courses, corporate training, digital stores, etc.
In addition, you can let customers sign up through a form and pay with various payment methods. Also, content restriction is very easy. You can give access to users depending on the level of membership they’ve purchased.
Features
- Gives free and premium add-ons to enable the content dripping functionality.
- Lets you design the pricing structure of each membership level individually.
- You can create forms for registration, login, password change, etc.
- Offers a reliable setup wizard that integrates everything and gives a single shortcode.
- Public profile templates are available for members to show bio, photos, etc.
- Security features like brute force login protection, hide login page, and more.
Pricing
ARMember is yet another freemium membership plugin for WordPress. Simply put, you can install its free plan from your WordPress dashboard. Another way is to download it from the WordPress.org plugin directory first.
If the free features aren’t enough, then buy its premium plan. You can purchase its pro version from the CodeCanyon marketplace. It costs $69 for a regular license. This comes with future updates and 6 months of support. For 12 months of support, it costs $24 more.
Find everything about this plugin in our detailed review of ARMember.
Our Recommendation – MemberPress
Among the above-mentioned membership plugins, we recommend using MemberPress. Want to know why? Know the reasons below:
- Seamlessly integrates with other WordPress plugins and 3rd-party tools.
- Includes a 100% risk-free money-back guarantee policy within 14 days of purchase.
- Ideal for membership sites of tutors, coaches, online stores, designers, and more.
- Lets you build customizable membership levels, coupons, content drips, etc.
- Contains a beginner-friendly drag-and-drop course builder.
- Provides good customer support and resources.
However, remember that MemberPress is a premium plugin. So, the choice depends on your business needs and budget.
For now, we’ll use MemberPress to move forward with the steps. You can still check them out to learn the steps involved in creating a membership website.
Note:
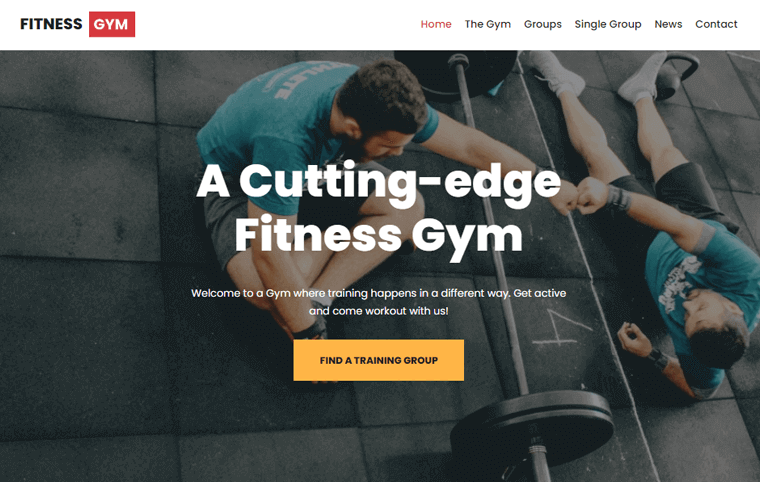
By now, you must be sure about the type of membership website you’re building. In our case, we’re going with a Serial Content Membership Website that offers news.
Among the previously-mentioned serial content websites, we’re taking the reference of BizNews. Accordingly, let’s learn how to create such a news website but for a different genre, which is Gym news.
Step 4: Install a WordPress Membership Theme
Following that, you must pick a membership theme that’s compatible with the membership plugin. And then, insert that theme into the dashboard.
A WordPress theme lets you have a beautiful website design. Surprisingly, the WordPress theme repository has many free themes and templates. Also, you can find advanced options in marketplaces like ThemeForest.
Here’s a list of the best WordPress membership themes to choose from. Make it easier for you by reading how to select a WordPress theme guide!
Among these, we recommend using the powerful theme, Neve. Why? Find the reasons here:
- It’s a freemium WordPress theme with both free and premium plans.
- Offers several templates for your membership website.
- AMP-compatible (Accelerated Mobile Pages), making your site run smoothly on mobile devices.
- Supports all the major page builder plugins like Elementor, Brizy, Divi, etc.
- A lightweight, fast, clean, and modern theme suitable to create a membership website.
- It has a 30-day money-back guarantee policy if you want to discontinue usage.
Learn everything about the Neve theme in this review article!
Step i: Install and Activate a WordPress Theme
After you decide on your theme, install and activate it on your website. Let’s go through the process using Neve.
First, open your WordPress admin area and navigate to the ‘Appearance > Themes’ menu. There, search for the theme ‘Neve’ and click on its ‘Install’ button once you find it.
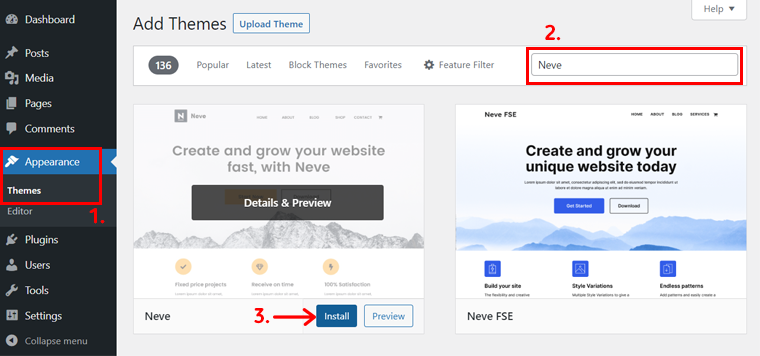
Afterward, hit the ‘Activate’ button to activate the installed free theme.
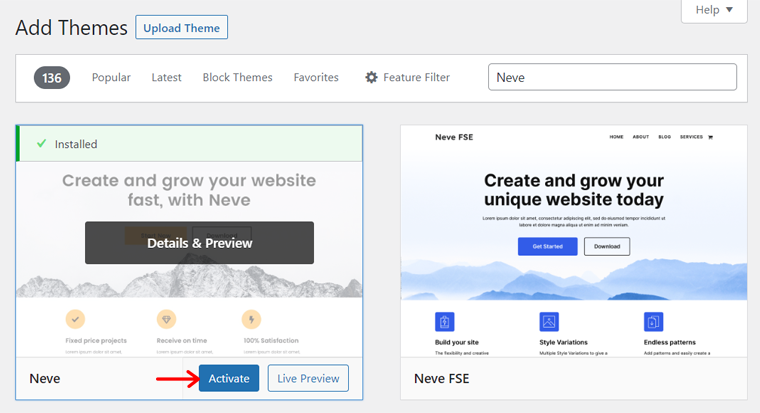
If you want to use a premium theme, then read our guide on how to install a theme here.
Step ii: Insert a Membership Template
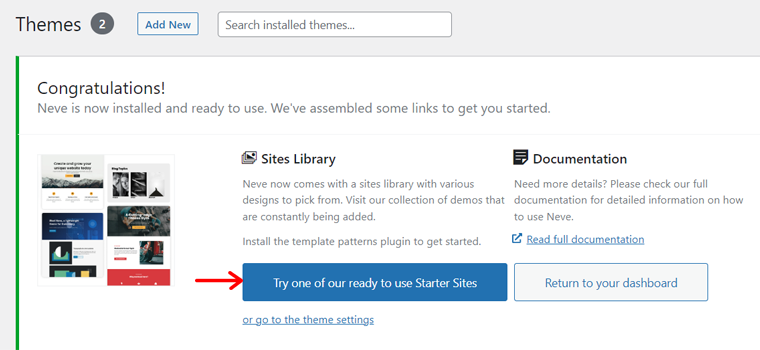
Once you find ‘Neve’ as one of the menu items on your dashboard, you can move forward. But it’s good if you use a template that makes your membership website stand out.
For that, enable the ‘Sites Library’ plugin by clicking ‘Try one of our ready to use Starter Sites’ as shown below.
This redirects you to the ‘Neve > Starter Sites’ menu. There, choose your website niche. Accordingly, you’ll get a list of options for the site design.
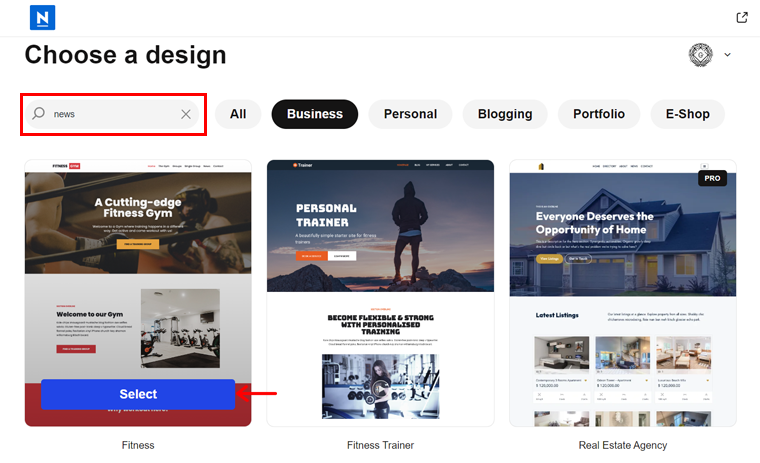
There, type the keyword ‘membership’ or anything that’s closest to your website. For instance, we’re creating a news membership site, so let’s type ‘News’. Among the given templates, hover over the one you like. And then, hit the ‘Select’ option.
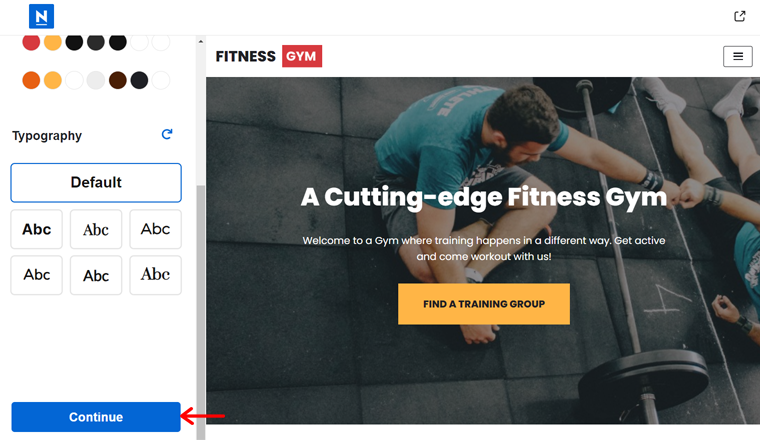
Following that, you’ll get access to design options for the website. So, pick the color palette and typography. Then, hit the ‘Continue’ button.
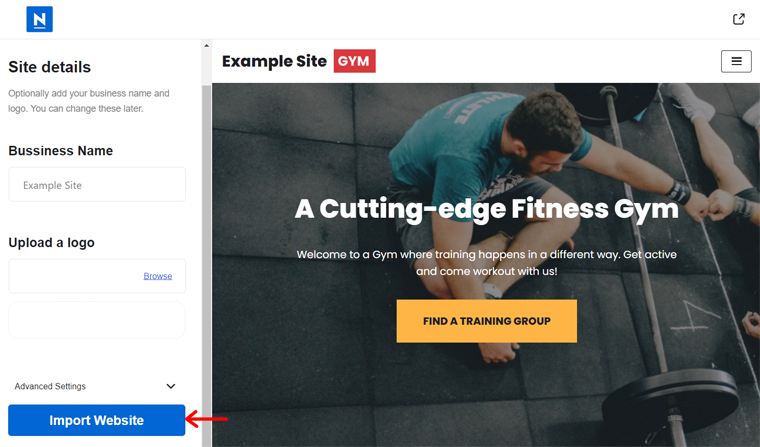
Similarly, you can enter your business name and upload the logo. Next, hit the ‘Import Website’ button.
Lastly, submit some information about you and your website and return to the dashboard.
After a while, the template installation is complete. Congratulations!
Step 5: Setting Up the Membership Website Features
Moving forward, you can now insert the membership plugin and use it on your website. For that, there’s a series of steps that you must carefully follow. Go through them!
Step i: Purchase a MemberPress Plan
MemberPress is a premium plugin, so you must buy it first. If you’re using a free plugin, then you can read this guide on how to install a WordPress plugin and work accordingly.
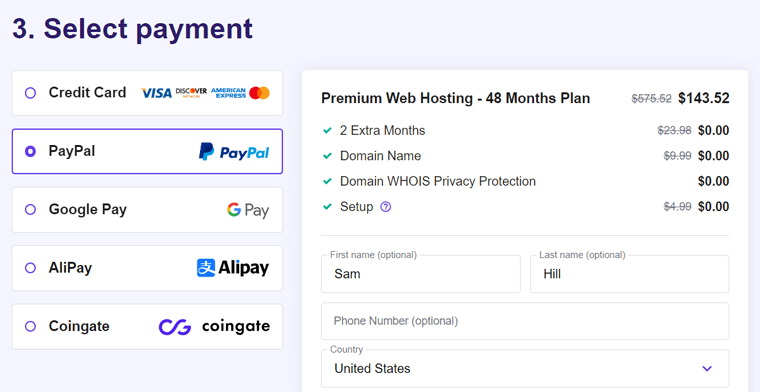
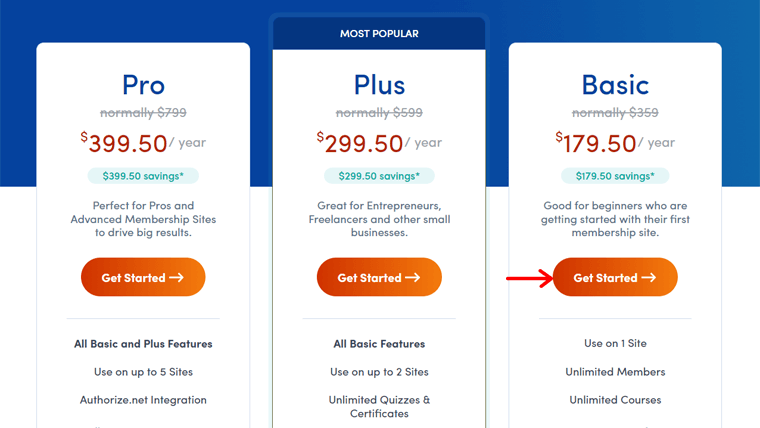
To purchase a MemberPress plan, open its Pricing page on the site. There, you can see the 3 different pricing schemes. Among them, pick a plan and click on the ‘Get Started’ button.
Now, you’ll land on the checkout page, where you have to add your account information. Next, pick a payment method between credit card options or PayPal. Accordingly, fill out the payment information and click the ‘Get Started with MemberPress’ button.

After the purchase is complete, you’ll receive an email with the download link and license key. So, download the plugin’s ZIP file and keep your license key safe somewhere.
Step ii: Upload, Install, and Activate MemberPress
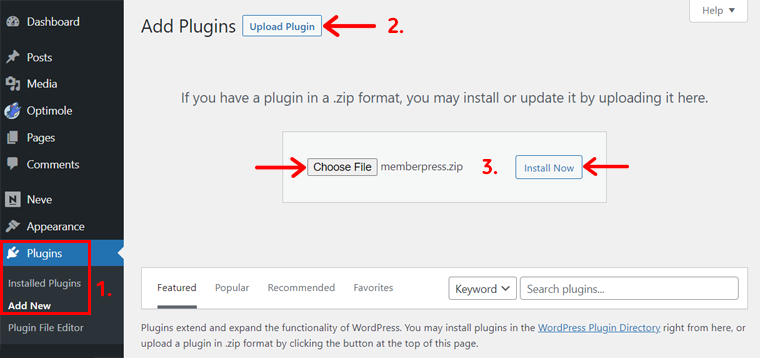
Following that, log into your WordPress admin dashboard and open the ‘Plugins > Add New’ menu. On that page, hit the ‘Upload Plugin’ button at the top.
There, click the ‘Choose File’ button and upload the MemberPress’s ZIP file. Next, click the ‘Install Now’ button to start the installation process.
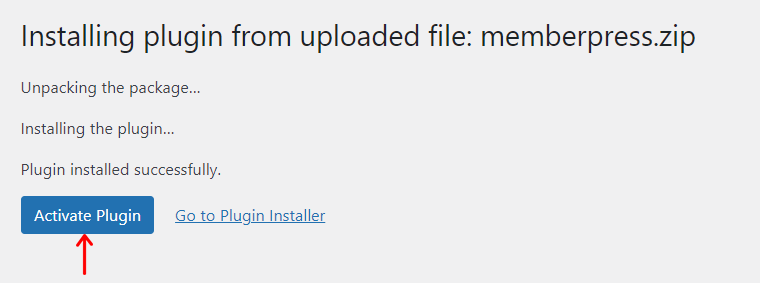
Afterward, you must click the ‘Activate Plugin’ button to activate the installed plugin.
This doesn’t end the process! You should activate the plugin with your license key as well. By doing that, you’ll get access to its add-ons and receive future updates.
Hence, open the ‘MemberPress > Activate’ menu. Next, add the license key and click the ‘Activate License Key’ button as shown below.

Congrats! Now, MemberPress is successfully installed and activated on your website.
Step iii: Configure MemberPress
After the installation, you should configure the plugin settings based on your needs. For that, navigate to the ‘MemberPress > Options’ menu.
There, you’ll find multiple tabs as follows that you must configure:
- Pages: Decide to use the default pages/slugs or custom pages/slugs for membership.
- Account: Setup permissions, registration, login, logout, and welcome page message.
- Fields: Configure the default user fields or add custom user information fields.
- Emails: Edit the sender’s email and name for notifications. Also, configure different member and admin email notifications.
- Info: Add your business information like name, address, city, country, and more.
- General: Contains settings for theme compatibility, SEO, language, currency, etc.
- Taxes: Lets you enable tax calculations and adjust the tax rates.
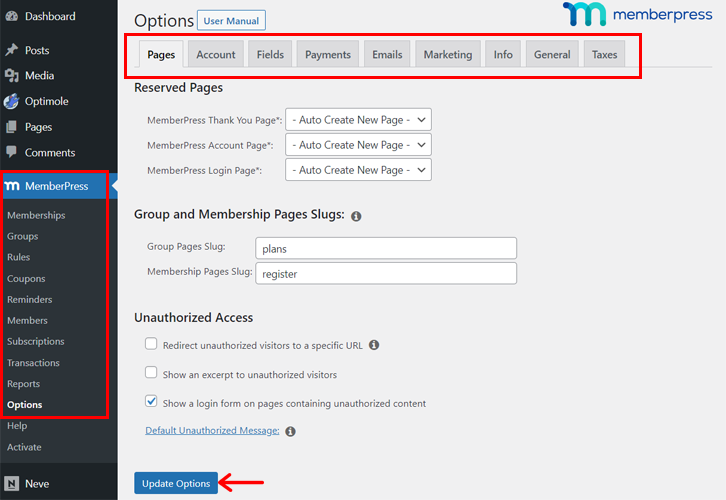
After you configure all these settings, click the ‘Update Options’ button.
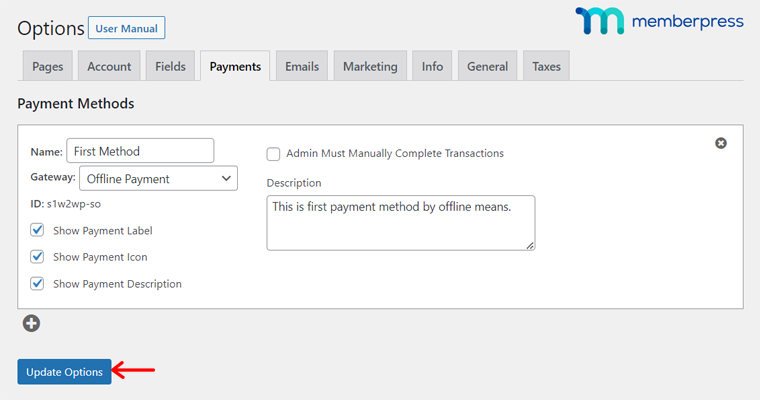
Step iv: Setup the Payment Settings
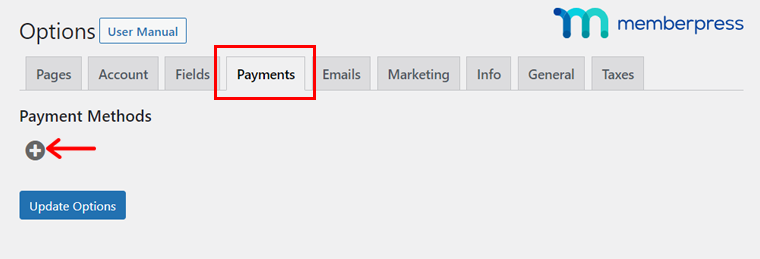
Among the MemberPress Options, one we skipped was the ‘Payments’ tab. Here, you can configure the payment method for the membership.
Currently, this plugin supports 5 payment methods. They are:
- Stripe
- Authorize.net
- PayPal Standard
- PayPal Express Checkout
- Offline Payment
Now, learn how to set up a payment method! Open MemberPress > Options > Payments. There, click the ‘+’ option.
On the setup box, name the payment method, describe it, and choose the gateway. Also, enable or disable options to showcase the payment information.
Depending on your chosen method, you’ll have more configuration settings. For example, you have to connect your site with that gateway. After you complete, hit ‘Update Options’.
That’s all!
Step v: Add Membership Levels
Based on your membership model, you can now start adding different membership levels to your website. For doing that, navigate to the ‘MemberPress > Memberships’ menu. And then, click the ‘Add New’ button.
There, follow the steps below:
- Add a title and description of the membership level.
- Configure your registration page, including the button, thank-you message, etc.
- Pick who can buy this membership level content and edit the no permission message.
- Adjust how your price box will look and contain.
- Set up advanced settings like the membership access URL, pricing terms, etc.
- Enable or disable comments, trackbacks, and pingbacks.
- Insert a featured image if you want.
- Fix your membership terms, including the price, billing type, and access duration.
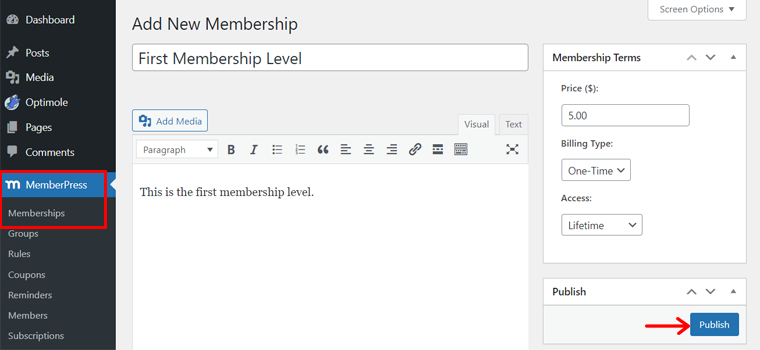
Once you configure them, click the ‘Publish’ button to make the membership level live. Then, add the other membership levels. And the billing type can be one-time, recurring, etc.
Step vi: Create Groups
Similarly, you can use unique MemberPress features like Groups.
Groups let you quickly set up a feature comparison page for users showcasing the various memberships you offer. To create a group, open ‘MemberPress > Groups > Add New’.
There, insert the group title, description, and featured image similar to the membership levels. Following that, you can:
- Configure the membership levels that get access to the group.
- Choose the members who can see the group.
- Select the access rules that belong to this group.
- Adjust the pricing page, such as choosing the theme design, adding custom CSS, etc.
- Pick which login form, unauthorized message, and excerpt to show.
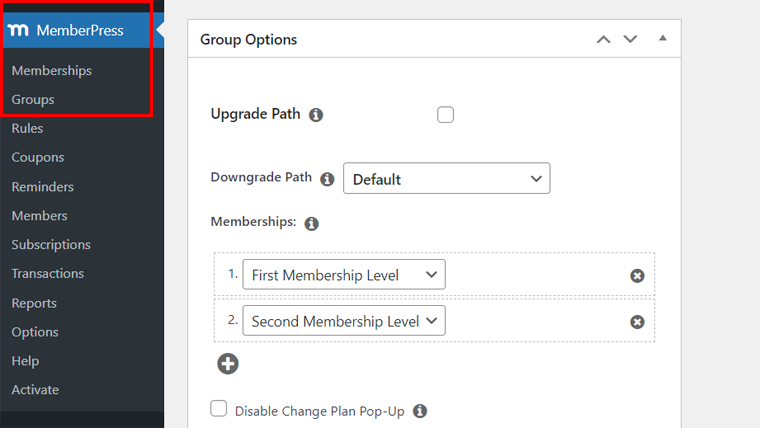
Lastly, click the ‘Publish’ button to make the group live.
Step vii: Offer Coupons for Members
Additionally, you can create coupon codes to offer special discounts on your membership plans. Now, users can use the code on the registration page when signing up for your site. Ultimately, this attracts new users and increases your revenue.
For doing so, go to the ‘MemberPress > Coupons > Add New’ menu. On the new page, you’ll already see the code generated automatically for that coupon.
Now, specify the discount percent or USD amount. Also, mention the number of times users can apply the code and the membership levels that get access to the code.
Further, you can override the trial period for those using the coupon code. For that, you must insert a different trial duration and trial cost.

In addition, adjusting the coupon expiration date is also possible. Once you finish, click the ‘Publish’ button to make the discount code work.
Step viii: Adjust and Send Reminders
Another remarkable feature of MemberPress is Reminders. This lets you send out automated emails to members or the admin if an event is going to occur or has occurred.
So, open ‘MemberPress > Reminders > Add New’. There, specify the triggering factor. It can be one of the given options, like ‘before Subscription Expires’, ‘after Members Signs Up’, etc. Also, point out the number of days to notify before or after the trigger.
Following that, enable this reminder for members, the admin, or specific membership levels. Further, you can edit, test, and reset these settings.
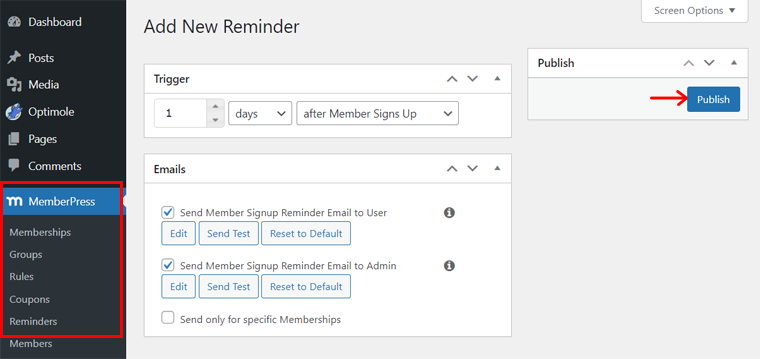
Lastly, hit the ‘Publish’ button to start sending reminders.
Step ix: Other Additional Features
Other than these features, MemberPress includes many more options. Some functions are:
- Members: Here, you can add members to your site and manage the existing ones.
- Subscriptions: Insert and manage recurring and non-recurring members of your site.
- Transactions: View and manage the transactions occurring on your website.
- Reports: Get insights about your membership website within a certain duration.
Remember, some of the features can be useful after you add and publish your content. So, ensure you revisit them to make essential changes.
Step 6: Publish Your Membership Site Content
Once you complete the entire process, you can start writing and publishing your content. And then set rules for the content based on your membership level or members.
Overall, you can customize the default pages by MemberPress and add new ones as needed. For now, you can open ‘Pages > All Pages’ and find the existing pages of your website.
There, edit the content and customize the design of the pages if you want. Best of all, your theme will showcase those pages well, no doubt!
Moving forward, let’s learn how to add a post for a membership level. Shall we?
i. Adding and Publishing Content
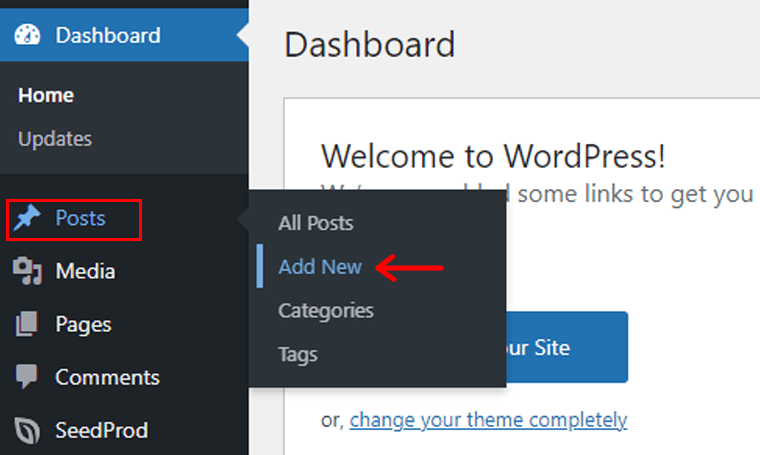
To do so, navigate to ‘Posts > Add New’. There, add your post content and customize it the way you like. Remember to give it a title.
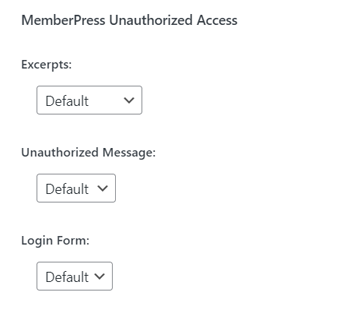
Most importantly, find the ‘MemberPress Unauthorized Access’ section at the bottom. There, select the excerpt, login form, and unauthorized message to display.
Afterward, click the ‘Publish’ button to make the post live.
However, you can see that this post is accessible to everyone. To make it accessible to certain members or membership levels, you must use the MemberPress Rules feature. This way, you can protect your content from unauthorized people.
ii. Configuring Access Rules
To do so, open ‘MemberPress > Rules > Add New’. There, choose the content to protect. In our case, let’s select ‘A Single Post’ and specify the post to be the title you wrote.
Then, pick the rule type for the membership levels or members who will gain access. For adding more rules, click the ‘+’ option.
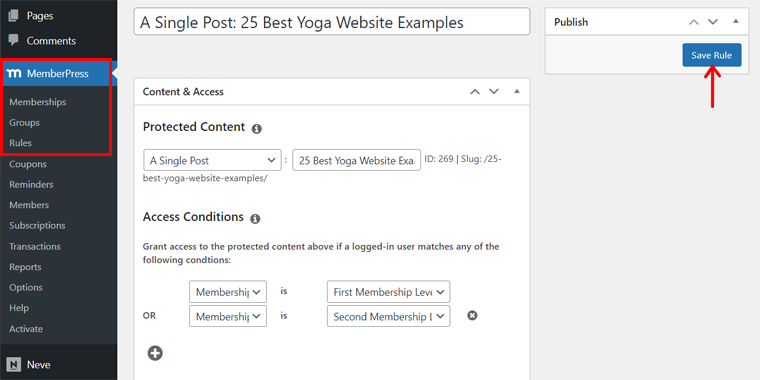
Once you’re done, click the ‘Save Rule’ button. That’s all!
Taking this as a reference, you can now publish content for your membership website. But this doesn’t end the process. Keep reading!
Step 7: Preview Your Membership Website
Here, let’s see how our membership website works in the front end!
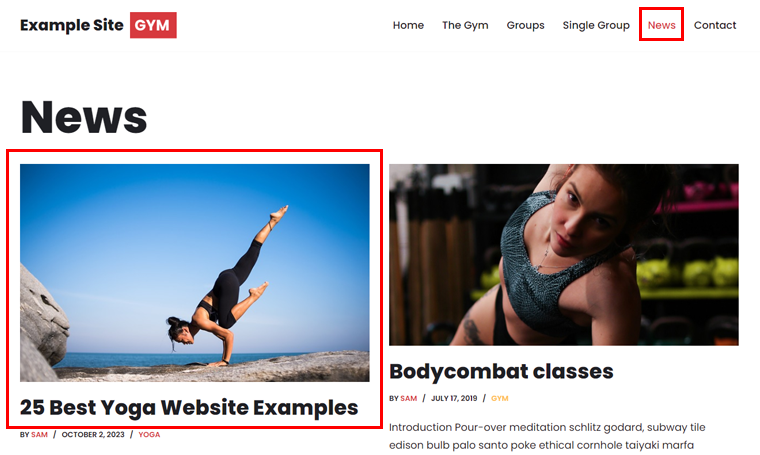
Visit the website and navigate to the premium section, i.e. ‘News’ on the navigation. There, you’ll find your posts, so open anyone you have configured.
Now, when users without the specified membership level try to access this post, they need to sign in to your account. Just like the screenshot below:
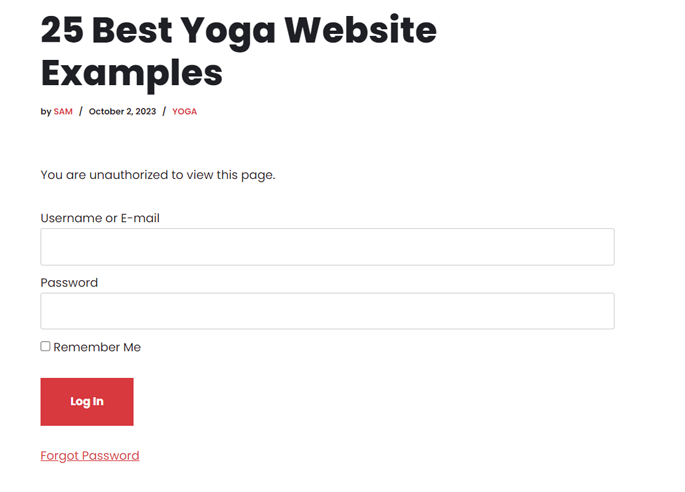
Once the member registers to a membership level, then he/she can access the content.
Step 8: Promote and Monitor Your Membership Site
Your membership website requires constant promotion and monitoring. That’s to ensure it’s getting new visitors or engaging members and working perfectly fine, respectively.
Therefore, you must develop an effective digital marketing strategy to promote your membership site. So, consider applying these strategies:
- Provide valuable content that fulfills the needs and interests of your audience. Hence, ensure that your content uses the right information.
- Insert relevant keywords, meta descriptions, and alt tags on the content. Ultimately, this improves your site’s SEO and rankings.
- Add call-to-actions that help users perform the next steps on your website.
- Use social media platforms to promote your site to new users and engage existing ones. Further, create a community that shares information.
- Build an email list and send regular emails to your valuable members. It can be about updates, promotions, and exclusive content.
- Use paid advertising tools like Google AdWords or Facebook Ads to earn extra.

Finally, you must always monitor your website to optimize it for the better. MemberPress contains the Reports feature showing insights into the transactions on the site.
On top of that, you can integrate your site with WordPress analytics plugins or 3rd-party services. Using them, you’ll gain access to key metrics like sales, revenue, signups, etc.
Want a more detailed guide? As beginners, learn how to make a website from scratch here!
Frequently Asked Questions (FAQs) on Membership Websites
Last but not least, have a look at some FAQs to solve your queries.
A membership website works when users first register an account. Next, they must pay for a subscription based on their membership level. Now, they can log into their members-only area. Ultimately, members get access to exclusive content, services, or products.
Before choosing a membership website builder, you must consider a few things. It includes ease of use, theme support, payment processing options, customer support, etc.
Several themes are present to create a membership website. Among them, select the one that’s compatible with your membership plugin, is responsive, and includes templates for a membership site. These are just a few criteria.
Your membership website can offer a wide range of content. Some of them include free or premium articles, videos, courses, webinars, Q&A sessions, discussion boards, tools, etc.
Here are some major challenges to running a membership website: First, you must offer high-quality content for your premium members. Following that, you must use various marketing channels to attract new members. Also, you should be able to retain them longer.
Conclusion
And that’s all! We’re at the end of this article on how to create a membership website. Hopefully, we helped you kickstart your membership site.
In conclusion, creating a membership website is a strategic endeavor with several benefits. So, follow these steps for a strong foundation for your membership site’s success.
As mentioned above, we strongly believe that WordPress is a suitable website builder for membership sites. Among the available software, MemberPress stands out the most.
With the right approach, your membership website can flourish and become a valuable asset. So, if you’re stuck at any place, then don’t forget to share your queries below.
Plus, read some of our helpful articles on the best membership plugins for Elementor and the best WordPress booking plugins.
Finally, follow us on Facebook and Twitter to read more guides like this.