
Are you ready to make your mark online and wondering how to create a personal website? If yes, then here we go!
In today’s digital world, having a personal website is a game-changer. That opens countless doors of opportunities. So, you can showcase your skills, talents, and unique personality like never before.
But where do you start? Fear not! Here, we’ll embark on an exciting journey together. Unraveling the secrets to create a captivating personal website.
In this article, you’ll learn everything you need to know to create a personal website that’s professional, eye-catching, and uniquely you. Let’s begin!
Introducing a Personal Website
Imagine having a virtual space that’s exclusively yours – a digital haven that showcases your unique story, passions, and victories. A personal website is precisely that and so much more!
More broadly, it’s like having your own corner on the internet. Where, you’re the star of the show, the director of your narrative, and the master of your storyline.

Whether you’re a freelancer, a budding entrepreneur, a creative professional, or simply someone who wants to establish an online identity. Creating a personal website is a perfect starting point.
And the best part? Creating a personal website has never been easier!
Gone are the days of complicated coding and technical jargon. With user-friendly website builders and an abundance of customizable templates, you can bring your vision to life. All with just a few clicks and drags.
Discovering the Magic of a Personal Website
Today, crafting a personal website is not just about self-expression. Rather, it’s a gateway to incredible opportunities. With huge possibilities to be discovered by potential clients, employers, collaborators, or even admirers of your work.
Get ready for an exciting journey to create a personal website ahead where you can learn more about the potential of a personal website!
- Unleash Creativity: Your website is a canvas for self-expression for your unique story and achievements. So, let your imagination soar and bring your site to life!
- Break Free: Escape social media constraints. Take control, showcase talents, and connect on a deeper level through your website.
- Forge Connections: Engage visitors with captivating visuals and compelling content. Cultivate a loyal community that eagerly awaits your updates.
- Establish Authority: Position yourself as a thought leader. Share expertise, opening doors to exciting collaborations and opportunities.
- Embrace Possibilities: Your website is a virtual launchpad. Attract clients, impress employers, and stand out in your field.
- Showcase Your Best: Inspire visitors with a stunning portfolio. Display your skills, talents, and achievements.
- Optimize for Visibility: Maximize impact with SEO (Search Engine Optimization) techniques. Attract organic traffic and leave a memorable digital footprint.
So, what’re you waiting for? Let’s step into the extraordinary world of personal websites and unlock the mesmerizing magic they hold.
A Step-by-Step Guide to Crafting Your Digital Masterpiece
So, are you ready to explore the magic of your personal website? And captivate your audience, and unlock a world of limitless opportunities.
As we go on an interactive adventure where your creativity knows no limitations and your digital presence takes center stage. Get ready to be amazed. All you’ve to do is follow us as we guide you through the following steps to create your personal website.
Step 1: Mapping Your Online Journey
Before you embark on the exciting adventure of creating your website, it’s crucial to map out your online journey. As it sets the groundwork for an effective and powerful website that accurately captures your personality.

So, here, we’ll guide you through the process of mapping your online journey like a seasoned explorer. Just, make sure you put on a tick mark on the following factors to create your personal website.
- Define Your Purpose: Clarify the goal of your website to shape its design and content.
- Identify Your Target Audience: Understand who you want to connect with and tailor your website accordingly.
- Outline Your Content: Plan essential sections like bio, portfolio, and blog to showcase your skills.
- Choose a Domain Name: Select a memorable, concise domain name aligned with your brand.
- Research Competitors: Analyze other websites in your niche to find unique opportunities.
- Plan Your Website Structure: Visualize how pages and sections will be organized for a seamless user experience.
- Create a Content Strategy: Develop a plan for engaging and consistent updates on your website.
All done? If yes, then you’ve completed the ground phase to create a personal website. And you’re all ready to bring your website to life.
You might enjoy reading our article on what makes a good website to map out your online journey smoothly.
Step 2: Choosing the Perfect Platform to Paint Personal Website
Now that you know what you want your personal website to do, it’s time to choose a platform to build it on. There are many different platforms to choose from to create your personal website, each with its strengths and weaknesses.

Remember, when choosing a platform, it’s important to consider your needs and budget. If you’re not sure which platform is right for you, then try out a few different ones to see which one you like the best.
For more guidance, you can check our article on what website builder is for comprehensive guidance.
Here are a few of the most popular platforms to create personal websites:
1. WordPress
WordPress is the #1 most popular open-source platform that’s best known for its flexibility and ease of use. It’s a good choice for anyone who wants a high level of control over their personal’s website design and functionality.
With its user-friendly interface, you can effortlessly bring your vision to life. No coding expertise? No problem! WordPress simplifies the process, allowing you to design and customize your website with ease.
Also, you get to become a part of a thriving community of WordPress users who are enthusiastic about exchanging ideas and experiences. This ensures you never feel alone on your personal website creation journey.
Pros:
- An extensive array of customization options. Thus, you can personalize your site to reflect your personality, making it truly one-of-a-kind.
- Discover an enchanting collection of WordPress themes that serve as the visual foundation of your personal website.
- SEO-friendly foundation. This gives you the power to attract organic traffic and make your mark on the digital landscape.
- Expand the functionality of your website with the vast library of WordPress plugins available out there.
Cons:
- Need to take charge of your domain name and hosting of your website.
- Embracing the full potential of WordPress requires a learning curve, especially for beginners.
- With its popularity and widespread use, WordPress can be a target for malicious activities. So, you’ve to be extra careful.
Did you know that WordPress comes in two different flavors? Namely: WordPress.org and WordPress.com. Read our comparison of WordPress.org vs WordPress.com to learn more about the differences.
2. Wix
Wix is another well-liked drag-and-drop platform that is known for its user-friendliness. It’s a good choice for anyone who doesn’t want to deal with the technical aspects of website development.
Moreover, Wix offers a compelling platform for creating your personal website. All thanks to its user-friendly interface, gorgeous templates, and powerful functionality. It truly is the ultimate all-in-one website builder. Enabling you to let your imagination run wild and fulfill your vision.
Pros:
- Built easy to use. It has a drag-and-drop interface that makes it easy to add and edit content on your website.
- Includes built-in SEO tools to help you improve your website’s ranking in Search Engine Results Pages (SERPs).
- Boasts a rich array of features from eCommerce functionality to booking systems. So, you can transform your website as you like later on.
- Automatically adapts its layout and design to provide a seamless and immersive user experience across different screens.
- Come with its own App Market. With that, you get a plethora of third-party applications. From analytics, live chat to several marketing tools.
Cons:
- Wix’s premium plans can be expensive, especially if you need more storage or bandwidth.
- Once you select a template, switching to a different one can be a bit challenging.
- If you opt for the free plan on Wix, then be prepared for Wix ads to be displayed on your website.
Are you wondering which one is better, Wix or WordPress? Then, check out the comparison article on WordPress vs Wix.
3. Webflow
Last but not least, we recommend Webflow website builder for creating your personal websites. It comes with a straightforward interface and robust features and functionalities. This empowered you to craft, develop, and launch a stunning personal website.
Moreover, it combines the best of both worlds by offering a visual design and development experience. So, you can create pixel-perfect designs and simultaneously generate clean and semantic code in real time. As a result, you’ve full control over your personal website’s appearance.
Pros:
- Offers robust Content Management System (CMS) to organize your content efficiently. Whether it be blog posts or portfolio items.
- Complete control over the design of your website. You can drag and drop elements, change colors, add custom fonts, and so much more.
- Its mobile-first approach ensures that your website not only adapts beautifully to different screen sizes.
- For those with coding expertise, Webflow provides the flexibility to dive into the code and make advanced customizations.
Cons:
- Webflow’s extensive feature set and customization options come with a learning curve.
- Though it offers powerful interactions and animations, you may require a deeper understanding of the platform and more advanced coding skills.
- Offers a free plan, but it’s very limited. So, you need to opt for a paid plan if you want advanced features, such as eCommerce or custom domains.
Check our comparison article on Webflow vs WordPress. Also, browse the best Webflow alternatives.
Our Recommendation: WordPress.org
When it comes to building a personal website, there are numerous platforms available. However, based on our experience, we highly recommend using WordPress.org.
Here’s why WordPress.org is an ideal choice to create your personal website:
- Extensive selection of customizable themes for personal websites.
- Seamlessly integrate eCommerce with WooCommerce for monetization.
- Enhance functionality with plugins tailored to your specific needs.
- Enjoy flexibility and customization options to reflect your unique brand.
Considering these aspects, we’ll show you how to create a fantastic personal website using WordPress.org.
So, let’s move on to the next step and start the thrilling process of creating your digital masterpiece.
Step 3. Conquering the Gateway with Domain & Hosting
Once you’ve chosen your website builder platform, it’s time for acquiring a domain name and web hosting.
So, to continue, read the following topics:
1. Get a Domain Name to Claim Your Digital Identity
Your domain name is your unique digital identity. It’s the web address that internet users will use to find you.
So, the first thing to do is, choose a domain name that resonates with your brand. Plus reflects your personality and is memorable to leave a long-lasting impression.
For example, www.sitesaga.com is the domain name of our blog.

Here are some quick tips on picking the right domain name for your website:
- Make it easy to remember: Your domain name should be easy to remember and spell. Avoid using numbers or hyphens, and keep it short and sweet.
- Use your name or initials: If you’re creating a personal website, then using your name or initials is a great way. This makes it easy for people to find you online.
- Choose a relevant domain extension: Generally, the .com domain extension is the most popular. But there are other options too, such as .net, .org, and .info. Always, choose the most relevant one.
- Do a domain name search: Before you register a domain name, make sure it’s available. You can use a domain name search tool to check availability.
- Register your domain name: Once you’ve found a domain name that you like, you can register it through a domain registrar.
For more guidance, refer to our article on how to choose a domain name for your blog or business.
2. Set Up Your Web Hosting
Now, the next thing to do is set up your web hosting for your website. Simply put, hosting is like the foundation that powers your personal website on the web. In other words, it makes your website visible to other fellow internet users on the web.

When it comes to choosing the right web hosting provider, there are a myriad of options available online. So, you must always prioritize those with exceptional uptime, the quickest load times, and the finest customer support.
For more guidance, you can check out our article on what to look for in web hosting for more detailed information.
Yet, if we were to make a recommendation, reputable providers like Kinsta, Bluehost, and Cloudways, stand out as excellent choices.
Quick Demo to Set Up Web Hosting
Here, we’ll show you a quick demonstration to set up your web hosting with Bluehost.
To begin, head over to the Bluehost home page and click on the ‘Get Started’ button. Once you’ve done that, proceed by selecting the plan of your choice. The Basic and Choice Plus plans are highly recommended for launching your personal website.

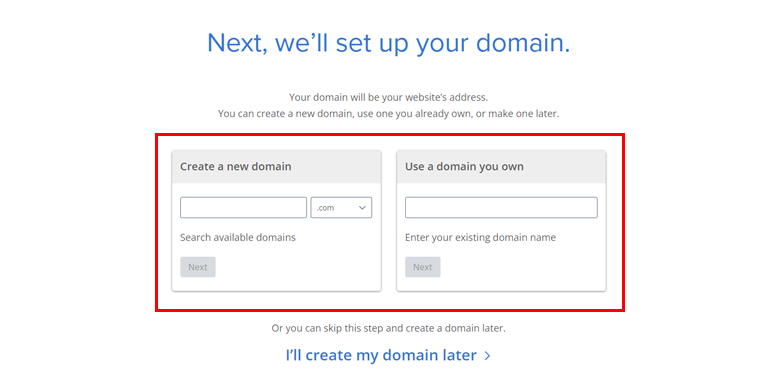
Moving forward, you need to add your domain name for your website. You can either create a brand new domain through the ‘Create a new domain’ option.
Or, if you already made one, then utilize an existing one via the ‘Use a domain of your own’ option. Then, simply click the ‘Next’ button to proceed.
Next, you need to open a Bluehost account. For that, provide your personal details, package information, and payment information in the designated fields.
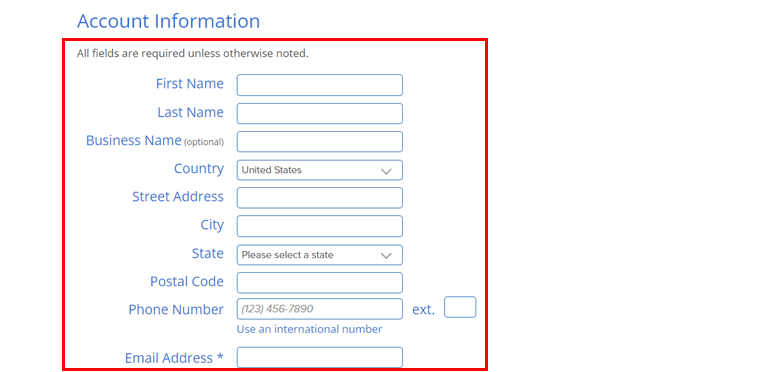
After meticulously filling out all the necessary information, conclude the process with a click on the ‘Submit’ button.
Congratulations! You’ve successfully set up a hosting plan for your WordPress personal website. The best part is that WordPress comes pre-installed on Bluehost, eliminating the need for any manual installation.
Next, log into your Bluehost account and click the ‘My Sites’ menu. Within this menu, you’ll discover the ‘Create site’ option.
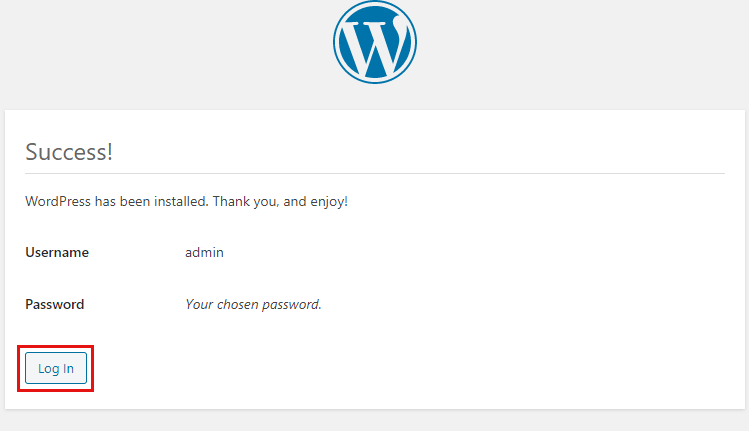
With that, you’ll be directed to the alluring WordPress login page. This is where the magic happens! Take a moment to log in to the WordPress dashboard, where you’ll uncover a world of possibilities awaiting your exploration.
Now, you’re all prepared to embark on the next steps outlined in this article to let your personal website journey unfold.
Step 4: Design Your Personal Website
Congratulations on reaching Step 4! You’re very close to letting your creativity shine and create a stunning personal website. This is where you can put your creativity to the test. And make your website look and feel exactly the way you want it to.
So, follow us as we guide you through!
1. Choose the Right Personal Website WordPress Theme
A WordPress theme is the key to shaping the entire visual appeal of your website. With so many options available, it can be a little overwhelming, but don’t worry, we’ve got you covered.
Check out our guide on choosing a WordPress theme to help you make the right pick.
For this guide, we’re using Kadence. It’s one of the top-tier freemium WordPress personal website themes that meet different needs.
In addition, it’s visually appealing, user-friendly, and offers plenty of customization options. With Kadence, you can easily create a professional-looking personal website in no time.
Now, let’s see its installation and activation in the next phase.
2. Installing & Activating Kadence WordPress Theme
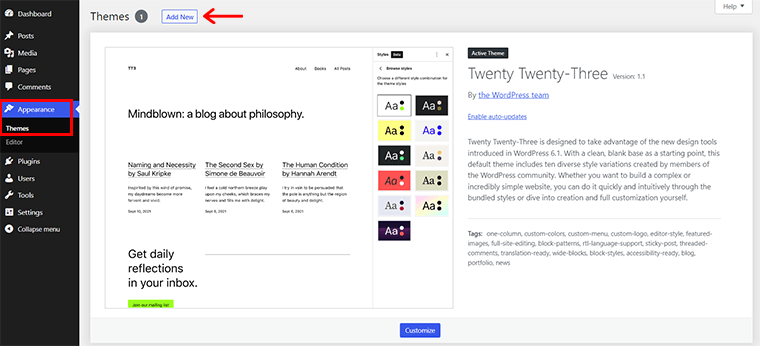
The quickest way to install the free Kadence theme is right from your WordPress dashboard. For that, all you’ve to do is navigate to Appearance > Themes > Add New.
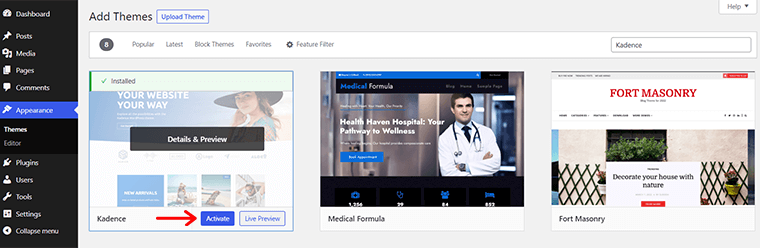
Then, search for the ‘Kadence’ in the search bar. Once you locate it, click on the ‘Install’ button.

Shortly, you’ll also see the ‘Activate’ button. Click on it.
3. Import Kadence Starter Template
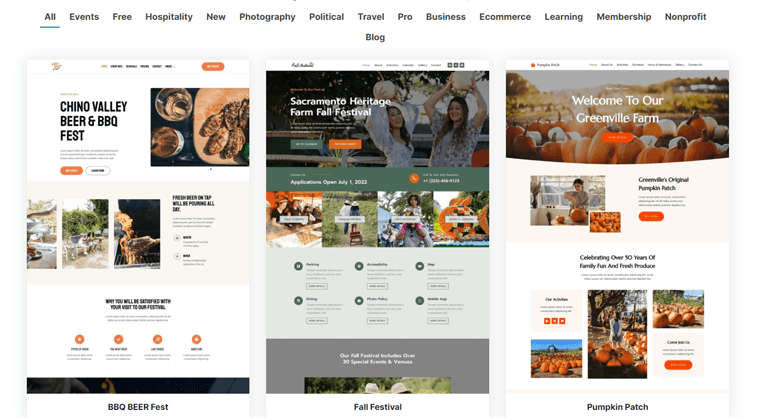
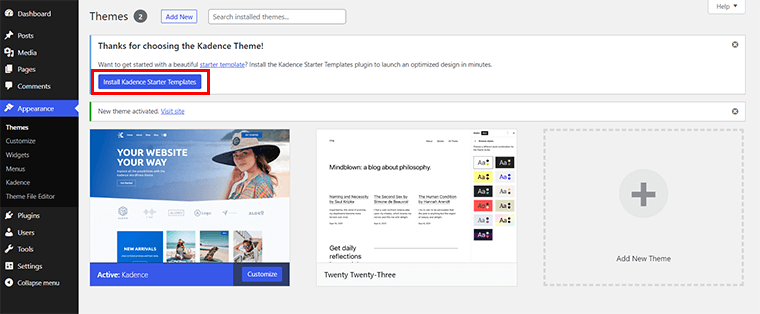
As soon as you activate the theme, you’ll have a choice to import the starter templates.
All you’ve to do is click on the ‘Install Kadence Starter Templates’ option. After done, you’ll see a list of templates available for import.
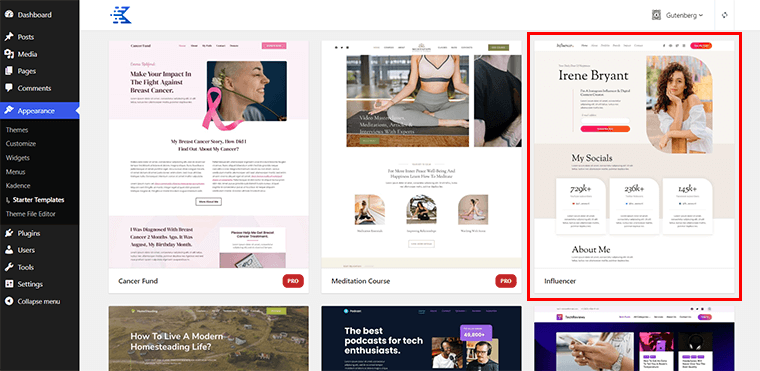
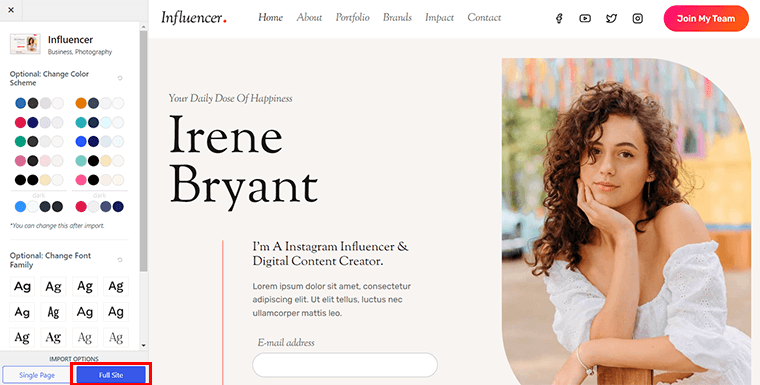
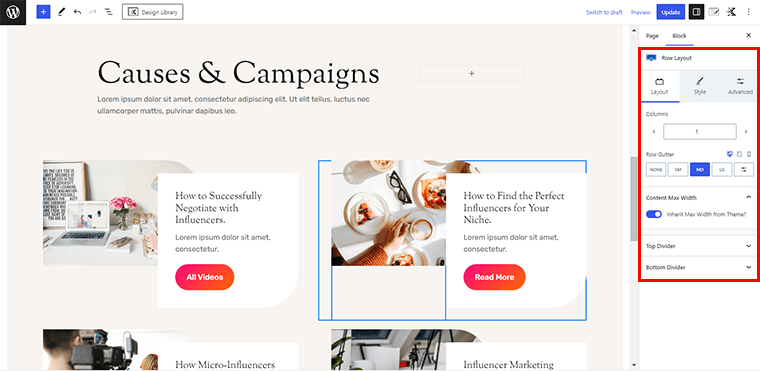
You can browse through these templates and pick the one you want to import for your personal website. Here, we’ve chosen the ‘ Influencer’ template.
On clicking it, you’ll see a page as shown below. Here, you can modify elements like fonts and colors. Also, you’ll find the option to import the Single Page or Full Site. Here, we go for the ‘Full Site’ option.
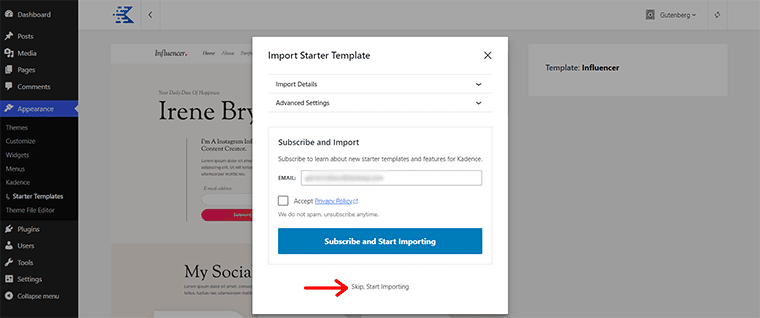
Following that, a pop-up box appears with the option to ‘Subscribe and import the template’. Alternatively, you can skip it and import the template. All you’ve to do is click on the ‘Skip, Start Importing’ option.
Once your import process is successfully completed, you can see the ‘Finished! View your site’ option. You can click on it to have a brief glance at your personal website.

And you’re done!
4. Customizing the Theme Template
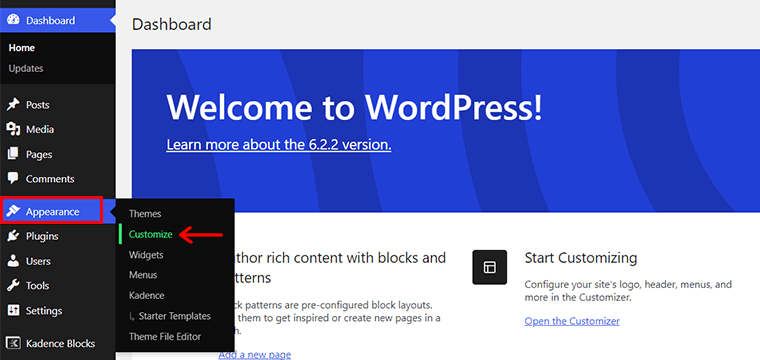
Next, we’ll proceed to customization in this journey to create a personal website.
For that, all you’ve to do is navigate to Appearance > Customize.
With that, you’ll be presented with the customization interface. Here, you can twist and turn your imported template as you wish for your personal website.
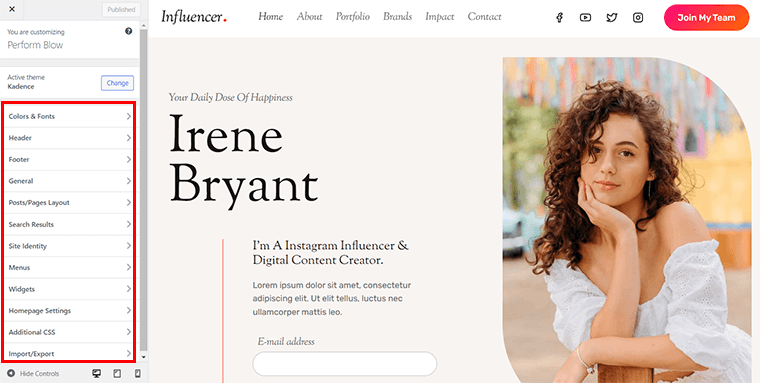
Just to let you know, the customization comes with a handful of settings like Colors & Fonts, Header, Footer, General, and so forth.
So, let’s explore some of the key customizing options.
Colors & Fonts
Under Colors & Fonts, you’ll see 3 more sub-options. They are: Colors, Buttons, and Typography.
If you click on the ‘Colors’ option, then you can see the page as shown below.
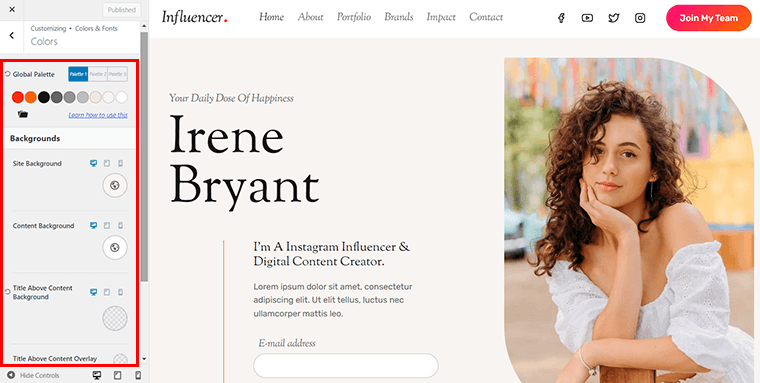
From here, you can choose the colors from 3 different palettes. And tailor the background colors of your site, content, title above content background, and more. Plus, you can also see how your chosen colors appear on different devices.
Similarly, you can go for the other two sub-options to configure the buttons and overall typography that will appear on your website.
General
Meanwhile, if you go for the ‘General’ tab, then you can find crucial aspects of customization. To name them,

- Layout: Customize the overall structure and alignment of your website’s pages. Including options for full-width or boxed layouts and spacing between elements.
- Sidebar: Enable or disable sidebars on your website to display widgets like search bars, recent posts, or advertisements.
- Images: Customize image appearance and behavior. Such as borders, shadows, overlays, and image size/quality for optimized loading.
- 404 Page Layout: Personalize the layout and content of your website’s error page for a consistent user experience when visitors encounter broken links.
- Social Links: Add links to your social media profiles, displaying icons or buttons. That allows visitors to easily connect with you on social platforms.
- Performance: Optimize your website’s speed and performance through several settings. Like lazy loading, minification, and caching for an improved browsing experience.
Besides, you can also find other options like scroll to top, comments, etc that you can configure. Also, remember, the specific options and functionalities may vary depending on the theme or version of Kadence you are using.
Posts/Pages Layout
You can find the layouts for your post/page structure in this tab. For displaying each of your posts, you can pick from a variety of designs. Precisely, you get 3 options here:
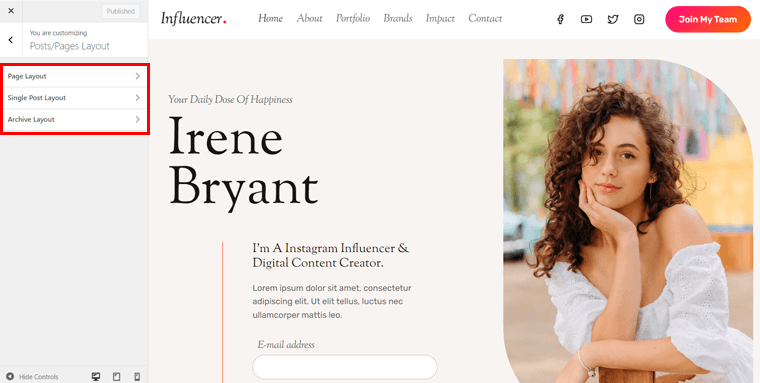
- Page Layout: Customize individual page structure. Including full-width or boxed layouts, sidebar placement, and content alignment.
- Single Post Layout: Here, you can configure the layout for blog posts. Such as full-width or boxed layouts, sidebar display, and position of post elements.
- Archive Layout: Customize the layout for archive pages. Adjusting column count, excerpt length, etc for an organized and appealing presentation.
Once you’re all done with the customization thing, you’re all ready to continue to the next stage of your personal website creation journey.
Step 5: Crafting Engaging & Captivating Content
Now that you’ve your WordPress theme installed and customized. It’s time to start crafting engaging and captivating content for your personal website. Here are a few tips:
1. Craft an Engaging Homepage With a Captivating Introduction
Your homepage is the first thing visitors will see. So it’s important to make a good impression. All you’ve to do is go to Pages > All Pages. There, you’ll see a ‘Home’ section. On hovering it, you’ll see the ‘Edit’ option. Click on it.
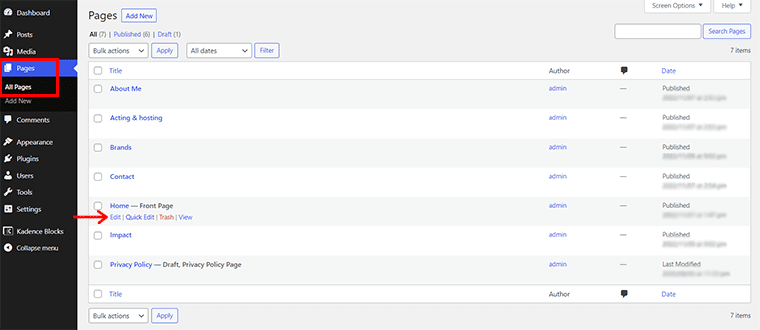
With that, you’ll land up to the editor interface. You’ll find all the necessary settings in the left section and see the changes on the right.
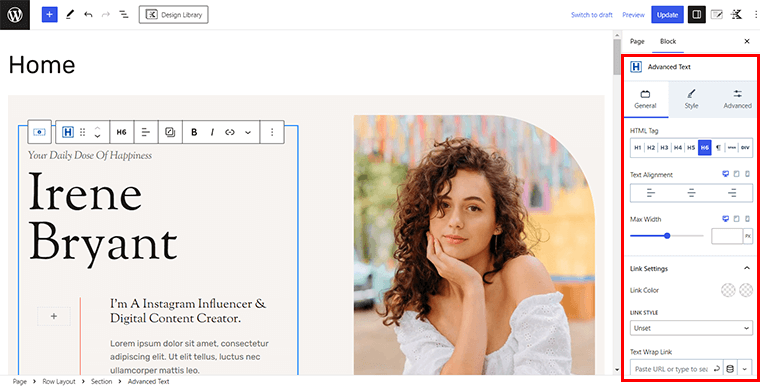
Here, you can start with a captivating introduction that tells visitors who you are and what your website is about. Also, use a brief personal bio, a mission statement, or anything you’d love to mention about you.
2. Showcase Your Skills, Experience, and Accomplishments
Similarly, just like before, you can navigate to the ‘Impact’ option and hover over it to click on ‘Edit’. With that, you’ll reach the editor interface.
Here, you can highlight your skills, experience, and accomplishments clearly and concisely. As visitors to your website are interested in learning more about you and your skills.
3. Add a Portfolio or Work Samples to Highlight Your Expertise
Similarly, if you have any work samples or a portfolio, then be sure to add them to your website.

You can simply go to the Portfolio page just like you navigate to other pages and showcase your works. This is a great way to show visitors what you can do and how you can help them.
With that out of the way, let’s jump onto our next step of this personal website-building journey.
Step 6: Mastering the Secrets of Search Engine Optimization (SEO)
In today’s digital age, having a personal website is essential for establishing your online presence. And, one crucial aspect of website creation is SEO.
Also, this helps improve your website’s visibility and organic traffic from search engines like Google. Here, we’ll explore some key subtopics that will help you master the secrets of SEO for your personal website.
1. Conducting Keyword Research Relevant to Your Personal Brand
So to effectively optimize your website for search engines, start by conducting thorough keyword research. Besides, keywords are the search terms people use when looking for specific information online.
Also, by identifying relevant keywords, you can tailor your content to match what your target audience is searching for. We recommend using the Semrush SEO toolkit to assist you with keyword research.
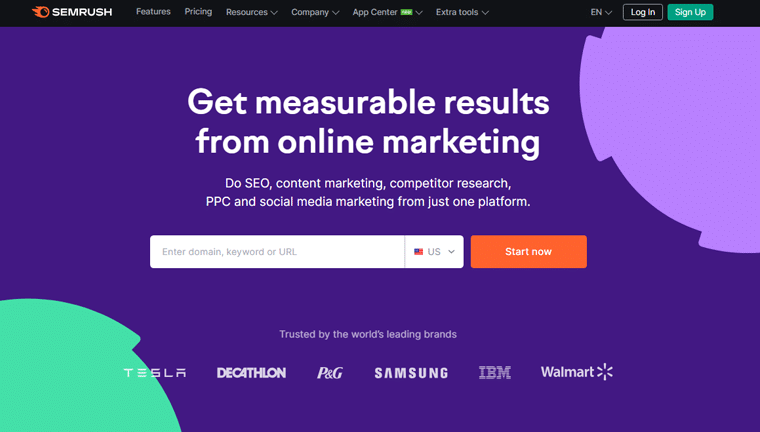
Alright, let’s dive into the exciting world of keyword research using the Semrush SEO toolkit. Grab your metaphorical detective hat and magnifying glass as we embark on this adventurous quest.
i) Begin with a Strategic Brainstorm
First, picture yourself as a mad scientist concocting the perfect formula for success. Start by brainstorming a list of words and phrases that are relevant to your business or industry.
Moreover, let your imagination run wild, and don’t be afraid to think outside the box. Also, jot down every idea that comes to mind, from the obvious to the downright quirky.
ii) Uncover Golden Nuggets with Keyword Overview
Now, armed with your initial keyword list, head over to the Keyword Overview tool. It’s like your secret treasure map, revealing hidden gems.
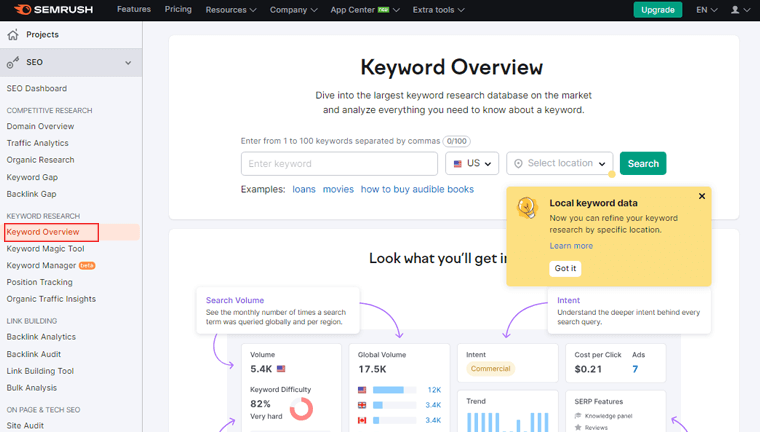
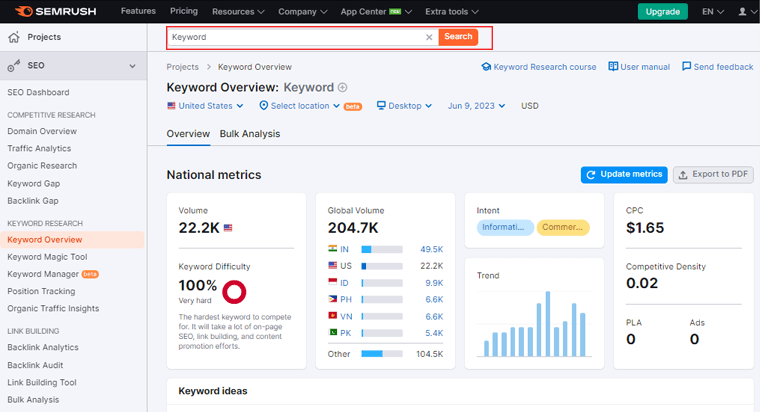
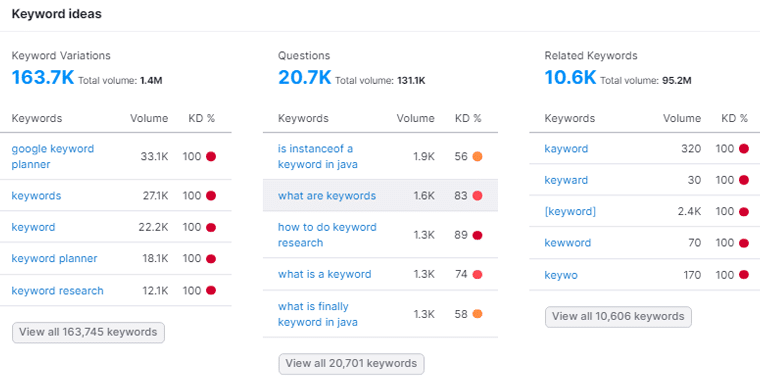
Following that, you can enter your primary keyword or phrase, and let the magic unfold. Moreover, you’ll uncover a plethora of information, like search volume, keyword difficulty, competitive density, etc.
iii) Analyze the Competition
Once you have your initial keyword data, it’s time to investigate the competition. Use the Semrush tool to analyze the top-ranking pages for your chosen keywords.
Therefore, look for patterns, identify their strategies, and gather insights to inform your approach. Who knows, you might even stumble upon a gap in the market waiting to be conquered.
iv) Expand Your Horizons with Related Keywords
Additionally, don’t limit yourself to a single keyword, and explore the realm of related keywords. Besides, its Keyword Overview tool provides a section called ‘Related Keywords’ that unveils a treasure trove of variations and synonyms.
v) Filter and Refine
Now that you have a vast collection of keywords, it’s time to select the best one. So, use the filters available like search volume, keyword difficulty, and other parameters. Also, it’s like creating a gourmet dish with only the finest ingredients.
vi) Embrace Long-tail Keywords
Additionally, long-tail keywords are like the sidekicks of the SEO world, often overlooked but mighty in their impact. However, they may have lower search volume, but they often come with higher intent and conversion rates.
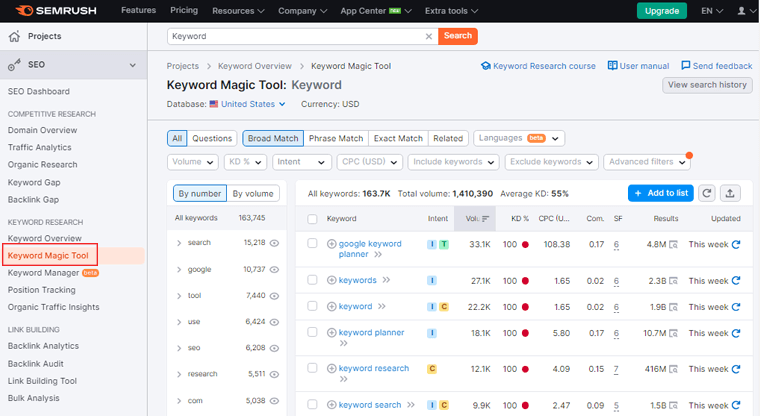
Therefore, use the Keyword Magic Tool to identify long-tail variations of your primary keywords. It’s like finding a needle in a haystack but eventually leads to higher rankings and more targeted traffic.
vii) Keep an Eye on Trends
No SEO strategy is complete without considering the ever-changing tides of search trends. Therefore, use the Keyword Overview option to spot rising stars and upcoming trends.
Besides, keep your finger on the pulse of the search landscape, and adapt your keyword strategy accordingly. After all, staying ahead of the curve is what separates true SEO strategies from the rest.
So there you have it! Embrace and explore the vast realm of keywords, and let your creativity shine. With Semrush by your side, you’ll be one step closer to conquering the search engine rankings and becoming the SEO hero.
2. Optimizing Your Website’s Meta Tags, Headings, and Content
Alright, fellow website wranglers, get ready to optimize your online masterpiece like a pro using the Yoast SEO plugin! With Yoast by your side, you’ll effortlessly tackle the elusive meta tags, captivating headings, and content.
Before you start, you need to install the plugin. Here’s a step-by-step guide on how to install the Yoast SEO plugin in the WordPress dashboard:
Start by login into your WordPress admin dashboard. This is usually accessed by adding ‘/wp-admin’ to your website URL (e.g., www.yourwebsite.com/wp-admin).
Once logged in, navigate to the left-hand side menu and click on ‘Plugins.’ Further, click on the ‘Add New‘ button at the top of the page.
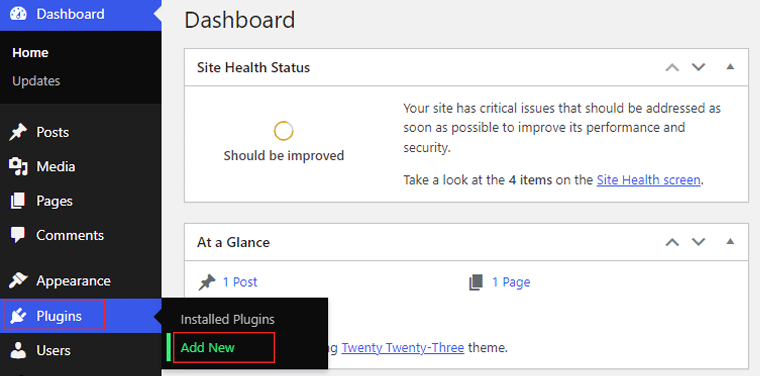
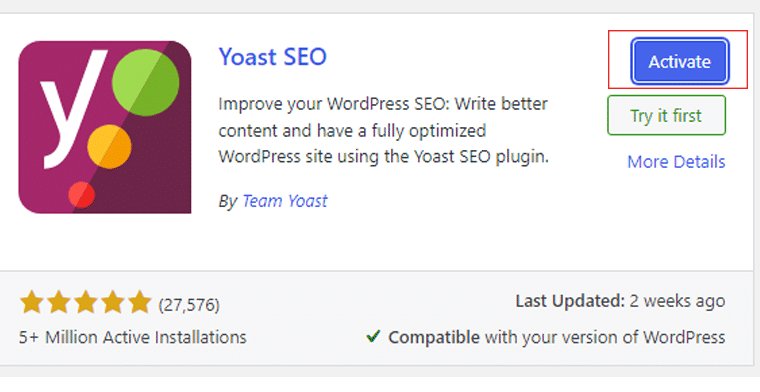
In the search bar, type ‘Yoast SEO‘ and press enter. Then click on the ‘Install Now‘ button next to it.

After the installation is complete, click the ‘Activate‘ button.
Now, you’ll see a menu called ‘Yoast SEO.’ Click on it to access the Yoast SEO settings.

Following that, it’ll guide you through a configuration wizard to set up the basic settings.
Then click on the ‘Configuration Wizard.’ The configuration wizard will walk you through various steps to optimize your website’s SEO settings.
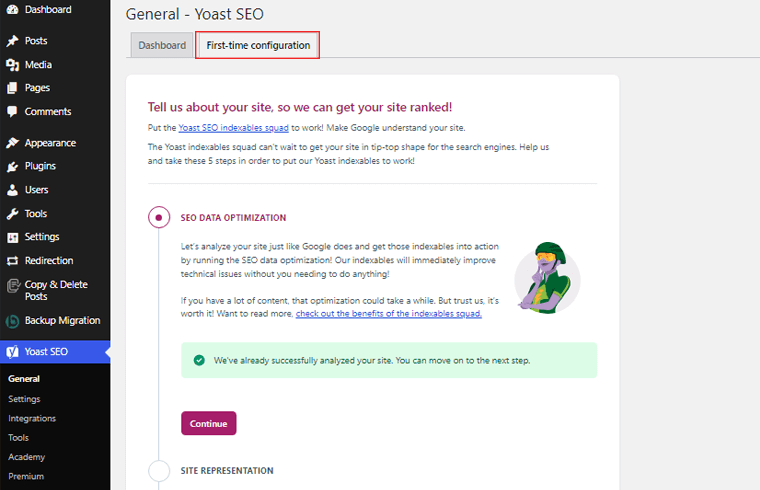
Additionally, follow the instructions provided by the wizard to set up your website’s SEO settings. The option is whether your site represents a company or a personal blog, or your site name.
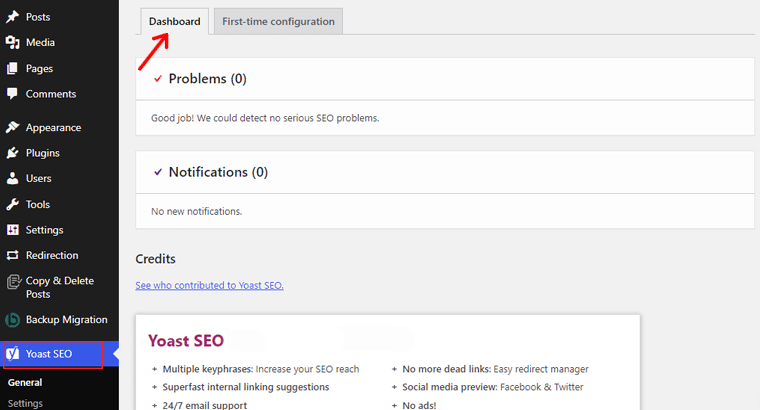
After completing the configuration wizard, you will be redirected to the Yoast SEO dashboard. Here you can access all the SEO features and settings provided by the plugin.
3. Mastering the Art of Meta Tags:
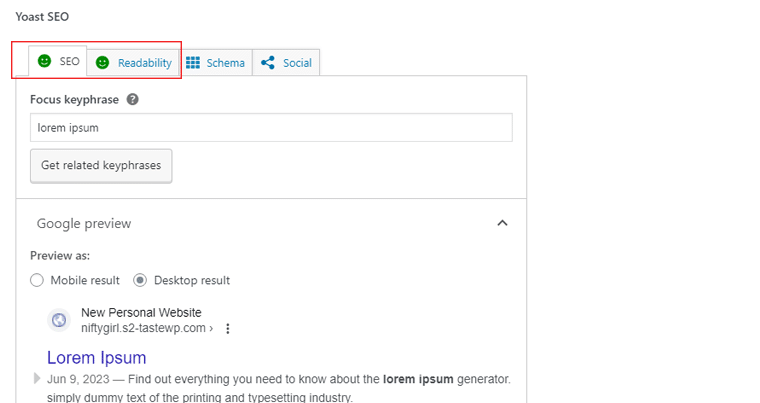
Now, when you create or edit a blog post, you will see a Yoast SEO box below the post editor. Within this box, you can optimize the meta tags for the specific post.
Start by entering a focus keyword or keyphrase in the ‘Focus Keyphrase‘ field. This represents the main keyword or phrase you want the post to rank for in search engines.
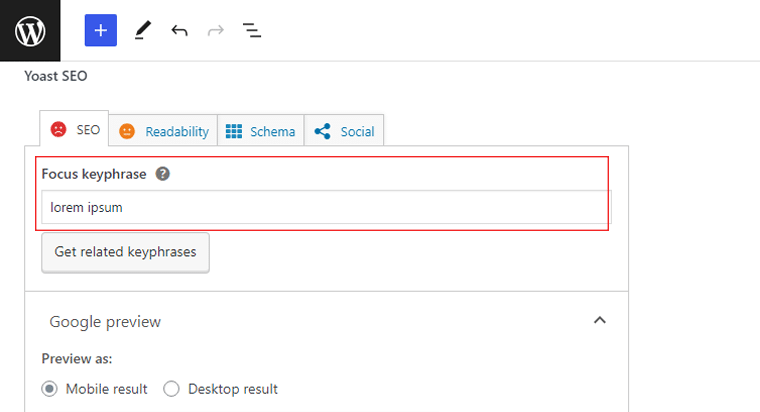
Following that, Yoast will analyze the content of your post and provide suggestions for improving the SEO of your meta tags. Also, pay attention to the ‘SEO Title‘ and ‘Meta Description‘ sections within the Yoast SEO box.
Besides, it’ll display a preview of how your post will appear in search results based on the meta tags.
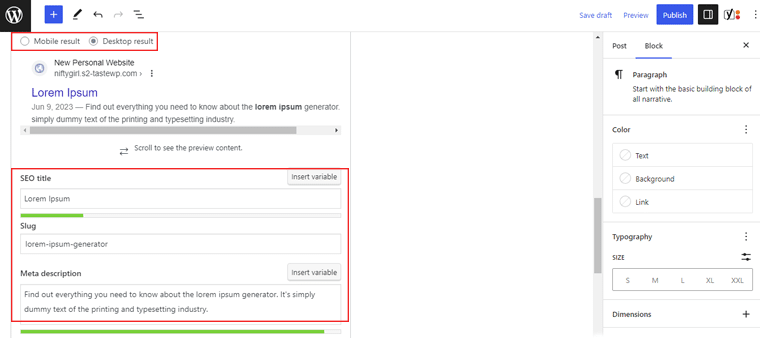
Also, use the analysis and recommendations provided by Yoast SEO to optimize your meta tags. And ensure your focus keyword/keyphrase is included in the title and meta description.
Additionally, make sure that they are both compelling and relevant to the content of your post.
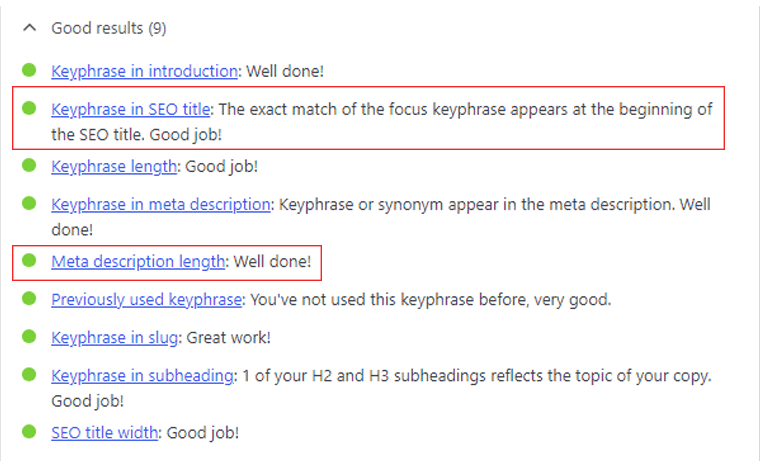
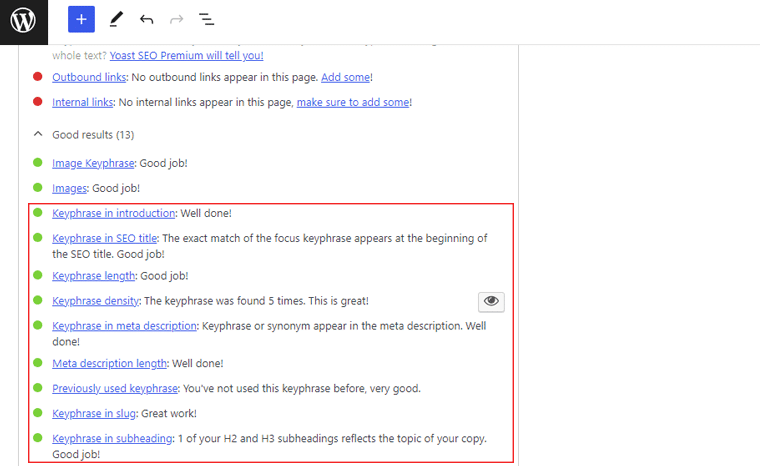
As you make changes to the meta tags, the preview in the Yoast SEO box will update accordingly. So, aim for a green smiley face next to the ‘SEO‘ section, indicating that your meta tags are well-optimized.
Once you are satisfied with your meta tags, click on the ‘Save Draft‘ button to save your changes.
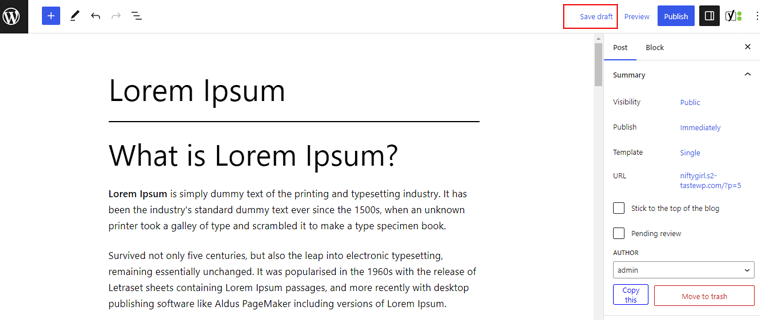
4. Crafting Headings That Demand Attention
Igniting the spark of curiosity, crafting headings is an artful dance of words. With each meticulously crafted heading, you’ll have the power to enchant and intrigue your audience on your personal website.
i) Headings Hierarchy Like a Boss:
Headings are the signposts that guide both readers and search engines through your content. So, use H1 for the main title, followed by H2 for subheadings, and so on.
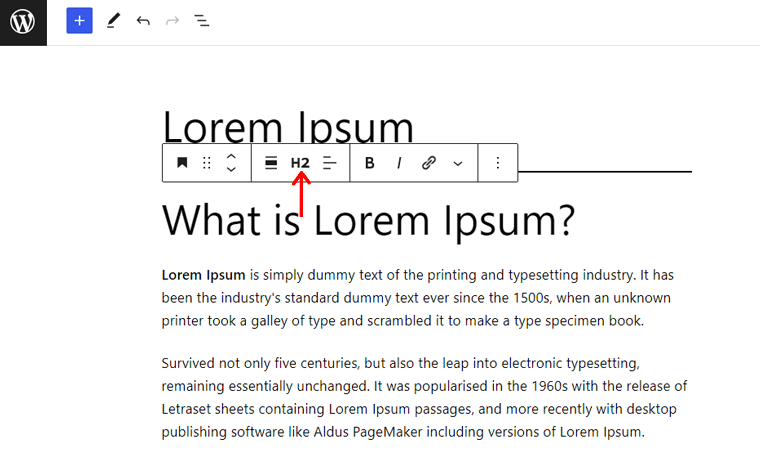
Additionally, Yoast checks the hierarchy of your headings to ensure it follows the best practices. Therefore, think of it as your friendly navigation GPS, leading you on the path to heading glory.
ii) Keyword-rich Headings that Dazzle:
After that, sprinkle your headings with keywords. However, remember to keep it natural and avoid overstuffing.
Furthermore, Yoast evaluates your heading usage and provides guidance to strike the perfect balance. Also, think of it as a keyword sommelier, helping you pair your headings with just the right amount of keywords.
iii) Write for Humans, and Optimize for Search Engines:
Content is king, and readability is its crown jewel. Moreover, Yoast analyzes your content’s readability, ensuring it’s clear, concise, and engaging.
Therefore, write for humans, and let Yoast be your literary coach. Hence nudging you to simplify complex sentences and spice up vocabulary.
iv) Optimize Your Keyword Usage:
Furthermore, keywords are the secret sauce that spices up your content. And Yoast helps you sprinkle them strategically throughout your text, maintaining a healthy keyword density.
Hence, ensure your keywords are perfectly distributed for maximum impact.
v) Embrace the Power of Internal Linking:
Internal links weave together the pages of your website. Also, it provides suggestions for internal links, helping you establish a network that enhances user experience and SEO. It’s like having your very own secret agent, guiding visitors to explore your website further.
That’s all in optimizing meta tags, headings, and content using the Yoast SEO plugin. So, go forth and let Yoast be your trusty sidekick on this thrilling SEO adventure.
5. Building Quality Backlinks and Implementing On-page SEO Techniques
Now, we’ll set sail on a quest to unlock the secrets of building quality backlinks and unleashing the power of on-page SEO techniques using the mighty Yoast SEO plugin.
Let’s navigate through this engaging journey of SEO success!
i) Foster Meaningful Relationship
Firstly, seek out websites and blogs that are relevant to your industry or niche. These are the seas where your target audience roams.

Besides, Yoast can be your compass, guiding you to opportunities for guest posting, resource pages, or even collaborations with influencers. It’s like having a trusty first mate pointing you in the right direction.
ii) Create Remarkable Content
When reaching out for backlink opportunities, charm your way into the hearts of website owners and bloggers. Also, craft personalized, engaging outreach emails that demonstrate your knowledge and passion.
Additionally, Yoast will assist with email optimization, ensuring your messages are shipshape and captivating. So, think of it as having a smooth-talking parrot perched on your shoulder, giving your outreach emails that extra charm.
iii) Seek Guest Posting Opportunities
Moreover, guest posting is like stepping into another kingdom and showcasing your expertise to a new audience. So, find authoritative websites in your niche that accept guest contributions and offer your valuable insights.

Besides, Yoast assists you in optimizing your guest posts with on-page SEO techniques. Hence, ensuring your content shines in the eyes of both readers and search engines.
iv) Optimize Page Titles and Meta Data
These elements are like the royal invitations to your website. So, craft compelling titles that grab attention and meta descriptions that entice readers to click.
Additionally, Yoast provides invaluable guidance on character limits, keyword usage, and readability. Hence, ensuring your titles and meta descriptions are fit for royalty.
v) Harness the Power of Heading Tags
Heading tags are the knights in shining armor that guide both readers and search engines through your content. Therefore, use H1 for your main title and H2-H6 for subheadings, organizing your content logically and hierarchically.
vi) Let Keywords Dance Through Your Content
Keywords are like the secret language that communicates with search engines. Hence, sprinkle them naturally throughout your content, allowing them to dance gracefully without disrupting the flow. Plus, Yoast provides suggestions and guidance on keyword density.
vii) Optimize Your URLs for a Royal Procession
URLs are the pathways that guide visitors to your web pages. Therefore, craft clear, concise, and keyword-rich URLs that give a clear indication of the page’s content.
Luckily, Yoast allows you to customize your URLs. Ensuring they are fit for a royal procession through the search engine results.
viii) Embrace the Magic of Internal Linking
Internal links weave together the relevant pages and enhance user experience. So, utilize internal links strategically to guide visitors through your content and create a well-connected website structure. While Yoast offers suggestions and analysis to help you establish a network of internal links.

With the mighty Yoast plugin as your trusted companion, you now possess the tools to build quality backlinks.
So, fellow bloggers, go forth and conquer the SEO realm with confidence, creativity, and the power of Yoast SEO by your side.
Step 7: Integrating Essential Website Features
The essential website features that make your online presence shine like a diamond in the vast digital universe.
So, let’s dive into the captivating world of integrating key elements into your website in this portion of how to create a personal website. Starting with the ever-important contact forms or inquiry forms.
Get ready to sprinkle some magic onto your website and make it as engaging as a captivating conversation.
1. Adding Contact Forms or Inquiry Forms
Adding contact forms or inquiry forms is the secret portal that bridges the gap between you and your audience. With these enchanting forms transcend your ordinary visitors into cherished companions.
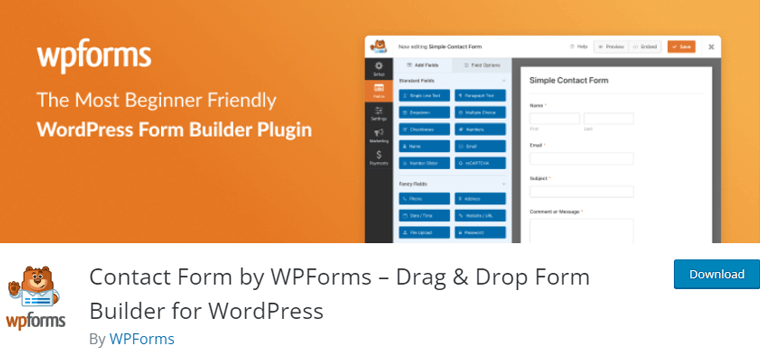
i) Prepare for Form-Building Greatness
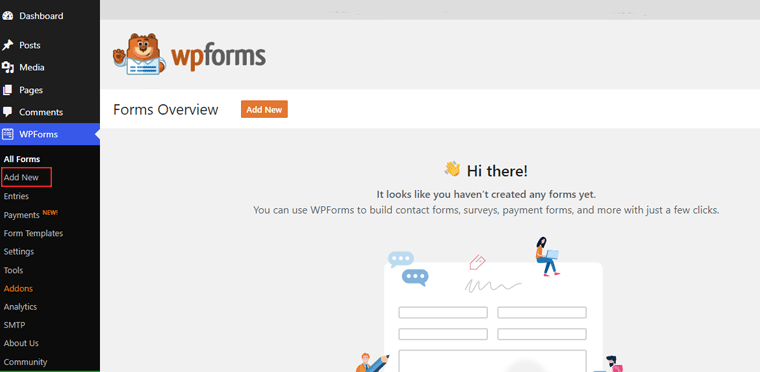
First things first, make sure you have the WPForms plugin installed and activated on your WordPress dashboard. It’s like having a trusty sidekick by your side, ready to assist you in your form-building adventures.
To get more detailed information on installing the plugin, check out our article on how to install the plugin.
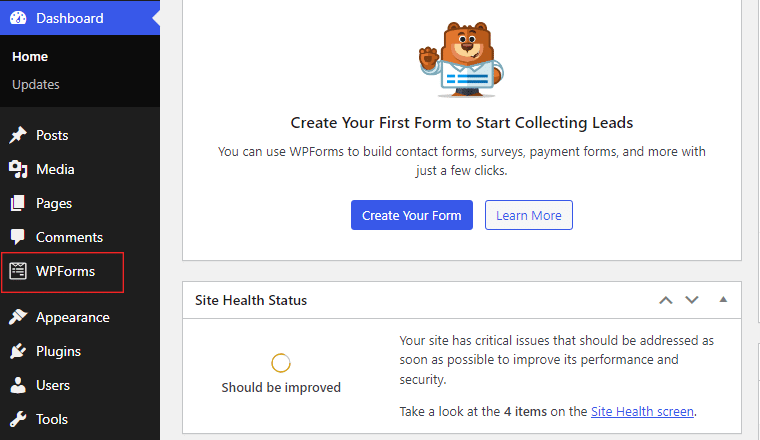
Once you’re armed with the plugin, navigate to the ‘WPForms‘ section in your WordPress dashboard.
ii) Unleash Your Creativity with Form Creation:
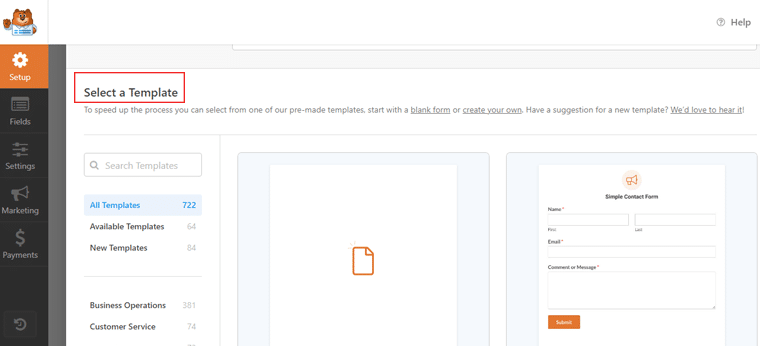
Further, click on the ‘Add New‘ button to unleash the form creation wizard. Give your form a catchy name that represents its purpose.
iii) Customize the Form
WPForms presents you with a gallery of pre-built form templates. So, choose the one that best suits your needs, or start from scratch and unleash your inner Picasso.
Furthermore, drag and drop form fields like a digital architect. From text fields to checkboxes, radio buttons to file uploads, build your form with the precision of a master craftsman.
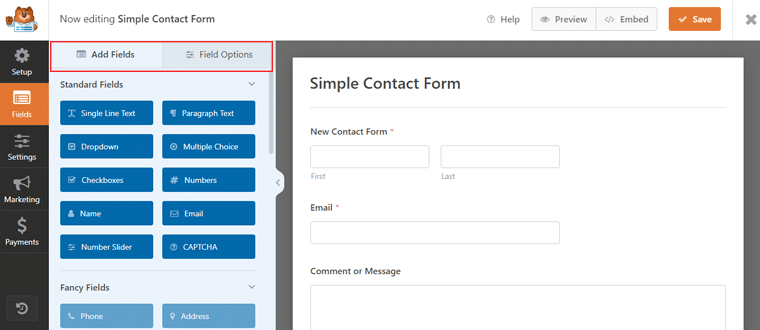
iv) Make it Visually Captivating:
Also, sprinkle some design magic on your form by exploring the customization options. You can choose colors that match your website’s theme.
Also, select fonts that speak to your brand’s personality, and add a touch of whimsy with captivating visuals.
v) Fine-tune The Form’s Behavior:
Moreover, WPForms gives you control over how your form behaves. Set up notifications to receive email alerts when someone submits a form. Also, redirect users to a specific page after submission, or enable conditional logic to show or hide form fields.
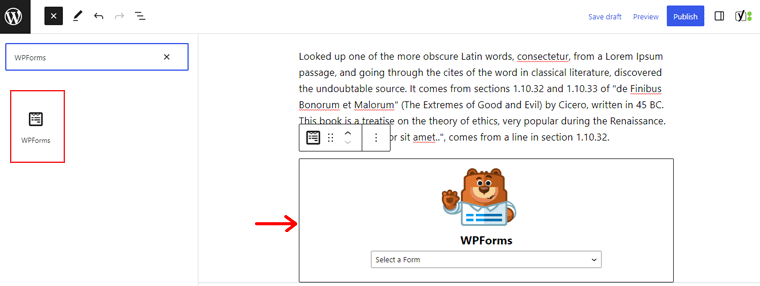
vi) Deploy the Form to Your Website:
Once your form is ready to dazzle, it’s time to deploy it on your website. Whereas, WPForms provides multiple options to add forms to your pages or posts.
Therefore, you can use shortcodes, Gutenberg blocks, or the handy WPForms widget. It’s like unveiling your masterpiece, eager to receive inquiries and bask in its glory.
And there you have it! You’ve successfully added a captivating contact form or inquiry form to your website.
2. Incorporating Social Media Links & Sharing Buttons
Now, let’s unlock the power of social media by incorporating social media links and sharing buttons in this portion of how to create a personal website.
Begin your adventure by accessing your WordPress dashboard. Navigate to one of your posts or create one.

Look for the ‘+’ sign at the top menu bar. Then search for social icons to begin your quest for social connectivity.
Now enter the URLs of your social media profiles, and add links to Facebook, Twitter, Instagram, etc.
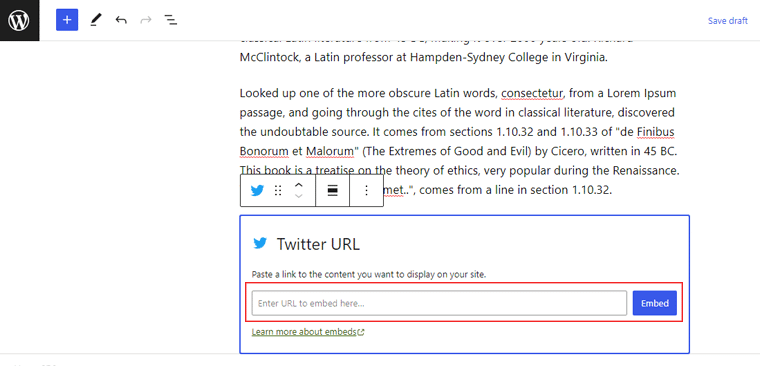
Now comes the exciting part, customizing your social media links. Choose the style and placement that best suits your website’s design and aesthetics.
Following that, choose the platforms where you want your visitors to share your content. Whether it’s Facebook, Twitter, Pinterest, or all of the above.
Before you unveil your social media links and sharing buttons to the world, it’s time for a final polish. So, double-check the placement and ensure the links are working correctly. Also, test the sharing buttons to confirm they’re spreading as intended.
Finally, it’s time to witness the enchantment unfold. Your visitors will now have easy access to your social media profiles, ready to connect, engage, and share your content.
Sit back and enjoy the ride as your website becomes a hub of social interaction.
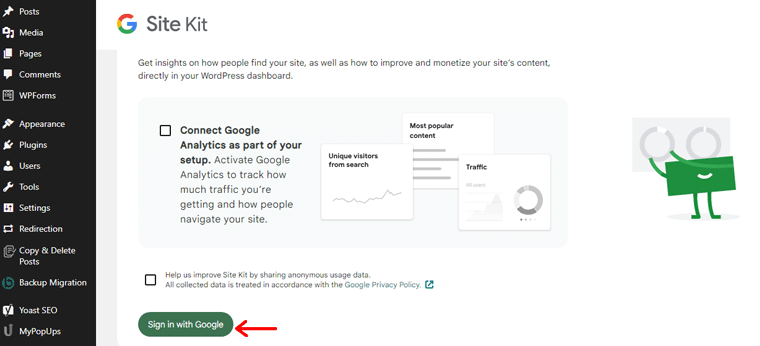
3. Implementing Analytics Tools to Track Website Performance
Now, let’s embark on a thrilling journey to implement analytics tools and unveil the secrets of tracking your website’s performance.
i) Prepare for Data-driven Greatness:
Begin your journey by accessing your WordPress dashboard.
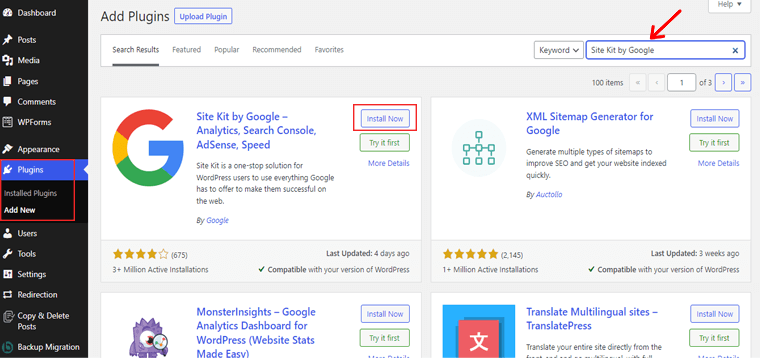
To install the Site Kit by Google plugin, navigate to the ‘Plugins‘ section of your dashboard. Click on the ‘Add New‘ button and search for the ‘Site Kit by Google‘ plugin.
After that, install and activate the plugin, and let the magic unfold.
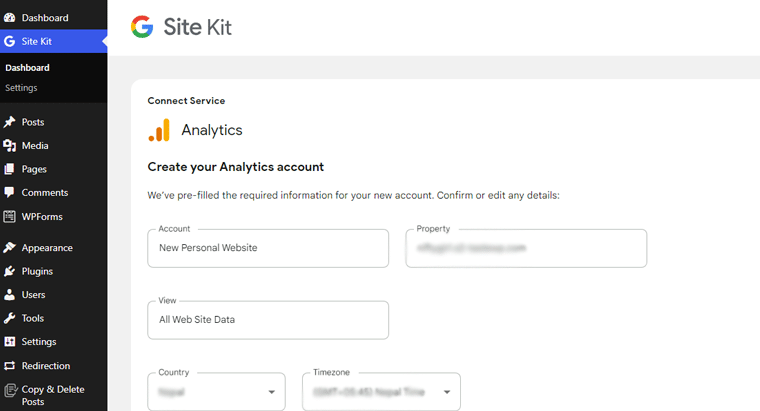
ii) Connect Your Website to Google Services:
Once the plugin is activated, you’ll be prompted to connect your website to various Google services. This includes Google Analytics, Google Search Console, and more.
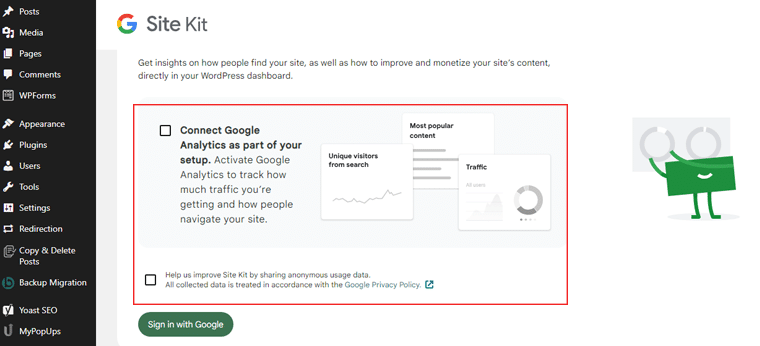
iii) Configure the Analytics Tools:
Moreover, this plugin simplifies the configuration process, making it a breeze to set up your analytics tools. Follow the intuitive prompts and connect your Google accounts to Site Kit.
iv) Explore the Data and Insights:
Now, it’s time to dive into the treasure trove of data and insights. Navigate to the Site Kit section in your WordPress dashboard.
There, you’ll find a wealth of information about your website’s traffic, user behavior, search performance, and more.
v) Take Action and Optimize:
Finally, you’re now equipped to make data-driven decisions. So, identify areas for improvement, track the success of your marketing campaigns, and optimize your website’s performance for maximum impact.
4. Ensuring Proper Website Security Measures
Website security measures help to safeguard your digital domains against the forces of mischief and mayhem. So, prepare to fortify your website with the power of security.
Begin by accessing your WordPress dashboard. Then, navigate to the ‘Plugins‘ and click on the ‘Add New‘ button.
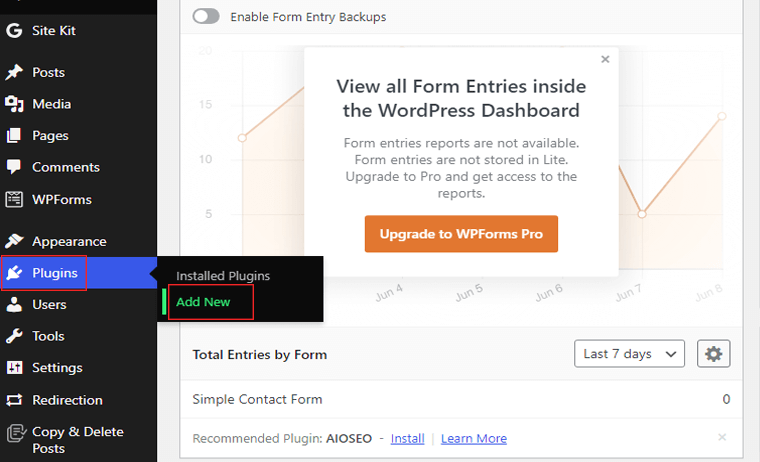
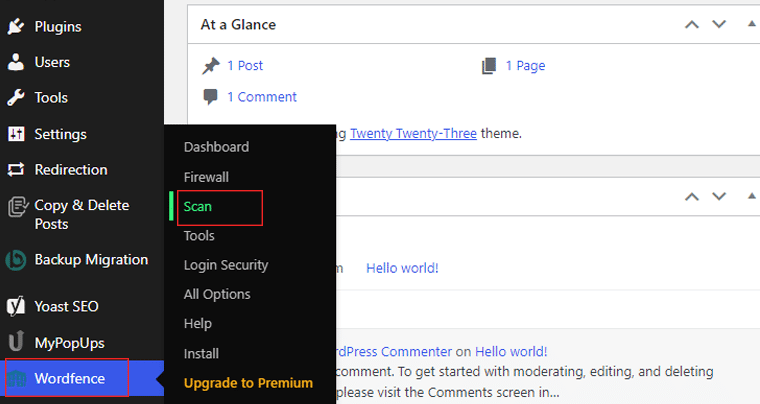
Following that search for the ‘Wordfence Security‘ plugin. Then, install and activate the plugin, and let the fortress begin to take shape.
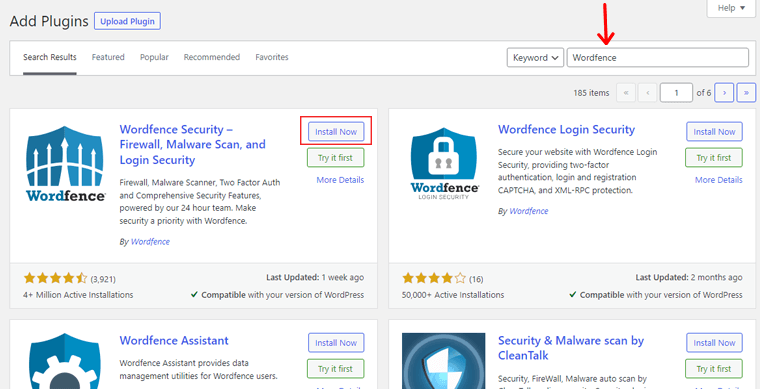
Once the plugin is activated, head to the Wordfence section in your dashboard. There, you’ll find a range of options to fortify your website.

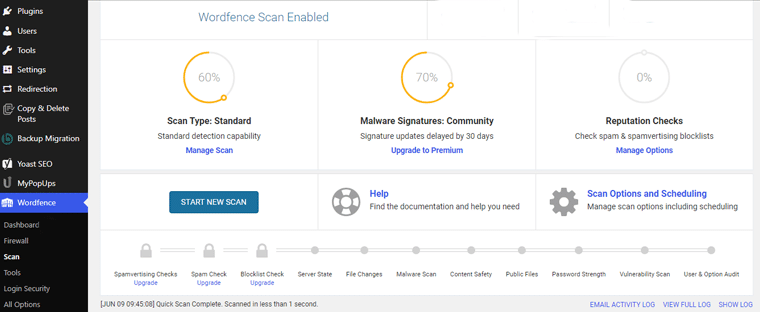
Now you can initiate a scan of your website to identify vulnerabilities and potential threats.
Based on the results of the security scan, take action to fortify your website. Also, Wordfence Security allows you to block suspicious IP addresses, set up firewall rules, and strengthen login security.
Additionally, you need to regularly update your WordPress core, themes, and plugins to ensure you have the latest security patches.
Besides, Wordfence Security will notify you of any available updates. Therefore, it helps you stay one step ahead of potential threats.
Step 8: Testing and Launching Your Personal Website
Let us delve into the captivating world of testing and launching your personal website, in this portion of how to create a personal website.
1. Embark on The Quest for Perfection:
Enter your WordPress dashboard, and double-check every element of your website, ensuring all content, images, and functionalities are in place.
2. Test, Test, and Test Again:
Begin the testing phase by previewing your website’s pages and posts. Then explore every nook and cranny, verifying that the layout, formatting, and functionality are impeccable.
Also, click on each menu item and link, ensuring they direct visitors to the correct pages. Finally, test any forms, buttons, or interactive elements, confirming that they work flawlessly.
3. Optimize for Different Devices and Browsers:
In this mobile-centric world, your website must adapt seamlessly to different screen sizes and devices. So, preview your website on desktop, tablet, and mobile views, ensuring that its responsiveness is impeccable.

Moreover, check the alignment of text, images, and other elements. Hence, making sure they appear appealing and readable on all devices.
4. Fine-tune for Speed and Performance:
A fast-loading website is crucial for providing a delightful user experience. So, utilize speed optimization techniques, like caching and image optimization, to enhance your website’s performance.

Furthermore, test the loading speed of each page using online tools or WordPress plugins. Also, identify any bottlenecks and make necessary adjustments to improve the loading time.
5. Prepare for Launch:
As you approach the final stages of testing, it’s time to prepare for the grand launch. Ensure that your website’s SEO settings, such as meta tags and descriptions, are optimized for search engines.
Besides, don’t forget to create an engaging and captivating homepage that introduces visitors to your brand. Also, craft compelling copy, select eye-catching images, and make your website a true reflection of your unique identity.
6. Unleash Your Digital Masterpiece:
With all the testing complete, it’s time to launch your personal website and share it with the world. Hit the publish button, and watch as your website comes alive, ready to captivate and engage your audience.

Congratulations! You’ve successfully tested and launched your website, taking it from mere ideas to a captivating online presence.
Step 9: Unveiling the Secrets to Promoting and Nurturing Your Digital Heaven
Now it’s time to unveil the secrets of promoting and nurturing your personal website in this section on how to create a personal website. This ensures your website blossoms and thrives in the vast expanse of the internet.

Let us dive on this enchanting journey together.
- Craft engaging blog posts, articles, or videos that resonate with your target audience.
- Share your expertise, insights, and stories that capture their attention and leave them wanting more.
- Foster a sense of community by encouraging comments, feedback, and discussions.
- Also, engage with your audience and create a space where they feel valued and heard.
- Share your content, interact with your followers, and build meaningful connections.
- Plus, utilize captivating visuals, thought-provoking captions, and strategic hashtags to increase your reach and engagement.
- Seek out collaborations with other like-minded individuals or brands in your niche.
- Also, guest blogging, podcast appearances, or joint projects can expose your website to new audiences and foster valuable partnerships.
- Plus, attend industry events, join online communities, and engage in conversations with fellow professionals.
- Moreover, networking opens doors to new opportunities and allows you to learn from others’ experiences.
- Continuously refine your website’s SEO strategy by conducting keyword research, and optimizing meta tags.
- Stay up-to-date with SEO best practices to enhance your website’s visibility in search engine rankings.
- Regularly create fresh and relevant content that incorporates keywords and addresses the needs and interests of your target audience.
Remember that your website is a living entity that requires care and attention. The insights gained from optimizing your website laid a solid foundation.
Frequently Asked Questions (FAQs)
Yes, you can indeed host a personal website for free. There are several options available that provide hosting services without any cost. Including WordPress, Wix, Blogger, GitHub, etc.
No, you don’t necessarily need coding knowledge to create a personal website. There are user-friendly website builders and content management systems like WordPress that allow you to create a website using pre-designed templates.
On a personal website, it’s essential to include key elements like an engaging homepage and an about me section. Also, a portfolio or showcase of your work, a contact page for visitors to reach out to, and links to your social media profiles.
Absolutely! Adding a blog allows you to share your thoughts, expertise, and updates with your audience. Additionally, you can incorporate features like comment sections, contact forms, interactive galleries, or even e-Commerce functionality.
To make your personal website visually appealing, focus on clean and modern design with a consistent color scheme and typography. Use high-quality images and multimedia elements sparingly. Ensure intuitive navigation and clear organization of content.
Conclusion
And that’s a wrap! This concludes our tutorial article on how to create a personal website.
We believe you’ve learned how to create a personal website. Also, we hope you can now draw in more visitors. And elevate your personal website to the forefront with a little hustle and perseverance.
Still, unclear about any steps? Or require any kind of help to create a personal website? Then, please comment below. We’ll be glad to help you.
Explore our other similar articles. Such as how much does a website costs and how to make a booking website.
Don’t hesitate to share this article with your friends and family looking to create a personal website.
Lastly, follow us on our social media handles Facebook and Twitter for more recent updates.