
Feeling overwhelmed and uncertain about how to create an event website that truly stands out? If so, then you’ve come to the right place.
The digital world presents event organizers like yourself with an intimidating range of tech and design choices. Making it quite challenging to navigate and create a captivating online presence that attracts attendees.
Without a compelling website, your efforts to organize a beautiful event may be hampered. Also, potential attendees will struggle to find essential event information. As well as the registration process will remain old-fashioned and engagement levels remain low.
Fear not, this beginner’s guide is the key to unlocking the secrets of creating an event website. That’ll captivate your audience and maximize event success.
So, you can confidently walk on your journey to create an event website that elevates your event to unparalleled heights. Let’s begin!
Understanding the Importance of an Event Website
Before we start with how to create an event website, it’s crucial to understand what’s event website is and its importance.
An event website serves as a virtual gateway. It welcomes potential attendees and provides them with essential information about the event. Beyond its informational role, it becomes a reflection of the event’s essence, theme, and objectives.
Let’s take a look at the importance of creating an event website.
- It fosters engagement long before the event takes place, maximizing attendance and attendee satisfaction.
- Also allows for creative expression, utilizing design and technology to craft a visually appealing and user-friendly experience.
- With features like event calendars and social media integration, it enhances attendee engagement and participation.
- It streamlines the registration process, making it seamless and efficient for potential attendees.
- Also serves as a centralized platform for event updates, with live information and real-time communication.
- The event website establishes the event’s credibility and professionalism.
- Moreover, it expands the event’s reach beyond geographical boundaries.
So, grasp the technical aspects, and start crafting an impressive event website that leaves a lasting impact on your attendees.
Now let’s learn the easy steps to creating an event website.
Steps to Create an Event Website
When it comes to organizing a successful event, a well-crafted and engaging website is a must-have tool. Let’s dive into the essential steps to create an event website.
A. Setting Up Your WordPress Website
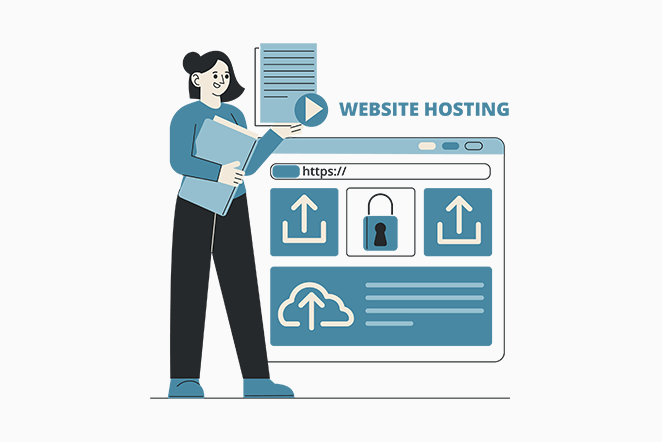
To start your event website creation journey, the first crucial step is setting up a reliable and user-friendly platform. Before that, let’s go through choosing a domain name and web hosting for your event website.
1. Choosing a Domain Name and Web Hosting
Selecting the perfect domain name is like choosing the prime location for your event. It should be unique, memorable, and closely tied to your event’s theme. Also, consider incorporating relevant keywords to enhance search engine visibility.
Need some guidance? Look into our article on how to choose a domain name for your business for more guidance.
Moreover, hosting companies can be trustworthy in helping you get that awesome domain name without any hassle. Also, you can purchase domain names from popular domain registrars like Namecheap or GoDaddy.
After deciding on a domain name, opt for a reputable WordPress hosting provider. Choose the one that offers ample storage, bandwidth, and reliable customer support.
Make sure to check out our article on “What Web Hosting Is” to dive into the fascinating world of hosting.
Besides, there are various hosting providers on the market. However, a well-chosen hosting service ensures your website performs optimally and remains accessible to visitors.
If you find yourself in need of some extra guidance, then our article on what to look for in a web hosting company will be helpful.
However, if we were to recommend, then we’d introduce you to Kinsta, Bluehost, Cloudways, etc.
2. Installing WordPress
Among various options for creating an event website, WordPress emerges as the top choice. Because of its unparalleled combination of versatility, ease of use, and extensive plugin support.
Moreover, WordPress provides event organizers to create unique and tailored websites. With a vast library of themes, including templates for your event websites.
Additionally, its user-friendly interface allows you to navigate and manage event websites effortlessly. Also, the platform’s intuitive Content Management System (CMS) facilitates seamless updates to event details, schedules, etc.
Let’s learn to install WordPress below:
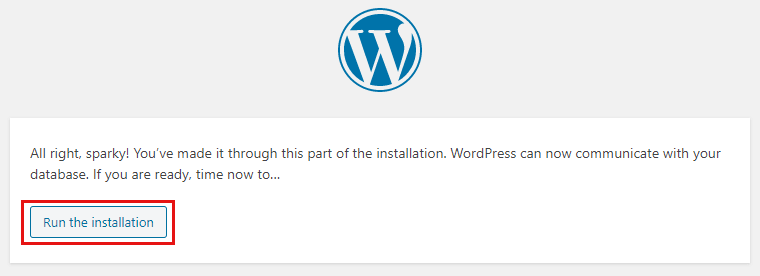
Once you’ve acquired a hosting plan and domain name, the next step is to install WordPress. Notably, numerous hosting companies offer user-friendly one-click installs, streamlining the entire setup process.
Additionally, you can explore the convenience of managed WordPress hosting plans. That automatically handles critical aspects like security, backups, and updates. Hence, ensuring a seamless and worry-free experience.
Regardless of the hosting plan you opt for, the WordPress installation journey involves a seamless 3-step process:
- Start by logging into your hosting account.
- Within the control panel, seek out the WordPress installation option.
- Then follow the step-by-step instructions presented by your hosting provider. It’ll guide you through the setup process.
Upon completing the installation, the hosting company will send you the login details via email. Once received, you can promptly log in to your WordPress dashboard and begin managing your website effortlessly.
Guess what? WordPress comes in two delicious flavors! Meet WordPress.org and WordPress.com. If you’re curious, check out our comparison article, “WordPress.org vs WordPress.com.”
Other Event Website Platforms
Other than WordPress, there are numerous platforms known for their flexibility and ease of use for creating an event website. So, carefully evaluate the features of each platform to find the one that best aligns with your event’s requirements.
Let’s take a look at them:
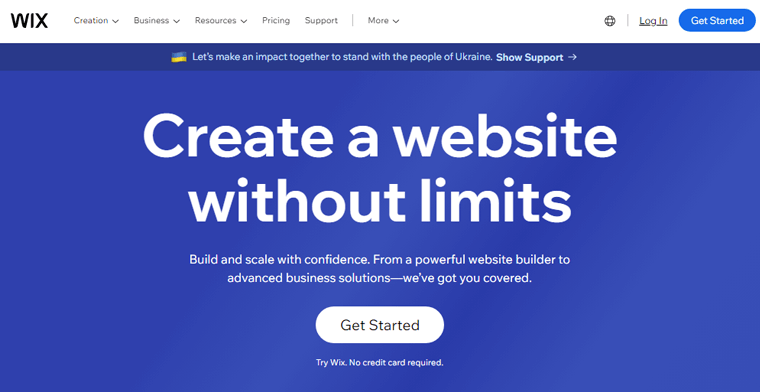
Wix offers an intuitive drag-and-drop website builder, making it a user-friendly option for event website creation. It also provides visually appealing templates designed for event planning. Moreover, enabling you to showcase event highlights, schedules, and speaker information with ease.
Check out our in-depth comparison of WordPress vs. Wix to unravel the mysteries and discover which platform reigns supreme.

Squarespace is a sleek and modern platform that emphasizes visual aesthetics. Making it a great choice for creating visually stunning event websites. Moreover, its seamless integration with social media and email marketing tools helps to promote and engage with the audience effectively.
Go through our comparison article, if you’re confused about choosing between WordPress vs Squarespace.
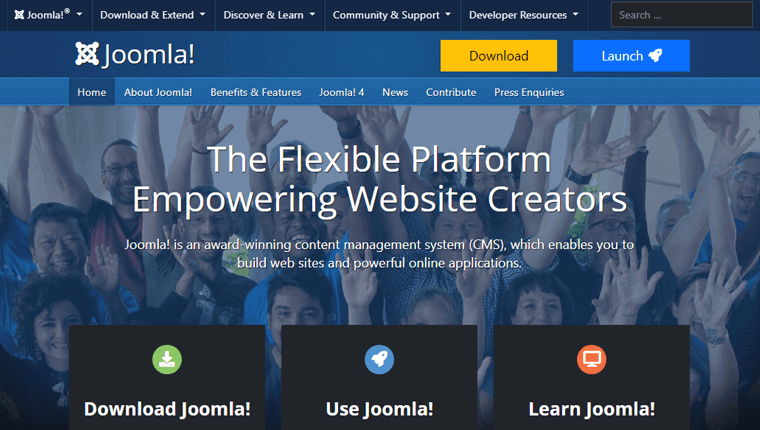
Joomla is a powerful open-source platform that provides a high level of customization and control for event websites. Additionally, its versatility and scalability make it an excellent choice for complex event websites. Also, its extensive range of extensions allows you to tailor websites to their unique requirements.
Having said that, now let’s explore the next section.
3. Selecting a Theme to Create an Event Website
Now, your next task is to select an elegant booking WordPress theme that complements your booking website.
If you’re thinking, what is a theme? Think of it as a ready-made template that offers the entire design, visual appeal, and functionality of your site. It serves as the foundation, dictating the overall look and user experience of your website.
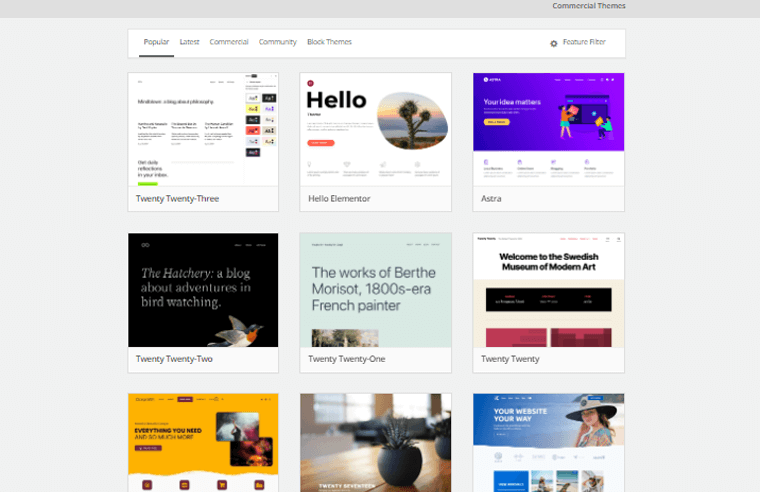
Hence, it’s crucial to choose a theme that aligns perfectly with your specific business, including an event website. So your customers enjoy a seamless and delightful user experience on your website.
You can read our article on how to choose a WordPress theme for more guidance.
Here, we’ll use the Kadence theme for this tutorial. This theme includes tons of templates perfect for event websites.
You can also check our article on the Kadence theme review to get more detailed insight into this theme.
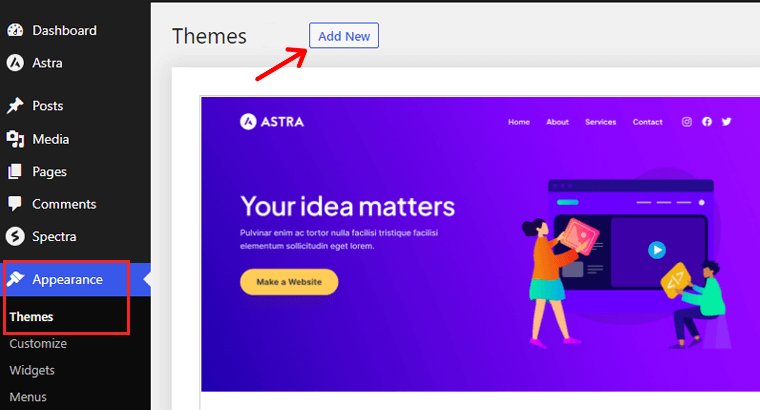
Installing Kadence Theme
Installing the Kadence theme from your WordPress dashboard is a simple and efficient process. Follow these instructions to get the theme up and running on your event website.
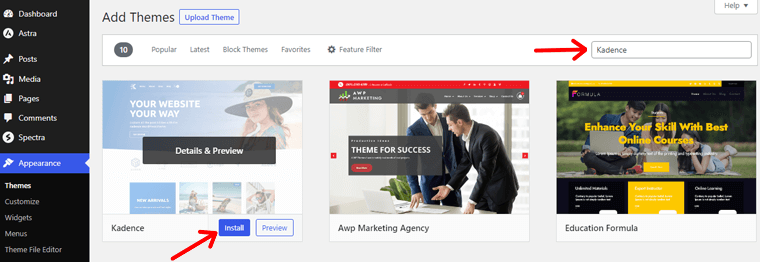
Firstly, access your WordPress dashboard. In the left-hand menu of your WordPress dashboard, hover over “Appearance.”
Then, click on “Themes” from the submenu. On the Themes page, you’ll see an “Add New” button at the top. Click on it to proceed.
In the search bar, type “Kadence.” After that, click on the “Install” button located below the theme’s name.
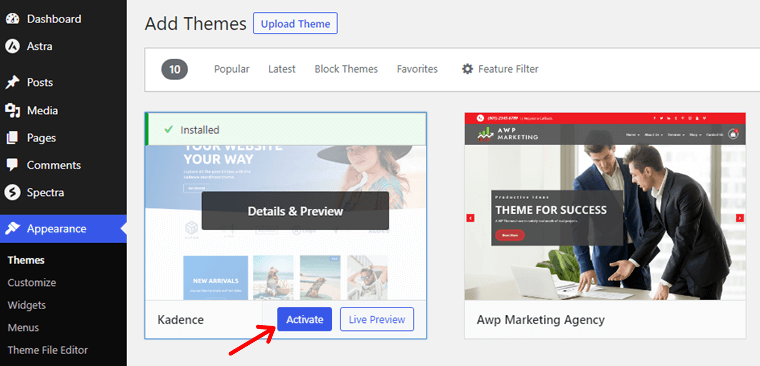
Once done, click on the “Activate” button to make the Kadence theme active.
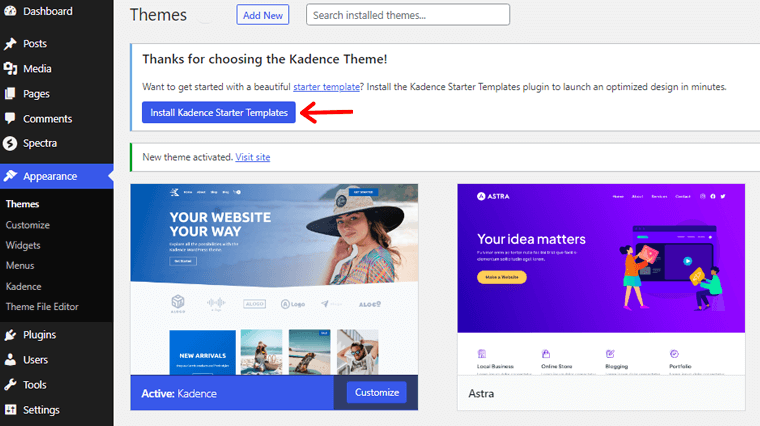
After activation, you’ll see a pop-up message, there click the Install “Kadence Starter Templates” button.
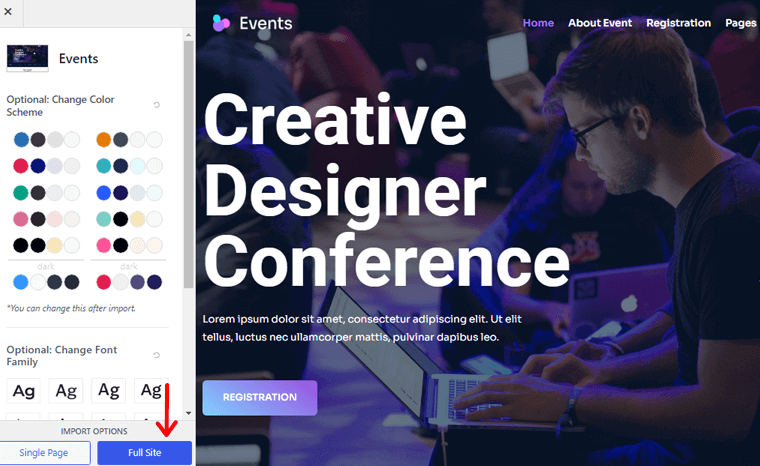
Now, you can choose from various pre-designed templates, customize colors, fonts, and layout options, and even import demo content.
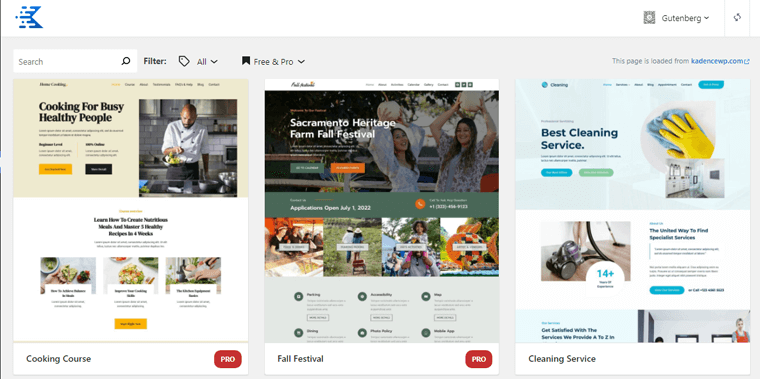
Import Event Website Template
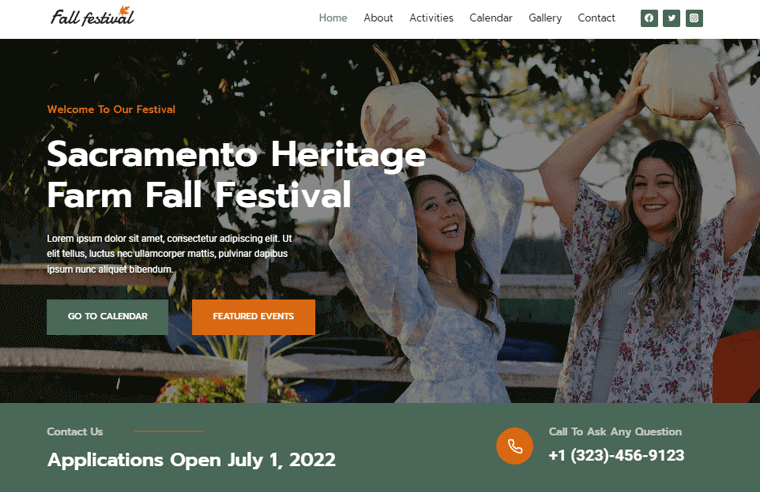
Then, you need to type the keyword of your business in the search bar.
For example, let’s consider you’ve got a festival event business. And you’re planning to create a festival event website where your clients can make booking right from your site.
So, type ‘Event’. With that, you’ll find several beautiful templates to create an event website.
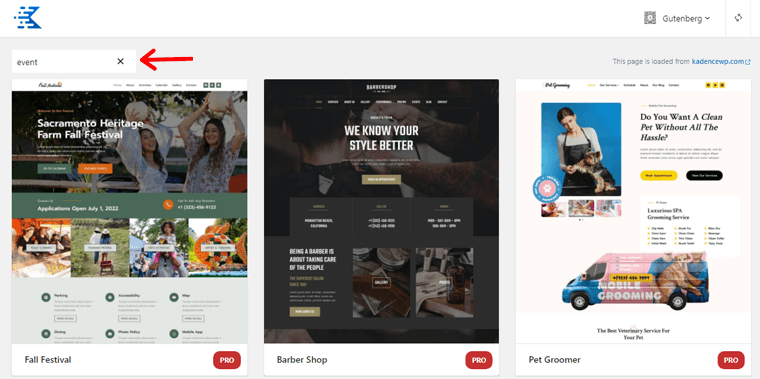
All you’ve to do is double-click on your chosen event template. Here, we chose the template i.e. ‘Events’.
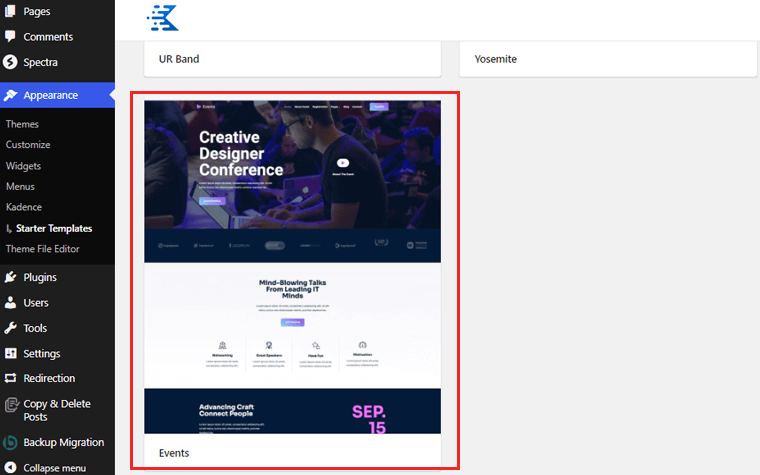
Now, you’ll see the customization page, then click on the “Full Site” option.
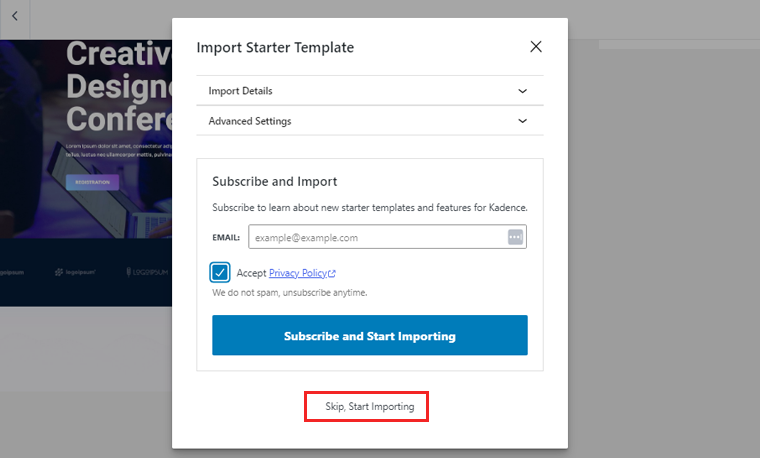
Further, a pop-up box will open, where you can choose to “Skip and Start Importing” option.
Upon completing, you’ll see a message where you can visit your event website. Simply click on “Finished Visit Your Site.”
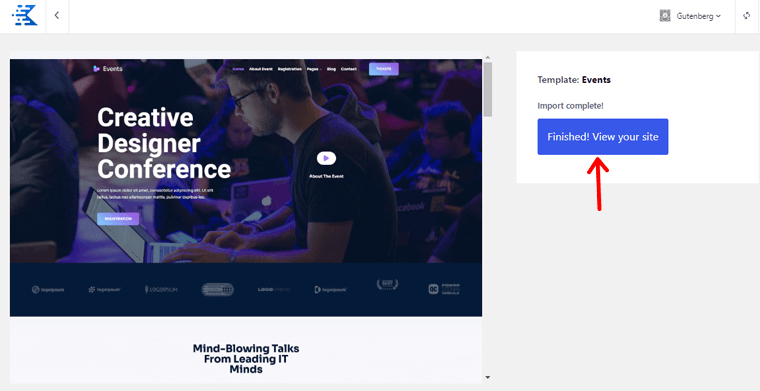
And you’re done installing the theme. So, get creative and make your event website a memorable experience for your visitors.
B. Installing and Configuring The Events Calendar Plugin
The next step involves installing a WordPress event management plugin into your website. Some of the popular booking plugins are The Events Calendar, WP Eventin, WP Event Manager, etc.
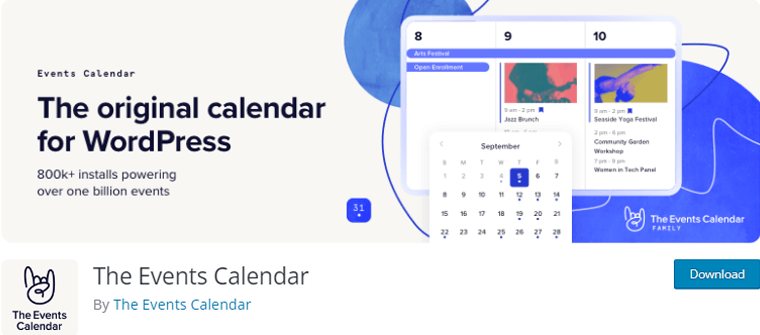
Here, we’ll be using The Events Calendar plugin to create an event website. This freemium WordPress event management plugin enables you to create a comprehensive event website easily.
So, let’s get started!
Step 1: Install and Activating The Events Calendar Plugin
You can easily install the free version of this plugin from your WordPress dashboard.
Installing Free Version
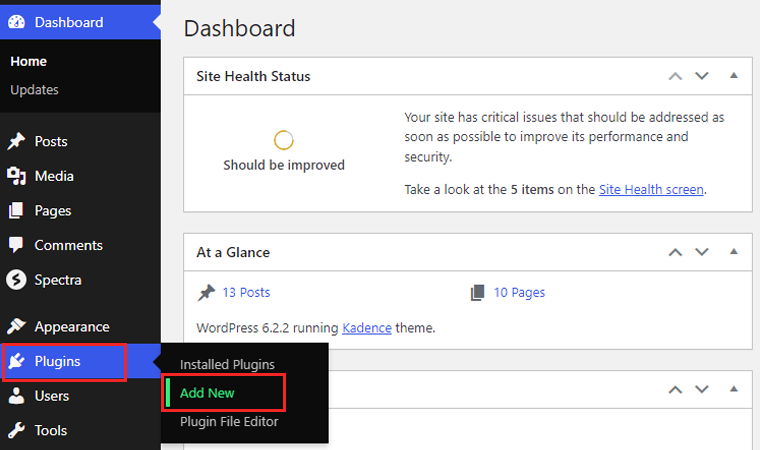
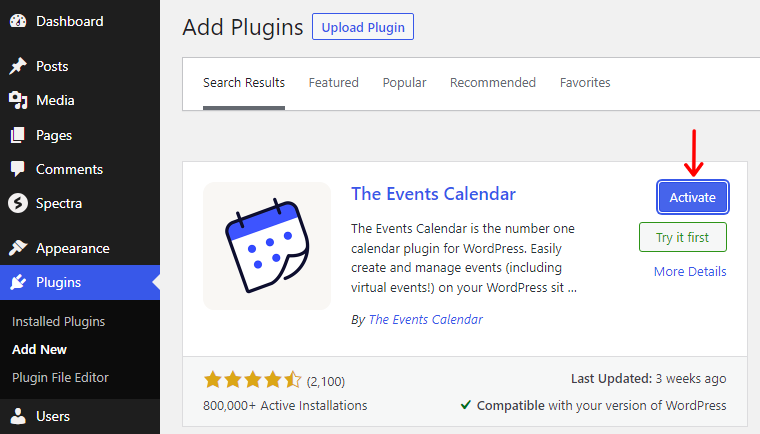
First, log in to your WordPress dashboard. Then, navigate to “Plugins” in the left-hand menu and click on “Add New.”
Now in the search bar, type “The Events Calendar” and hit enter. After that, locate the plugin in the search results and click on the “Install Now” button.
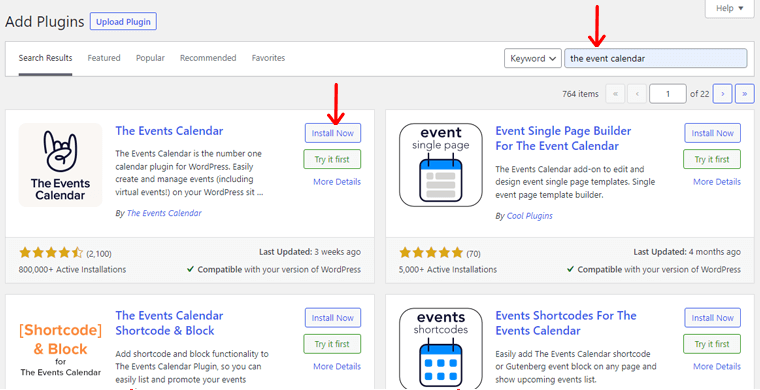
Once the installation is complete, click on “Activate” to activate the plugin on your website.
Installing the Premium Version
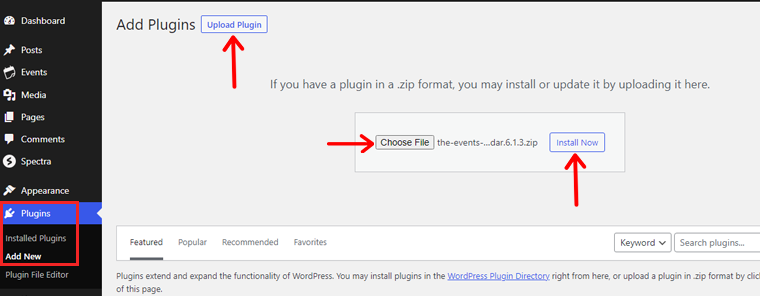
In your WordPress dashboard, go to “Plugins” in the left-hand menu and click on “Add New.”
Click on the “Upload Plugin” button at the top of the page. Choose the plugin zip file you downloaded and click on the “Install Now” button.
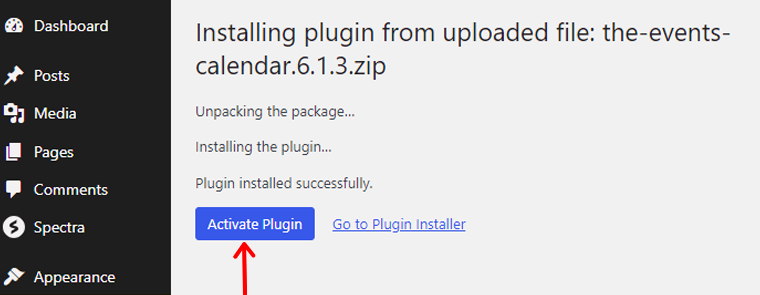
Wait for the installation process to complete, and then click on “Activate.”
Once done, you now have access to a wide range of advanced features and functionalities. Explore the settings and options available.
Step 2: General Settings Configuration
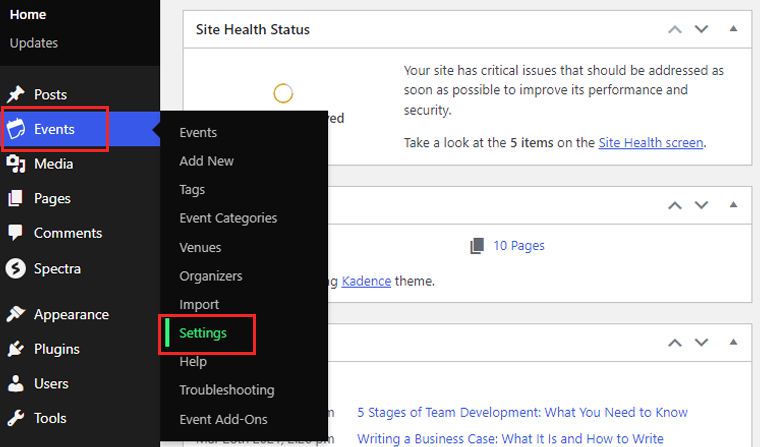
After activation, you’ll see a new “Events” option in your WordPress dashboard menu. Hover over it and click on “Settings.”
Under the “General” tab, configure basic settings like options to “Show the Event Calendar Link,” “Event URL Slug,” etc.
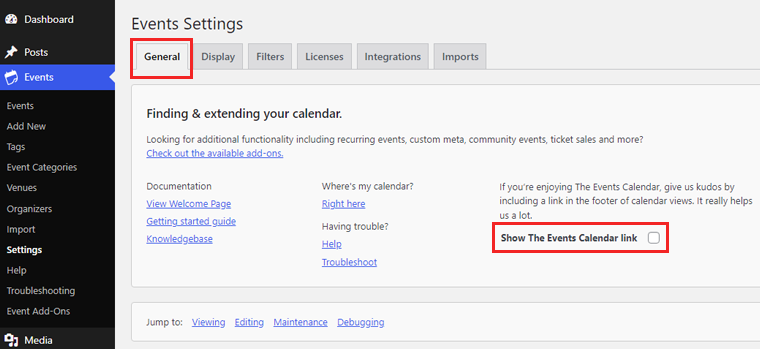
If you scroll more, you can enable or disable the activate block editor for events and show custom fields meta box.
As well as you can choose to move the older events to trash. It allows you to select events older than 1 month, 3 months, 6 months, and so on.
Moreover, it also has an option where you can disable or enable debug mode and opt-in to share usage data with The Event Calendar.
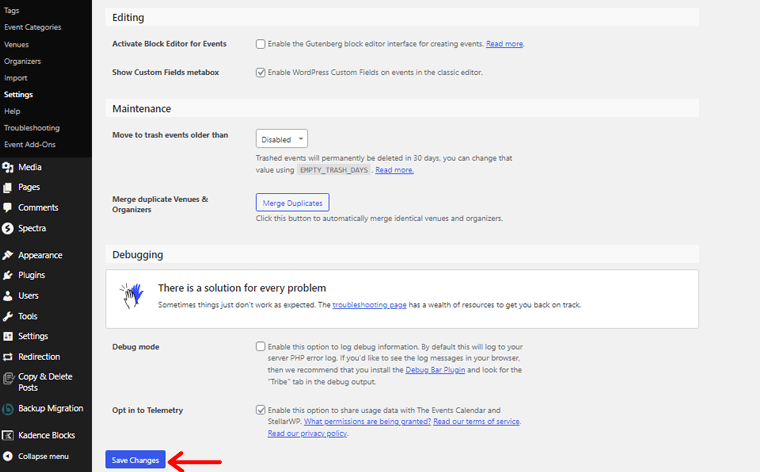
Once you’re done with your general setting, click on the “Save Change” option.
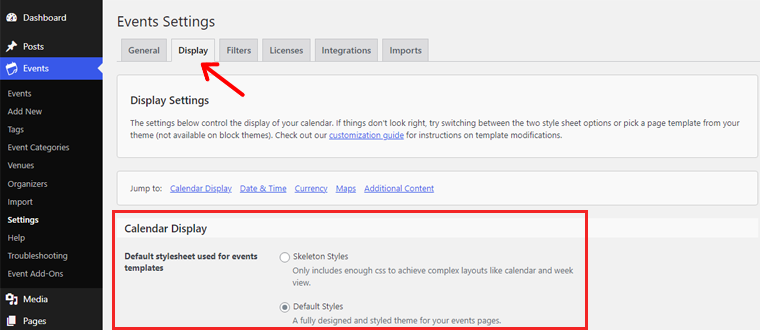
Step 3: Event Display Settings
In the “Display Setting” tab, fine-tune the behavior of the plugin to suit your needs.
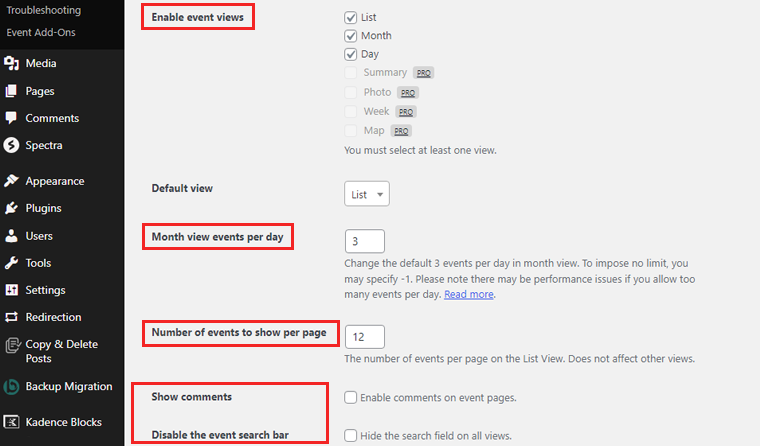
Adjust settings related to calendar display, for example, Skeleton Styles or Default Styles. You can also enable event view as per list, month, and day.
Moreover, you can choose the number of events to show per page. You can also enable the option to show comments on the event pages.
Additionally, you can set currency symbols and codes. Whereas the currency symbol normally proceeds with the value. So if you enable the “Currency symbol follows value” option, it’ll position the symbol after the value.
Furthermore, you can enable maps for events and venues. Also, set the zoom level for Google Maps.
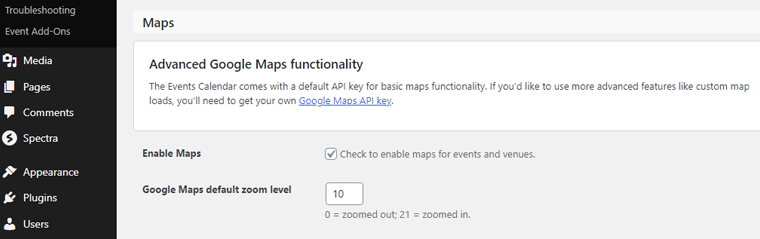
Once you’re done, you can hit the “Save Changes” button.
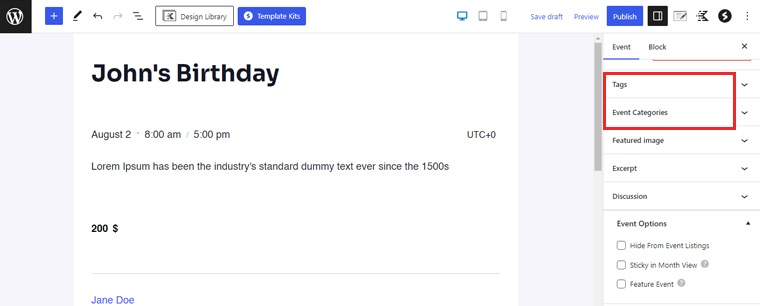
C. Creating Event Categories and Tags
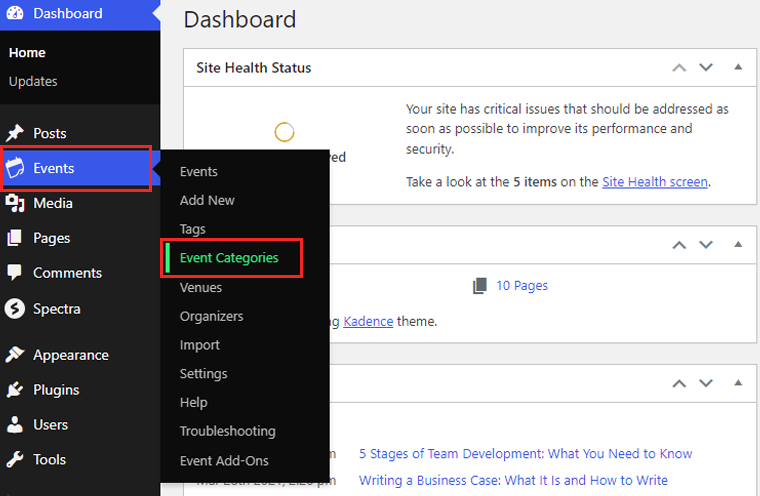
Step 1: Create Event Categories
To create event categories, click on the “Event Categories” option within the Events dashboard.
There, you’ll be prompted to add new categories. Enter the name, description, and slug for each category.
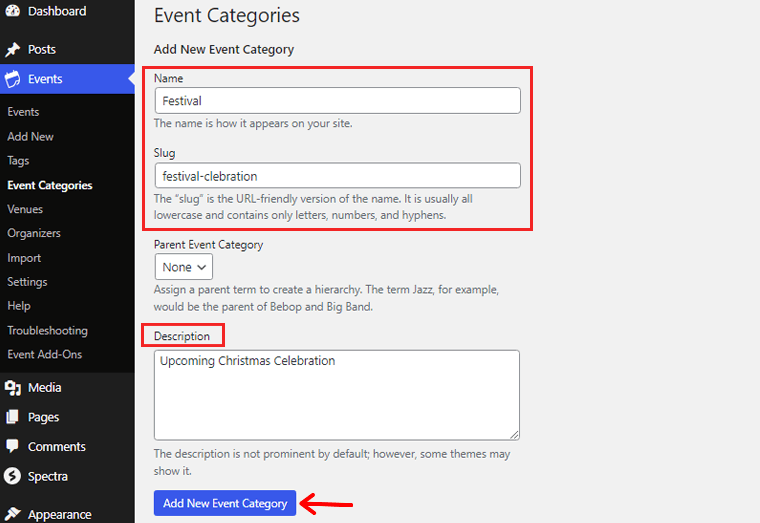
Also, creating distinct categories helps attendees easily filter and find events of interest.
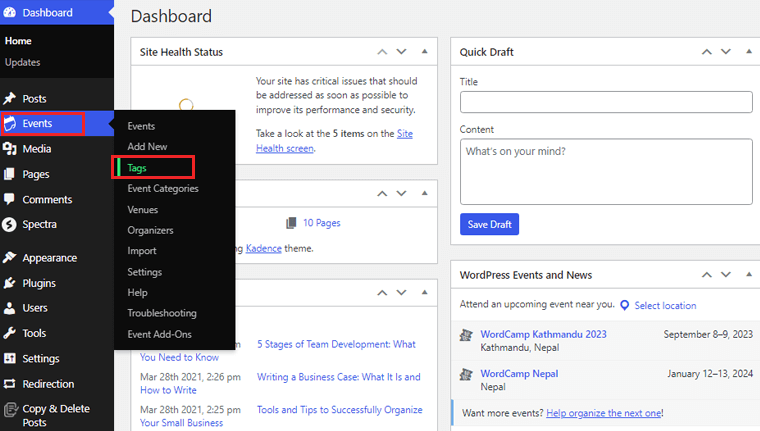
Step 2: Add Event Tags
Tags offer another layer of event organization, enabling attendees to search for events based on specific keywords or topics.
To add event tags, click on the “Tags” within the Events dashboard.
You can then add new tags by simply entering their names, slug, and descriptions.
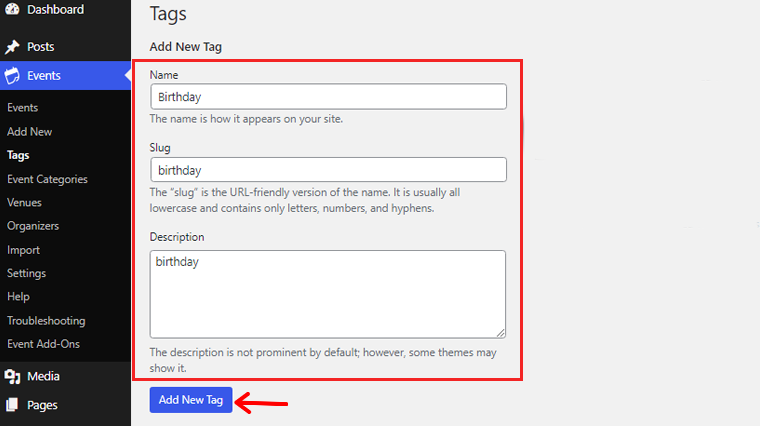
Consider using relevant and descriptive tags that represent the event’s key themes, locations, or speakers.
D. Creating Your First Event
Creating your first event is an exciting step in building your event website. This plugin offers enhanced features and functionalities that elevate your event management experience.
Let’s walk through the process of setting up your first event in detail:
1. Setting Up Event Details:
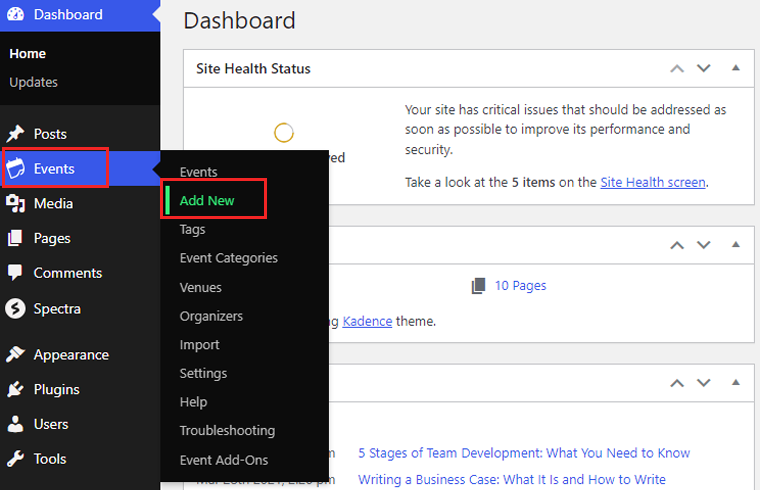
Start by navigating to “Events” on your WordPress dashboard and click on “Add New.”
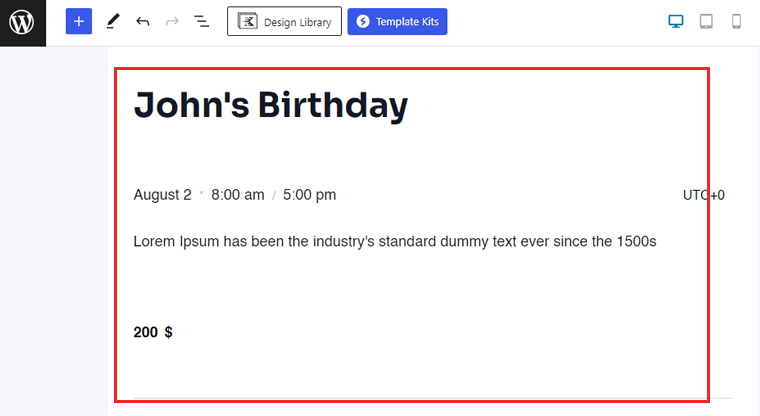
Enter the event title, date, start time, end time, and a comprehensive description of the event,along with the cost.
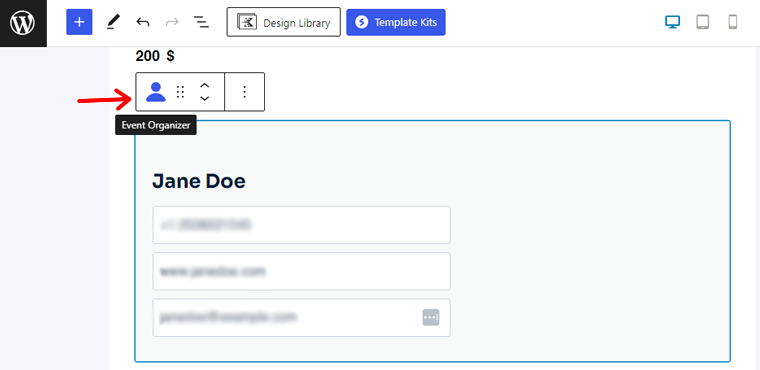
Moreover, you can also add an event organizer to this event editor page.
Additionally, you can add an event venue and your event website link. Also, you can add this event to your calendar.
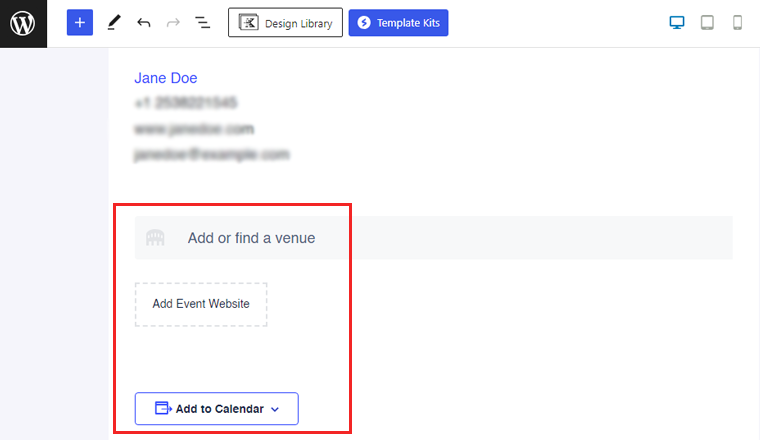
Furthermore, use event categories and tags to organize and categorize your events effectively.
Once you’re done creating your event, now simply hit the “Publish” button.
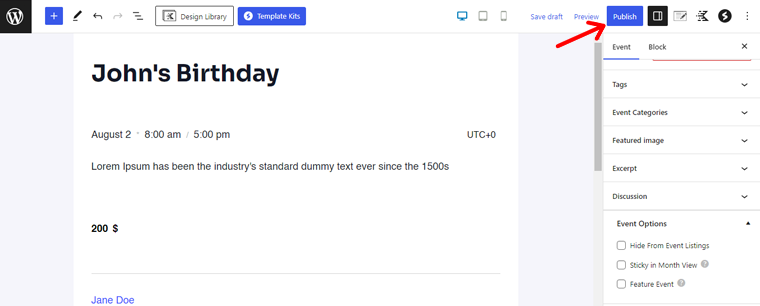
Congratulations! You’re done creating your first event.
2. Enabling Event Registration and Ticketing Options:
To streamline the registration process and offer seamless ticketing options, enable event registration and ticketing features. With this plugin, you can set ticket prices, quantity limits, and even early bird discounts.
Integrate secure payment gateways, like PayPal or Stripe, to facilitate smooth transactions. Attendees will appreciate the ease of registration and secure payment options.
3. Configuring Event Cancellation and RSVP Settings:
Having an event cancellation policy is crucial. So, you can configure event cancellation settings, including refund policies and notifications to registered attendees.
Additionally, you can enable RSVP settings for events that don’t require ticketing but need an estimated headcount. Attendees can RSVP to your event, providing you with valuable insights for planning purposes.
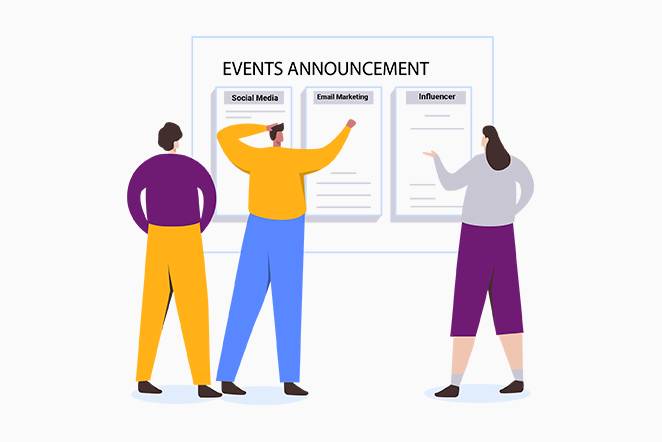
E. Promoting and Sharing Your Events
Creating an event website is only the first step; the real challenge lies in promoting and sharing your events. This plugin offers powerful features that can significantly enhance event promotion.
Let’s explore how to leverage this plugin to boost your event’s visibility and reach:
1. Integrating Social Media Sharing Buttons:
Social media platforms have become a cornerstone of event promotion. You can easily integrate social media sharing buttons directly on your event website.
Moreover, these buttons enable attendees to share event details, updates, and exciting highlights with their friends and followers. Besides, social media sharing enhances word-of-mouth marketing and exponentially expands your event’s reach.
2. Utilizing Email Marketing for Event Promotion:
Email marketing remains a potent tool for event promotion and fostering attendee engagement. Also, it enables you to collect email addresses during the event registration process. Allowing you to build a targeted email list of interested attendees.
So, utilize this list to send out event reminders, updates, and exclusive offers. Hence, keeping attendees informed and excited about your upcoming event. Also, create personalized and well-timed emails that can influence attendee turnout and encourage repeat attendance.
3. Implementing SEO Best Practices for Event Visibility:
Search Engine Optimization (SEO) plays a vital role in improving your event website’s visibility on search engines like Google. So, this plugin offers advanced SEO features, like customizable event permalinks, meta descriptions, and schema markup for events.
Therefore, by optimizing event-related content with relevant keywords, you can enhance your event’s search engine rankings. As well as you can attract organic traffic.
So, take advantage of this plugin and elevate your event promotion to new heights.
F. Utilizing Event Calendar Views
One of the key elements in creating a successful event website is a comprehensive and visually appealing event calendar. Moreover, this plugin offers a range of powerful features and customizable calendar views that enhance the user experience.
Let’s explore how to utilize event calendar views:
The first step in harnessing the potential of The Event Calendar Plugin is to configure different calendar views to display events. The plugin offers various calendar view options, including:
- Month View: This classic view displays events in a traditional monthly calendar format. Allowing users to navigate through different months and access event details with ease.
- Week View: The week view provides a condensed view of events for an entire week. Enabling attendees to quickly identify events for a specific week.
- Day View: For a detailed daily schedule, the day view presents all events for a particular day.
- List View: This view presents events in a streamlined list format. It’s ideal if you prefer a simple, linear display of upcoming events.
- Photo View: With a visually striking layout, the photo view highlights events through captivating images. Hence, providing an immersive experience for website visitors.
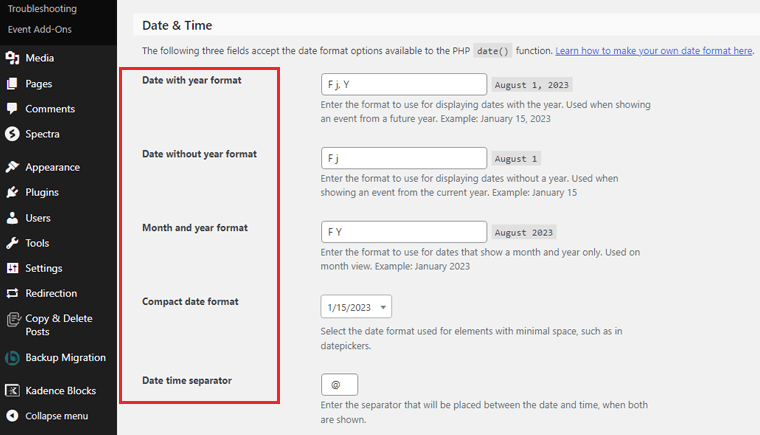
To configure these calendar views, navigate to “Events”>“Settings” in your WordPress dashboard.

From there, access the “Display” tab. Here, explore calendar date formats, like “date with year format,” “date without year format,” and “month with year format.”
G. Creating Upcoming Events Widgets
When it comes to showcasing upcoming events on your event website, this plugin offers numerous customizable widgets.
In this section, we will explore how to create and add upcoming event widgets to your website. Also, includes tips on customizing the widget layout and styling.
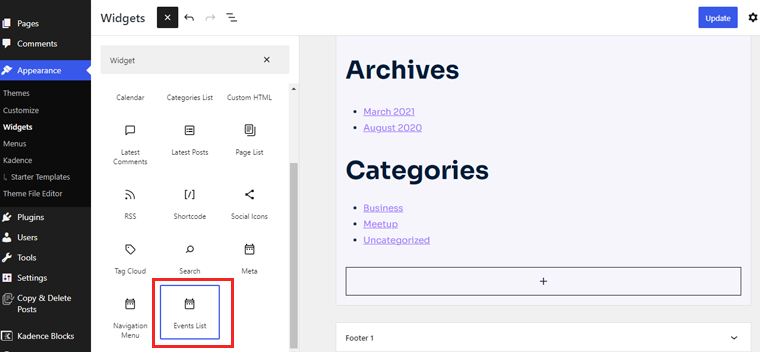
In your WordPress dashboard, navigate to “Appearance” > “Widgets.” Here, you’ll find a list of available widgets.
Locate the “Event List” and drag it to your desired widget area. Common widget areas include the sidebar, footer, or homepage.
Upon adding the widget, you’ll have the option to configure its settings. Choose the number of events to display, specify event categories or tags, and set the date range for upcoming events.
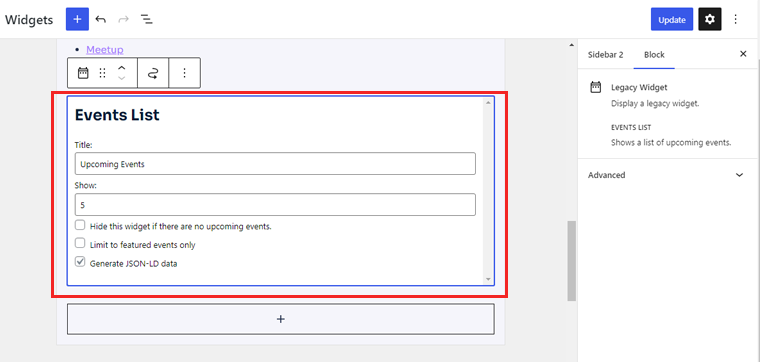
For advanced users and designers, the plugin allows you to add custom CSS to further fine-tune the widget’s appearance.
After customizing the widget settings, click “Update” to apply your changes.
Finally, engage your audience with pertinent event information. Encourage registrations, and elevate your event website’s overall experience.
Also, browse our article on the ultimate checklist of what makes a good website for more detailed information.
Conclusion
And that’s a wrap! This concludes our tutorial article on how to create an event website.
We believe you’ve learned how to create an event website. Also, we hope you can now draw in more clients and maximize your event reservations. And elevate your event website to the forefront with a little hustle and perseverance.
If you require any kind of help to create an event website, then, please comment below. We’ll be glad to help you.
Explore our other similar articles. Such as how to make a booking website and how to create a personal website.
Don’t hesitate to share this article with your friends and family looking to make a booking website. Lastly, follow us on our social media handles Facebook and Twitter for more recent updates.