Are you looking for an authentic Neve theme review? Or confused about whether to use Neve on your site or not? If yes, then this article will clear all your doubts.
Neve is one of the versatile WordPress themes that claims to be fast, lightweight, and multipurpose. It has been installed on over 300,000 sites and is really getting the hype.
But is it really the best theme for business websites?
In this Neve theme review, we’ll take a closer look at Neve and go through its features, installation, customization, pricing, support, and more. By the end of this article, you’ll have a clear idea of whether Neve is the best theme for your website or not.
So, tighten the seat belts as we’re about to take you to the Neve ride.
Overall Rating
Neve is a fast, lightweight, and multipurpose WordPress theme that you can use for free or upgrade to a pro version for more features. With its mobile-first design and compatibility with page builders like Elementor, you can create any website with Neve.
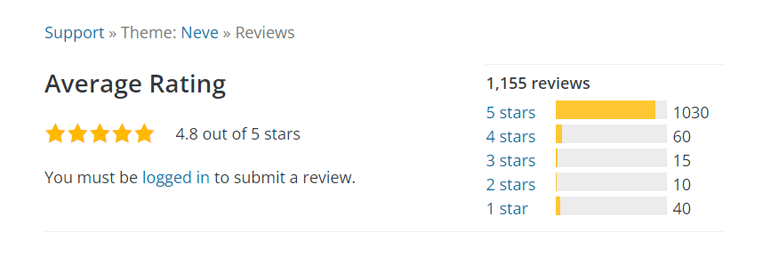
As per WordPress.org, Neve has an impressive rating of 4.8 out of 5 stars based on 1155+ real users. Plus, it’s installed on 300,000+ sites and has received positive reviews. Pretty amazing, right?
After trying out the Neve theme, we give it a rating of 4.8 out of 5 stars. Neve offers a lot of starter sites, customization options, and performance optimization features that make it stand out from the rest.
So, why not give Neve a try and see how it works for you?
Pros and Cons of the Neve Theme
Like every WordPress theme, Neve has its perks and limitations. So, let’s quickly go through the pros and cons of the Neve theme.
Pros of Neve Theme
- Neve is very lightweight and performance-optimized.
- It has a mobile-first design and supports Google AMP for faster loading on mobile devices.
- Includes header and footer builder that lets you drag and drop components and customize them with the WordPress Customizer.
- Large collection of ready-to-use demo sites that you can import with a few clicks.
- You can also use Elementor or the block editor to create your layouts.
- Compatible with popular page builders like Elementor, Beaver Builder, Brizy, and Visual Composer.
- Offers Elementor Booster module that adds new widgets and templates for Elementor.
- Detailed WooCommerce compatibility with a module that adds features like a mini cart, wishlist, etc.
Cons of Neve Theme
- You can only change the primary and secondary colors, and not the individual elements in the free version of the Neve theme.
- Neve’s support options are also limited in the free version.
A. Neve Theme Overview
Neve is a fast and lightweight multipurpose WordPress theme. Multipurpose meaning, you can use it to create different kinds of websites.
The core theme is free, and you’ll find it in the WordPress.org theme directory. Also, it offers a premium license which is an addon plugin for more advanced functionalities. With that, you get access to features like Elementor Booster, White Label, Custom Layout, etc.
Unlike other multipurpose themes, Neve keeps up speed as a top priority without sacrificing flexibility. There is no doubt that Google adores fast-loading sites, and Neve stands tall on that task.
The theme comes up with a minimal design that puts the primary attention on the content. Hence, it offers a good user experience. With the range of options in the WordPress customizer, you can achieve your dream design effortlessly.
The theme has an extensive library of starter templates so, you don’t need to start from scratch. You can import any likable demo with a click and replace the content with yours. It’s just easy like that.
Furthermore, it works seamlessly with Gutenberg and all the popular page builders. So, it makes website building an easy task for everyone.
B. Major Features of Neve Theme
Features are what make Neve a truly stand-out theme in the market. The possibilities are endless when it comes to building a professional-looking site. All right then, now let’s see those outstanding features in action.
1. Outstanding Speed
One of the most important features of any WordPress theme is its speed. A fast-loading website can improve user experience, SEO rankings, and conversions. That’s why the Neve theme is designed as one of the fastest WordPress themes in the market.
Its lightweight and minimalist design makes it load in mere seconds. According to the Themeisle team, a default WordPress install with a Neve theme is only 28 KB. That’s much smaller than the average WordPress theme size of 300 KB.
What’s more, it has several performance optimization features that make it even faster. For instance, if you go to the ‘Neve > Neve Options > Neve Pro’, then you’ll find the ‘Performance’ section.
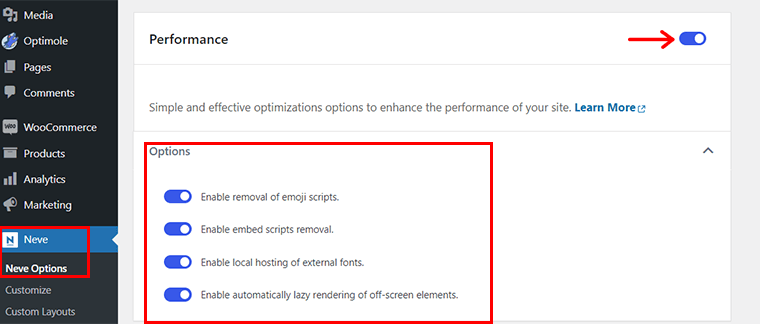
Once you enable it, you get several performance optimization options for your website. Such as:
- Remove Emoji Scripts: Boost performance by disabling unnecessary emoji scripts and streamlining your website’s code.
- Remove Embed Scripts: Improve loading times by eliminating extra embed scripts and enhancing the efficiency of your website.
- Host External Fonts Locally: Speed up your site by locally hosting external fonts, minimizing external requests, and optimizing font rendering.
- Lazy Render Off-Screen Elements: Enhance performance by automatically deferring the loading of non-critical elements until they come into view.
As a matter of fact, everybody hates waiting and is the same when it comes to slow-loading sites. Thus, Neve ensures that your site loads fast. Plus, it puts you on the good side in the eyes of Google as well.
2. Custom Layouts
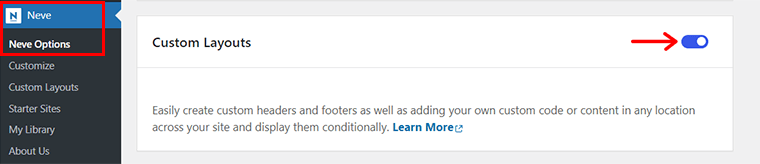
Another beauty of this theme is its Custom Layouts module, which allows you to create and display custom sections for different parts of your website.
You can use the Custom Layouts module to create custom headers, footers, sidebars, 404 pages, and more. You can also use Elementor or the block editor to design your custom layouts with drag and drop.
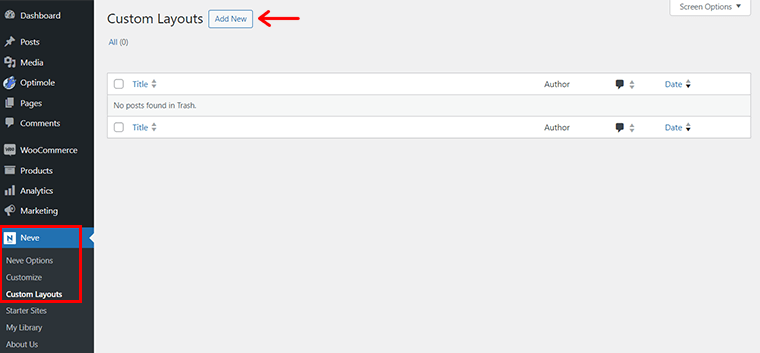
To create a custom layout via the Neve theme, first, you need to go to ‘Neve > Neve Options > Neve Pro’. And enable the Custom Layouts module if it’s not already activated.
Again, go to ‘Neve > Custom Layouts’ and click on the ‘Add New’ button on the top.
With that, you’ll see a popup where you can choose one of the layout types from the list: Hooks, Templates, or Components.
Next, specify the type for your custom layout from the options, Individual, Header, Inside Content, Footer, Sidebar, etc. For instance, here we’ve chosen ‘Footer’ option.
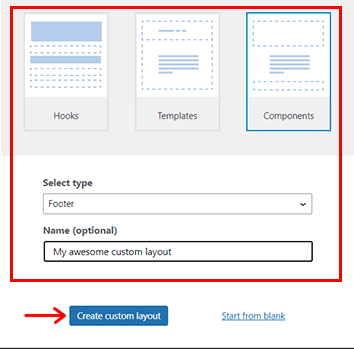
Then, you can name the layout if you want and click on the ‘Create Custom Layout’ option. With that, you’re taken to the editor panel.
Here, click on the ‘+’ icon to explore several blocks to create a layout. And the best part is that the premium version of Neve provides you with several Otter blocks that help you create the layout you want.
For instance, here we’ve created a custom footer layout using ‘Form’ and ‘Maps’ Otter blocks.
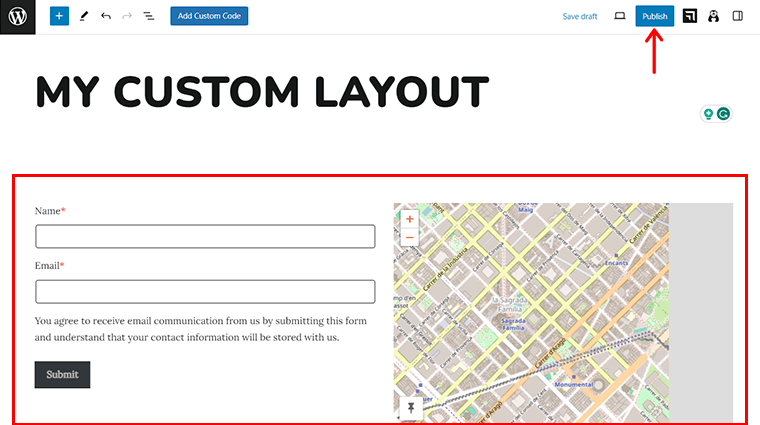
Once you’re done, click on the ‘Publish’ button in the top right corner. And there you’ve your custom layout created via Neve effortlessly.
3. Highly Customizable
The customization possibilities it offers are far incredible as compared to others. You can use its WordPress customizer to customize every element with ease. And you can see the preview of the changes in real-time.
Once you install the theme, you’ll be amazed by the number of customization options.
We’ve explored the Neve customization comprehensively in the Customization portion below.
4. Compatibility with Major Page Builders
For all those newbie friends, page builders are plugins of WordPress that allow you to build and edit pages via drag and drop. Themeisle team is well and truly aware of it, so they’ve provided a multitude of options to choose from.
It works perfectly with Gutenberg, Elementor, Beaver Builder, Brizy, Visual Composer, etc. And the best part is Neve theme not only works well with these page builders, but also enhances their functionality and design.
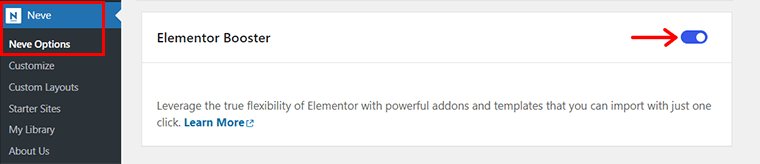
For example, Neve theme has an Elementor Module that adds new widgets and layout for Elementor. Such as flip cards, pricing tables, timelines, review boxes, and more.
You can quickly go to ‘Neve > Neve Options > Neve Pro’ and enable the Elementor Booster module if it’s not already activated.
Then, go to ‘Pages > Edit’ of the page you want to configure. For instance, here we chose ‘About’ page.
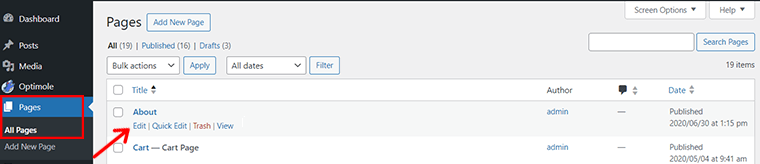
Next, click on ‘Edit with Elementor’ option on the top.
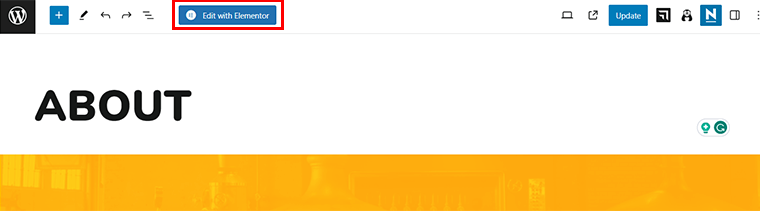
With that, you’ll land up on the Elementor editor panel. Now, if you scroll down to the ‘Elementor Widgets’ area, you’ll see a new tab called Neve Pro Addon Widgets.
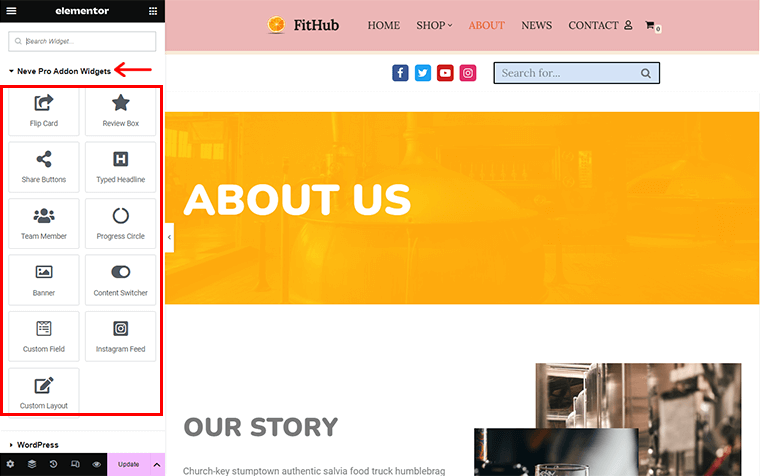
Now, all you’ve to do is drag and drop the widgets that you want to use on your page and customize them with the Elementor options panel. You can choose from 10 widgets, such as Flip Card, Review Box, Share Buttons, Typed Headline, and more.
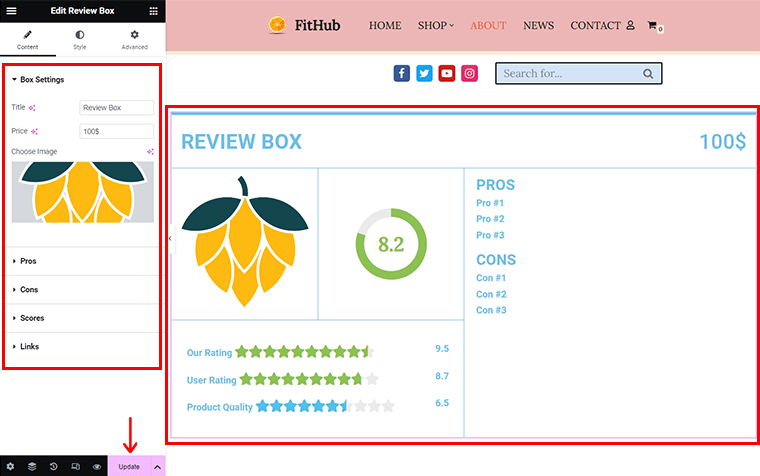
For instance, here, we’ve added the ‘Review Box’ widget. Once done, click on the ‘Update’ button at the bottom of the left-hand side panel.
5. AMP Compatible
If you’re unaware of the term, AMP stands for Accelerated Mobile Pages. In a simple sense, this technology makes your site load extremely faster on mobile devices. It’s an open-source initiation that aims to improve the performance of mobile sites on the internet.
Google loves it, thereby creating an AMP page is worth it. Hence, keeping the performance in mind, Neve is fully compatible with AMP and automatically converts your website into AMP-compatible version.
To enable the AMP on your site and Neve to operate at full potential, you’re required to install the AMP for the WordPress plugin. For that, go to ‘Plugins > Add New’. And type ‘AMP’ in the search box.
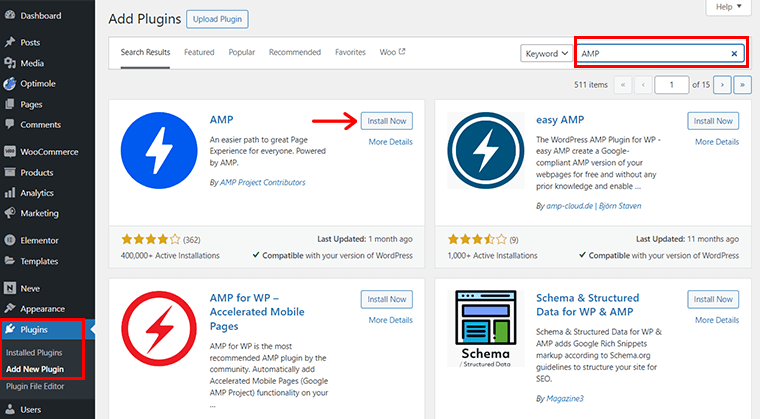
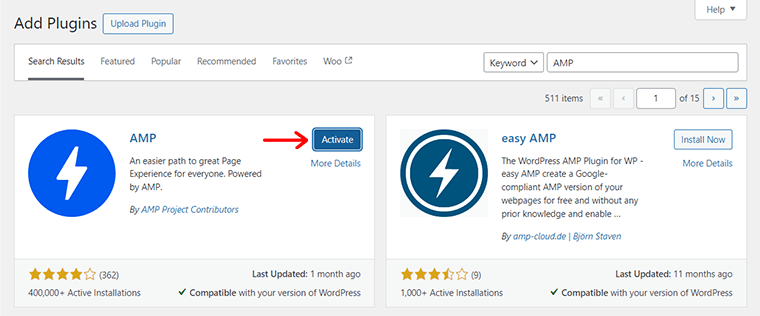
Once you locate the plugin, click on the ‘Install Now’ button, shortly followed by the ‘Activate’ button.
Now, you need to go to ‘AMP > Settings’ and choose the mode you want to use. Basically, you get 3 options – ‘Standard’, ‘Transitional’, and ‘Reader’. You can read the description of which mode to use and select accordingly.
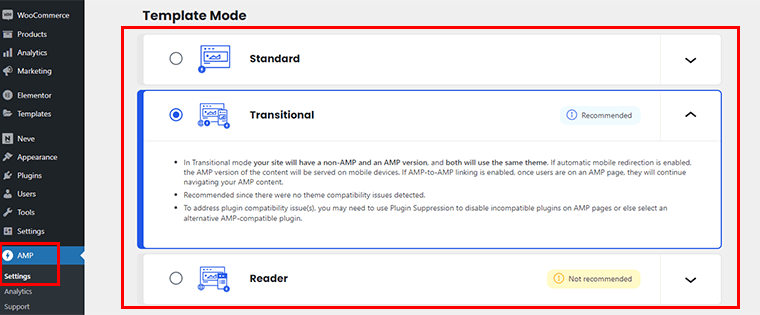
Neve theme also offers a paired mode, which allows you to keep the non-AMP version of a page, while also having an AMP version of it. There will be two versions of your web pages, AMP and non-AMP. You can choose which pages to enable AMP for, and which pages to exclude.
For more details, you can check out this documentation article on how to enable or disable AMP in Neve.
6. Ready to Import Starter Sites
Neve’s developers have put on serious efforts to make it the best in the market. The inclusion of tons of demo sites makes the theme stand true to the name of multipurpose.
They claim that they have 100+ starter sites covering a wide variety of niches or industries. The difference is, some templates are dedicated to free users. And the rest remaining can only be accessed by premium purchasers.
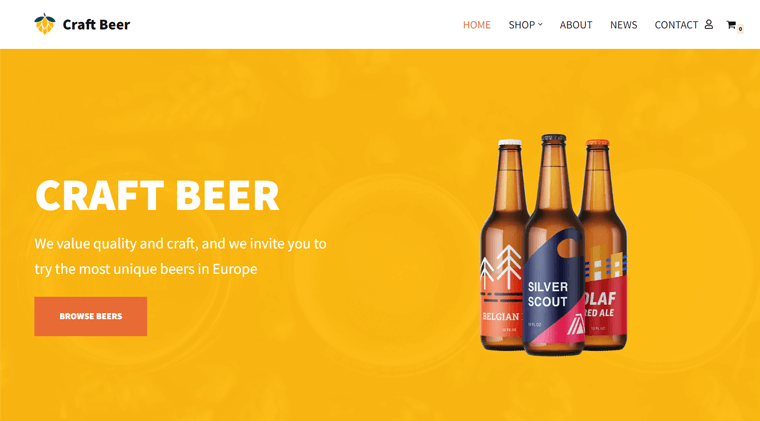
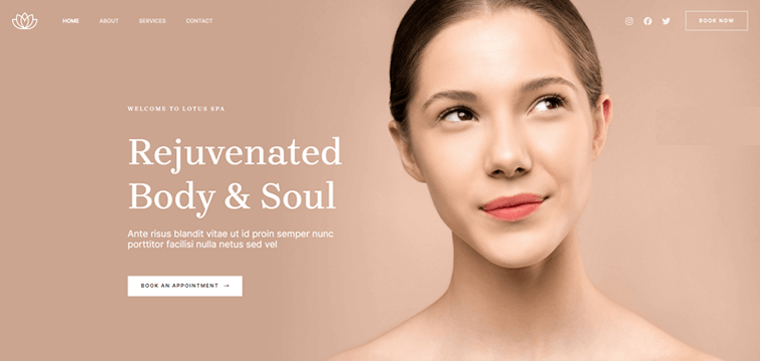
Here, have a look at these ready-made templates that you’ll get with Neve.
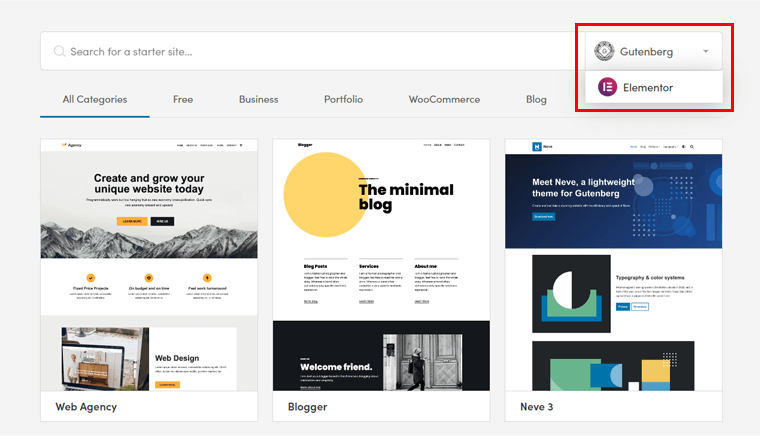
What’s more, you can choose between the ‘Gutenberg’ and ‘Elementor’ modes for your templates. You can check importing the starter template section below for guidance on importing the template.
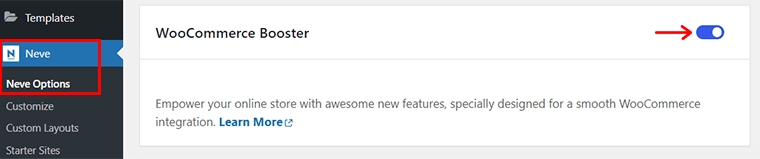
7. WooCommerce Booster
Another significant highlight of the Neve theme is its WooCommerce Booster module. It’s designed to enhance the compatibility and functionality of the Neve theme with WooCommerce (a popular eCommerce plugin).
To use WooCommerce Booster, firstly, go to the ‘Neve > Neve Options > Neve Pro’. And enable the WooCommece Booster module if it’s not already activated.
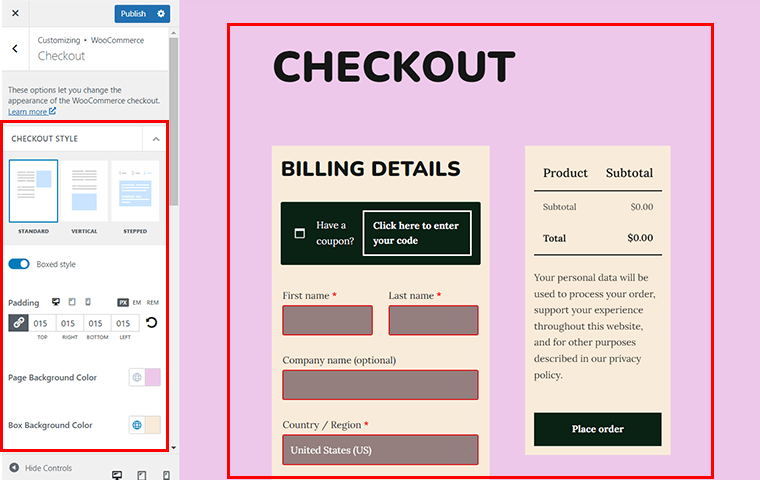
Then, go to ‘Appearance > Customize > WooCommerce’ and explore the options that are available for each section.
With that, you’ll see the editor panel as shown below. Here, you can adjust several settings according to your preferences and see the changes in real time.
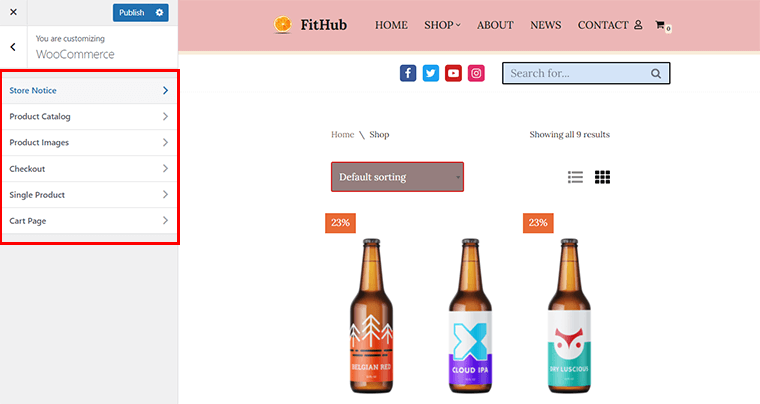
So, let’s tweak a few!
For instance, you can enable the Store Notice in case you have any sales going on or any message that you need to convey to your visitors.

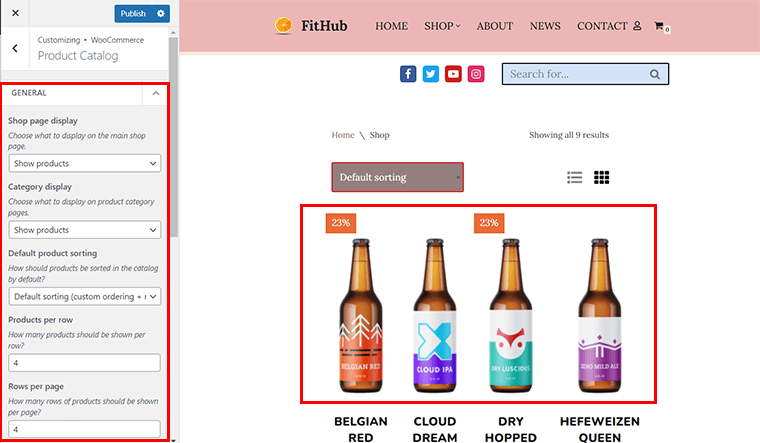
Similarly, from the ‘Product Catalog’ tab, you can customize general settings. Such as, the shop page display and specify the number of products per row in your store.
Likewise, you can also choose how you want your product card to display i.e. whether in ‘Grid’ or ‘List’. Also, specify how you want your ‘Add to Cart’ button to appear.
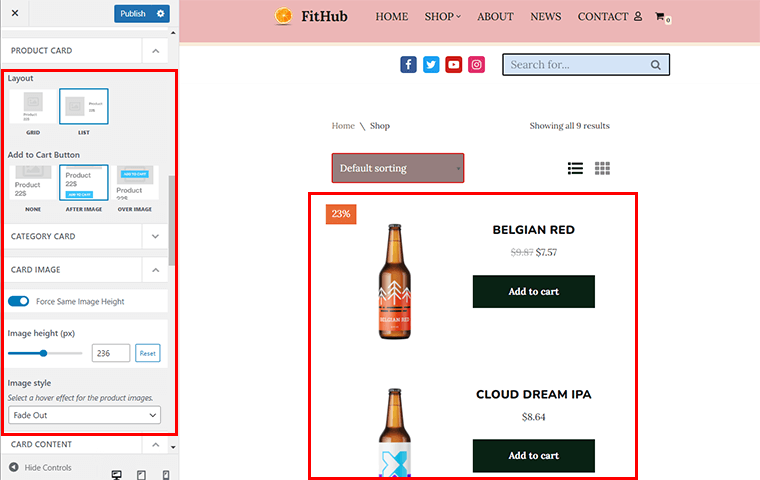
What’s more, you can even set ‘Image Height’ right from the slider and also specify the ‘Image Style’.
Similarly, you can enable or disable element order. For instance, here we’ve shown Category, Short Description, and Product Price and set the alignment to Left.

Likewise, from the ‘Checkout’ tab, you can choose the checkout style, padding, page background color, box background color, etc.
Similarly, you can explore other settings like ‘Single Product’, ‘Cart Page’, and more and utilize Neve’s WooCommece Booster at full capacity. With that, you can now enjoy the benefits of having a fast, flexible, and beautiful online store with a Neve theme.
8. White Label
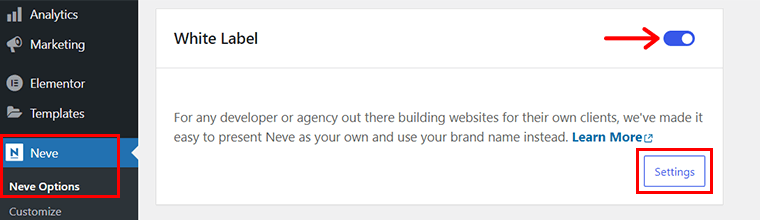
Are you a developer or agency out there building custom sites for your clients? Then, here’s a cake for you. Neve provides you with a White Label module that allows you to present Neve and Neve Pro as your own.
This means you can hide the actual names of the theme and the plugin along with their custom details and rather use your brand name.
To use White Label, navigate to ‘Neve > Neve Options > Neve Pro’ and enable the White Label module.
Then, click on the ‘Settings’ option. With that, you’ll see the following page.
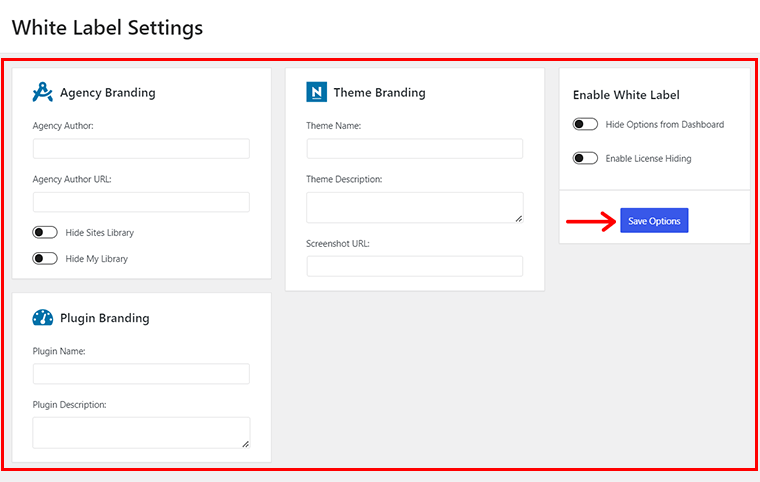
Now, enter the information that you want to use for your agency branding, plugin branding, and theme branding. Once done, don’t forget to click on the ‘Save Options’ button.
9. Neve Mega Menu
Another stand-out feature of the Neve theme is its Mega Menu feature. It allows you to create and display custom sections, particularly for your primary menu. Moreover, you can add icons, headings, descriptions, dividers, and other elements to your menu items.
To use the Neve Mega Menu, you can follow the same process as before. Go to ‘Neve > Neve Options > Neve Pro’ and enable the Mega menu option under the Header Booster module.

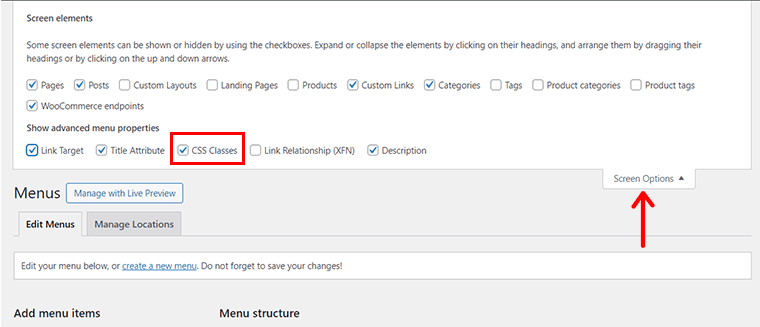
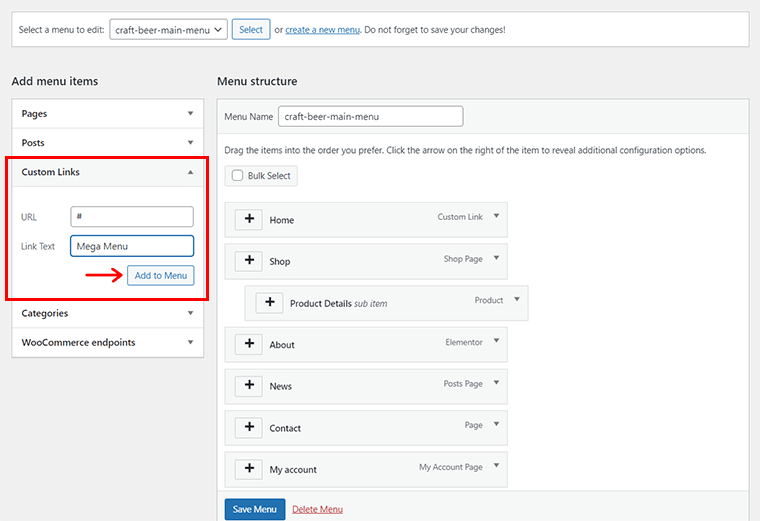
Then, you need to open the Screen Options above and make sure CSS Classes is checked.
Now, click on the ‘Custom Links’ tab, and use the hash (#) symbol for the URL, and name it ‘Mega Menu’. You can type in just Menu or another word as well if you wish, then click on Add to Menu.
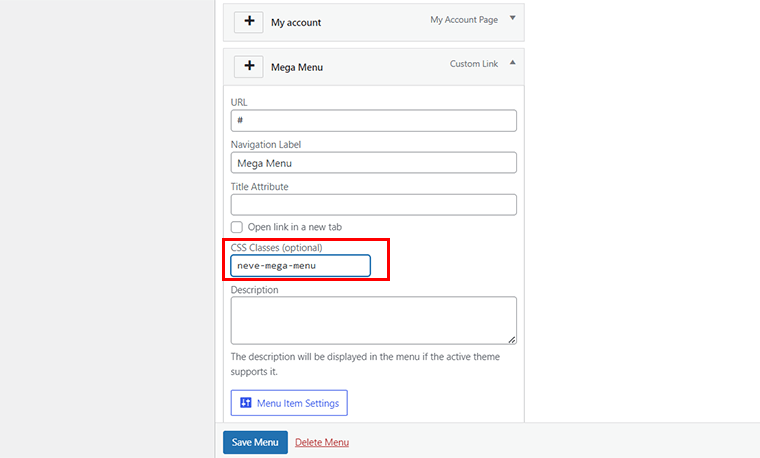
With that, you’ll see the ‘Mega Menu’ is added. Now, click on the drop-down icon right beside it.
Also, add the class “neve-mega-menu” in the CSS Classes section.
Further, you can easily drag the Mega Menu to position it up and down, the way you like. This way, you’ve your root element set up.
Now, let’s add some columns for the mega menu via Custom Link again. Again, let’s use the hash (#) symbol for the URL, and name it ‘Column 1’.
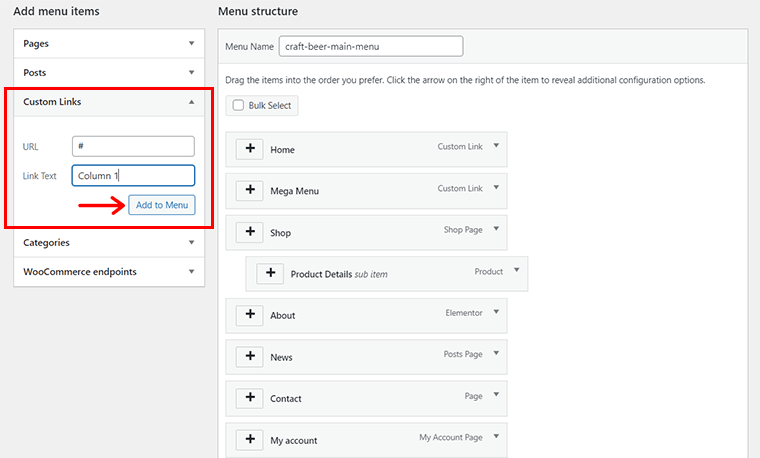
Again, click on the drop-down icon and add the class “neve-mm-col” in the CSS Classes section.
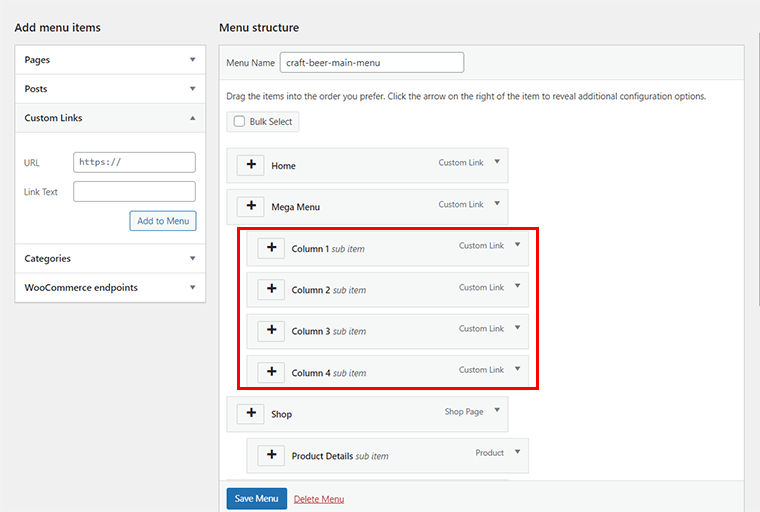
Following the same pattern, you can create a few more columns as per your needs. Here, we’ve created 4 columns.
Again, let’s add some categories for columns of the mega menu via Custom Link. As done earlier, let’s use the hash (#) symbol for the URL, and name it ‘Category 1’.
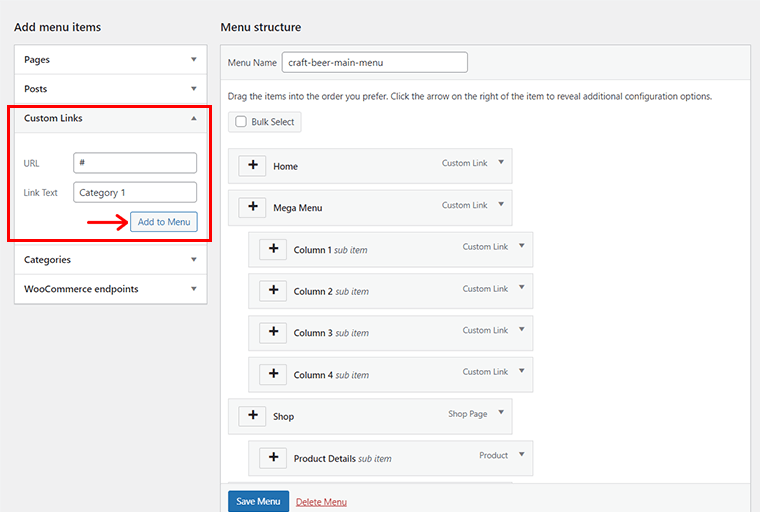
Like before, click on the drop-down icon and add the class “neve-mm-heading” in the CSS Classes section.
Following the same pattern, you can create a few more categories as per your needs. Here, we’ve created 4 categories. Also, put the Categories under Columns under Mega Menu via drag-and-drop, which looks something like below.

Once you’re done, click on the ‘Save Menu’ option. Then, you can live preview the Neve Mega Menu on your website.
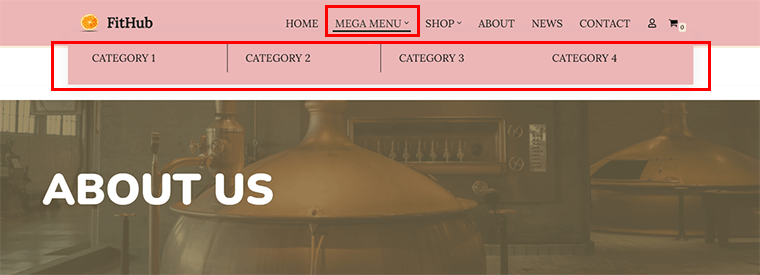
For more detailed guidance, you can browse the documentation article on the Neve mega menu setup.
10. Other Additional Features
Besides the above-mentioned features, Neve theme also offers additional features that make it a versatile and powerful WordPress theme.
Some of those features are:
- Header and Footer Booster: Add new components to the header and footer builder, such as social icons, contact info, breadcrumbs, and search forms.
- Blog Booster: Gives you more control over the appearance and behavior of your blog posts. Such as adding pagination, infinite scroll, sharing icons, author bio, etc.
- LMS Booster: Provides dedicated customizations and compatibility options for two popular LMS plugins, i.e. LifterLMS and LearnDash.
- Future Expert Sites: Offers advanced starter sites with dedicated content and deep integration with 3rd party plugins for job boards, listing sites, forums, etc.
- Neve Cloud: Allows you to save unlimited templates in your Neve Cloud account and import them later on other websites.
- Otter Pro: Adds a collection of page building blocks and enhancements for the block editor. Such as section templates, advanced columns, pricing tables, and more.
- Sparks for WooCommerce: Extends your eCommerce functionalities with conversion-focused features. Such as product filters, product variations, product bundles, etc.
These are some of the other additional features of the Neve theme that make it a complete and comprehensive WordPress theme.
This concludes the key feature section of this Neve theme review article. Now let’s explore how to get started with Neve.
C. Getting Started with Neve Theme Installation
Alright, now we jump into the installation process of the Neve theme.
The installation process is quite simple and easy for both the free and paid versions. Follow along as we guide you into this.
I. Installing the Neve Theme (Free Version)
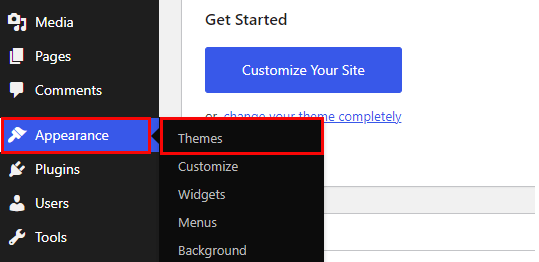
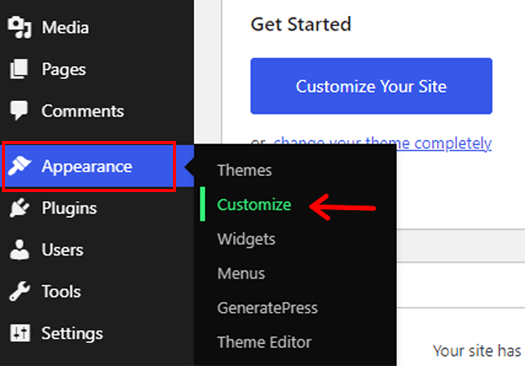
First and foremost, you’ve to log in to your WordPress website. Only then, from your WordPress dashboard, you’ll be able to install the theme. Once you get there, head into Appearance > Themes.
Then you’ll be redirected to another page. From there, click on the ‘Add New’ button.
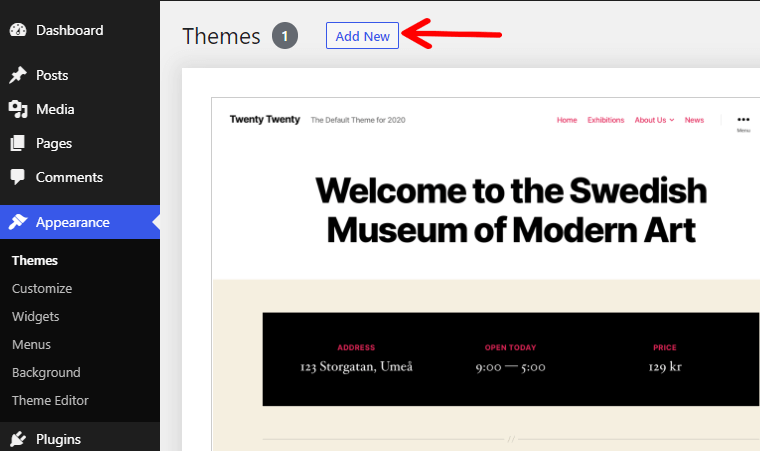
After that, search for Neve, once it popups, click on the ‘Install‘ button.
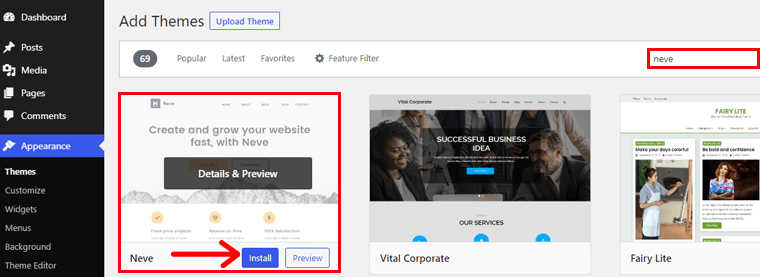
And lastly, click on the ‘Activate’ button to activate the theme to your WordPress site.
There you go, it’s that easy!
So, that was the installation process for the free version.
Right after installation, you’ll also see the prompt ‘Try one of our ready to use Starter Sites’. You can click that button to install the starter site.
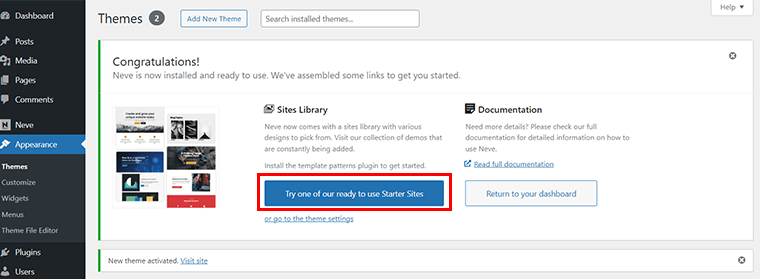
But, in case if you’re planning to use the Neve premium version, then you can leave it as it is. As, we’ll come back to it once we install the premium version.
II. Purchasing and Installing the Neve Theme (Premium Version)
If you want to unlock more features and customization options for your website, then you can upgrade to the premium version of Neve.
The Neve premium version comes with a plugin called Neve Pro Addon that enhances the functionality of the free theme.
To purchase and install the Neve Pro Addon, follow as we guide you through:
Firstly, go to the pricing page and choose the plan that suits your needs. You can compare the features and benefits of each plan and select the one that fits your budget and goals.
After you complete the payment, you will receive an email with the download link and the license key for the Neve Pro Addon. You can also access these details from your ThemeIsle account.
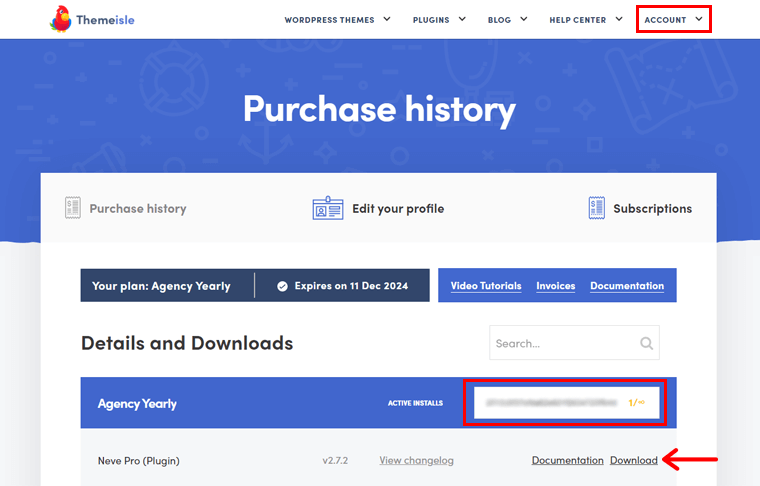
Then, download the Neve Pro Addon zip file from the link provided and save it to your computer.
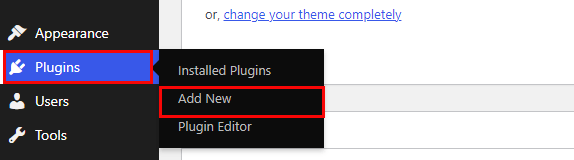
Now, come back to your WordPress dashboard and go to ‘Plugins’. Click on the ‘Add New’ button and then click on the ‘Upload Plugin’ button.
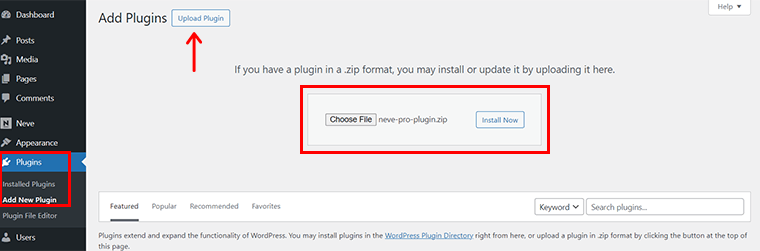
Now, choose the Neve Pro Addon zip file from your computer and click on the ‘Install Now’ button.
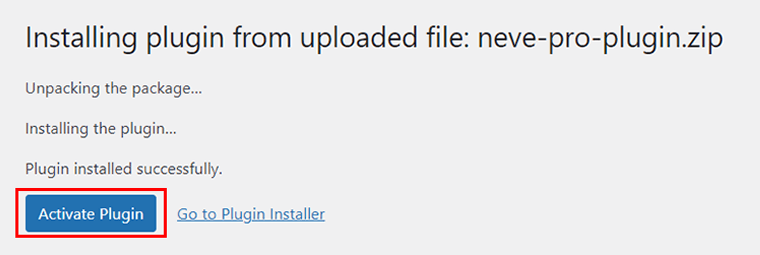
After the installation is complete, click on the ‘Activate Plugin’ button.
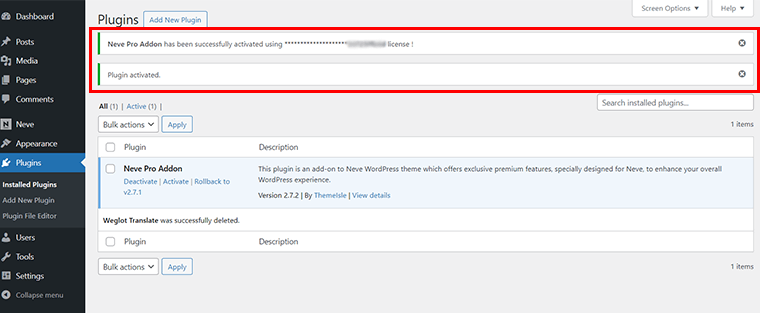
Then, go to ‘Neve > Neve Options > Neve Pro’ and paste the license key that you received in the email. Click on the ‘Activate License’ button to validate your purchase and enable the premium features.
In a few cases, the license is already activated automatically once you install the pro zip file.
With that, you have successfully purchased and installed the Neve Pro Addon. You can now enjoy the advanced features and customization options that come with the premium version of Neve.
D. How to Import the Neve Starter Templates?
With that, now let’s see how we can import the ready-made templates that Neve offers. Now, to import these demo sites, just make sure you have Neve installed and activated first. If all is set, then let’s proceed.
To successfully import any starter sites of Neve, you need to install a plugin named Cloud Templates & Patterns collection. You can simply download it from your WordPress dashboard. Firstly log in to your WordPress dashboard and head on to ‘Plugins > Add New’.
Afterward, search for Cloud Templates & Patterns collection and install it.
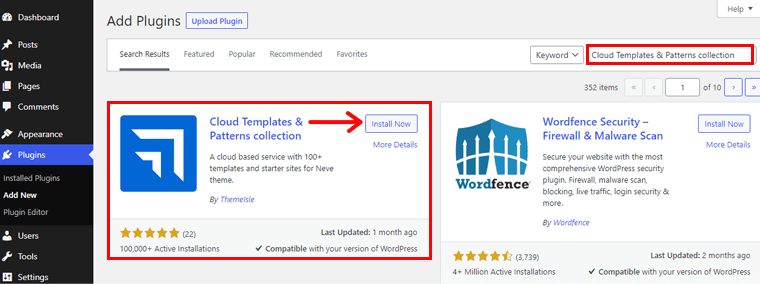
Now you’ve to activate the plugin.
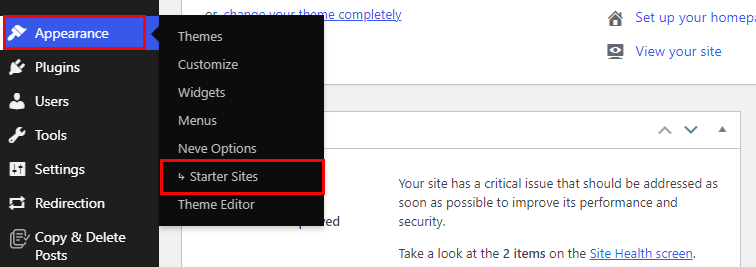
Once done, you’ll discover a new Starter sites tab inside the Appearance menu. Click on it to see all the available demos.
Each demo site is built specifically for a page builder. Pick your favorite page builder and click on the ‘Import’ button.
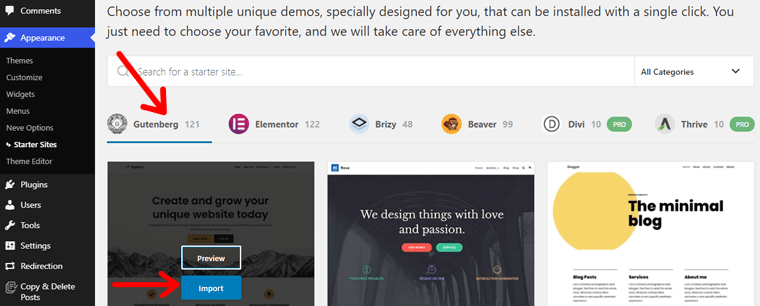
It gives you two options: either you can import a whole site or only a specific page.
For the first option, it’s a straightforward process, you can simply click on the ‘Import entire site’ button.
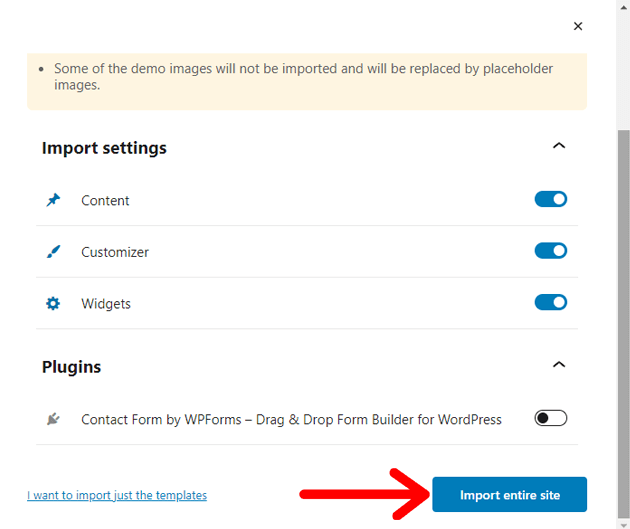
Or, if you’re to import an individual page, then click on the ‘I want to import just the templates’ link.

And following that, you can import a specific page with just the same approach above.
See, you don’t have to sweat either you’ve to give too much time to import these sites!
Quick Method to Import the Starter Template
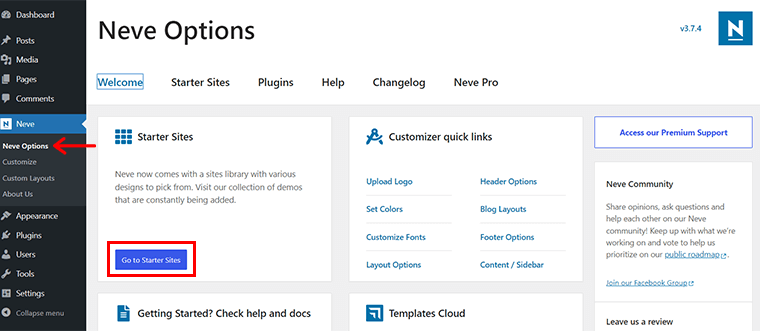
Alternatively, right after you’ve activated the Neve theme whether free or premium, you can simply go to ‘Neve > Neve Options’. There, you’ll see the option ‘Go to Starter Sites’, or you can click on the ‘Starter Sites’ tab as shown below.
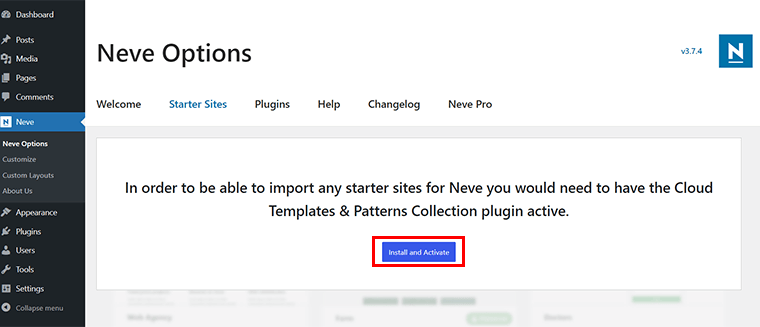
Here, you’ll see a quick prompt button to activate the Cloud Templates & Patterns Collection plugin. All you’ve to do is click on the ‘Install and Activate’ option.
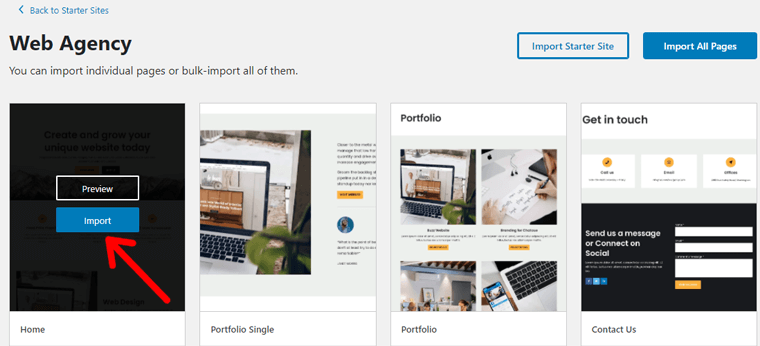
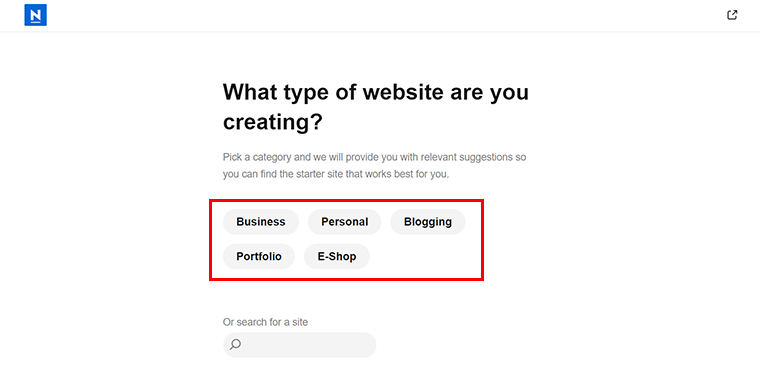
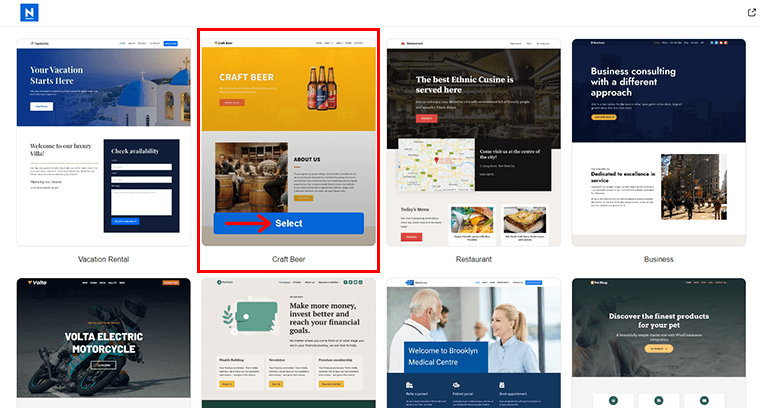
With that, it asks you what type of website you’re creating among Business, Personal, Blogging, Portfolio, etc. Now, you can click on the preferred button, meanwhile, here we choose the ‘Business’ option.
Now, you’ll see tons of starter templates related to the field you’ve chosen before. Simply, hover over your chosen template and click on the ‘Select’ button.
Right while you’re importing the theme, you can quickly change the color of your template from the ‘Color Palette’ option.
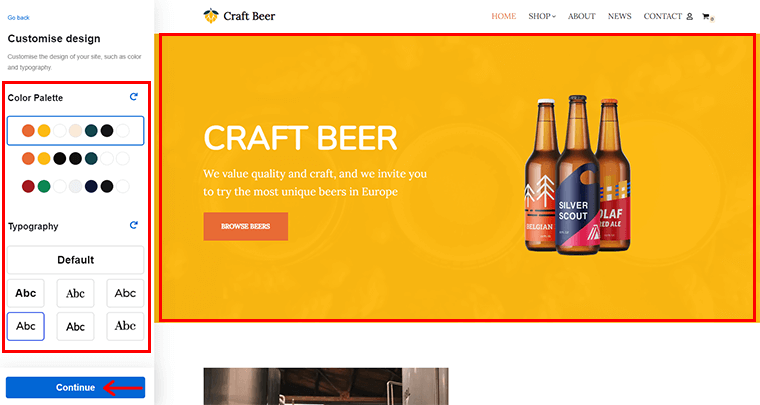
Also, you can change the ‘Typography’ and see the changes on the right-hand side. Once you do that, click on the ‘Continue’ option.
Next, you’ll see the option to edit the Business Name and also Upload the Logo of your business.
As earlier, you can quickly see the changes made on the right-hand side. Once done, click on the ‘Import Website’ button. In case, you want to make these changes later, then you can click on ‘Skip and import website’ as well.
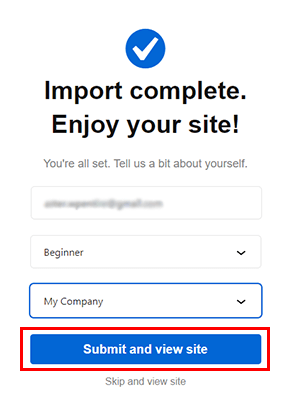
With that, you’re all set to go forward with a prompt box as shown below. Now, click on the ‘Submit and view site’ option.
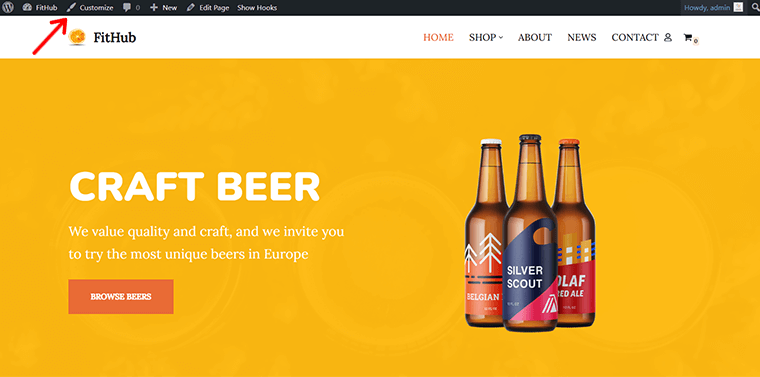
Afterward, you’ll see your imported template as shown above. Now, that brings us to our customization section.
E. Customizing the Neve Theme
As mentioned in key features, one of the main focal points that make Neve such a beloved theme is its customization. To customize, you can quickly click on the ‘Customize’ option right above when you import the template.
Alternatively, you can also navigate to Appearance > Customize.
With that, you’ll see the ‘Customizer’ interface as below. Now, we’ll be looking at each major customization.
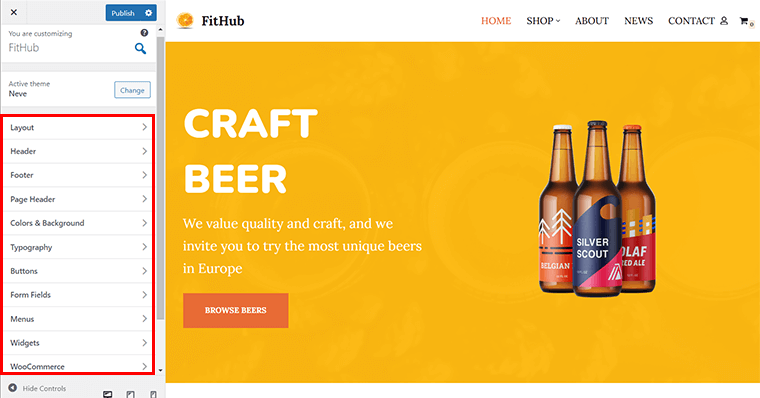
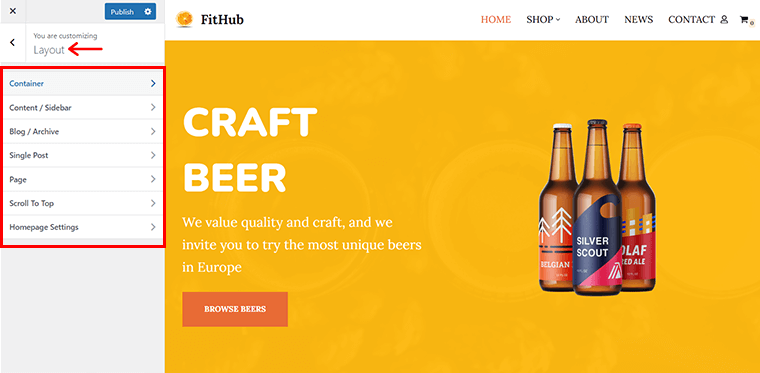
1. Layout
The first customization setting is a Layout where you’ll be getting settings like Container, Content/Sidebar, Blog/Archive, Scroll to Top, Page, etc.
Let’s not just go for words! Rather, how about tweaking few customizations?
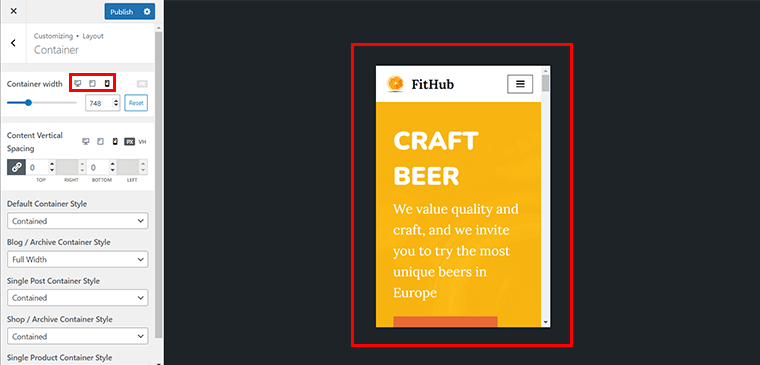
i) Container
So, basically, the Container option allows you to control the width and alignment of the content area of your website.
You can change your entire site’s content. For instance, you can set container width, you can change the layouts of blogs, archives, and pages as well.

The best part is that you’ll get the Slider that helps you adjust the custom content width.
Also, you can change the Content Vertical Spacing of the containers.
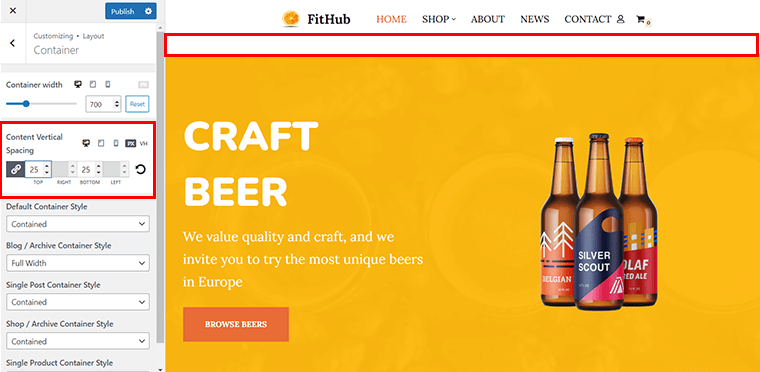
What’s more, you can check how your content is appearing on mobile devices, tablets, and desktops simultaneously right from the customizer.
ii) Content/Sidebar
From here, you can choose a sidebar layout, set content width of both blog/archive, single post, and others.
Suppose, let’s say you want to change the Shop Page content. Now, all you’ve to do is click on the ‘Shop/Archive’ tab on the right section. Also, don’t forget to click the ‘Shop’ tab in the menu too, so that you can see the changes instantly.
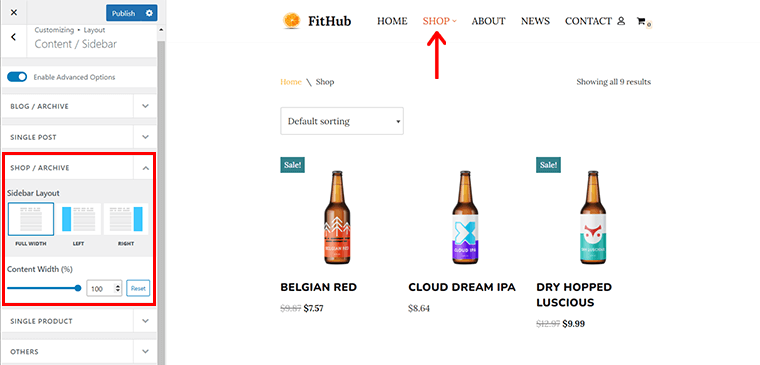
Now, consider, that you want to add the sidebar to the right. Now, all you’ve to do is click on the ‘Left’ option box. Also, you can adjust the content width with a slider.
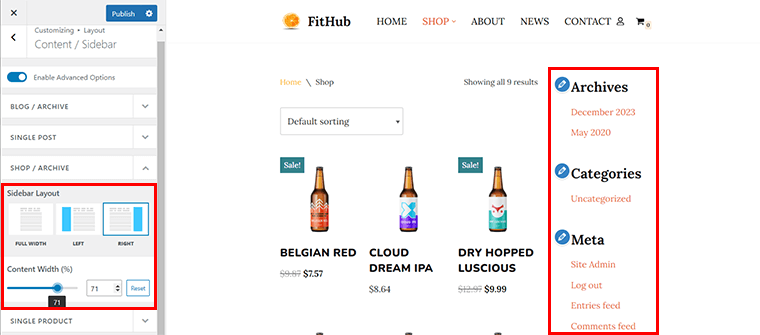
With that, you’ll quickly see the changes on the right-hand side.
iii) Blog/Archive
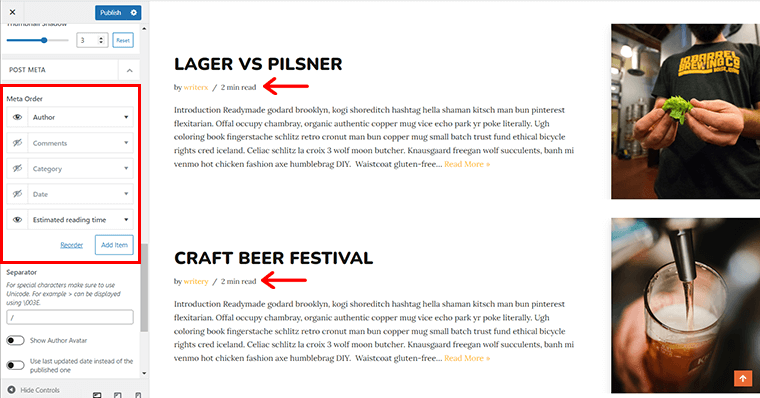
Similarly, from the Blog tab, you can change the blog layout, list spacing, image position, content padding, image width, and so much more.
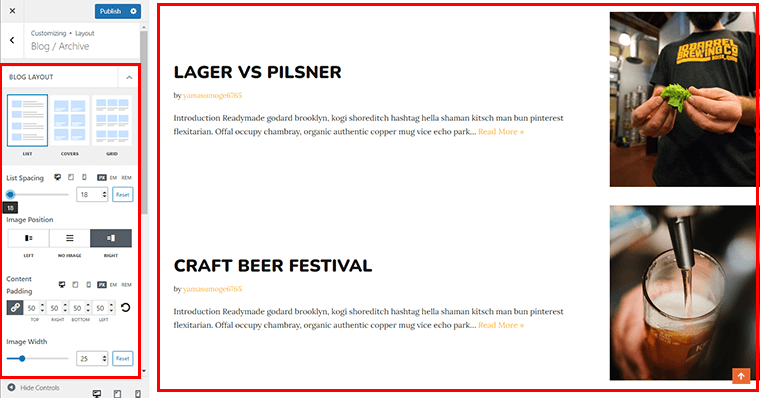
On scrolling a bit down, you’ll even see more options. You can enable or disable Meta Order options. For instance, here, we’ve enabled Author and Estimated reading time and disabled other options.
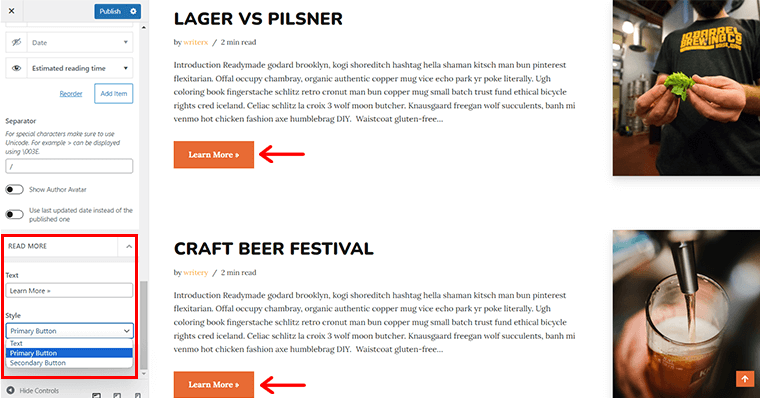
Also, if you want to transform the Read More text into something like ‘Learn More’, then also you can do so. Also, change the text style to the ‘Primary Button’ style.
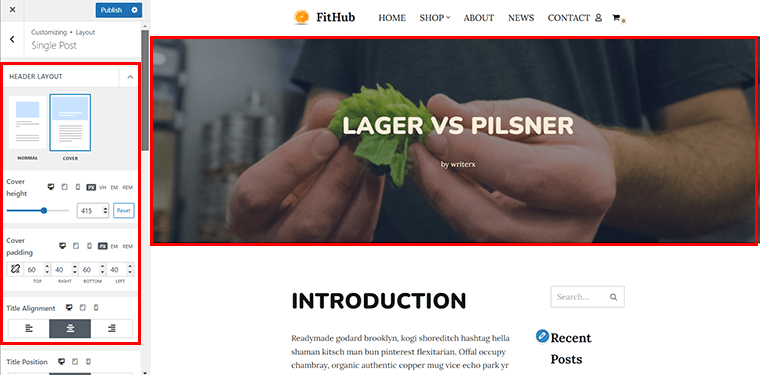
iv) Single Post
Likewise, you can customize how each post appears from the ‘Single Post’ option. You can set header layout, cover height, cover paddling, and title alignment.
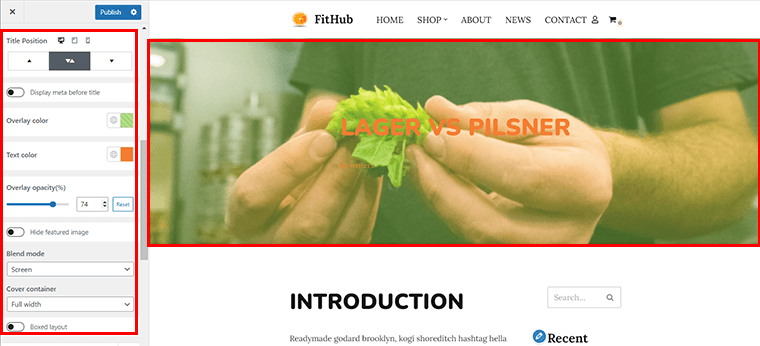
Also, you can change the title position, overlay color, text color, overlay capacity, blend mode, etc of your post.
Following the same pattern, you can also tailor the page settings too.
v) Scroll to Top
Coming to the ‘Scroll to Top’ option, you can tailor how you want your scroll to the top button to appear on your site. In case, you don’t want it, you can simply disable it.
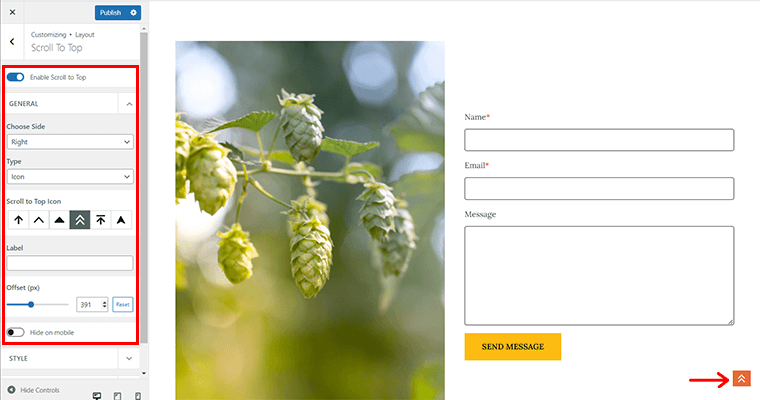
Here, you can change the icon style and type, and choose the appearance side of the scroll button. Plus, if you don’t want the scroll button to appear on mobile devices, then you can quickly click on ‘Hide on Mobile’ option too. Or else, you can leave it as it is.
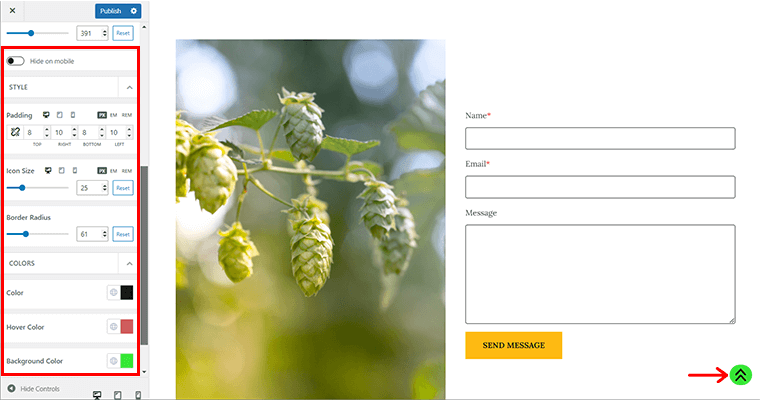
Also, you can change the icon size, border radius, hover color, background color, and more of the scroll to top button.
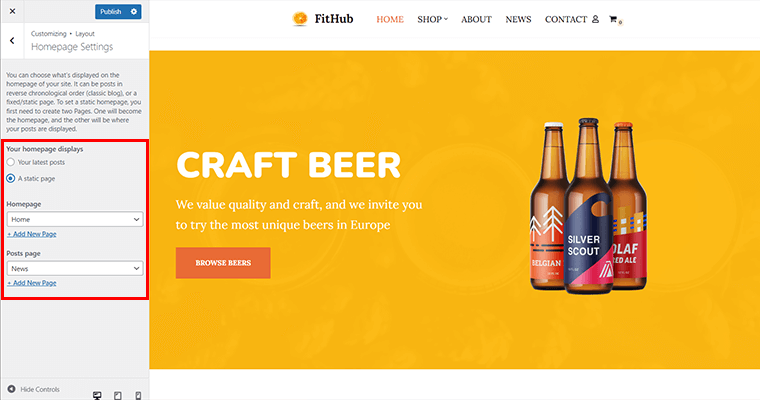
vi) Homepage Settings
Last but not least, you can choose you can choose what to display on the homepage of your site. You can show your posts in reverse chronological order or on a fixed/static page.
2. Header
Building your header is an easy job as it includes a header builder. In just a few minutes, you can create a stunning header. The header builder comes up with three rows(a top, main, bottom).
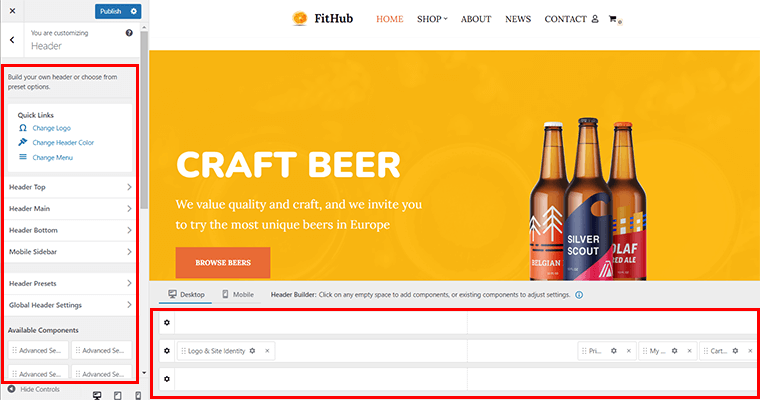
With a click on each row, you can change its layout and style. Layout options include full width-contained, full width, and contained. Whereas in the style, you can set row height, text color, and row background.
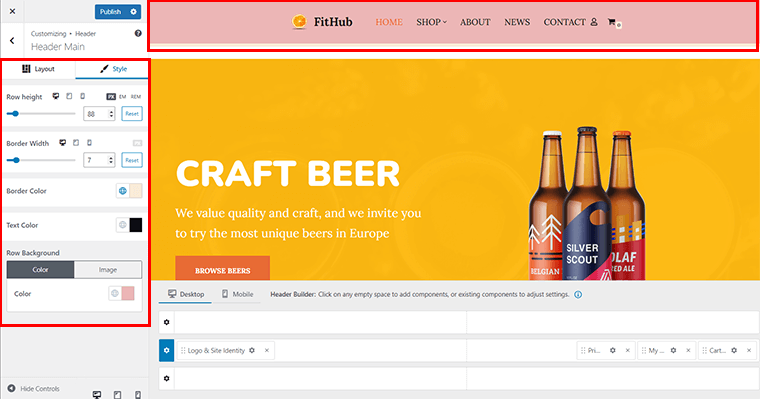
Also, you can quickly click on the ‘+’ button on the bottom on the preview side to add other elements.
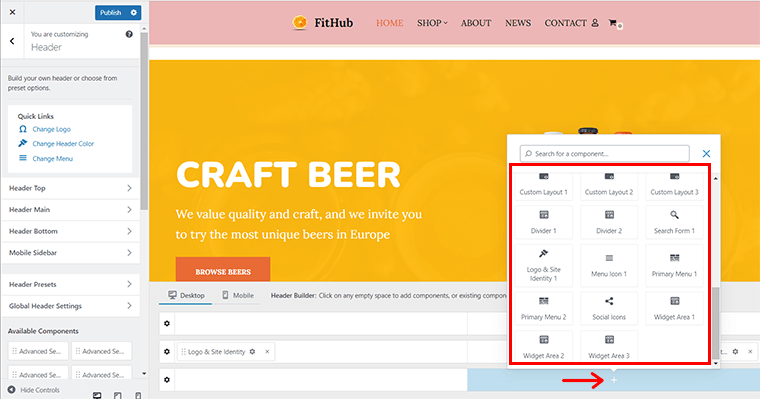
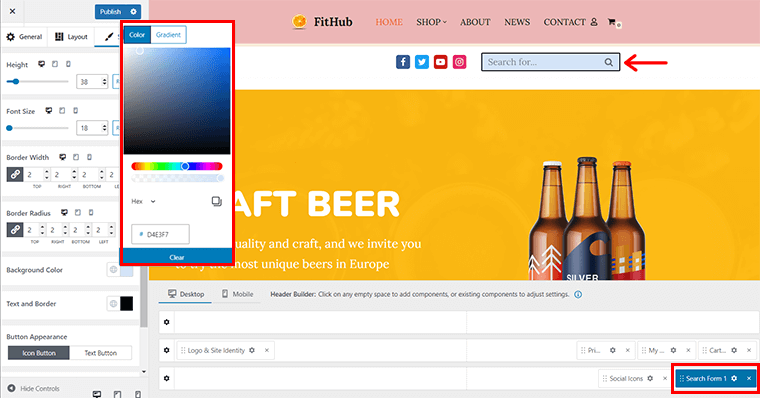
For instance, here we’ve inserted the ‘Social Icon’. Further, you can customize it, whether be it inserting your social links, changing background color, or reordering from the left-hand side.
Similarly, we’ve inserted the ‘Search Form’. You can easily change the height, font size, border width, border radius, background color, etc of the search form icon.
Besides, you can tweak the sidebar for mobile devices from the Mobile Sidebar component. In addition to that, you can choose presets from the multiple options by going to Header Presets.
3. Footer
Similar to header builder, you can create your likable footer with it. Just like header rows, it also has three rows(a top, main, bottom).
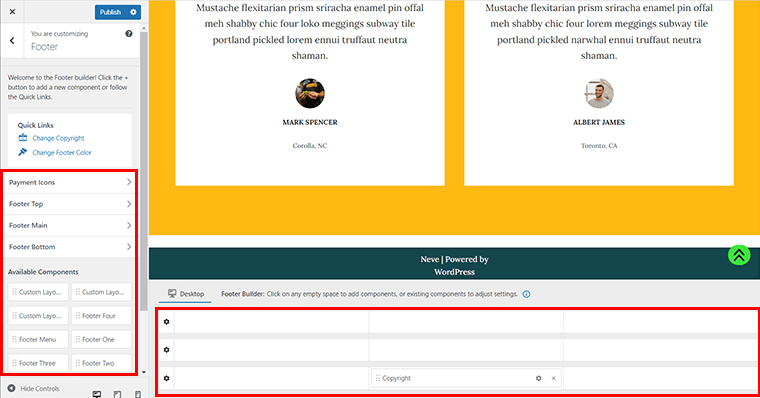
In each row, you can modify its Layout and Style. Layout options come with full width-contained, full width, contained. Also, you can set several columns and a column layout.
Similarly, in the style, you can change row height, text color, and row background. And, you can add footer elements via ‘+’ option.
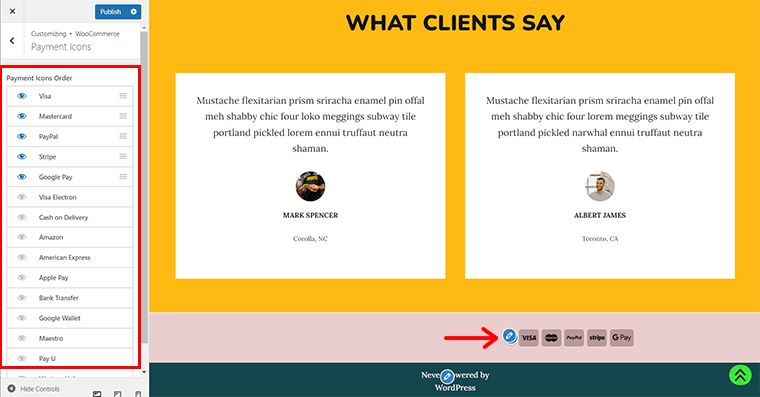
What’s more, you can even add ‘Payment Icons’ on the footer the way you like, if you’re selling anything of your business on your website.
And further, add the payment gateway of your choice.
4. Colors & Background
With the Global color option, you can create a stunning color palette. It includes Global colors (Base/Dark/Cape Mode), also it allows you to add a custom palette. You can pick any palette color with the option of resetting all to default with a click.
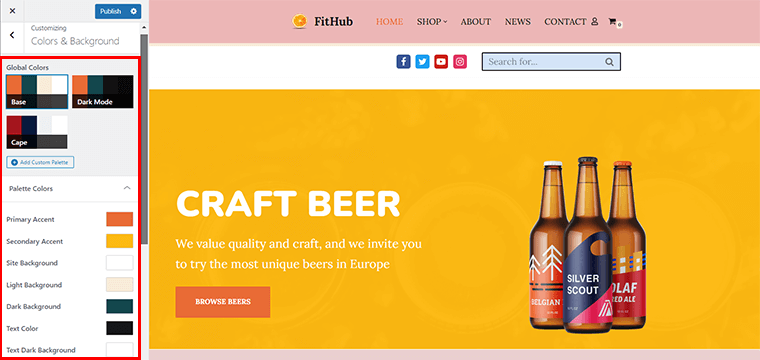
For instance, here we’ve changed the Primary Accent, Secondary Accent, Site Background, Light Background, and other colors. And you can easily see the changes on the right-hand side preview.

5. Typography
With a click on the ‘Typography’ tab, you’ll be getting typography options such as:
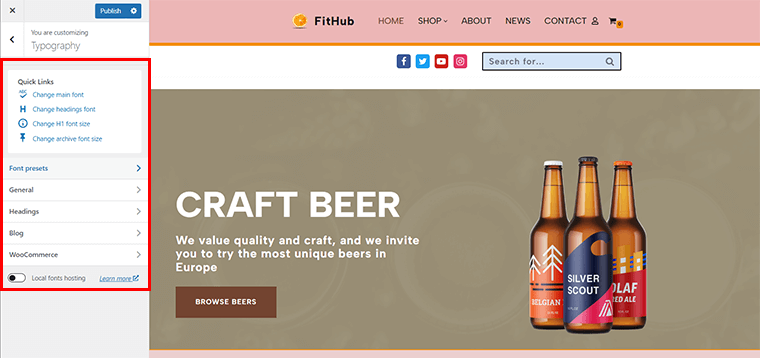
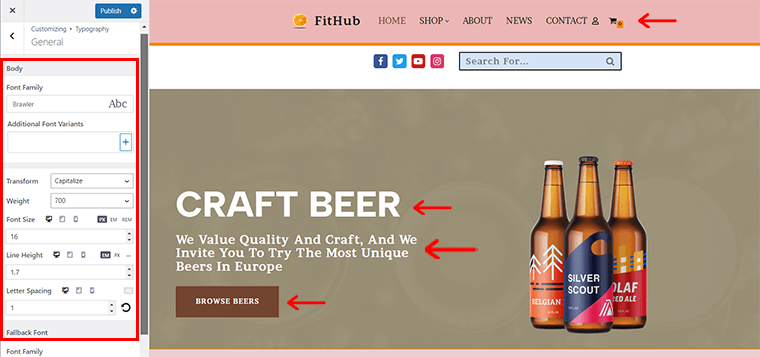
- General: Set font family, font weight, font size, line height, letter spacing, etc.
- Headings: This includes options related to headings(H1-H6).
- Blog Archive: It has specific settings related to the blog/archive page as well as a single post layout.
- WooCommerce: You get typography settings related to the product title, product price, product description, etc.
6. Buttons
From here, you can tweak the appearance of buttons. Basically, you get 3 sub-options.
The first one is ‘General’. From here, you can set padding, button text, button weight, font size, line height, letter spacing, etc.

The next one is the ‘Primary Button’. It includes two styles for the button: Filled and Outline. Both feature border-radius, background color, text color, hover settings, etc.
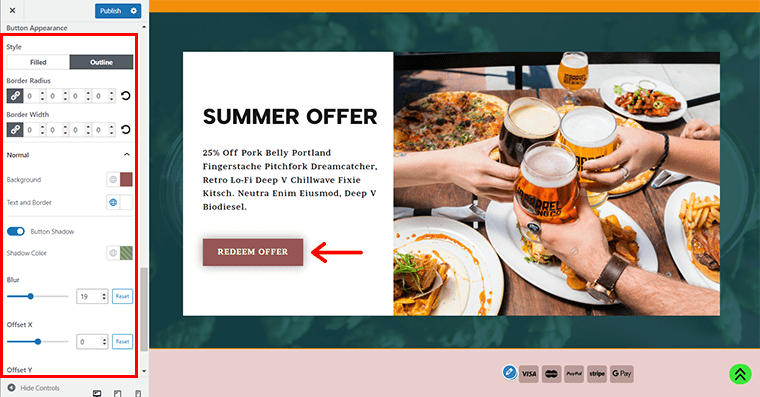
Lastly, another one is the ‘Secondary Button‘. It features the same thing as included in the primary button.
7. Form Fields
Neve offers options for styling forms which you can add by using plugins like WPForms Lite, Contact Form 7, or even with Elementor.
The ‘Form Fields’ tab features settings for four areas:
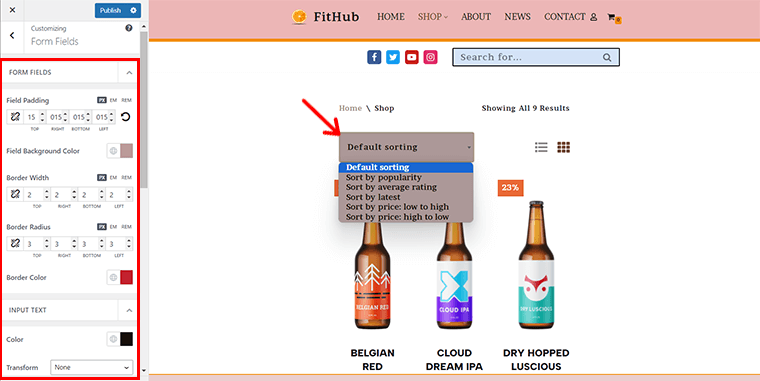
- Form Fields: Set field padding, field background color, border width, border radius, etc.
- Input Text: You can set color, text-transform, text weight, font size, line height, etc.
- Form Labels: Label transform, label weight, font size, line height, etc.
- Button: You can customize the default button styles.
Similarly, you can customize other Neve settings such as menu, widgets, and other settings just the way explained earlier in the key features section.
Having said that, now let’s explore the customer support options in the Neve theme in the coming portion of this review.
F. Neve Theme Support
Support is something that’s taken as a high priority in every theme you look at. We say rightly so because if you’re using a theme chances are that you might get stuck at some stage. And this is where the technical support team guides and pulls you out of that problem.
Neve features a detailed knowledge base, 300+ product docs, and 200+ video tutorials. Themeisle has also mentioned their support hours: Monday to Friday, 9:00 AM – 5:00 PM EEST.
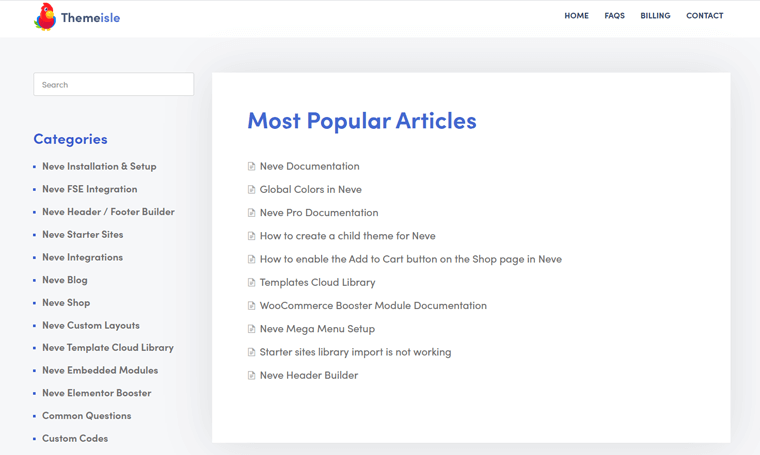
Frequently asked questions are highlighted on the Themeisle page that might be helpful to you. Or, in another case, if your question isn’t on the FAQ, you can even ask a question by visiting their contact page.
Registered customers can log in to their accounts for technical support assistance. You’ll get priority support once you purchase its Business license. Its Agency license includes both priority and live chat support.
G. Neve Theme Pricing
Now, it’s time to see Neve’s pricing. As mentioned earlier, it comes up in both the free and paid versions.
Speaking of truth, the free version is sufficient for small business websites with its plentiful features. And no doubt you can build a great website with it.
Premium plans come with advanced functionalities that’ll help your site to grow even further. And to your pleasant surprise, you don’t have to spend big money to get it either.
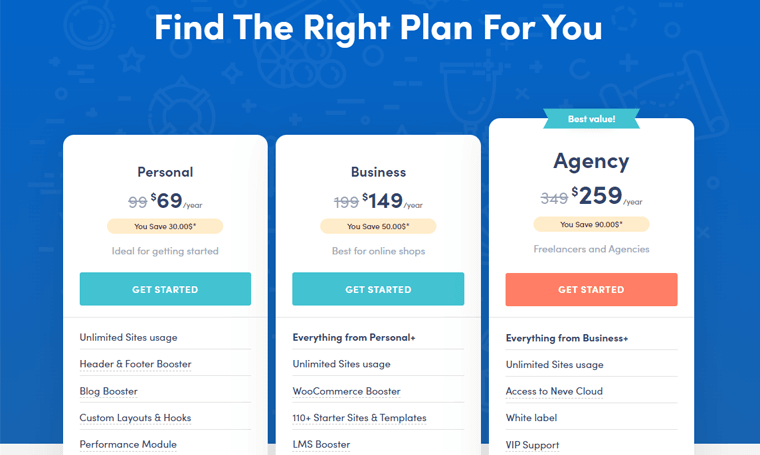
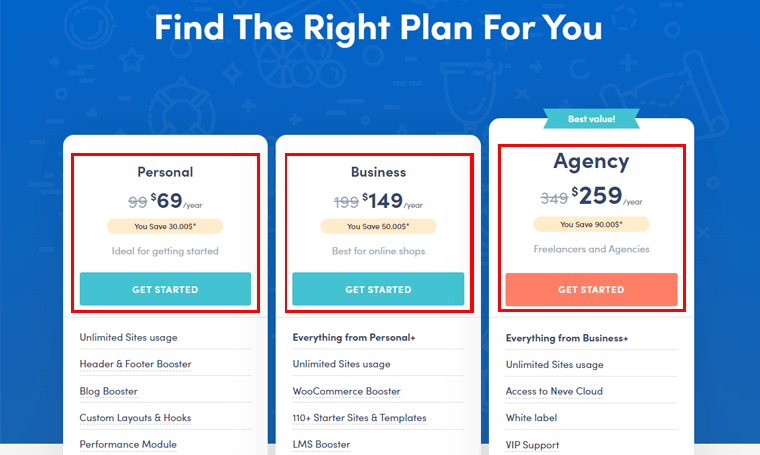
As you’ve seen by yourself, it includes 3 pricing plans.
- Personal: $69(Unlimited Site Usage, Header and Footer Booster, Blog Booster, Elementor Booster, Custom Layouts, etc)
- Business: $149(Above mentioned features of the Personal plan + Premium Starter Sites, WooCommerce Booster, LMS Booster, Sparks for WooCommerce worth $129, etc)
- Agency: $249(All of the mentioned features + Access to Neve Cloud, White label, Priority, VIP Support, and more)
It also offers a 30-day money-back guarantee if you feel the theme isn’t up to the mark. All the plans are flexible, hence, you can cancel the service or even change the plan wherever you like.
H. Neve Theme Alternatives
There are good themes out there that are a good replacement for Neve. You can opt for these themes if Neve doesn’t stand up to your expectations. So, let’s get to know these alternatives of Neve.
1. Astra
Astra is a top-class multipurpose WordPress theme used on over 1 million sites. It comes up with hundreds of demos to create any imaginable site. It’s a good alternative to Neve if you’re looking for a theme that’s highly customizable and compatible with various plugins.
It has a lot of features and options that let you control every aspect of your website. You can use the WordPress Customizer or the Astra Options panel to adjust the global settings, such as colors, fonts, layouts, headers, footers, and more
Similar to Neve, it also requires less than 50 KB of resources, offering you unparalleled speed. Another common thing is a header and footer builder enabling you to create a header and footer with ease. On top of that, it is made to work with all the major page builders.
Pricing:
Astra is a freemium theme like Neve. You can quickly install the free version right from your dashboard.
Meanwhile, if you want to opt for premium version, then you can get it at following prices.
- Astra Pro: Costs $49 per year. Contains a mega menu, global color palettes, sticky header, advanced blog layouts, etc.
- Essential Toolkit: Costs $79 per year. All features of the Astra Pro. Plus, 180+ premium templates, WP Portfolio Plugin, etc.
- Business Toolkit: Costs $149 per year. All features of the Essential Bunder. Plus, includes Convert Pro, Schema plugin, etc.
Want to learn more about the Astra theme? Then, be sure to check our Astra theme review article.
2. OceanWP
OceanWP is another well-reputed highly extendable WordPress theme for building any kind of site. The theme is built with the best SEO practices, so you can get massive traffic. Apart from that, it offers amazing customization options to tweak your site as per your needs.

Similar to other WordPress themes, it also goes well with all the major page builders. Other key features include 3 mobile menu styles, custom page layout, 200+ starter sites, and much more. Plus, it looks stunning on all the devices.
Pricing:
OceanWP is also a freemium theme that’s available in both free and paid versions. The free version is easily available in the WordPress.org repository with several free extensions.
Meanwhile, premium version with additional pro extensions costs you the following prices:
- Starter: Costs $35/year for 1 site. Includes 7 free extensions, 14 premium extensions, 17 free demos, and more.
- Personal: Costs $43/year. All features of the Starter plan, usable on 3 sites.
- Business: Costs $71/year for 6 sites. All from the Personal plan, exclusive Freepik discount, join support group, etc.
- Agency: Costs $127/year for 50 sites. Everything from the Business plan, VIP support, dedicated Slack channel, etc.
3. Sydney
Created by aThemes, Sydney is an awesome business theme by which you can build a stunning online presence. It includes plenty of features like Google fonts, layout control, full-screen slider, header image, and much more.
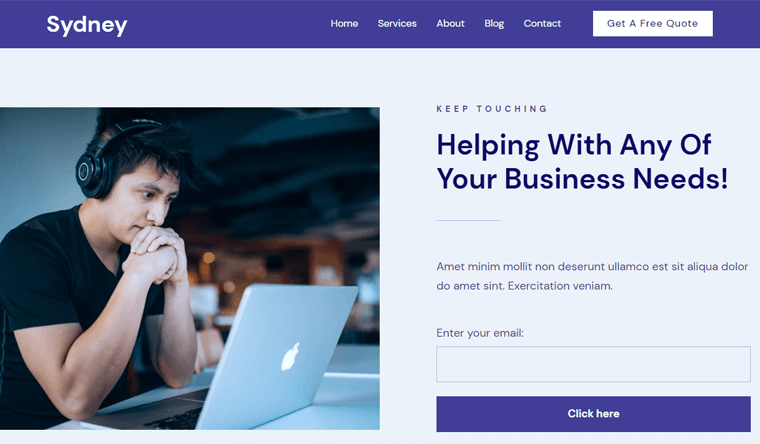
Furthermore, the theme offers a span of options in the Theme Customizer, so you can tweak things on your site. Also, with the parallax backgrounds, you can entice your site visitors. Sydney is a 100% translation-ready theme.
Pricing:
Sydney is also available in both free and paid versions. You can directly install the free version right from your WordPress dashboard.
Meanwhile, the premium version is available to you at the following price costs:
- Personal: Costs $41/year. Comes with Sydney Pro, a 1-site license, and premium support.
- Professional: Costs $47/year. Includes all the Personal plan features, and a 5-site license.
- Agency: Costs $149/year. Includes all Professional features, and you can use it on unlimited websites.
Want to explore a few more themes? Then, check out our article on the best WordPress themes and templates and the best lead-generation WordPress themes.
I. Is it the Best Theme for Business? – Our Verdict
All right then, your wait is over!
Now, it’s time to answer your most awaited query, ‘Is Neve an ideal theme for business?’
Yes, yes, and a big yes! And the big reason behind why we’re saying this is because you can create any website, including business websites with Neve. All thanks to its starter templates and effortless customization features.
On top of that, it has many premium features and options that make it suitable for business websites, such as:
- Compatibility with popular page builders like Elementor with Elementor Booster module.
- Customization and flexibility with the WordPress Customizer, the Neve Options panel, and the Custom Layouts module.
- Speed and performance optimization with a lightweight design, AMP support, and performance module.
- WooCommerce integration and enhancement with the WooCommerce Booster module.
What’s more, we have personally tried Neve and we think it’s one of the best themes for business websites.
Using it, you can showcase your products, services, and brand in a fast, flexible, and beautiful way. And, help you generate more leads, conversions, and sales for your business.
Don't just go for our words! Instead, give it a shot and discover the power of the Neve theme for yourself!
Conclusion
And that’s a wrap! So, we’ve come to the end of our Neve theme review. We hope you like it!
We tried our best to cover up Neve from every possible angle. As you’ve seen yourself, the theme is rich in features. And the possibilities it provides you are limitless. Neve benefits overshadow its few weaknesses, thereby without any doubt, you should go for it.
Still, do you’ve any questions? Then leave a comment below.
Don’t hesitate to share this Neve review article if anyone you know is planning to go for the Neve theme.
You might explore our other review articles like the Kadence theme review and Blocksy theme review.
If you liked it, then follow us on Facebook and Twitter for similar types of content.