Are you looking for an honest review of the Nexcess hosting service? Want to create an online store using its WooCommerce hosting solution? If yes, then here we go.
Nexcess is a popular hosting platform that offers managed solutions for WordPress, Magento, and WooCommerce. With the managed plan, you can easily create and host your site.
And for creating an eCommerce site, you can choose its managed WooCommerce hosting plan. It gives you enough design features with the best performance, security, and speed.
So, you may be wondering if its managed WooCommerce hosting is worth it or not. Don’t worry! In this review, we provide you with the features, pricing, pros, cons, etc. on Nexcess.
So, let’s dive right into it!
A. What is Nexcess? – A Brief Introduction
Nexcess is a fast and reliable fully managed hosting platform providing web hosting services for leading platforms. Such as Nexcess WordPress, Nexcess Magento, Nexcess Drupal, and Nexcess WooCommerce hosting. Apart from them, it also gives other types of web hosting services like Nexcess cloud and enterprise hosting.
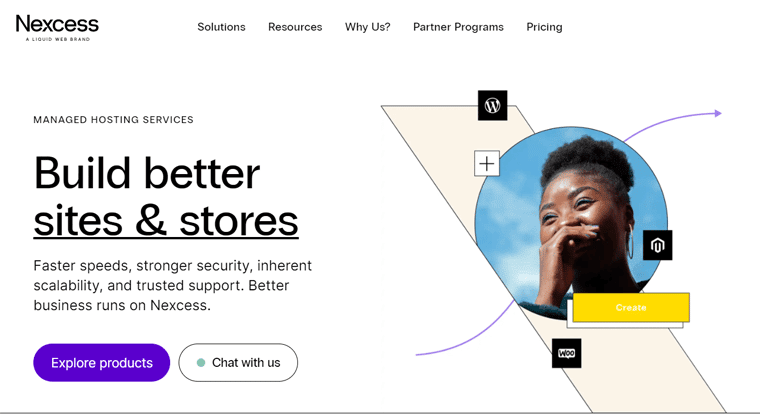
With over 23 years of continuous service, Nexcess stands as one of the top managed hosting services on the market. Moreover, it has served a total of over 500,000 sites of SMBs (Small and Medium Businesses), designers, developers, and agencies with its 10 global data centers.
Not to mention, it comes with relatively more bandwidth and storage space plus many smart tools for managing your site.
Further, Nexcess has joined forces with Liquid Web, another popular hosting company. So, among the multiple services of Liquid Web, the managed WordPress, WooCommerce, and Magento hosting plans use Nexcess as their digital cloud platform.
As you might already know, a managed hosting solution allows you to focus on your site design and content. That’s so because the hosting company takes care of all technical configurations, security, speed, and other aspects itself.
While talking the Nexcess managed WooCommerce hosting, it’s also top-notch. It includes all the WordPress, performance, and security features. Like free SSL (Secure Socket Layer) certificates, automatic daily backups, CDN (Content Delivery Network) service, etc.
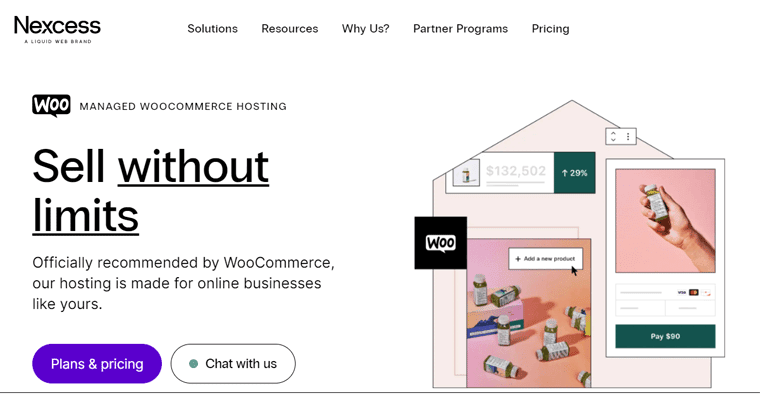
In addition, it also gives features for better store design and monitoring tools for improving sales performance. And these are just a few. To know more, let’s move to our next section.
Now, we’ll focus on the managed WooCommerce hosting services by Nexcess in our further review sections. So, let’s go!
B. Key Features/Advantages of Nexcess Managed WooCommerce Hosting
In this review section, we’re mentioning the key features of the Nexcess managed WooCommerce hosting plans. With that, you can also know about its advantages. Let’s start!
1. Important WordPress Features
Every plan in Nexcess contains all the basic yet important WordPress features. So, let’s have a look at them one-by-one.
(i) Automatic Core and Plugin Updates
The WordPress and WooCommerce core goes under several updates to improve the services. Similarly, every plugin, theme, or tool has updates for better functions and security.
With a busy schedule to run your store, you won’t have to worry about updating everything. The Nexcess Cloud infrastructure automatically keeps your WooCommerce store updated and secure. That means the host automatically takes care of the core and plugin updates.
(ii) Visual Regression Testing
Nexcess comes with a tool for visual regression testing. This tool lets you compare the 2 versions of your eCommerce site. With that, you can see the visual difference between them.
Therefore, you can quickly identify the visual bugs or issues by performing visual regression testing. Ultimately, you can solve them to create the best version of your online store.
(iii) 1-Click Staging and Development Site
Each WooCommerce plan in Nexcess comes with a 1-click staging and development site options. With that, you can easily make an environment that’s a copy of your site. There, you can develop and test the new WooCommerce features in your store.
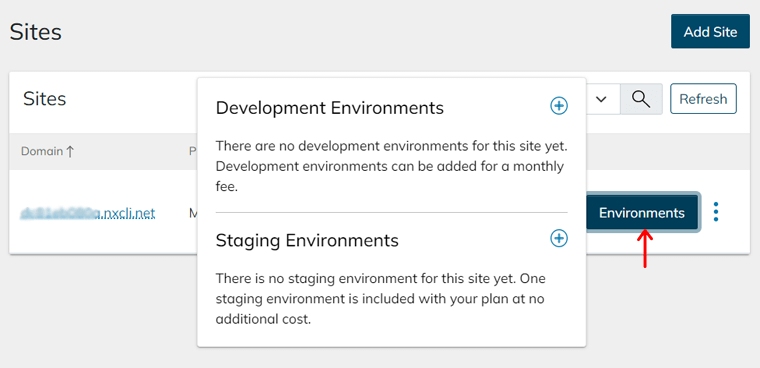
Moreover, you get to check the themes, plugins, and design before having any changes to the production site. And it takes only one click to merge all the changes to the existing site.
2. Strong Security
Security is very important, especially for a high-traffic eCommerce website. Nexcess offers free SSL certificates on all its plans to keep your and your customer’s data secure.
Apart from them, there are several other security features in it that you must know. So, let’s see some of them here.
(i) Daily Backups
Nexcess takes backups of your site every single day and stores them for 30 days. You can also view and manage the backups right from your hosting dashboard.
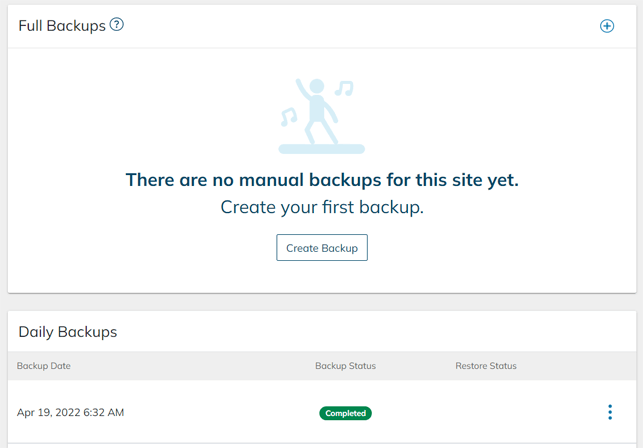
Additionally, you’re able to take on-demand backups of the live or staging site. Also, you get to download those backups easily. And suppose, if any disaster or issue occurs, then you can restore the backup of your store at any time. That too with just a click.
(ii) iThemes Security Pro
All the plans come with some helpful premium WordPress plugins. One of which is iThemes Security Pro, one of the most famous WordPress security plugins.
This plugin prepares, detects, and prevents any possible security issues. Thus, it automatically performs the following security measures:
- Strengthens user credentials.
- Fixes site errors or common bugs.
- Scans for any vulnerable activity.
- Monitors for any suspicious activity.
- Protect the store against malware.
- Stops automated attacks.
3. Excellent Performance
Fast-loading speed and good performance are necessary for any eCommerce site to attract customers. No doubt, websites hosted on Nexcess run with great performance and speed.
And it’s all because of its excellent performance features. So, what are those performance and SEO (Search Engine Optimization) improving features?
First, it’s compatible with the latest PHP 7 and 8 versions. Also, it offers its own Nexcess CDN service for all the plans. Now, let’s see others.
(i) Image Compression and Lazy Loading
Nexcess performs automatic image compression and lazy loading to improve the site performance. In simpler terms, it optimizes the images you use on your site by compressing them on upload. Moreover, it uses lazy loading to display the image to your customers.
Some of you may be thinking about what actually is image compression and lazy loading. Here’s the answer:
- Image Compression: Reduces the image size without affecting the quality for faster page load time.
- Image Lazy Loading: Loads images only when a user is about to see them for overall good page speed.
(ii) ElasticSearch
The enterprise-level hosting plan in Nexcess gives seamless integration with ElasticSearch. ElasticSearch is a search and analytics engine that stores your data with lightning-fast searchability. Plus, it offers high relevancy and powerful analytics that can scale admirably.
It’s helpful for large WooCommerce stores having lots of user searches. That’s because it allows you to run search queries faster than any other native search feature.
(iii) WooCommerce Automated Testing
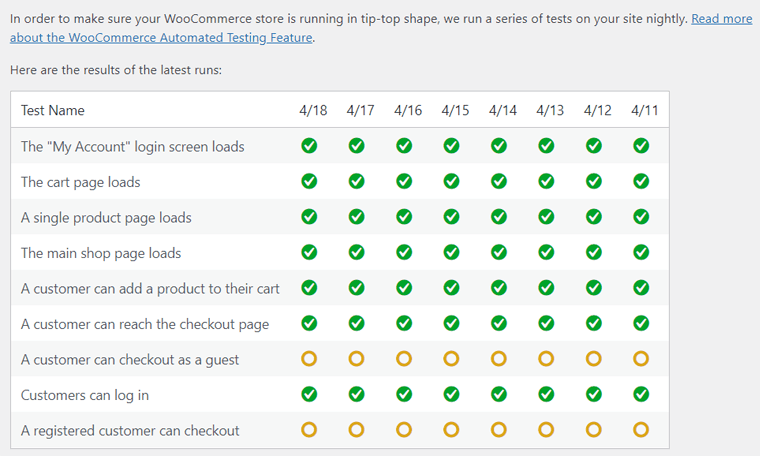
Before letting your site be live, you need to test if every step of your online store works perfectly fine or not. It includes checking the shopping cart, checkout process, payment modules, etc. And it goes the same when you do an update or add new features to the site.
But doing this every day becomes hectic, isn’t it? This is when Nexcess WooCommerce Automated Testing comes into play. It can detect all the possible payment, cart, login, or checkout issues on your store. Not to mention, it can also fix them for you.
4. Exciting Design Features
Everyone wants their online store to match their brand and liking. Moreover, they want it to look eye-catching for customers to visit and purchase goods.
So, the next one on the list is the design features. The following features are present on managed WooCommerce hosting of Nexcess to make your store design look next-level.
- Astra Pro: Astra is one of the most famous multipurpose WordPress themes. Nexcess gives you Astra Pro, the paid version of the theme in all of its plans. And that’s for more advanced customization features and site elements.
- Beaver Builder: Almost every Nexcess WooCommerce hosting plan comes with Beaver Builder, a WordPress page builder plugin. In addition, they also include Ultimate Addons for Beaver Builder Pro, with which you’ll get 60+ page modules.
- Iconic WP: Some plans also come with the Iconic WP plugins. Using them, you can show a feature-rich product listing on your WooCommerce store.
5. Instant Auto-Scaling
Another interesting feature that we must not miss out on is instant auto-scaling. Every WooCommerce hosting plan has a limit on bandwidth and storage. So, suppose there’s a sudden increase in your store traffic. This means it has crossed the limit of your resources.
In that case, you don’t need to worry about your site going down. That’s because of Nexcess’s instant auto-scaling function that allows your site to handle more concurrent users when required. Even in sudden traffic spikes.
6. Smart Monitoring Tools
One thing that we skipped on the performance features is the smart monitoring tools present in Nexcess. As mentioned before, Nexcess comes with some smart monitoring tools to analyze your online store. They are:
(i) Sales Performance Monitor
This tool gives you insights into the sales of your WooCommerce store. Using them, you can notice if any fluctuations have occurred that need to be addressed. So, you wouldn’t be unaware when your store’s sales slow down at an abnormal rate.
(ii) Plugin Performance Monitor
Nexcess has its own Performance Monitor plugin that monitors every plugin on your store. It first compares and finds the changes on your site before and after using a plugin. Then, it notifies you when any of those plugins resulted in slowing down your site.
7. WooCommerce StoreBuilder
Apart from the managed WooCommerce hosting plans, there’s another tool called StoreBuilder by Nexcess, an AI (Artificial Intelligence) assistant. It’s a much simpler alternative for you to build your online store. That’s because you can quickly make one without needing to code.
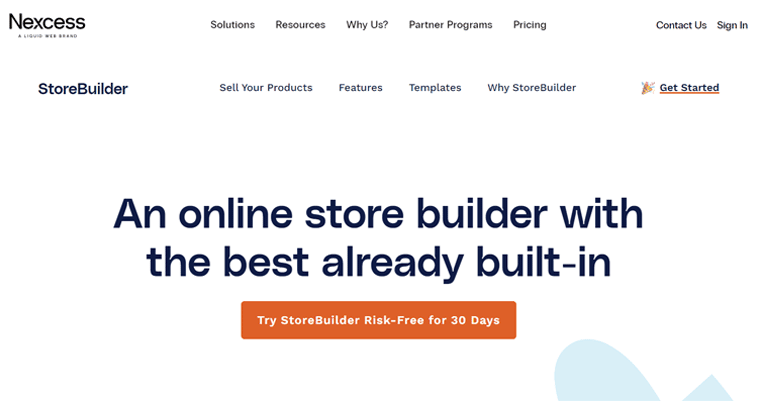
Some of the features or advantages that StoreBuilder gives are:
- Offers a bundle of premium plugins and tools best for a WooCommerce store.
- Comes with fully customizable templates for beautiful designs.
- Marketing tools like customer reviews, detailed product pages, and abandoned cart recovery.
- Improve your branding with social sharing, sales monitoring, etc.
Thus, if you’re a beginner wanting to create a site for your store, then StoreBuilder is the tool you should get.
8. Other Features and Extensions
Here, we’re listing some of the extra features and extensions of Nexcess WooCommerce hosting. So, let’s see them!
- Glew.io analytics is present on some higher plans. It is an advanced analytics tool for an advanced WooCommerce store with features like data visualization.
- Includes one-click fast checkout that’s best for shortening the process from product listing to sale.
- Some plans also offer the Dokan Pro plugin. Using it, you can create a multivendor marketplace on WooCommerce.
With that, let’s jump into the next Nexcess review section.
C. How to Get Started with Nexcess WooCommerce Plan for an Online Store?
In this review section, we’ll show the steps for you to get started with Nexcess. Here, you’ll know how you can get the managed WooCommerce plan to start with your eCommerce site.
So, without any delay, let’s start!
Step 1: Purchase the Managed WooCommerce Hosting Plan
First, you need to purchase a suitable managed WooCommerce hosting plan. For that, follow the steps below.
Step I: Select the Plan
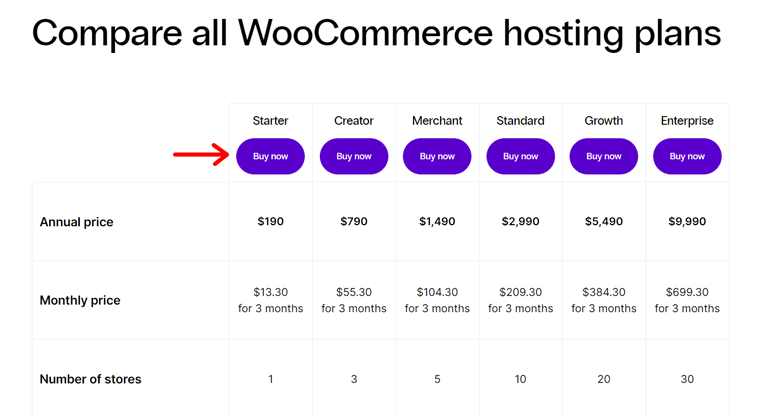
Go to the original website of Nexcess. There, on the navigation, you can see the Pricing menu. Click on that and select the WooCommerce Pricing option to open the pricing page.
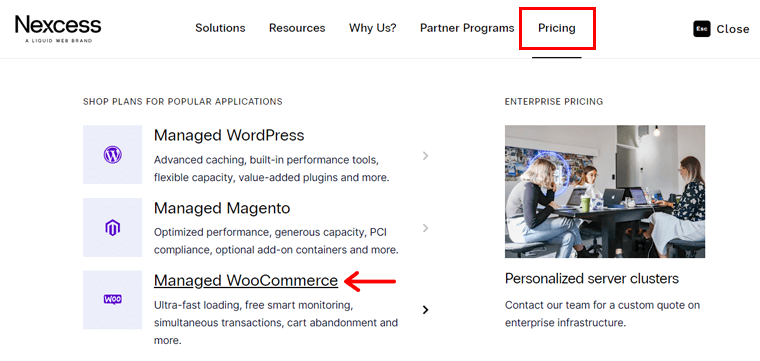
Here, it shows all the managed WooCommerce hosting pricing plans. Once you decide which plan suits your store’s needs, click on the Buy now button present on it.
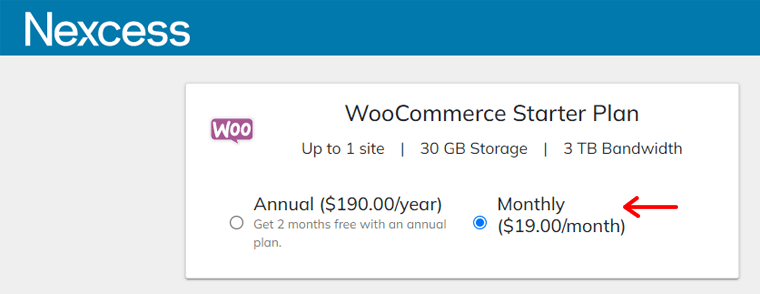
Now, you’ll be redirected to the checkout page with multiple forms to fill out for the purchase. At first, you’ve to select if you want the monthly or yearly paying plan.
Besides the plan selection tab, there’s also a Cart section. Here, you can see the price of the plan you chose. In addition, you can enter the coupon code if you’ve one. Then, click on the Update button.
Step II: Create Your Nexcess Account
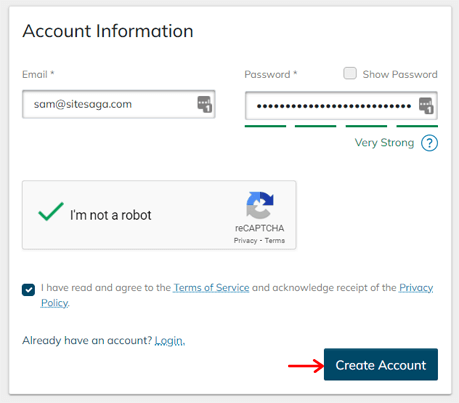
Next, in the Account Information section, you’ve to create your Nexcess account if you don’t have one. There, you need to fill in your email address and password.
Don’t forget to approve the terms and conditions and enable the reCAPTCHA. Lastly, click on the Create Account button.
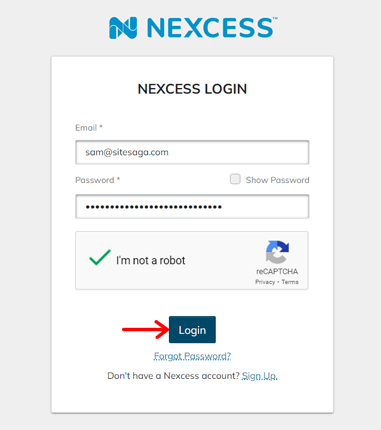
In case, you already have an account, then you must directly log in to your account. For that, click on the Login option present in this Account Information section.
To log in to your account, you must enter your email address and password. After that, you can click on the Login button.
Step III: Fill in Your Billing, Payment, and Plan Information
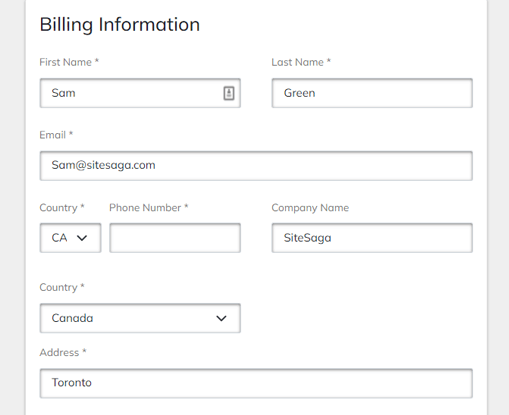
After that, you can see the Billing Information section. Here, you need to enter your personal details including name, email address, country, etc.
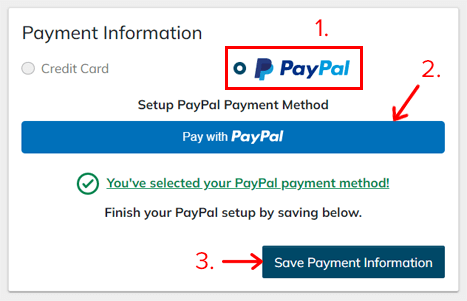
Then, in the Payment Information section, there are 2 payment options present. They are Credit Card or PayPal.
As per your choice, select one of them and click on the button. Here, we’ve selected the PayPal option so, we need to click on the Pay with PayPal button.
Once you finish the PayPal setup, click on the Save Payment Information button.
Additionally, you can also see a small section called Plan Information. There, you can choose the name of your managed WooCommerce hosting plan. Moreover, you get to select the server location of your hosting website. But, you can do this later on also.
Step IV: Purchase the Plan
After filling out all the forms, you can recheck them once. Then, you can go to the Order Confirmation section. There, click on the Purchase button present at the bottom to confirm the purchase order.
You’ll see a message about the purchase process taking place. And it’ll take some time to successfully complete the order.
Once the purchase is complete, you’ll be redirected to your Nexcess dashboard.
Step V: Opening Nexcess Dashboard
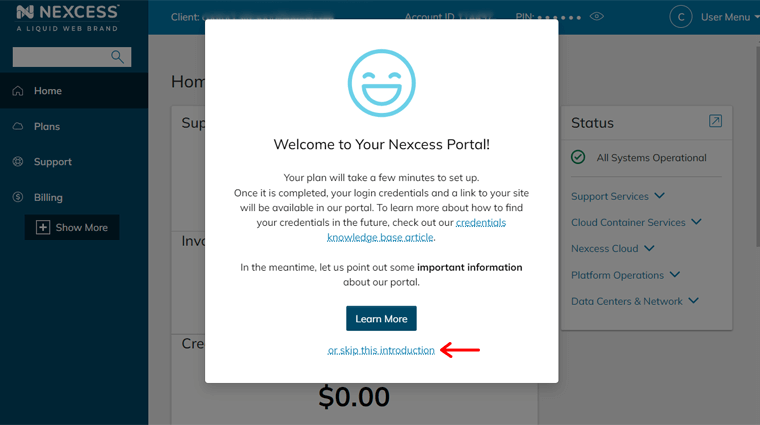
On the dashboard, first, you can see a welcome popup. It also says that it’ll take more time for the setup to be complete. So, you can either click on the Learn More button to know about the host and portal. Or, just click on the ‘or skip this introduction’ option.
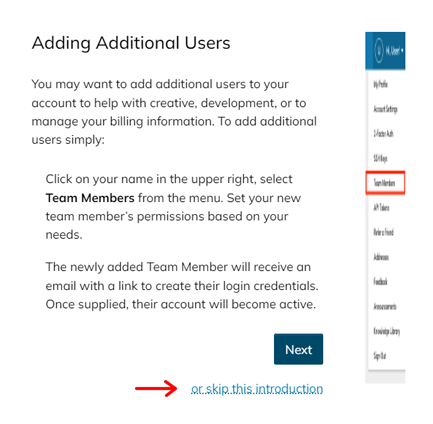
After that, an option will show up that allows you to add the team members to your account. If you want to do so, then follow the instructions given by first clicking on the Next button. Else, click on the ‘or ship this introduction’ option again.
Next, you can see the Support Shortcuts section which states the different support options in Nexcess. You can check them out and then click on the Finish button to move ahead.

Step 2: Knowing the Nexcess Dashboard
Now, you can finally view the user interface of your Nexcess dashboard. It looks like this:
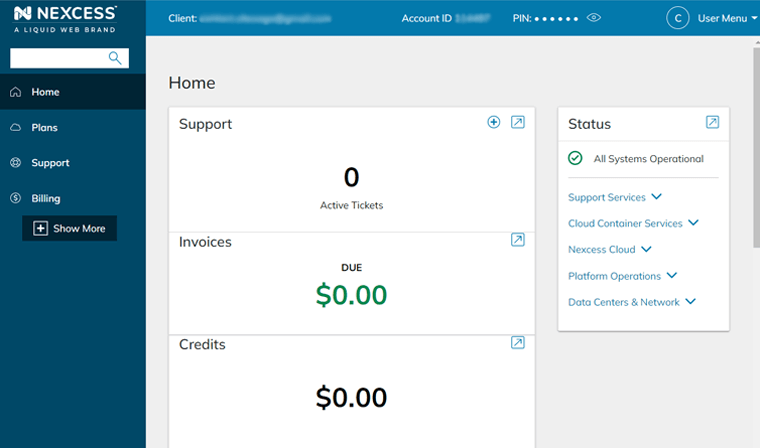
To know whether the setup is complete, go to the Plans menu. If it takes more time, then it’ll show a notice like shown in the screenshot below.
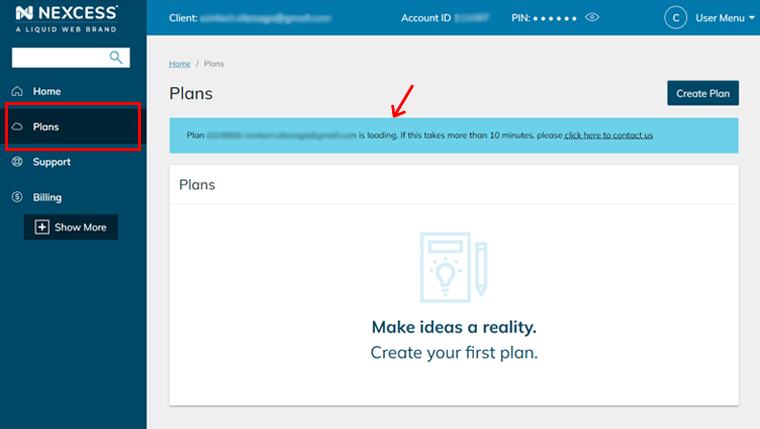
While you can confirm that the setup is complete when your plan appears on this menu. Once the setup completes, you can start using the plan for your online store.
But, you need to configure a few things on your Nexcess dashboard first. So, let’s get to know about the dashboard now!
Note that the options on your dashboard may differ by the WooCommerce plan you choose.
1. Home
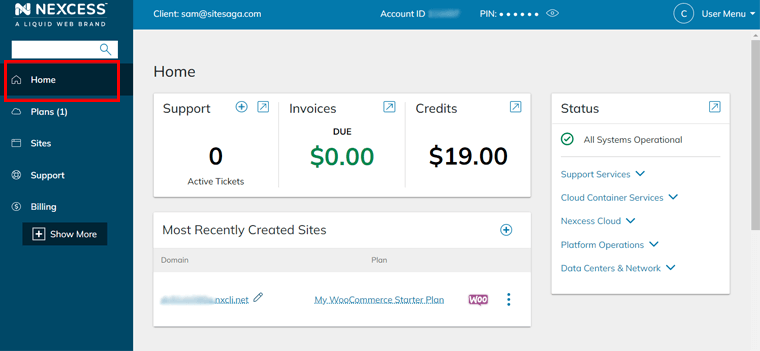
The first menu that appears on the dashboard is Home. Here, you can see the overview or summary of your Nexcess account information.
This information is presented in different sections. So, let’s see some of the important ones.
- Support: Here, it shows the number of active support tickets you have. Also, you can open new support tickets.
- Invoices: This shows the amount due on your account. A green dollar amount means there’s no due, and all invoices are paid. Orange means there will be a due soon, whereas red means the amount is overdue.
- Credit: It shows the available amount of unapplied credits on your Nexcess account. Generally, credits are applied on the due date of every available invoice.
- Status: As the name says, this section shows the status of your system. That too under various sections like support services, platform operations, and more.
- Most Recently Created Sites: Here, you can see a list of all the websites you have on your account. Since Nexcess automatically sets up a site, you can see it on the list.
2. Plans
In the Plans menu, you can see that it includes a number inside the parentheses. And that determines the number of services you have on your account.
When you click on the menu, a list of all the Nexcess plans assigned to your account appears. It can be for managed WordPress, WooCommerce, or Magento solutions.
Since we’re using a WooCommerce plan, you can see that it’s added here. Also, you can configure some settings on it like cancel the plan, change the plan name, contact support, etc.
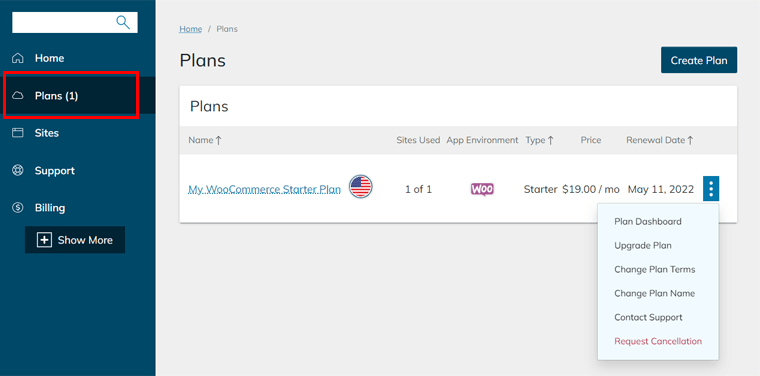
Moreover, there’s also a Create Plan button from which you can add new plans directly.
3. Sites
The number of WooCommerce stores you can host on Nexcess depends on the plan. And the Sites menu is to see a list of all the sites you’ve made on your account.
Nexcess sets up a WooCommerce site for you on its own when you purchase the plan. So, you can see that the site is already added here.
Additionally, you can change the site name, add a staging environment, contact support, and more on your site. Further, you can easily filter and search the site to select or configure your desired site.
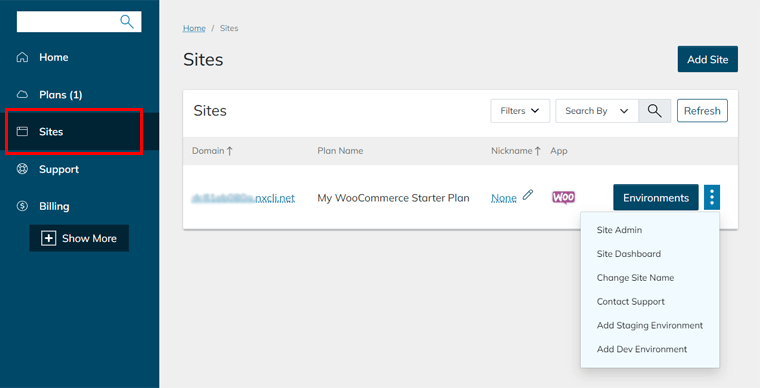
Here’s the guide on setting up a staging environment. While you’re also able to add new sites if your plan allows more. And to learn how to add a new site to your plan, check this article from Nexcess.
4. Support
In the Support menu, you can view a list of all the tickets present on your account. Also, you can see, close, and add a quick comment on every ticket.
Further, you can open a ticket from the ‘+ Ticket’ button. To know how to use the support ticket system, here’s the link for its guide by Nexcess.
Not to mention, you can also request a site migration from this menu. Here’s the full guide for site migration on Nexcess.
5. Billing
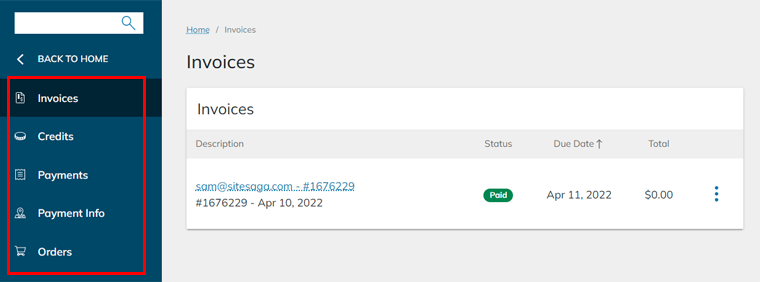
Next is the Billing menu that shows the payment information. When you click on this menu, you’ll see another set of sub-menus. That includes:
- Invoices: Here, you can see all the account invoices. Also, you get to view and download each of them.
- Credits: Every credit on your account is shown here. And it’s either applied (no remaining credit amount) or unapplied (credit that’s not applied or partially applied).
- Payments: In this menu, you can see all the information on all your payments.
- Payment Info: Here, you can view/edit your address and payment method info.
- Order: All of your orders are in a list on this page. Every order shows its status i.e. pending, allocated, completed, or denied.
6. Extra Menus
Apart from the above menus, 2 other menus will display once you click on the ‘+ Show More’ button. They are:
- SSL: From here, you can import the SSL certificates or order certificates for your websites. To do that, here are the guides to import SSLs on Nexcess and purchase SSLs for Nexcess.
- DNS: On this page, you can create your own DNS zones.
To know all the menus in detail, you can view the complete Nexcess portal guide here.
Step 3: Site Dashboard Walkthrough
Once you’re aware of all the options in your Nexcess portal, you can start configuring your WooCommerce store settings. For that, go to the Sites menu and open your eCommerce site.
And that’s by clicking on the domain Nexcess gave you. Or you can also click the Site Dashboard option in the triple-dot settings.
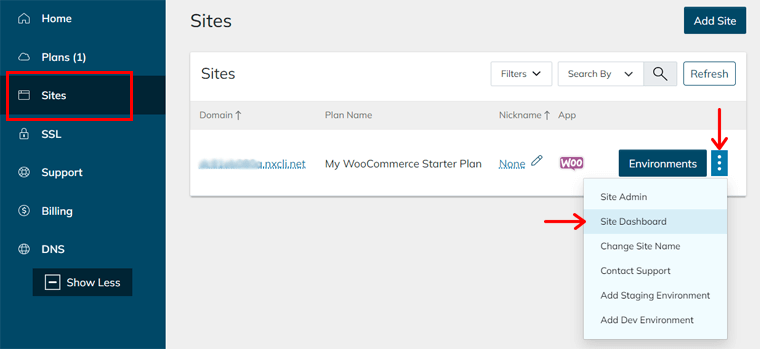
This redirects you to the website setting menus. So, let’s see some of those options:
1. Performance
Here, you can view the available storage space and bandwidth usage in your store. Moreover, you get to enable the Performance Monitoring tool, configure the CDN of your site, etc.
2. Domain Options
With the Domain Options menu, you can modify your master domain. Nexcess keeps its own domain for your pre-configured store. However, you can change the domain name to make it as you like.
Note that, the Nexcess domain registration service is available to get your own domain name. To change the domain, check out this complete documentation on that.
3. SSL
Using the SSL menu, you can view your SSL certificate status. In addition, you get to enable or disable the Auto Let’s Encrypt certificate.
4. Backups
In this menu, you can see all the daily backups of your store. You can restore the files, databases, or both. Moreover, you can also take manual backups when you need to.
Here are some important guides on creating a backup in Nexcess and restoring a backup on Nexcess.
Similarly, there are other menus with different objectives. Such as setting up SSH/SFTP access, email hosting, conducting a visual comparison, adding Dev environments, etc.
Step 4: Setting Up an eCommerce Site
Once the configuration part is complete, you can move ahead to build your eCommerce site. To help you to begin, this Nexcess review section shows some steps you may need to know.
1. Working with WordPress Dashboard
To open the WordPress admin dashboard of your WooCommerce store, you need to first go to the Sites menu. Before opening the dashboard, you must know its login credentials. And it’s present at the top. So, save them for your use as there may be a limited viewing option.
Now, on the Sites menu, click on the triple-dot option of your site first. Then, select the Site Admin option that redirects you to the WordPress login page.
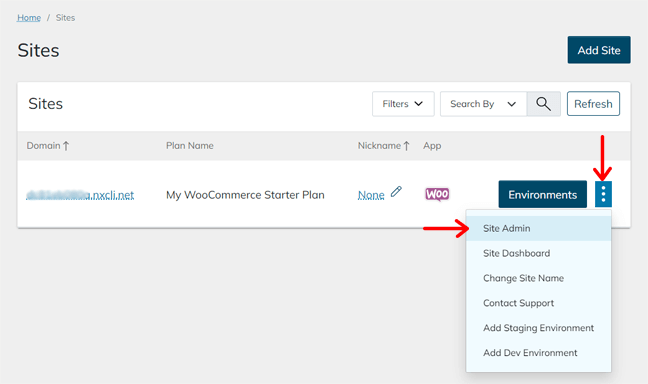
Enter your login credentials on the login form and click on the Log In button. By doing that, your WordPress dashboard opens up. And you can notice that WooCommerce is already installed on it.
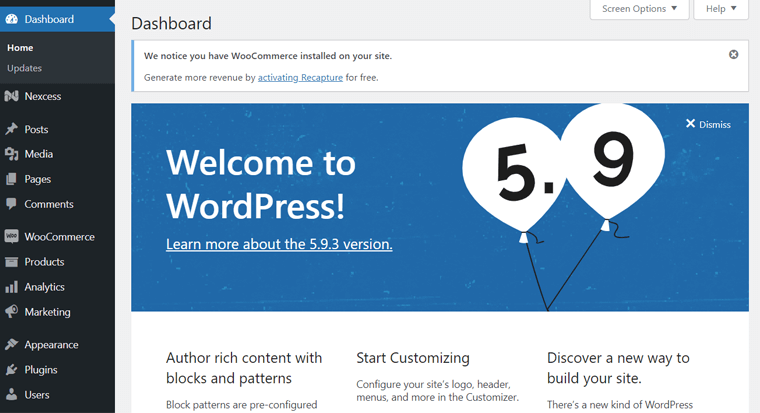
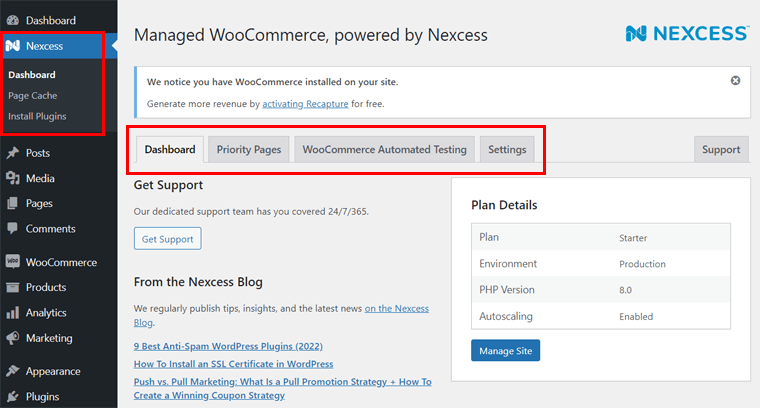
Further, you can see a menu called ‘Nexcess’. And it contains some submenus including Dashboard, Page Cache, and Install Plugins. Here’s what every submenu does:
- Dashboard: From here, you can get support, set up the priority pages, check the WooCommerce Automated Testing results, and enable/disable functions of the store.
- Page Cache: It’s an option from the Page Enabler plugin. Here, you can configure the cache settings to improve the loading time of your store.
- Installed Plugins: This shows the list of all the plugins already installed on the dashboard. Or recommended for the installation.
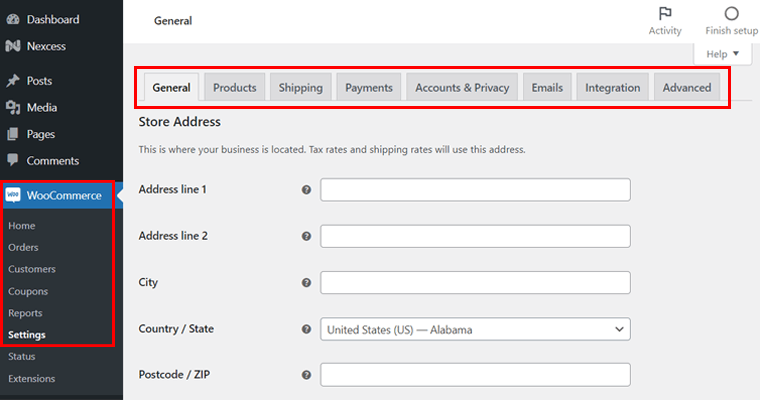
2. Setup WooCommerce and Add Products
Apart from the Nexcess settings, you should also configure the settings of WooCommerce. For that, navigate to the WooCommerce > Settings option. There, you can set up WooCommerce under categories like General, Products, Shipping, Payments, etc.
Now, to manually add your new products to the store, navigate to Products > Add New option. There, enter the product name and description first.
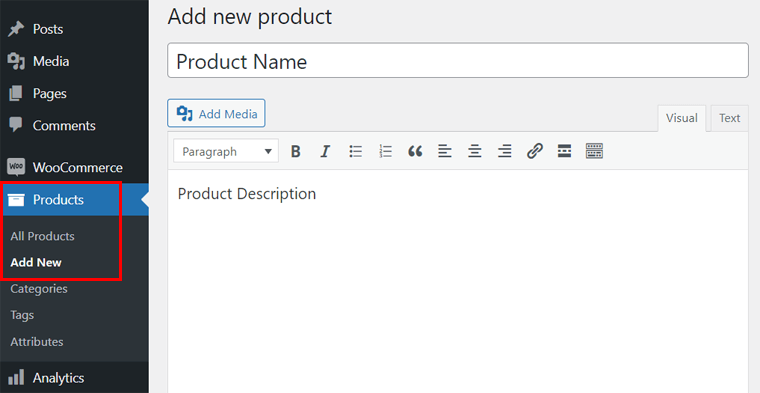
Also, include the product data to determine the product type. Next, you can fill in all the necessary information about that product on the product settings.
Moreover, you can add the product category, product tags, product image, and more. Lastly, click on the Publish button to save the changes.
Another simple way is to import the products via a CSV file. For that, you can navigate to the Products > All Products option and click on the Import button.
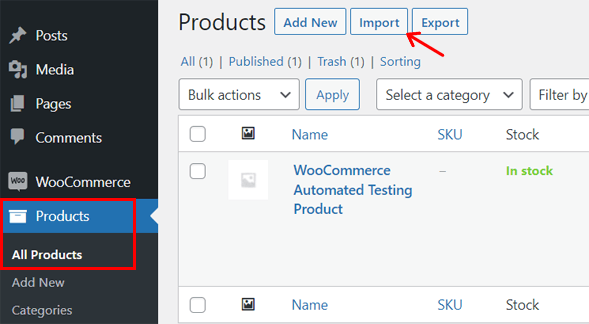
Also, here’s a great article by Nexcess for you to build your new online store. And that’s all for this section!
To know more you can check all the documents on its knowledge base straight away. So, you can go through the complete guide on getting started with managed WooCommerce hosting on Nexcess.
For now, let’s move forward with the next section on the Nexcess review.
D. Nexcess Managed WooCommerce Hosting Pricing Plans
In this review topic, we’re mentioning the pricing plans present for the managed WooCommerce hosting services in Nexcess. So, let’s look at them for you to easily select the one that suits your needs.
| Plan | Starter | Creator | Merchant | Standard | Growth | Enterprise |
| Starting Price Per Month (For 3 Months) | $13.3 | $55.3 | $104.3 | $209.3 | $384.3 | $699.3 |
| Renewal Price Per Month | $19 | $79 | $149 | $299 | $549 | $999 |
| No. of Stores | 1 | 3 | 5 | 10 | 20 | 30 |
| Bandwidth | 3 TB | 5 TB | 5 TB | 5 TB | 10 TB | 10 TB |
| Storage | 30 GB | 60 GB | 100 GB | 300 GB | 500 GB | 800 GB |
| Max. Orders Per Hour | 500 | 1000 | 2500 | 3000 | 5000 | 10000 |
| Glew.io Analytics | No | No | No | No | Yes | Yes |
To know more, you can go to the managed WooCommerce hosting page on the official site of Nexcess.
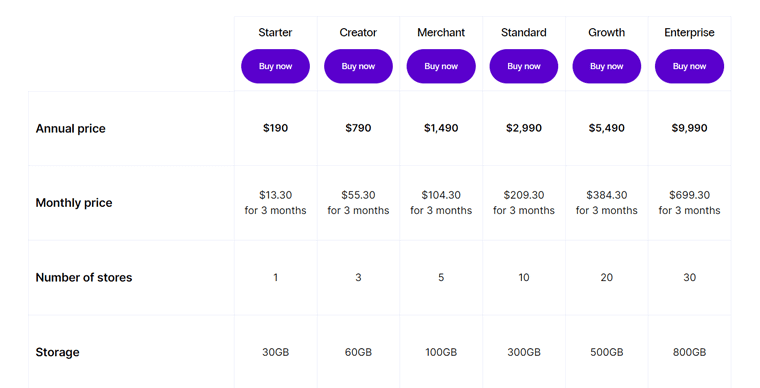
Not to mention, every plan on Nexcess offers a 30-day money-back guarantee. To upgrade/modify your plan or discontinue the service you can contact its support team.
If the above plans are costly for you, then you can look for other alternatives in our other section. Many web hosting platforms also provide WooCommerce hosting at an affordable price. So, look into our articles on the best cheap WordPress hosting and the top free WordPress hosting providers.
That’s it for the pricing section of this Nexcess review. So, let’s move ahead!
E. Nexcess Customer Support Options
Now, it’s time to look at the customer support options available in Nexcess in this review section. Overall, Nexcess delivers good customer support to host and manage websites.
First of all, there’s a Support page from where you can find answers to general FAQs. And from the Contact page, you get to contact the support team through chat, email, or call.
Additionally, it contains dedicated Resource Centers that offer support to their specific plan users. As for WooCommerce hosting, the Nexcess WooCommerce Resource includes a complete guide with many articles on different topics.
Moreover, Nexcess also gives an extensive knowledge base with guides on many categories. Such as billing, CDN, security, email, domain management, and a lot more.
On top of that, you can also view the webinars, read the white papers, and access the web tools available. Not only that, but you can check out its blogs to get the latest updates.
Further, there’s also a Beyond Support team in Nexcess that gives 24/7 support. The team is responsible for looking after the server status of the hosting platform.
Extra attention is needed when there’s an unexpected issue on the server. So, you can subscribe to get these updates from the Beyond support team. With that, you get to know about the upcoming maintenance or status of those issues.
That’s it for the customer support option! Now, let’s jump to the customer review section on Nexcess.
F. Customer Reviews on Nexcess
It’s best to check out the review by customers on Nexcess to know the pros and cons of the host. With that, you’ll have a clear idea of the hosting service from its genuine users.
So, we’ll be looking at its customer reviews on legitimate online review sites. They are Trustpilot and G2 reviews. Now, let’s see them.
User Reviews and Ratings on Trustpilot:
The TrustScore of Nexcess.net on Trustpilot is 4.6 out of 5 stars. That’s good! And the rating is calculated based on 407 user reviews. Among these 87% of them say that it’s excellent. Also, check out more recent user reviews on Nexcess.
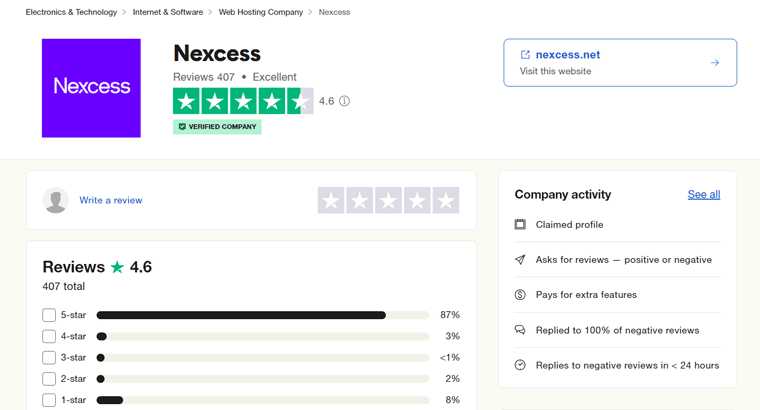
When checking the Trustpilot reviews, it seems that there are some mixed feelings about the host. To clear out, some users are satisfied with its customer service, however, others are not.
But a good thing is that their team replies to the comments on the issues users have mentioned on Trustpilot. This shows that they’re trying their best to give improved service.
User Reviews and Ratings on G2:
In G2 reviews, the average rating on Nexcess is 3.6 out of 5. That seems a little low. But it’s based on just 26 user reviews.
As per the analysis, the high-rated features of Nexcess are great storage and bandwidth allowance. Whereas low-rated features are database support, content panel integration, and dedicated hosting.
Let’s also have a look at the average user rating score in various categories:
- Ease of Use: 7.8/10
- Quality of Setup: 8/10
- Ease of Setup: 8.5/10
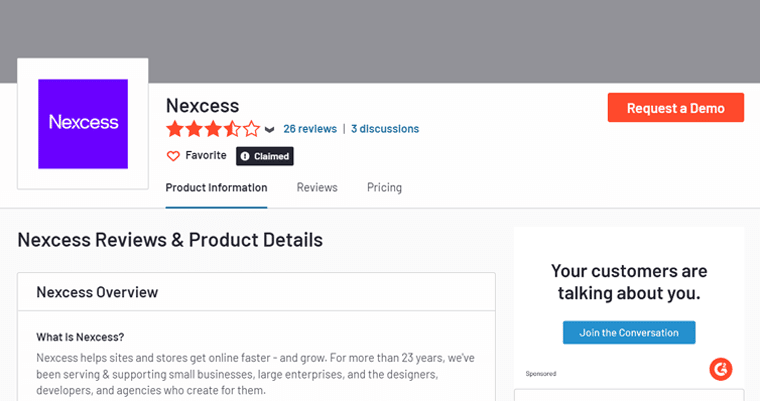
For updates, check out the latest review of Nexcess on G2.
Overall, Nexcess has plus points like an easy-to-use dashboard with the pre-installed application and plugins making it quite fast to start. In addition to that, it’ll be a great platform if it improves its customer service and performance.
G. Pros and Cons of Nexcess Managed WooCommerce Hosting
As everything has 2 sides, Nexcess also has some demerits despite several merits. So, in this review section, we’re looking at some of the pros and cons of Nexcess.
Pros of Nexcess Managed WooCommerce Hosting
- Offers several tools for performance, visual regression testing, and more.
- With instant auto-scaling, your site will be running smoothly even in peak traffic.
- Contains multiple customer support options for 24/7 service.
- It has a cheaper starting price for a managed WooCommerce hosting plan.
- Better in terms of storage and monthly visit limits.
- Includes email hosting service, free website migration, CDN service, and more.
- Comes with all the main features like daily backups, staging environments, etc.
- 14-days of free trial and gives a 30-days money-back guarantee.
Cons of Nexcess Managed WooCommerce Hosting
- It can improve its knowledge base or documentation for better support.
- May be a little expensive for beginners.
- Needs improvement on its dashboard to suit the beginner’s needs.
- Doesn’t include a free domain registration service.
H. Alternatives to Nexcess WooCommerce Hosting
Nexcess is indeed a great choice for your eCommerce website. However, if you’re still not sure enough, then check out its top alternatives.
Other popular web hosting platforms also provide WooCommerce hosting plans. And in this review section, we’re mentioning some of the best Nexcess alternatives.
1. Cloudways
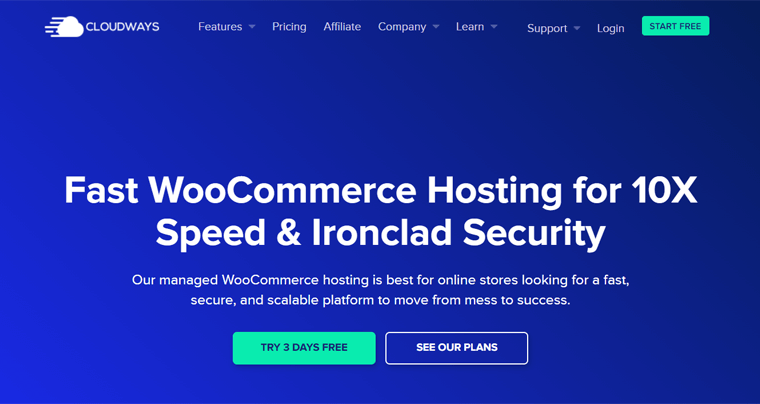
Cloudways is a unique hosting provider that offers managed solutions when using 5 of the top cloud hosting platforms. They are DigitalOcean, Linode, Vultr, Google Cloud, and AWS.
Moreover, it offers 10X faster speed managed WooCommerce hosting that’s best for a secure and scalable platform. And with its eCommerce Starter Bundle, all the important plugins get pre-installed to design, launch, and manage your online store right away.
2. Kinsta
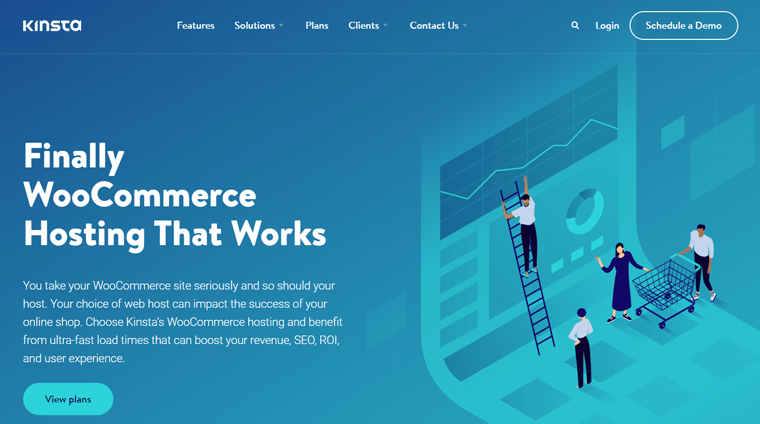
Another best hosting platform that gives scalable WooCommerce hosting is Kinsta. Since security is a big deal for a shop, Kinsta includes an enterprise-level firewall and DDoS protection powered by Cloudflare. Also, site monitoring takes place every 2 minutes.
Further, it offers a free local development tool called DevKinsta to integrate into your MyKinsta dashboard. Using it on the local machine, you get multiple built-in features like an email testing tool, a lightweight database management tool, etc.
Have a look at our complete comparative article on Kinsta vs Cloudways to know more.
3. Pressable
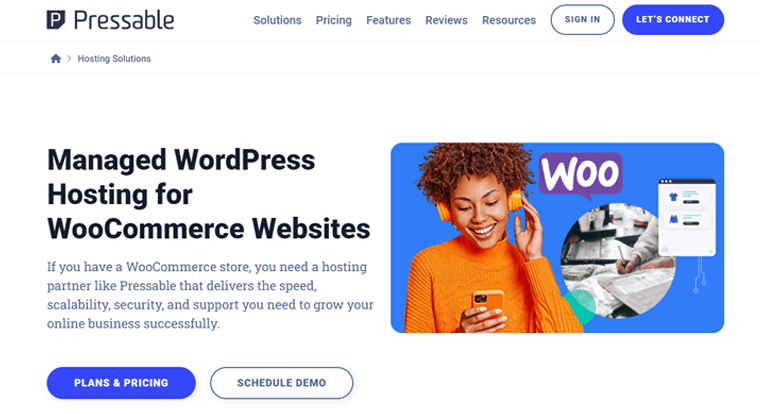
Pressable is yet another host that offers managed WooCommerce hosting with top-notch performance. It contains 28 global point CDN services with server-level caching features. In addition, it delivers 100% uptime service with the best customer support to its users.
The security features are also highly advanced in Pressable. Some of its features that aren’t present in Nexcess include hack recovery assistance and the free Jetpack Security Daily tool.
For more in-depth knowledge, look at our complete review on Pressable.
I. Final Thoughts – Is it the Right Managed WooCommerce Hosting Platform?
Your wait is finally over! In this section, we’ll summarize everything in this Nexcess review. With that, determine if it’s the right managed WooCommerce hosting platform.
According to our review, we admit that Nexcess is a great best option for hosting your WooCommerce store. That’s because it has good features in every area. Whether performance or customization options, Nexcess is top-notch everywhere.
Moreover, it has an affordable starting price for beginners. The plans are also very flexible. Thus, you can select a plan that suits your present business needs. And it can instantly scale up when the store grows. While the host is responsible for maintaining its security.
In the end, we also recommend you try the host yourself. The best part is that it gives a free trial for 14-days. Plus, if you want to discontinue the purchased plan, then there’s a 30-days money-back service.
Therefore, we totally recommend you try and use the Nexcess managed WooCommerce hosting if any plan matches your needs. For that, this review on Nexcess can be a great help!
J. Frequently Asked Questions (FAQs) on Nexcess
Hosting providers generally give you a server with PHP and MySQL for your WordPress site. In the case of Nexcess, it monitors the infrastructure, manages WordPress, optimizes WooCommerce, and gives the ultimate support for your online store.
Nexcess offers 14 days of free trial for its WooCommerce hosting plans. So, there’s no need to even add your credit card information if you want to access the free trial.
Yes, Nexcess allows you to easily update your plans as per your needs. First, you can get a plan that matches your business preferences. Later, you can upgrade to any other plan that suits your demands.
Nexcess protects your website with ModSec for WAF to prevent attacks like DDoS or brute force. In addition to that, all the plans also come with iThemes Security Pro. If Nexcess finds any issue in your store, then it’ll automatically remove it and notify you.
The maximum usage range is actually recommended by Nexcess and not the limits. When your eCommerce site goes near the recommendation, then your site will still be running. You can just contact support for suggestions or upgrade to the next plan as per your needs.
Conclusion
It’s a wrap! We’re at the end of this complete review on Nexcess. We hope you liked this review on the popular managed hosting platform, Nexcess.
Moreover, we also hope you know more about its great managed WooCommerce hosting service. Accordingly, you may have made your decision on using it or not.
In case, there’s any confusion or questions on Nexcess that are not clear from this review, then post a comment. We’ll try to solve your queries as much as possible.
On top of that, make sure to look at our latest blogs on how to use Semrush for free and Avada theme review.
Finally, follow us on social media handles on Twitter and Facebook to keep getting updates online.
