In search of an honest review of the WP Event Manager plugin? Or wondering how to host virtual events on your WordPress website? If yes, then you’re in the right place.
WP Event Manager is a popular WordPress event management plugin for listing events on your website. The core plugin is free with many great features.
But that’s not all! Using the plugin with some paid add-ons, you can also create engaging virtual events with complete access to sessions, lounges, tables, and exhibitor halls. In fact, you can build a full-fledged virtual event platform with it.
In this WP Event Manager review, we’re going to present its main features with a major focus on the virtual event features. Additionally, we’ll go through its pricing, support, pros, cons, and more. Then, in the end, we’ll share our verdict on whether it’s one of the best virtual events plugins or not.
So without further ado, let’s start this review on the WP Event Manager plugin.
A. WP Event Manager – An Overview
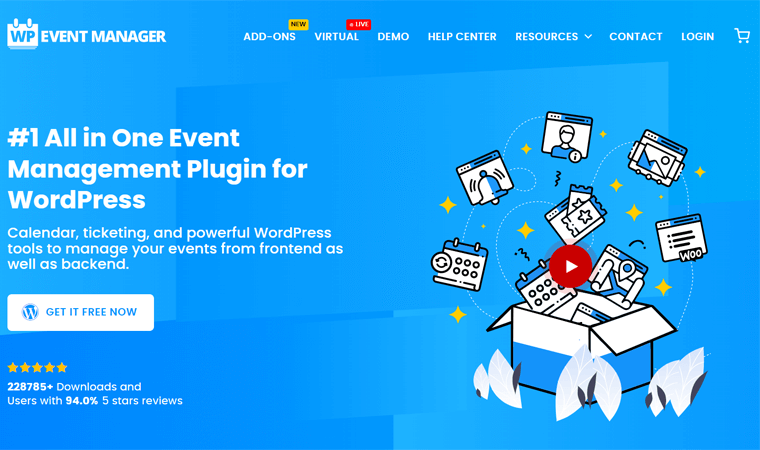
WP Event Manager is a powerful and full-featured WordPress event management plugin. Using it, you can easily create and manage events on your WordPress website. The events can be digital like a webinar to physical in-person events.
Moreover, you can either display your own events or invite others to register and then submit their events on your site.
And the good part is that you get to create and manage the events from both sides. It means from the backend i.e. WordPress dashboard and the frontend of your site.
Not only that, the plugin is built fully responsive and works well on all the major browsers. On top of that, it’s translation-ready so that you can convert it to multiple languages.
Also, it supports all the top WordPress plugins including the SEO plugins and page builder plugins. Along with that, it’s well integrated with popular tools and email marketing services like Zapier, Mailchimp, Sendinblue, Active Campaign, and more.
Furthermore, there are numerous shortcodes and widgets present on the plugin. With that, you get to add simple to complex sections or features to your posts and pages. Such as recent events, upcoming events, featured events, etc.
Therefore, organizing and promoting event listings is also a lot easier using this plugin. All you’ve to do is work from a single dashboard.
Besides these, there are several other key features of this plugin. So, let’s move forward with this WP Event Manager review to know them.
B. Major Features of WP Event Manager
Here in this section of the review, we’re mentioning some of the major features of the core WP Event Manager plugin. So, let’s have a quick look.
1. Submission Forms for Creating Events
The core plugin allows you to store the events and their details on your WordPress site. And you can do so by both the front-end and back-end dashboard of the site.
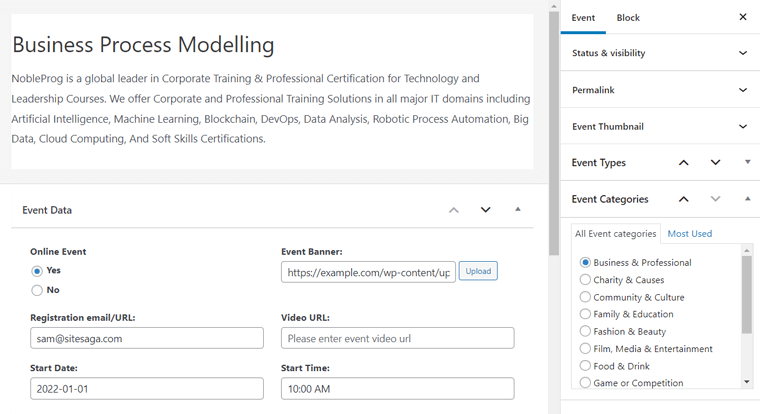
On the back-end event form, you can create the event listings. So, you get to easily add the event title, its description, event category, and event type. Along with that, you can also add additional information like location, venue, banner image, date, time, organizer, and more.
While on the front-end submission form, registered users can submit their events. Plus, they get a preview of their listing before it goes live. Such events remain pending until the admin accepts them.
2. Manage Events on Your Website Easily
Talking about managing the events, it can also be done from both the front-end and back-end of your site.
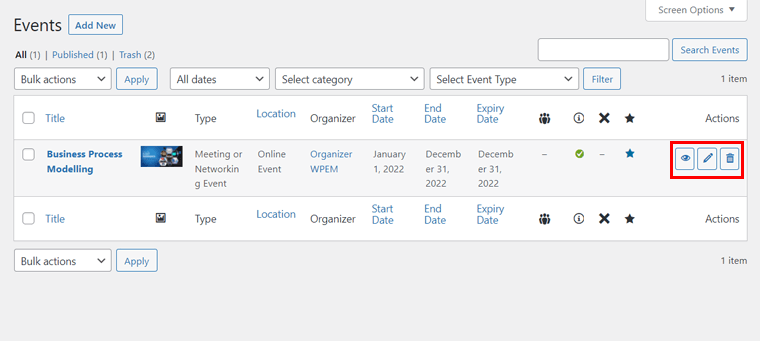
On the back-end, you get to view all the events and easily manage them. Such as you can edit or delete events. Or you’re also able to change the status of the event from pending to approved. Also, you get to cancel events.
Users who have roles to add events also can manage those events. So, after logging in and going to their respective dashboard, they can see and manage the events that they’ve submitted. With that, they can also edit or cancel their events.
3. Ajax Search & Filter Options
This plugin allows you to add categories, types, and tags to the events. Also, you get to assign the venues and organizers for events. By using them, organizing the events becomes way easier.
Also, the visitors can now search and filter from the event lists to view the event they like. Plus, you can also show a dedicated page for different types of events. Such as events at a specific venue.
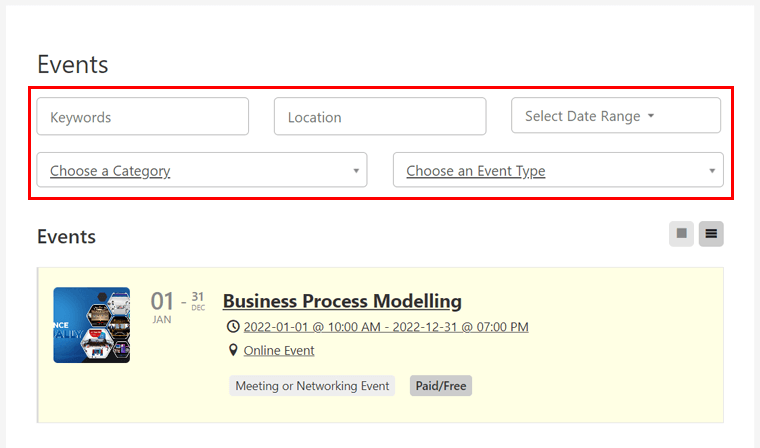
Not to mention, a search feature also helps you and your users to easily find information.
All of this is possible because of the Ajax-powered search and filter functions on event listings. And you can easily add them to your pages via shortcodes.
4. Event Dashboards for Organizers, Venues, and Admins
Apart from the back-end WordPress dashboard, the admin also has a front-end event dashboard. From there, they can view, add, and manage the events, organizers, and venues.
Furthermore, organizers also have their organizer dashboard and venue dashboard. With that, they get to moderate the information about organizers and venues, respectively.
5. Powerful Field Editor
WP Event Manager provides a powerful field editor on your dashboard. If the default fields were not enough to describe your events, then you can add the custom fields from this editor.
On top of that, editing or deleting the existing fields is also possible. Also, you get to change the field labels, adjust the input type, and define whether a field is required or not for submission.
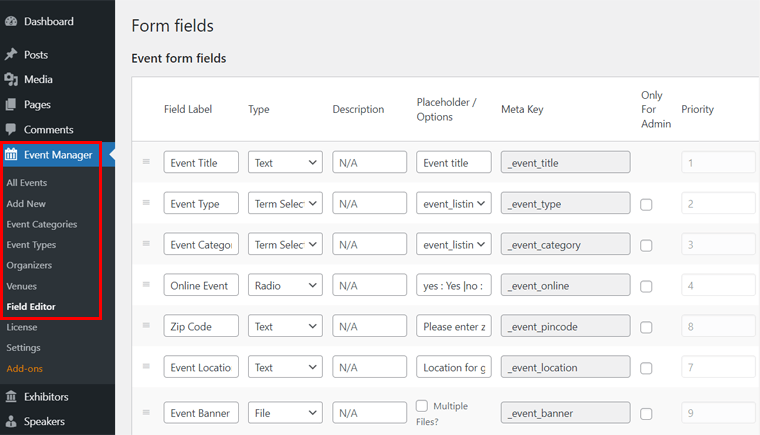
By doing that, you can store and display the exact details of the events that you want to. Also, there are field editors for doing the same for your organizers and venues.
6. Tons of Useful Addons to Extend Features
There are tons of other useful add-ons available to extend the features in this plugin. More than 30+ to be exact and still counting. Few of them are free while most are premium ones. Some of the free add-ons are Mobile APP, Divi Elements, etc.
In the paid ones, one is Google Map with which users can find the event location by searching on the map. And by using the Calendar add-on, you can show the list of future events in a calendar.
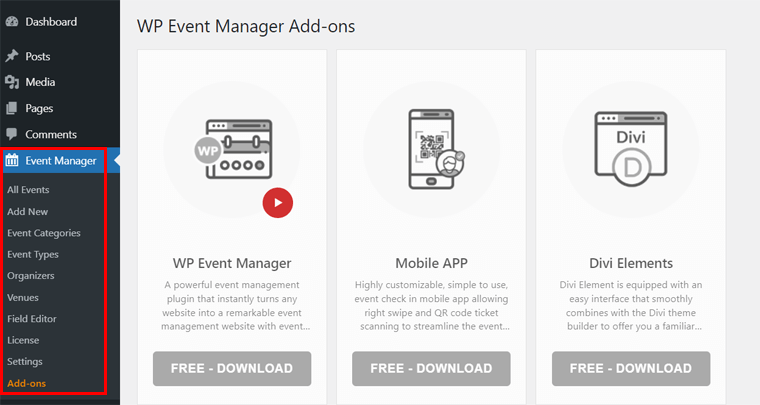
Similarly, the Registrations add-on allows users to register for an event as an attendee. While Sell Tickets is for selling and managing the tickets via WooCommerce. And these are the names of just a few of them.
C. WP Event Manager – Virtual Events Overview
To those who aren’t sure about what virtual events are, here’s what it is. A virtual event is an online event where people get to interact in a virtual environment.
So, the virtual add-ons alongside the core WP Event Manager plugin allow you to build a virtual event platform. And, you get to create virtual platforms like Airmeet, Hopin, vfairs, etc.
Users have to pay a high price to conduct their events on these above-mentioned platforms. But using WP Event Manager, users or organizers can create their own complete white-label virtual platform. This saves a lot of their money.
Now, you and your event organizers can plan, create, promote, run, and manage the events online on your site. It can be an annual conference, exhibition, social webinar, or anything. And these events will be so engaging and interactive than you could think of.
Therefore, the add-ons required with the core plugin for virtual events are:
- Registrations: Using this add-on, invitees can register for an event as attendees.
- Sell Tickets: It allows you and your organizers to sell the tickets.
- Expo Networking: This add-on plays the main role in hosting virtual events. Using it, you get to organize network exhibitions or any other event.
- Speaker and Schedule: With this add-on, you can add speaker information and schedule the sessions for an event.
For more details, you can check WP Event Manager virtual events page.
D. Features for Making a Virtual Events Platform
We had enough information about the core plugin features in this WP Event Manager review article. Now, it’s time to focus on the advanced virtual event features of its virtual addons.
So, after a quick overview of the add-ons, let’s see what virtual event features it provides.
1. Create and Manage Multiple Sessions or Breakout Rooms
With the use of the add-on, you can manage the main stage with the attendees, speakers, and host. Additionally, you get to create and manage multiple sessions or breakout rooms for engaging the attendees.
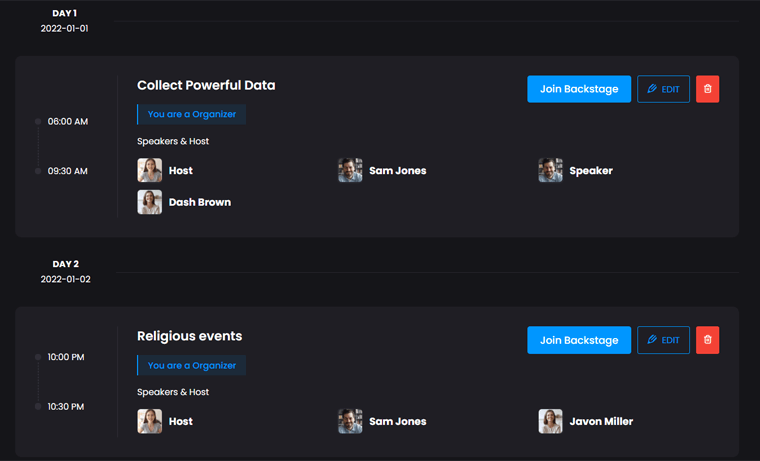
In a session, there can be multiple speakers and hosts. If people join a session, then they can see a live stream of that session. Also, attendees can look at upcoming sessions with the speakers.
While users can meet the speakers backstage before the session starts.
2. Real-time Conversation Features
The sessions are also highly interactive. Attendees can have live one-on-one Q&A with speakers. And users can raise their hands using emoji reactions.
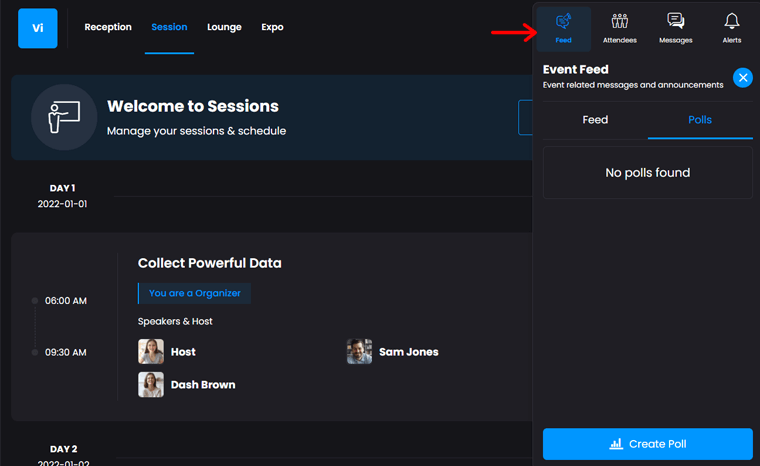
Not only that, but screen sharing is also possible. On top of that, files can be even shared for a better presentation. And if polls and surveys are necessary for a session, then they can also be included.
3. Interactive and Customizable Booth
A way to make users aware of your brand is through an interactive and customizable booth. Using this plugin, you get to form booth tables for the meetings. With that, users get to exchange business cards, download brochures, watch product demos, and more.
Also, a live chat or video option is there for attendees to interact with the exhibitors. With such features, you can easily enhance your business.
4. Sell Tickets Online
As mentioned before, the add-ons provide you with a white-label solution. That’s why you get to sell the tickets on your own on the virtual platform.
First, you can easily handle the registrations and then sell the tickets to the attendees. Also, the plugin supports 100+ payment gateways to accept the payment of the tickets. So, you’ll have more options to sell the online tickets as you want.
5. Mobile App for Admin and Organizers
The admin and organizers can also manage their events from their mobile devices. It’s because of the mobile app available on Google Play and App Store.
Here, the admin can view the total number of views, tickets sold or available for an event, etc. Also, they get to view the attendees registered for an event. While organizers can identify the number of arrived users at the event, and more.
Using this, they can roll in and connect with more people to promote the events. And they can make connections from anywhere without any geographical barriers.
6. Enhance your Sponsorship and Partnership
Sponsors, partners, and exhibitors also get to know more about your brand while using this plugin. As you can form dedicated sponsor areas, carry out sponsored sessions, and branded social lounges. With that, you also get to enhance your sponsorship and partnership.
Going through all these features shows that you can connect and engage with your attendees and other users from anywhere. Whether it’s from the group discussion tables, lounge, booths, etc., with any mobile device. This proves that you can build a great experience for your users.
E. How to Install and Setup WP Event Manager Plugin?
To start your virtual event platform, you need to get the core WP Event Manager plugin and some additional add-ons.
So, in this section of the WP Event Manager review, we’re explaining the steps to guide you for installing and setting up them.
1. Core Free Plugin
First, you need to have the core plugin on your website. So, please follow these steps.
Step 1: Install and Activate the Plugin
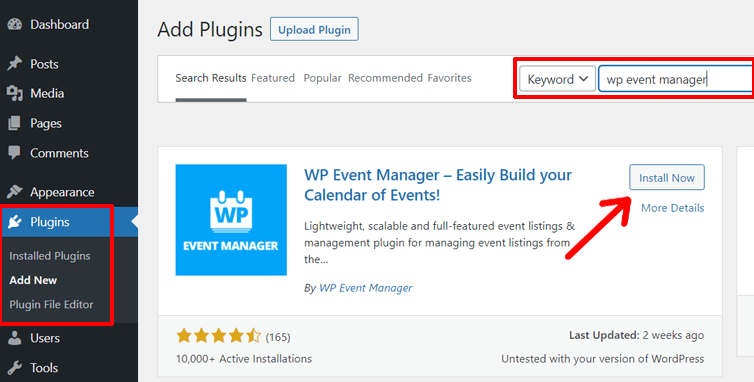
Log in to your WordPress dashboard and then go to the Add New option in the Plugins menu. Now, by searching the plugin there, you must click on the Install Now.
After that, you’ll see Activate button. Simply click on that.
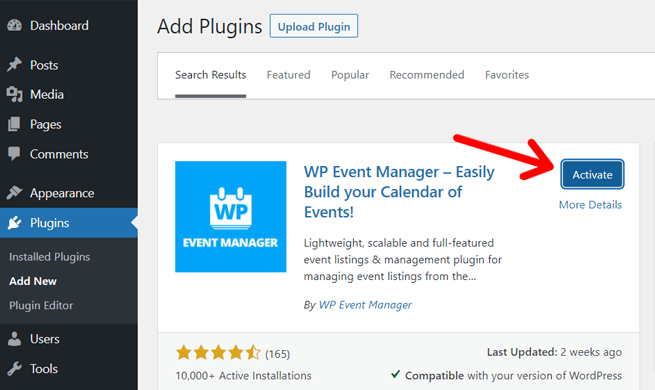
Once done, the plugin will be completely installed and activated on your site.
You can also check our article on how to install a WordPress plugin for a step-to-step guide.
Step 2: Using the Setup Wizard for Configuration
Once the activation completes, you can see a new menu on your dashboard i.e., Event Manager. And, you get the option to configure the plugin using the setup wizard.
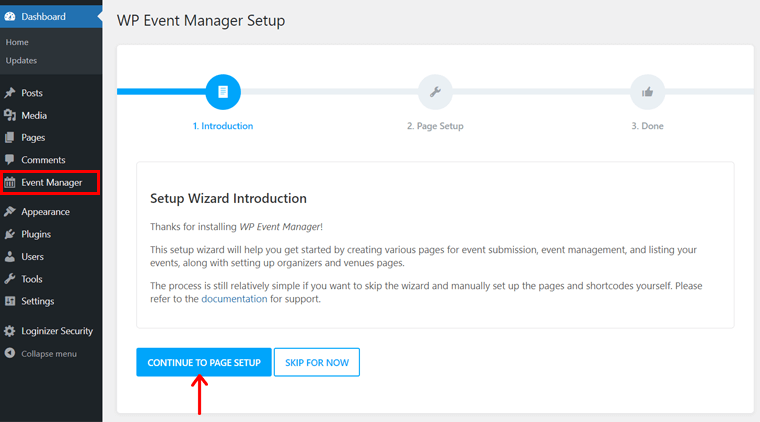
So, click on the Continue to page setup button first. Then, it recommends you allow the plugin to automatically create multiple pages on your site important for a virtual event. It includes Post an Event, Event Dashboard, Events, and more.
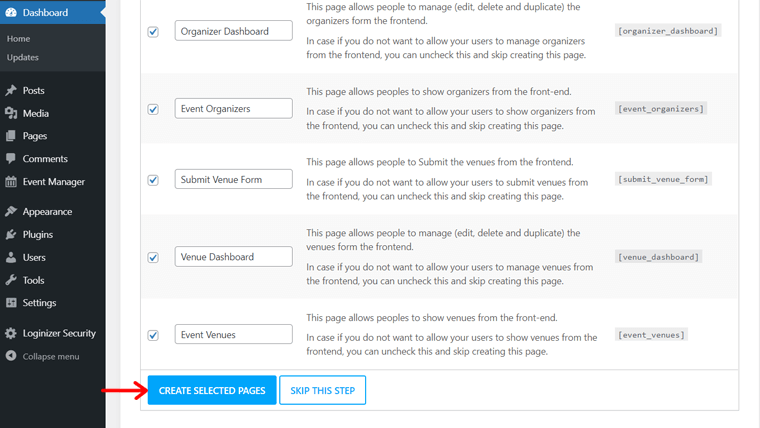
We also recommend you allow the plugin to make these pages. That’s why click on the Create selected page button.
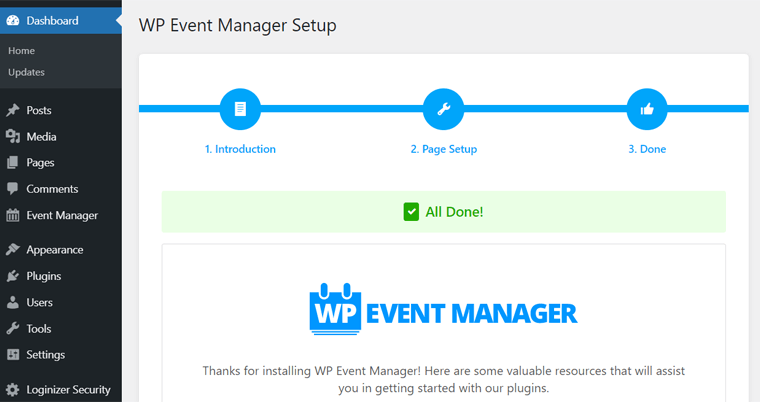
Now, the setup is all done so you can start using the free features.
Step 3: Configure the WP Event Manager Settings
But before anything else, let’s first look at some of the settings in the WP Event Manager plugin. By doing that, you may want to add some features or enable/disable some functions of the plugin.
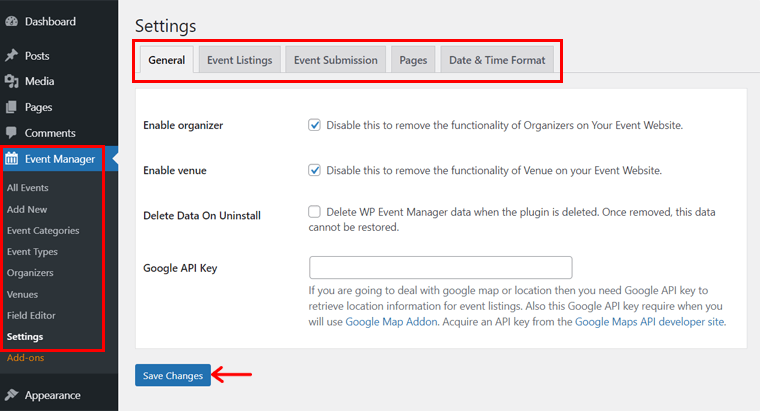
(I) General
Here, you can enable or disable the functions for organizers and venues. Also, you get to delete the entire data when you uninstall the plugin. Plus, you can include a Google API key to provide your location.
(II) Event Listings
Using this setting, you can manage your event listing page. So, you get to set the number of listings to show on your one page. Also, there are options to hide canceled events, expired listings, and more.
(III) Event Submission
Next is the Event Submission setting that focuses on posting events from the front-end. Here, you can make sure that users have an account before submitting lists. Along with that, there are other options for account creation, role, username, password, and more.
(IV) Pages
The Pages setting shows you the location of the pages that were automatically created by the plugin. From here, you can change the location of the features and functions on other pages.
(V) Date & Time Format
Lastly, in this section, you get to set the format of the date picker and time picker. Also, you can include a separator for date and time, etc.
Keep in mind that after changing settings, you must click on the Save Changes button.
2. Premium Addons for Virtual Event Platform
We’ve already mentioned that you need to have 4 add-ons to create a virtual event platform on your WordPress site. So, the steps below are for installing and activating those premium add-ons.
Make sure to carefully follow them.
Step 1: Purchase the Addons
First of all, you need to purchase these 4 add-ons. For that, go to the Add-ons menu on the navigation of the plugin’s official website. Or you can also do it from the Add-ons section on the Event Manager menu of your WordPress dashboard.
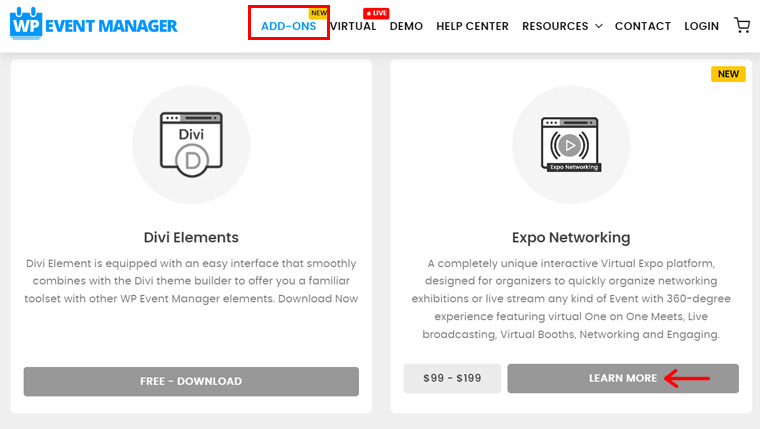
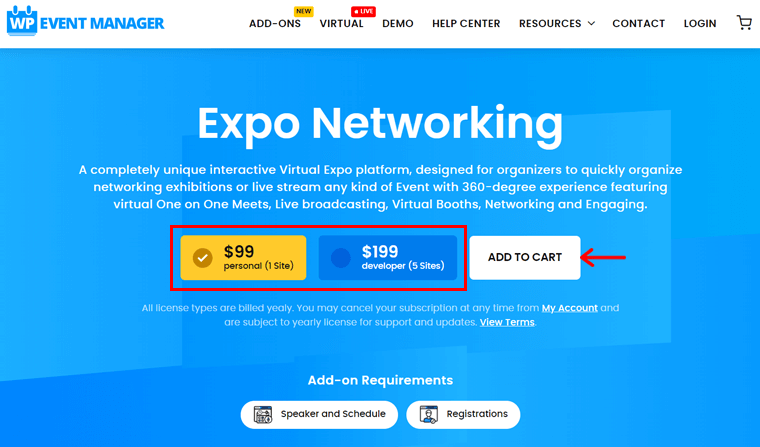
Then, find the specific add-on such as Expo Networking, and click on its Learn More button. Now, choose the pricing plan among the 2 options and click on Add to Cart button.
After one is done, do the same for the other 3 add-ons as well.
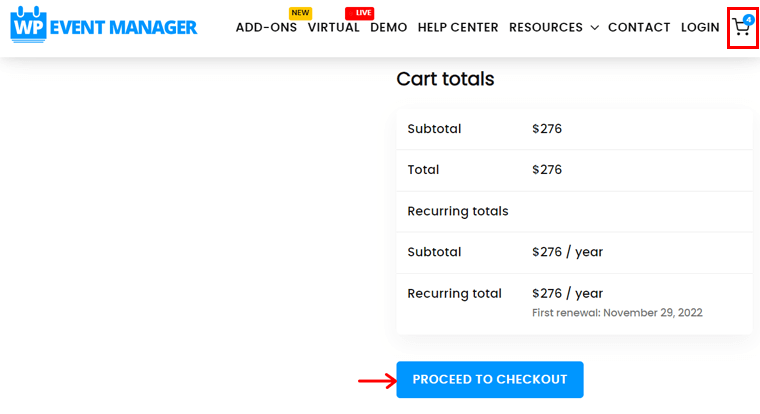
Next, click on the cart icon on the navigation to go to the cart page. There on the cart page, click on the Proceed to Checkout button.
On the checkout page, fill in all your required personal and payment information. Lastly, click on the Proceed to PayPal button (if you’re using PayPal gateway) to complete the purchase and download the add-on files.
Step 2: Upload, Install, and Activate the Add-ons
Now, for the installation of the add-ons, you need to upload the downloaded files. And we’re going to show the process for 1 of the 4 add-ons. Once you do it for an add-on, you need to repeat the steps for other add-on files.
Note that you need WooCommerce on your site to use the Sell Tickets add-on.
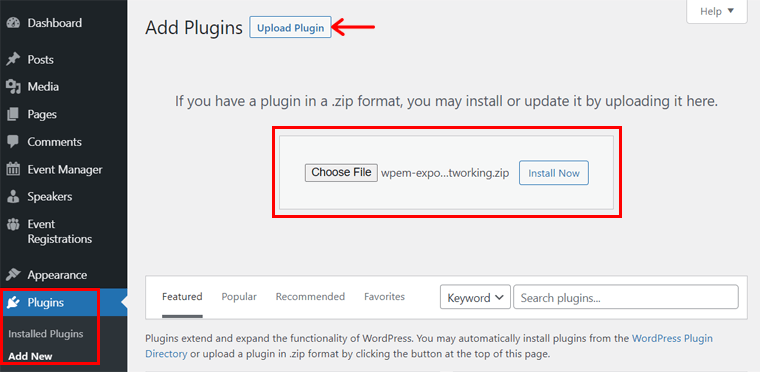
So, first, go to the Add New option on the Plugins menu. There, click on the Upload Plugin button first and then the Choose File button. After you upload the file, click the Install Now button.
Once the installation completes, then click on the Activate button. By doing that, the add-on gets activated and ready to be used.
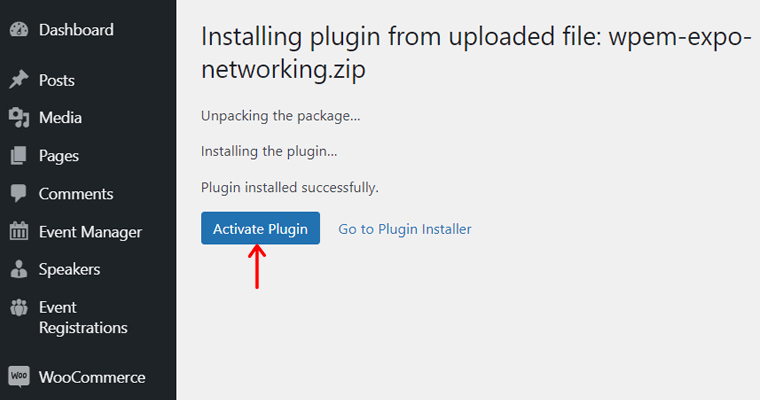
You can also see the new menus added on your dashboard including Event Registrations, Exhibitors, and Speakers.
Note that you can also add the license key of each add-on. That’ll provide you with updates and more for it.
Step 3: Configure the Add-on Settings
Previously, we discussed some of the settings that the core plugin provides. Now, after activating the add-ons, some additional settings are included on the Settings section of the Event Manager menu.

They are:
(I) Sell Tickets
Here, you get to enable or disable to show free, paid, and donation ticket fields on the events form. Also, there are a few layout options for the ticket to choose from. And, you can also add your own ticket PDF there.
(II) Expo Networking
This plugin must be integrated with 3 external services namely Agora, Firebase, and Amazon S3. They are for managing virtual event features like live streaming, real-time messaging, and event recordings. So, in this setting, you need to enter multiple information about your account on these services.
(III) Speakers
There’s a single option on this setting that’s to remove all the speaker’s data when you delete the plugin. So, once the data is removed after the deletion of the plugin, you can’t restore it.
Regarding these premium features, we’ll be discussing them in more detail in our next section of this WP Event Manager review.
F. Creating a Virtual Event Platform using Virtual Expo Functionality
In this section of the review, we’re going to show you how to create a virtual event platform with the WP Event Manager plugin. And it’s done using the virtual Expo functionality from the add-ons of the plugin.
Now, you get to manage exhibitions, fairs, and networking events virtually on your site. And it works with the combination of certain admin and organizer settings.
So, please carefully follow these steps.
Step1: Integrating Agora, Firebase, and Amazon S3
The server of your WordPress website can’t handle event live streaming, real-time messaging, and event recordings. For that, WP Event Manager works with some external services to build these functionalities.
That’s why you need to set up your site with 3 services to be able to do that. Each of which is:
1. Agora
The plugin uses the live streaming API of Agora. Now, it can handle live audio and video streaming. Also, it provides real-time interactive actions for the users.
2. Firebase
The plugin utilizes Firebase to get real-time messaging, Q&A, and polling features. With that, your attendees can have a real-time conversation and a great engaging experience.
3. Amazon S3
Amazon S3 provides an interactive recording function for the plugin. This enables you to export recordings automatically, generate screen recordings, etc.
To receive these 3 services, there’s stepwise documentation available by the developer of the plugin. So, you can check that out.
Step 2: Configure Expo Networking Settings
After you get an account and receive all the 3 services, you need to configure them on the plugin. For that, you need to go to the Settings option in the Event Manager menu of your WordPress dashboard. There, click on the Expo Networking settings.
We had already mentioned a brief about this setting in the above section. So, now, you need to fill in the details of the 3 services in this setting.
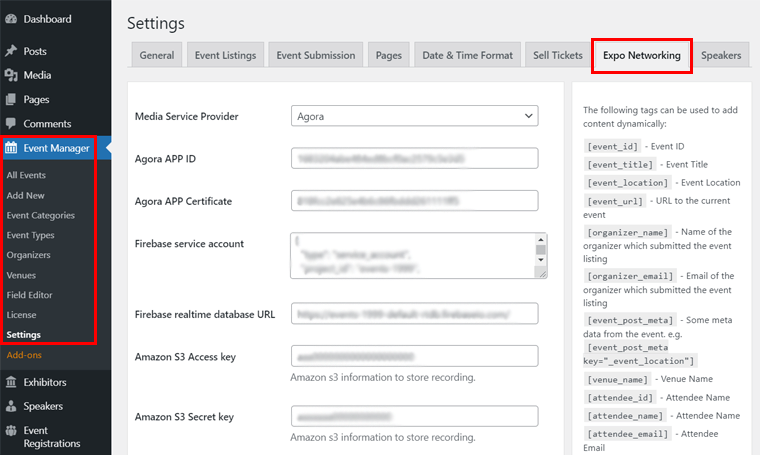
First, choose Agora in the Media Service Provider dropdown option. Then, enter the Agora APP ID and Agora APP Certificate that you’ll receive after making an Agora account.
Next, add the Firebase service account and real-time database URL that you get in your Firebase account. And after that, enter the Amazon S3 Access Key, Secret Key, region, and Bucket name from your Amazon console.
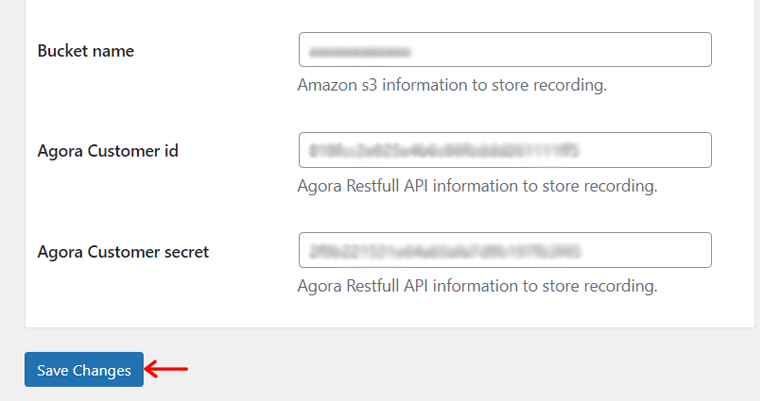
Lastly, keep the Agora Customer id and Customer secret and then click on the Save Changes button.
Step 3: Adding Events
After the configuration part is done, you need to add your events. So, do these steps with us to add an event.
I) Creating an Event Category and Event Type
Before adding an event, you need to add the category and type of event. To be clear, the event category is different event topics like business, community, film, etc. While event type includes kind of event like a conference, workshop, festival, seminar, etc.
And actually, there are already some event types and categories set on the plugin. If the type or category is present there, then you don’t have to create a new one. But to add a new event type or category, you have to fill in the information and save it.
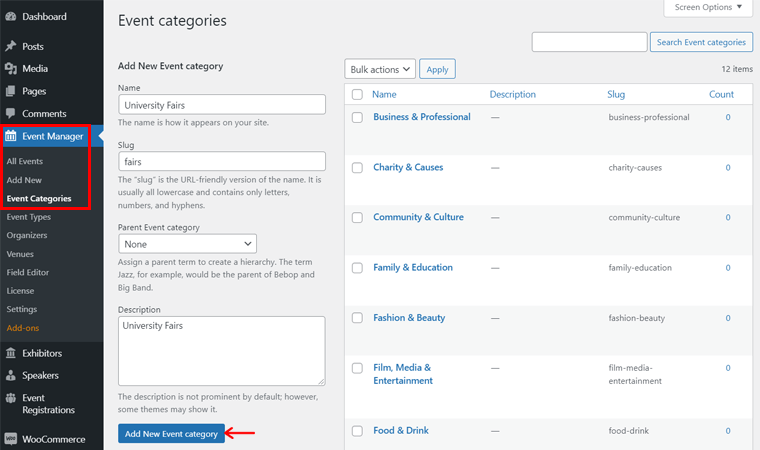
So, go to the Event Categories option on the Event Manager menu. There, add the name, slug, and description. After which, click on the Add New Event Category button to save it. You’ve to do the same for the event type from the Event Types option on the Event Manager menu.
II) Inserting Organizers
Similarly, now you’ve to insert the organizers of the events. So, go to the Organizers option in the Event Manager menu. Then, you need to click on the Add New button present at the top.
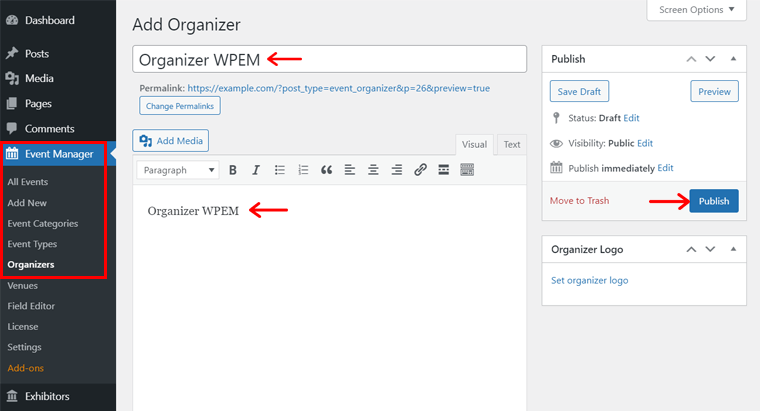
There, you must enter the information about the organizer. It includes the title, description, and some organizer data like email, website, and social media links. Also, you get to add the organizer logo. Then after that, click on the Publish button.
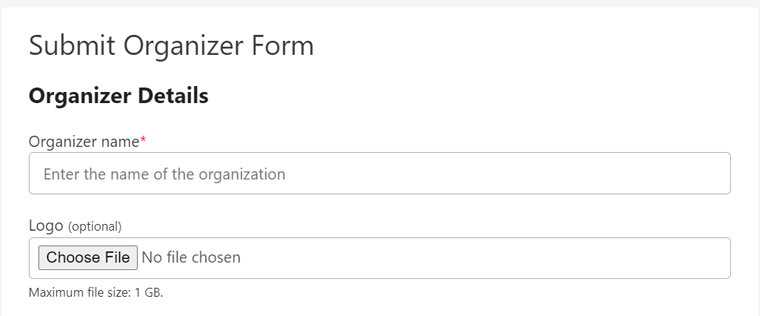
Front-end Organizer Form Submission
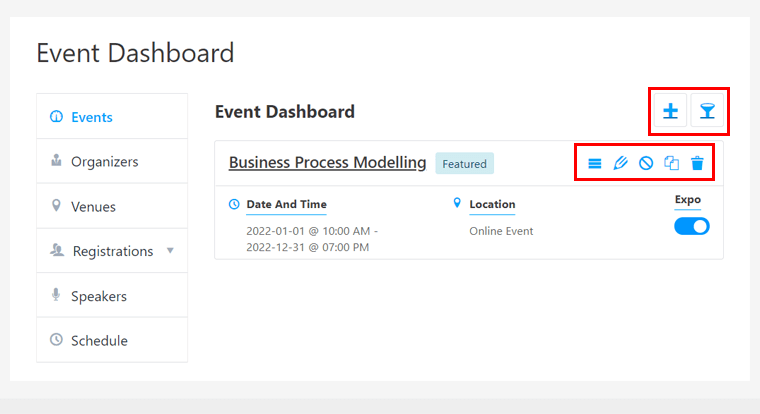
Note that you can also do the same from the Event Dashboard on the front-end of your site.
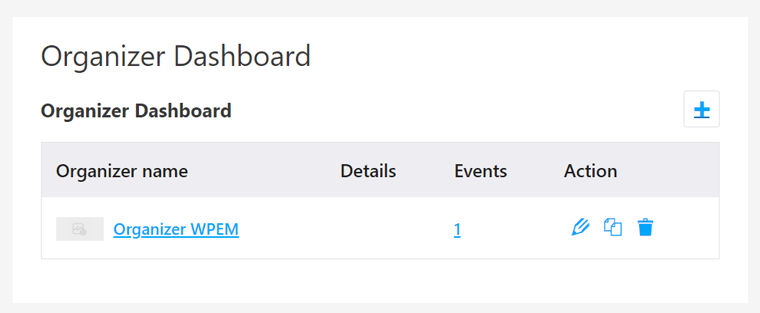
For that, click on the Organizers section on this page. This redirects you to the Organizer Dashboard page. Here, you must click on the ‘+’ symbol to add an organizer.

Now, on this organizer submission form, you must fill in the details about the organizer. After that, click on the Submit button to submit the form and save it.
Also, you can edit, delete, or duplicate the organizer that’s already saved from the Organizer Dashboard.
III) Add a New Event
Now, go to the Add New option in the Event Manager menu. There, write down the event title first. And then, fill in the Event Data section.
We’re demonstrating to create a virtual event which is an online event. So, tick on the Yes radio button for the Online Event option.
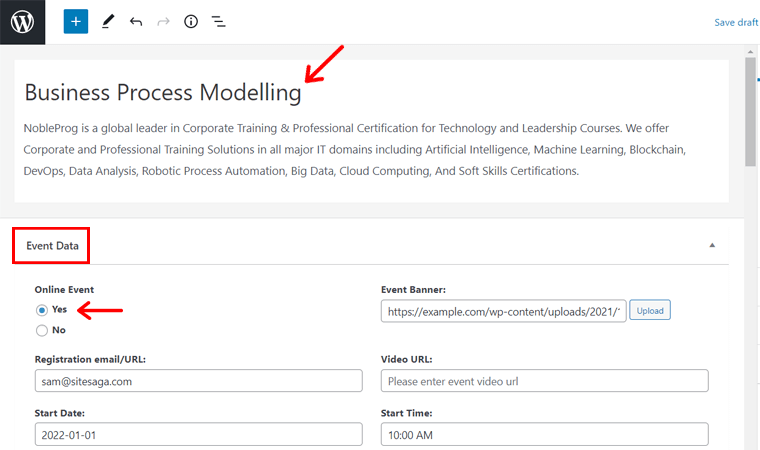
After that, enter all the required information about the event. Some important ones include registration URL, start/end date, banner, start/end time, etc. Also, choose the specific organizers for the event that you just created.
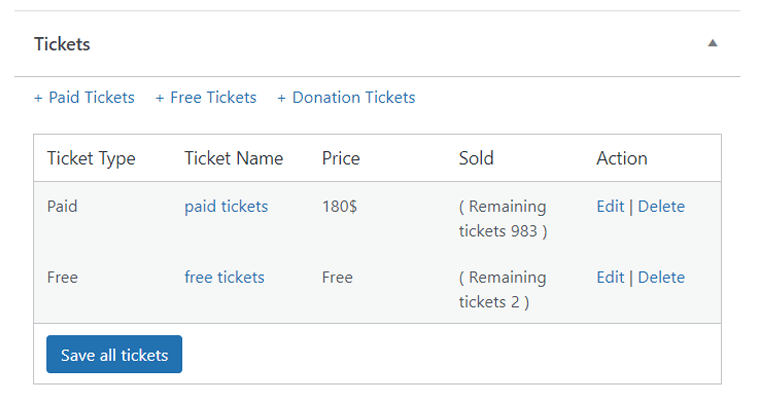
Then, you get to add free, paid, or donation tickets for an event. So, in the Tickets section, you can choose the ticket types you want to add to the event. For each type, you need to enter information about it. Like the name, start and end date, etc., and save it.

Lastly, click on the Publish button to make the event go live.
Front-end Event Submission by Organizers
To add here, other users like organizers can also post an event from the front-end of the website. And you can manage the fields that they can enter for an event from the field editor that we’ve discussed before.
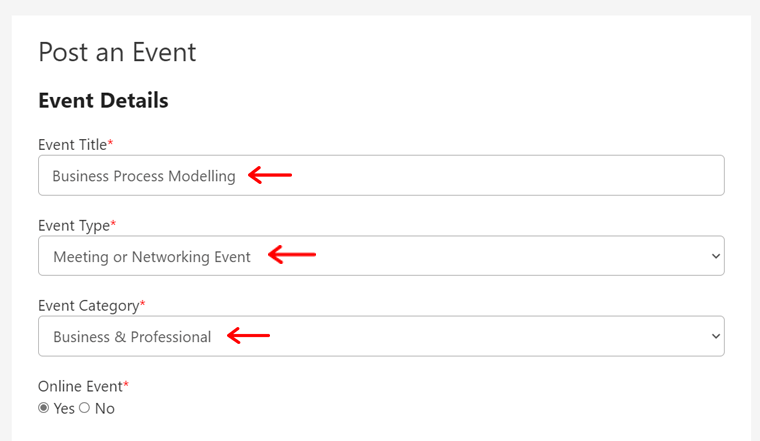
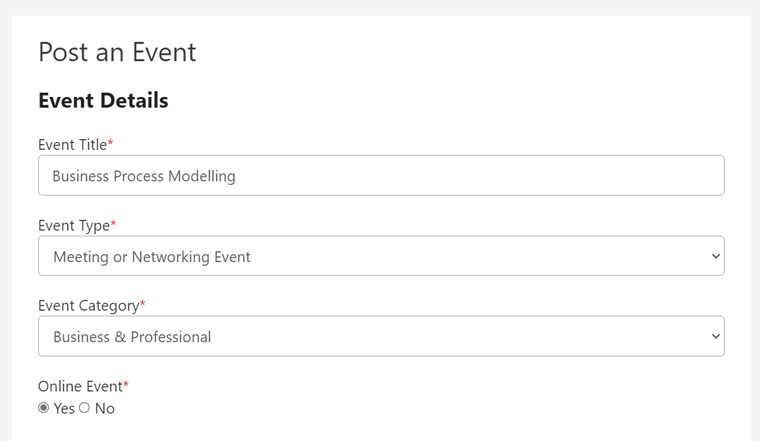
So, organizers can go to the Post an Event page of the site. And then, fill in the information just like mentioned before. Here, organizers also get to select the event category and type that you’ve created or available by the plugin.
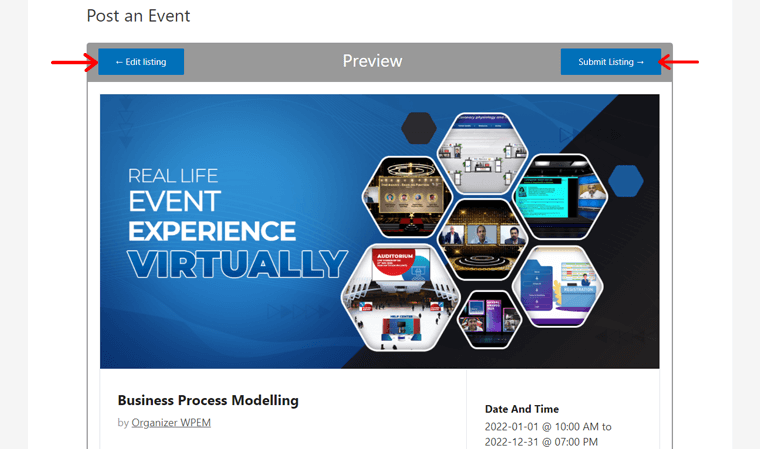
Before going live, they can take a preview of the event by clicking on the Preview button. And then decide to submit the listing by clicking on the Submit Listing button. Or edit the event further by clicking on the Edit Listing button.
As the platform administrator, you can view the submitted events and then approve or cancel them easily.
IV) Enable Expo
Now for using the virtual Expo functionality, you’ve to enable it at the event.
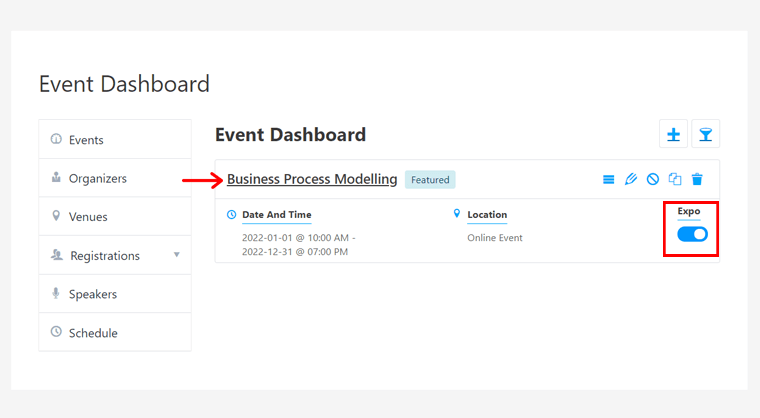
For that, go to the Event Dashboard webpage of your site. Then, enable the Expo option for that event. After that, click on that event to view it.
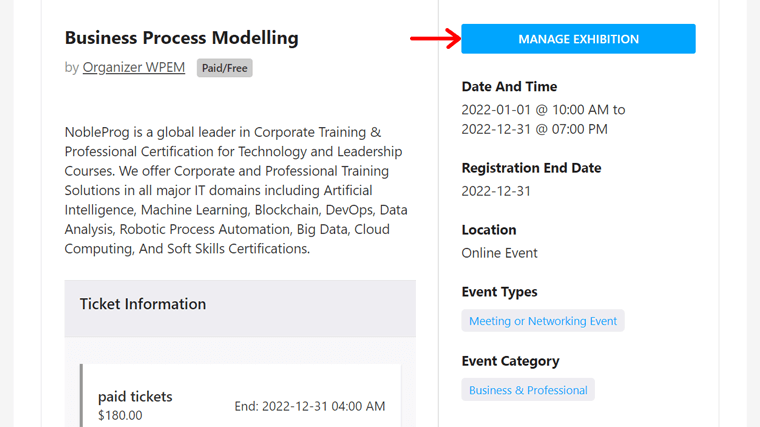
With that, on the event page, you’ll see a Manage Exhibition button. Now, click on that button to load and view the Expo.
V) Preview
After the Expo loads for that event, you can see that it’s empty. It’s because we haven’t created any sessions, exhibitors, or lounge tables yet.
However, once you create them and customize your Expo, then it’ll look like the screenshot below.
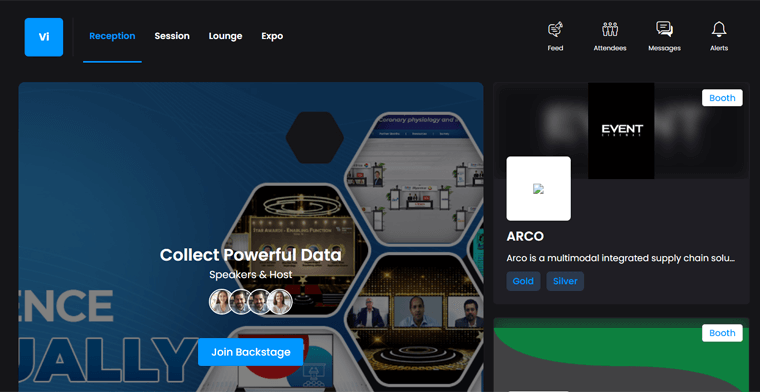
Here, first, you can see a section i.e. Reception. The reception room shows you the upcoming sessions and the exhibitor booths and sponsors.
Step 4: Adding Speakers
Now, you’ve to add the speakers to your event first. And you can do it from both the front-end and back-end of your site. Here, we’re focusing on adding speakers from your dashboard.
To do that, follow these simple steps.
I) Using Field Editor
First, you can organize how the speaker forms and notification will look like. For that, go to Field Editor on the Speakers menu.
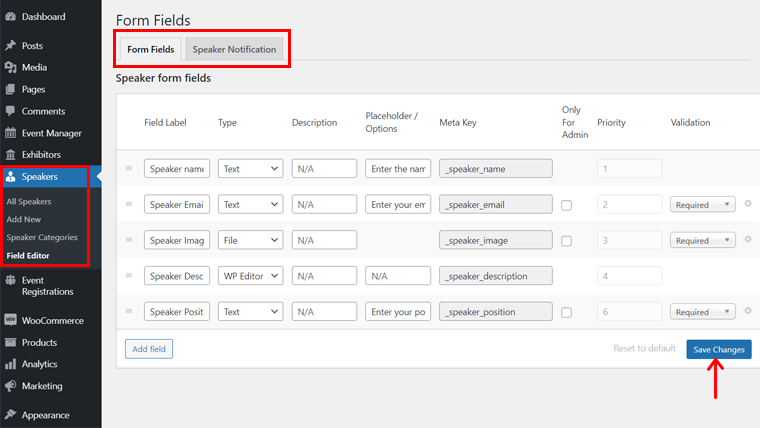
On the Form Fields section, you can add, manage, and organize the form fields similar to that of events. After making any changes, click on the Save Changes button.
While from the Speaker Notification section, you can edit the content of the email that’ll be sent to the speakers.
II) Add Speaker Category
Similar to adding an event category, you’ve to also add a speaker category. And you can do that by going on the Speaker Categories option in the Speaker menu.
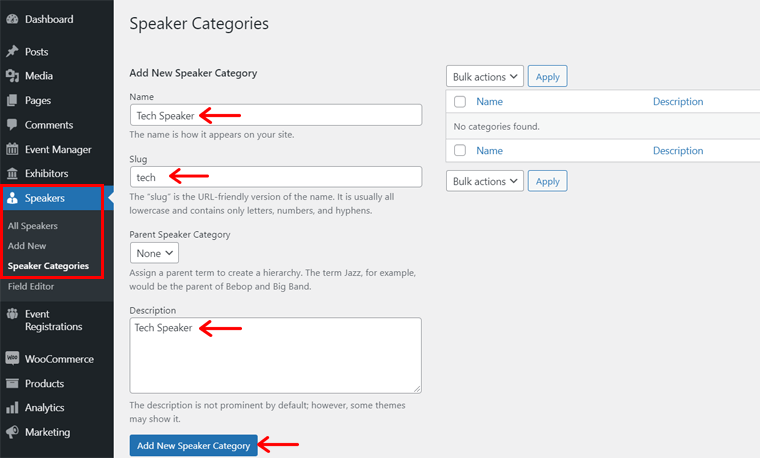
So, add the name, slug, and description and then click on the Add New Speaker Category button.
III) Add New Speaker
Now, it’s time to add a new speaker. And it’s just like adding an organizer.
Go to Add New option in the Speakers menu. Then, type the title, description, and speaker data. You can select the category of the speaker in the Speaker Categories option. Also, you get to add the logo in the Speaker Logo section.
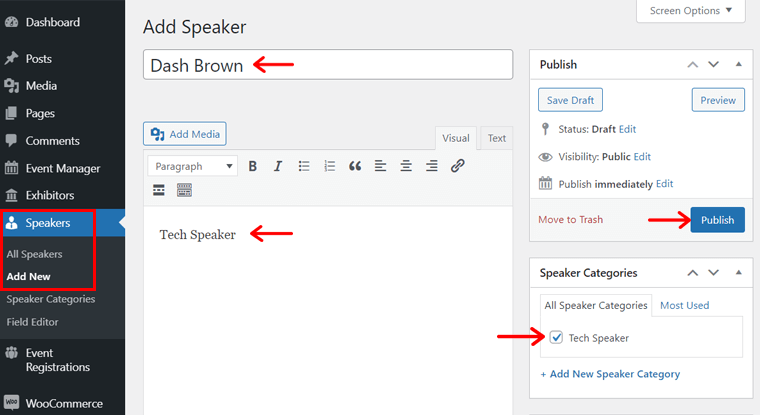
Lastly, click on the Publish button to save speaker information.
Front-end Speaker Form Submission
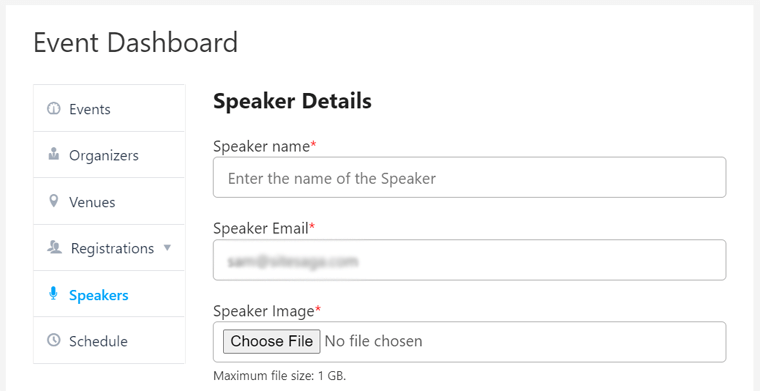
Also, you can add a speaker from the front end of your site. Similar to adding organizers, here you’ve to go to the Event Dashboard page. There, click on the Speakers option.
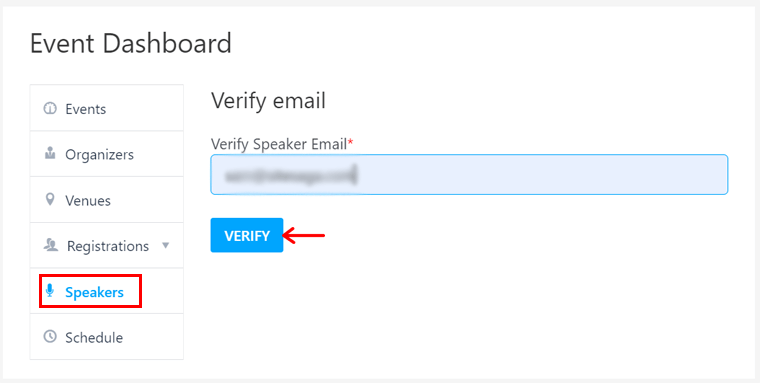
Then, you’ve to verify the speaker’s email. After doing that, you can see a form for submitting speaker details. So, you can fill it out and lastly click on the Submit button to save it.
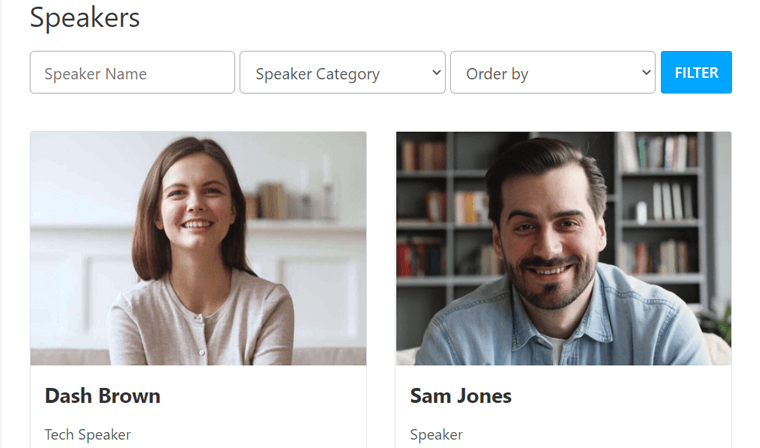
IV) Preview
To preview the speaker’s list, you’ve to create a new page called Speakers and add a shortcode i.e. [event_speakers]. After you publish and preview the page, you can see it as in the screenshot below. Also, it includes different filter options to find the speakers.
Step 5: Adding Event Sessions or Schedule
For adding sessions, you’ve to work from the front-end. For that, you’ve to go to the page where we left after enabling Expo while creating an event.
So, on the Expo page of an event, go to the Sessions section. There, click on the Add Session button and the session form will display.
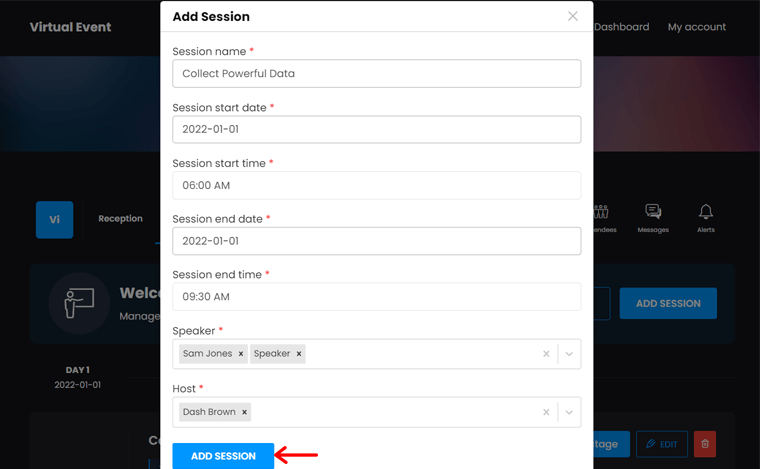
Here, you need to fill in the session information including name, start date/time, and end date/time. Also, choose the speaker and host for the session. Lastly, click on the Add Session button.
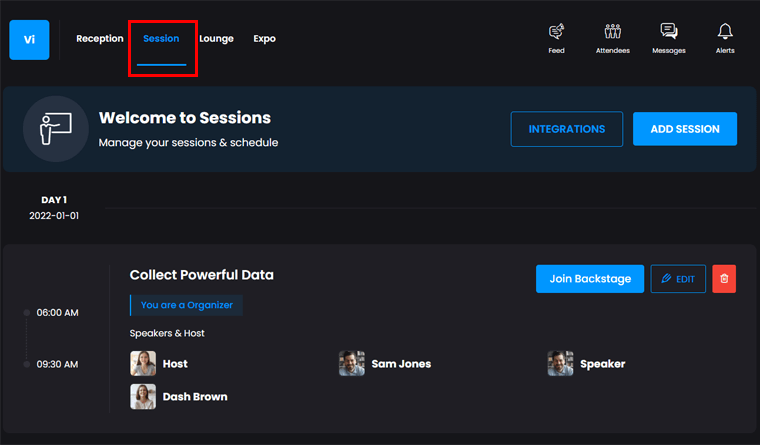
Now, the session gets added and it’ll look like this screenshot.
Step 6: Adding Lounge Tables
Next is adding lounge tables and its process is similar to that of sessions. Now, go to the Lounge section on the Expo page of the event and click on the Add Table button.
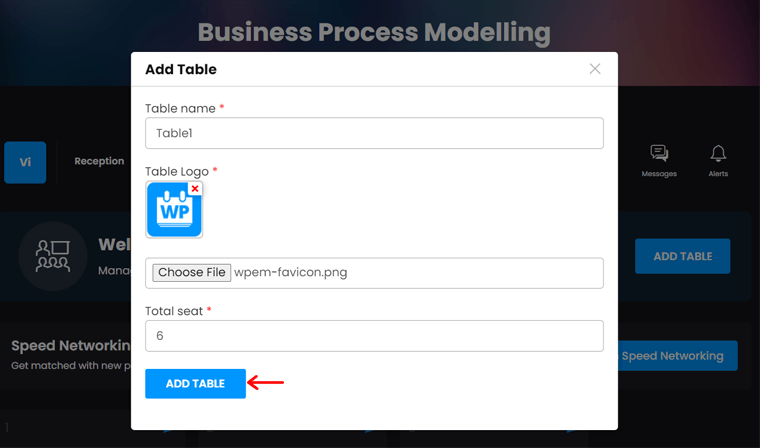
After that, fill in the form by entering the table name, logo, and number of seats. Here, the total number of seats can be a maximum of 8 for a table.
Finally, click on the Add Table button to save it.
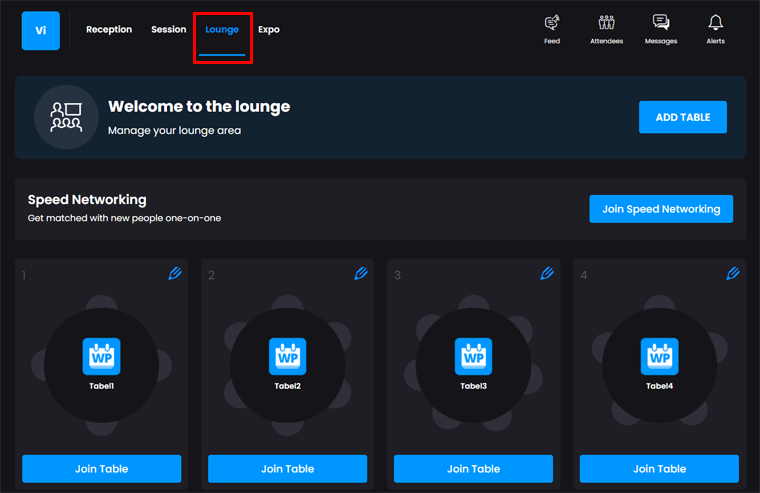
With the lounge, attendees can connect with one another. They can join the existing table by the Join Table button where they can open a video chat. Or they can also be a part of speed networking to get one-on-one matches with people.
Step 7: Adding Exhibitors
Exhibitor hall allows you to list your sponsors or exhibitors. When users click on a sponsor, they can join tables and chat with that sponsor.
There are a series of steps that you need to perform for adding exhibitors on the front-end and back-end of the site. So, follow them sequentially.
I) Include Exhibitor Category
First of all, you need to include an exhibitor category. For that, go to the Exhibitors Categories option in the Exhibitors menu of the WordPress dashboard.
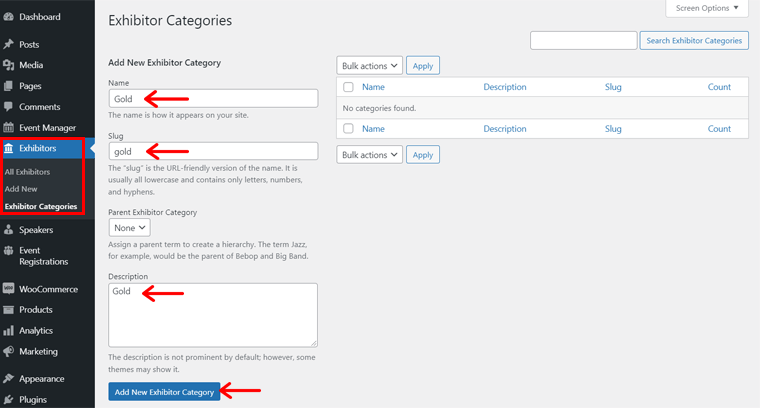
There, add a category mentioning the name, slug, and description. And then, click on the Add New Exhibitor Category button.
II) Add New Exhibitor
Now, go to the Add New option of the same menu. After which, add the title and description of the exhibitor. Also, you can include an exhibitor logo there.
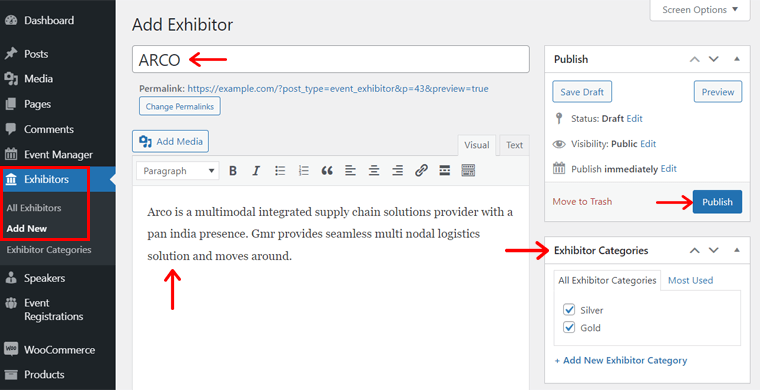
Next, click on the Publish button.
After that, organizers need to also add the exhibitor from the front-end of your site. So, they’ve to go to the Expo page of the event and click on the Expo section there.
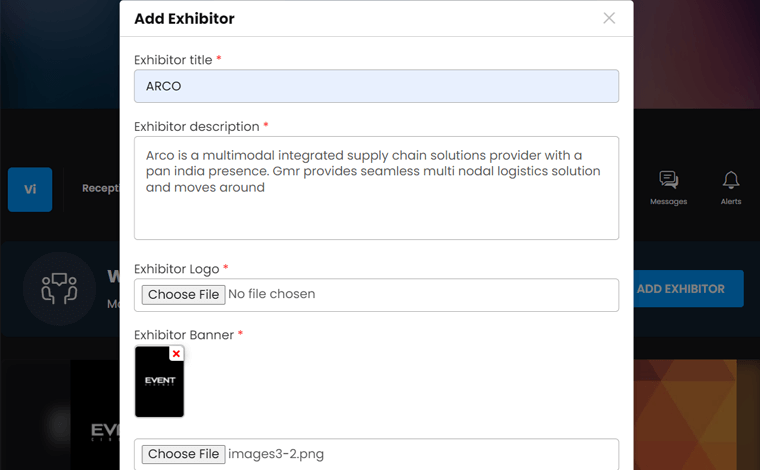
Now, organizers must click on the Add Exhibitor button and fill the form. It includes title, description, logo, banner, category, and social media links.
Next, they must click on the Add Exhibitor button.
III) Preview
After adding the exhibitor, it looks like the screenshot below.
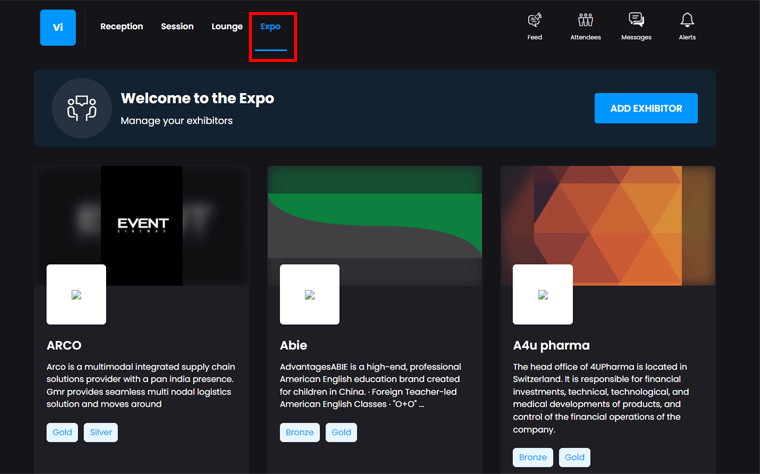
That’s it! Your virtual platform is ready now.
G. WP Event Manager Pricing
Want to start your virtual event platform right now? Then you need to have the core plugin and purchase some additional add-ons.
The core WP Event Manager plugin is free. So, you can easily download and install it on your site from WordPress.org. With that, you get to create and manage your events.
There are some add-ons that you can use to add a specific feature and function to your platform. Some are free while most of them are paid ones.
But you need to install 4 important premium add-ons to completely run your virtual event. And these add-ons are quite affordable and easy to use too.
So, the pricing plans of each of them are mentioned hereby in this section of WP Event Manager review.
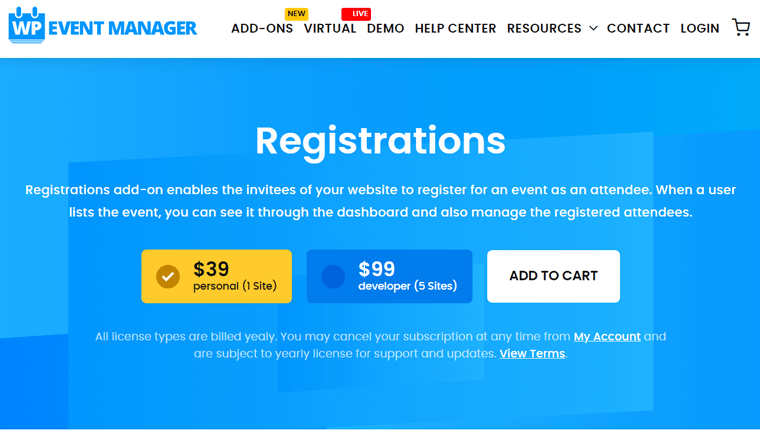
1. Registrations Add-on
- Personal: Costs $39 for 1 site.
- Developer: At $99, can be used for up to 5 sites.
2. Sell Tickets Add-on
- Personal: The price is $39 for 1 site.
- Developer: Costs $99 for up to 5 sites.

3. Expo Networking Add-on
- Personal: Costs $99 and you get to use it for 1 site.
- Developer: The price of it is $199 that can be used for up to 5 sites.

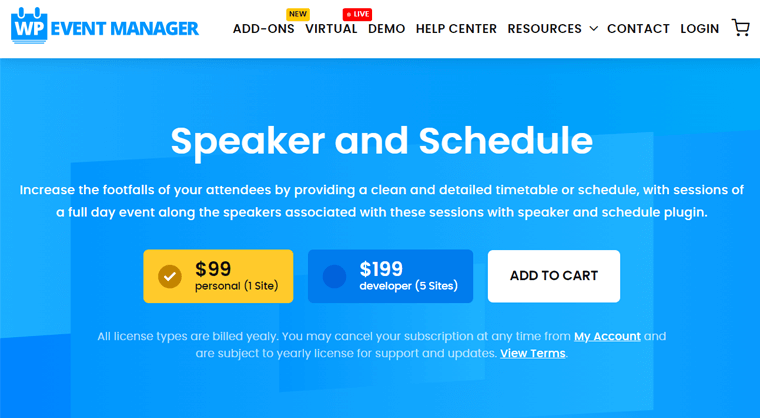
4. Speaker and Schedule Add-on
- Personal: At $99, you get to use it for 1 site.
- Developer: Costs $199 for up to 5 sites.
Instead, you can buy the Virtual Bundle Package worth $399 consisting of all the necessary add-ons.
Note that all the license types are billed annually. Also, if you want to cancel your subscriptions, then you can do it at any time.
H. Customer Support Options in WP Event Manager
Have any confusion regarding the WP Event Manager plugin? Or facing any trouble while using it? Then, make sure to look for the customer support options of the plugin.
There are several mediums through which it delivers support to its customers and we’re going to point them out now in this WP Event Manager review. When using the free plugin, you can visit the Support Forum on WordPress.org.
Also, you can simply visit its official website if you’ve queries regarding the free plugin or its add-ons. There on the navigation itself, you get to see different resources provided for support.

The first one is the WP Event Manager Help Center. Here, you’re able to go to its Knowledge Base that contains detailed documentation about the plugin and its add-ons. Next, from the FAQs section, you can find answers to common questions.
Moreover, there are Video Tutorials on YouTube that you can check out if you want to learn some skills while using the plugin.
Additionally, Addons Support is also there for customers using the add-ons. Here, you need to first log in from your account and then you’ll get answers from the experienced support team.
And if you’re a developer, then there are resources for you as well. Go to Developer Resources for technical documentation.
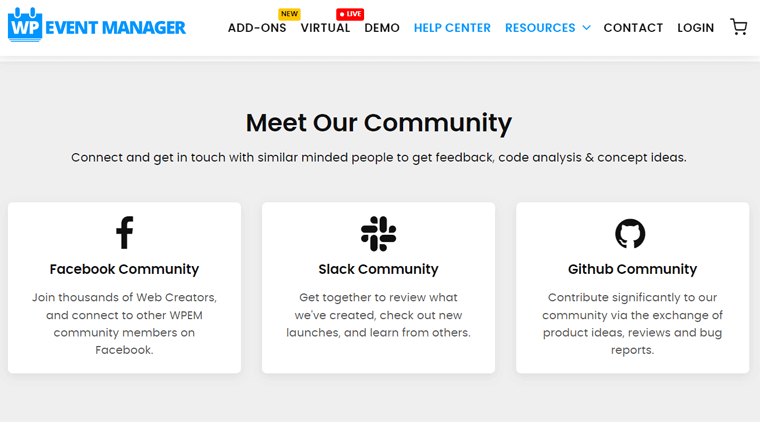
Along with that, you get to connect with its community on social media platforms like Facebook, Slack, and Github.
Not to mention, there’s a live chat option to ask the professionals queries right away.
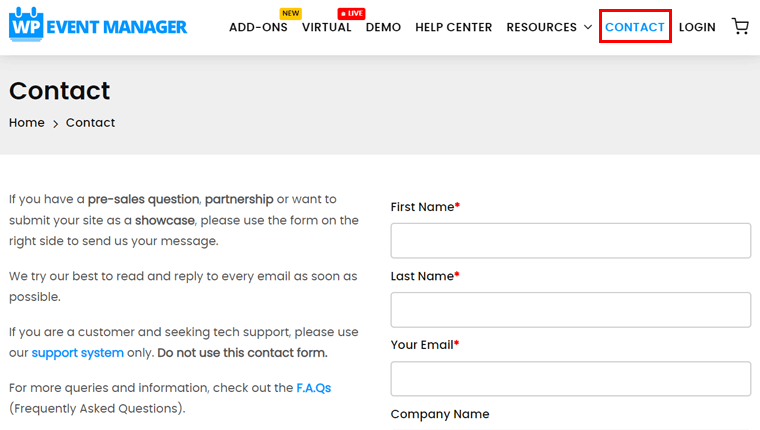
Apart from them, there’s a Contact menu on the navigation. From there, you get to ask a pre-sale question, partnership or submit your site as a showcase.
Lastly, you can look at the Blogs that tell about the tips, guides, and updates on the plugin and virtual events.
I. WP Event Manager – Pros and Cons
Now, let’s have a look at the pros and cons of this plugin here in this section of the WP Event Manager review.
Pros of WP Event Manager
- Easy to use and configure.
- Freedom to submit listings from both the front-end and back-end of your website.
- Able to manage the events from the Mobile App.
- Interactive features and functions for a better engaging experience.
- Excellent support and tons of add-ons for additional functionality.
- Compatible with other WordPress plugins and popular tools/services.
Cons of WP Event Manager
- Limited styling options aren’t enough for those who aren’t developers.
- Needs annual renewal of add-ons to get updates and support.
Final Verdict – Is it the Best WordPress Events Plugin for Virtual Events?
Going through this review, we come to know that WP Event Manager is a feature-rich and powerful WordPress plugin. And with the advanced features, you can easily build an interactive virtual event platform with multiple sessions, lounges, exhibitor halls, etc.
Honestly, such functions require a SaaS tool to access. But with this plugin, its add-ons, and a few third-party tools, you can all do it from your WordPress website. And that at a cheaper price.
That’s why we can say that it’s one of the best WordPress events plugins for virtual events. So, we recommend you use it if you’re planning to create your virtual event platform.
However, we also want you to try out the free version and free add-ons first. And also check the virtual event demo or the virtual expo demo to get a better idea. Then, it’s up to you whether you should use it or not for your virtual events.
Conclusion
That’s all folks. We’ve come to the end of this WP Event Manager review article. After reading it, we hope that you were aspired to try and use this plugin for your virtual platform.
In case you’ve any queries, then post them down in the comment section below. Also, you can share your experience while using this feature-rich plugin.
If you like this WP Event Manager review article, then you can also check out our other articles on SEOPress Review and Beaver Builder Review. Finally, we want you to stay connected with us by following us on Facebook and Twitter.